Cactus Owners Manual
Released on 3/5/10 - Z800011A Page 9 UV Pure Technologies Inc. © 2010
backside of the unit – See Figure 1C. Do not install the system horizontally.
Remove the top and bottom covers of the unit to make the mounting holes
accessible.
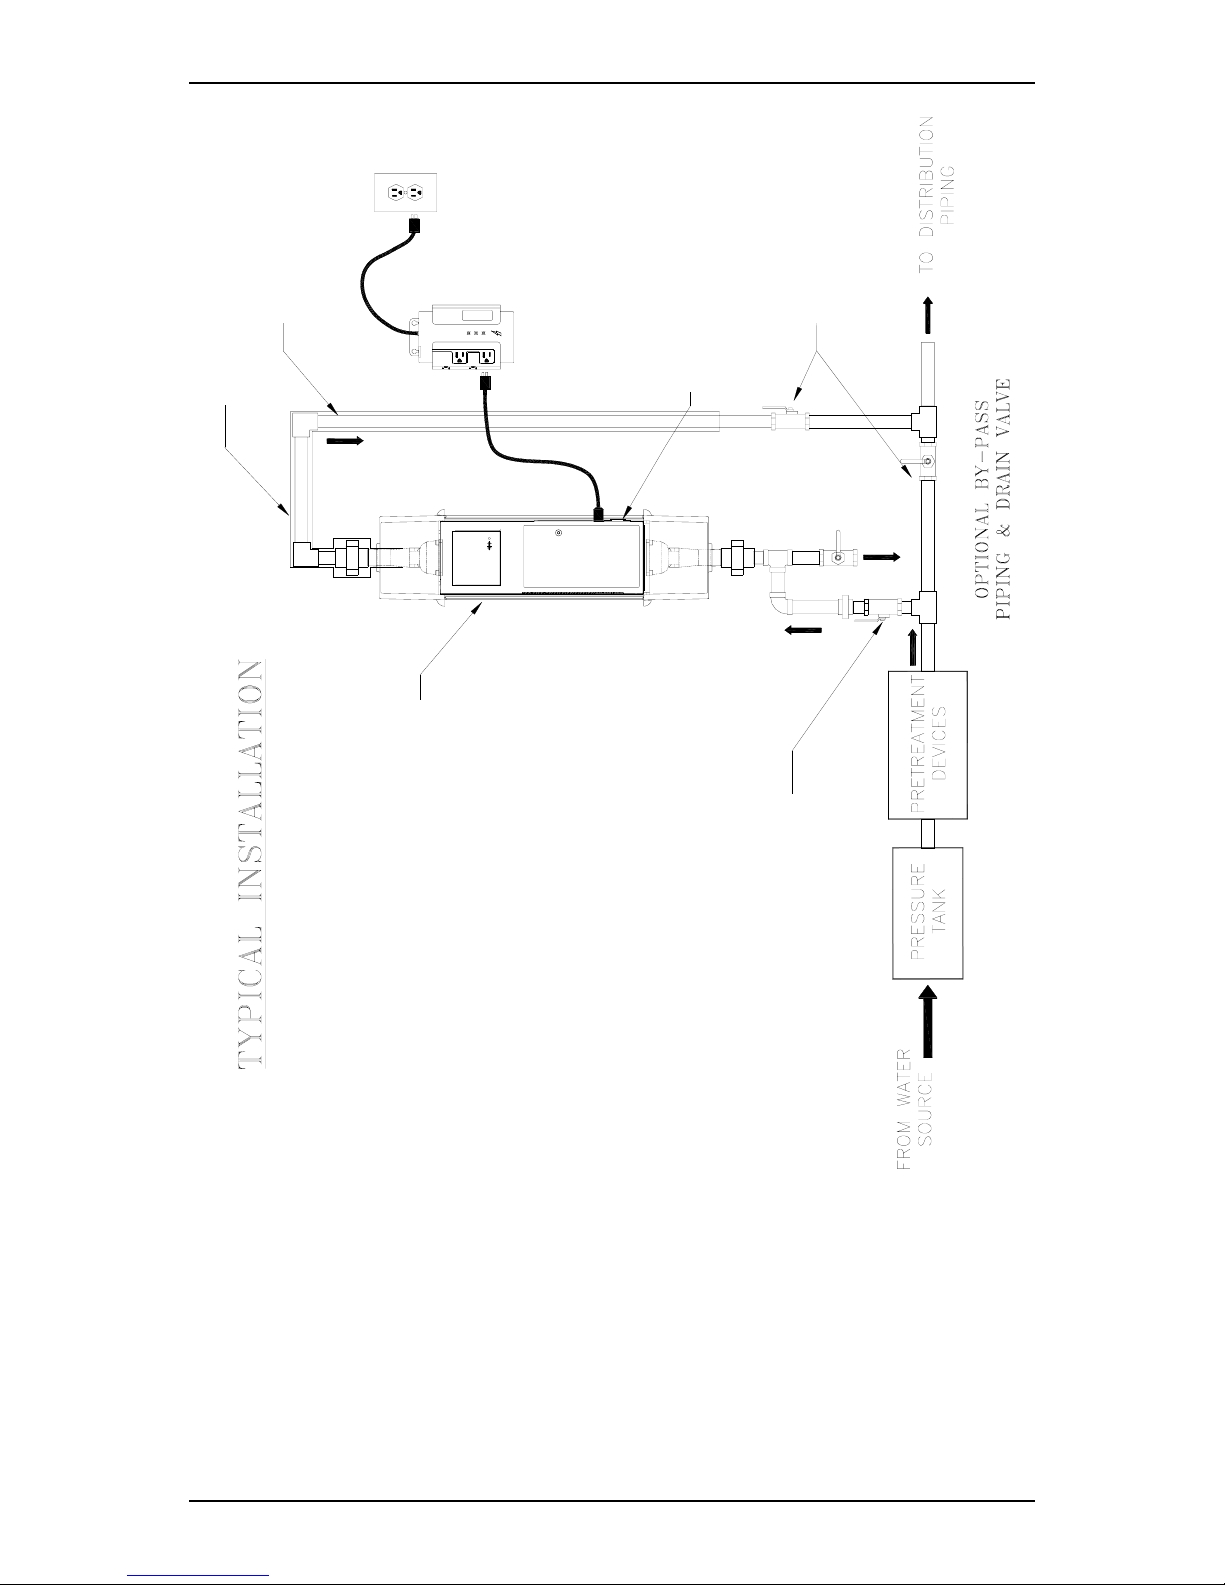
Connecting the Pipes
We recommend that a qualified dealer or licensed plumber perform the water
connections for your UV system. Water must flow into the inlet at the bottom
of the Cactus. The outlet is located at the top of the unit. The stainless steel
manifolds (both top and bottom) must be held with a wrench when
tightening mating connector. The use of a flexible stainless hose is
recommended (Part No. R400007).
Step 1: Shut off the water supply. Caution: Always turn off the water supply
before modifying or disconnecting any piping. Always open a faucet after shutting
off the water supply to relieve water pressure and ensure that the water has been
completely shut off.
Step 2: If you have decided to install an optional by-pass line and drain, you may
begin to install these fittings at this point. See Figure 1B for more information on
how to connect optional by-pass piping and drain.
Caution: Do not allow solder or solder flux to fall in or on the Cactus.
Step 3: Connect the outflow piping to the manifold located at the top of the unit.
Do not use PVC pipe or braided hose at the outlet – during extended periods
of no flow, water temperatures may exceed the softening point of PVC.
Step 4: Caution: Do not allow the inside of the unit to get wet. Before turning
on the water supply, double check all connections and cover the top of the
system with a rag or some plastic to prevent water entry. Ensure that the front
panel is closed. Close any faucets you opened in Step 1 and then slowly turn on
the water supply to check for leaks. If leaks exist, investigate the cause and
repair. Caution: Do not connect the unit to electrical power until the piping and
unit are free of water leaks.
Step 5: Install the Anti-Fouling System. The Anti-Fouling System consists of a
pressure regulator, drip valve and connectors and is designed to allow a small
amount of water to flow through the UV unit during periods of no water usage. It
should be located such that water would flow from the water reservoir (or
pressure tank) through the UV unit and then through the Anti-Fouling System.
Detailed instructions for the system are provided within the kit.
Step 6: Once the system is checked for leaks, install pipe insulation on all
overhead outlet piping to prevent condensation from falling onto or into the unit.
Parallel Installation
When more than one system is installed in parallel to increase treatment capacity
(the flow is divided among systems), the systems must be installed with manual
shutoff valves before and after each system. This allows one Cactus to be
serviced without interrupting the flow to the other(s). See Figure 1D.