manuals.online logo
Brands
  1. Home
  2. •
  3. Brands
  4. •
  5. V-tech
  6. •
  7. Baby Monitor
  8. •
  9. V-tech DM271 User manual

V-tech DM271 User manual

How the system works
* The combin ation of sensors depe nds on the package you purc hased.
DM271 Baby monitor
Receive aler ts on your
parent unit when t here’s
activit y in your child’s
room – from an ope n door
or window to movemen t in
the crib.
Motion Sensor
Lets you know when
there are visito rs,
intruders, o r pets
moving around your
home.
Open/Closed Sensor
Apply this ma gnetic
Open/ Closed Sensor to a
door, window, or medic ine
cabinet to know i f it is
open or close d.
4
Check and locate
Check the motion sensor
before use
Test the sensor signal
strength
NOTES
If No signal o r Weak signal
message is d isplayed in sensor
setup mode, or i f you do not
receive an al ert when you open
the door, move the ba se closer to
the mountin g location or move the
sensor clo ser to the base.
Use adhesive tape to hold the
sensor temporarily in place.
•
•
Use your parent unit t o enter
the Sensor s ettings menu , and
then select t he Check sign al
menu. Follow the st eps to test
the sensor’s sig nal strength, a nd
then exit the sen sor setup mode.
Make sure there is a g ood signal
received when t here is motion.
Refer to Sensor n otification s
section in t he User’s manual for
the alerts .
If your package includes
a Motion Sensor, please
read the following
section.
Motion Sensor
installation
1
Parts checklist
1 set for DM271-110
Motion Sensor
Screw for
mounting
brackets x 2
Anchor for
mounting
brackets x 2
Open the battery
compartment case
2
Power
The Motion Sens or detects moti on
with one-m inute cool of f time.
Once motion i s detected, the
sensor will on ly start to dete ct
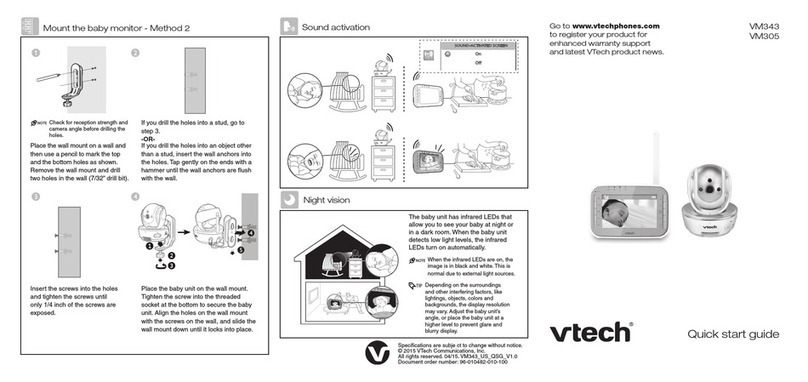
motion again af ter one minute.
The Motion Sen sor is more
sensitive in de tecting motio ns
crossing th e space in front of th e
sensor than th at moving towards
the sensor.
The Motion Sen sor can detect
motion occ urring at distan ces up
to 40 feet (12 meters) when it is
mounted at a heigh t of 7.9 feet
(2.4 meter s).
It is recomme nded to mount the
sensor at the height between
6.2 feet (1.9 meters) and 7.5 feet
(2.3 meters) for optimal dete ction
coverage.
For motion de tection of ba bies
or pets:
If you use the Moti on Sensor only
to detect the mot ion of babies or
pets, you can moun t the sensor
at a lower positio n to shorten
the minimum di stance before
reaching the d etection area . It is
recommend ed to mount it at the
height 3.3 feet (1 meter) for optimal
detection of b abies or pets.
Up to 34.4
feet
(10.5 meters)
Side view
Detectio n
area
78o
Top view
Shootingarea
19.7inches
60degrees
22.8inches
Shootingarea
19.7
inches
50degrees
18.3
inches
63inches
87o
Detectio n
area
1.3 feet
(0.4 meter)
10o
Height: 6. 9 feet (2.1 meters)
Height: 6.9 feet (2.1 meters)
Detectio n
area
78o
87o
Detectio n
area
0.7 feet
(0.2 meter)
10
o
Height: 3. 3 feet (1 meter)
Up to 16.4
feet
(5 meters)
Height: 3.3 feet (1 meter)
Top view
Side view

Baby Monitor installation
1
Parts checklist
2
Connect
Parent unit
Test your baby monitor
3
Check and Locate
3
2
THIS SIDE UP
3
2
THIS SIDE UP
3
2
THIS SIDE UP
3
2
THIS SIDE UP
Battery compartment cover Battery
Parent unit adapter Baby unit Baby unit adapter
Positioning your baby monitor
Install the battery
6
2
5
1
8
4
7
3
6
2
5
1
8
4
7
3
6
2
5
1
8
4
7
3
6
2
5
1
8
4
7
3
6
2
5
1
8
4
7
3
6
2
5
1
8
4
7
3
6
2
5
1
8
4
7
3
6
2
5
1
8
4
7
3
6
2
5
1
8
4
7
3
6
2
5
1
8
4
7
3
6
2
5
1
8
4
7
3
CAUTION
Keep the baby uni t out of the reach of the baby. Never pl ace
or mount the ba by unit inside the baby’s cr ib or playpen.
Do not expose t he baby unit to extreme heat o r direct sunlight.
•
•
1 set for DM271/DM271-102/DM271-110
At least 1 meter
(3 feet)
At least 1 meter (3 feet)
Press to turn on the
projector.
It projects so me colorfu l
images to the envi ronment.
Adjust the ang le of the baby
unit so that the i mages are
clearly proj ected to the
ceiling or a wall.
At least 1 meter
(3 feet)
At least 1 meter (3 feet)
Connect the baby monitor
3
Motion Detection
NOTE
The numeric al values in the
illustrat ions are for conceptua l
reference o nly. The actual ang les
and distan ces may vary upon the
change in th e mounted height of
the sensor.
•
Install Motion Sensor Battery
NOTES
Use only CR123A Lithi um Battery.
When inser ting Battery, ensure
polariti es are correct.
The Motion Sen sor is already
pre-registered to the baby monitor.
For proper op eration, use battery
within the fo llowing temperature
range: 0°F ( -18°C) and 120°F (49°C ).
•
•
•
•
6
2
5
1
8
4
7
3
6
2
5
1
8
4
7
3
Unscrew.
6
2
5
1
8
4
7
3
6
2
5
1
8
4
7
3
Lithium battery
Double-sided
mounting tape
Screw for

back cover x 3
Anchor for
back cover x 3
Mounting bracket
on mounting base
with screw
Installation guide
DM271
DM271-102
DM271-110
Wireless Monitoring System
with Safe & Sound®
Digital Audio Monitor
Go to
www.vtechphones.com
to register your product
for enhanced warranty
support and the latest
VTech product news.
Specific ations are subject to c hange without notice.
© 2015 for VTech Communi cations, Inc.
All rights r eserved. 12/15. DM271_IG_V2.0
Document o rder number: 96-0108 88-020-100
4
Mount
5
Mount
NOTES
This sensor m ust be mounted vertic ally on wall.
Do not mount th e Motion Sensor in a horizo ntal
orientati on, or flat on the ceiling.
If you drill th e holes into an object oth er than a
stud, inser t the screw anchors in to the holes and
tap gently o n the ends with a hammer unt il the
screw anch ors are flush wit h the wall or ceiling.
TIP
You can choose to mou nt the sensor with the
mounting ta pe first. Remove the mount ing tape
and use screw s later if you deci de to mount it at
that locat ion for long term.
•
•
•
Mount with screws
(Optional)
Insert screw
anchors if
necessary.
Mount on the wall - with fixed angle Mount on the wall - with rotate detection angle
6
2
5
1
8
4
7
3
6
2
5
1
8
4
7
3
6
2
5
1
8
4
7
3
Mount with screws
Mount on the wall - with fixed angle
6
2
5
1
8
4
7
3
6
2
5
1
8
4
7
3
6
2
5
1
8
4
7
3
6
2
5
1
8
4
7
3
6
2
5
1
8
4
7
3
6
2
5
1
8
4
7
3
6
2
5
1
8
4
7
3
This screw should only
be fully secured after
you adjusted the angle.
Unscrew
first.
(Optional)
Insert screw
anchors if
necessary.
6
2
5
1
8
4
7
3
6
2
5
1
8
4
7
3
6
2
5
1
8
4
7
3
6
2
5
1
8
4
7
3
6
2
5
1
8
4
7
3
6
2
5
1
8
4
7
3
6
2
5
1
8
4
7
3
Tighten the screws
after you slided the
sensor over them.
Tighten
the screw.
Tighten
the screw.
Tighten
the screw.
> 1 cm
(0.4 inch)
> 1 cm
(0.4 inch)
> 1 cm
(0.4 inch)
1 cm
(0.4 inch)
Mount the magnet unit
c
c
cc
Without spacer With spacer (optional)
Mount the sensor unit
A
We recommend you mo unt the magnet uni t on a
door, window, or medic ine cabinet, an d mount the
sensor unit on i ts respecti ve frame.
You can use the spacers pr ovided if there i s a
differenc e in level between th e door and the
frame. The space r will help to align yo ur sensor
to the correc t height. You can also use a s pacer
if the frame is too n arrow or has some de corative
molding.
NOTES
You can mount the sen sor unit with mounting t ape first,
and then use s crews later if you decide to mo unt it at
that locat ion for long term.
Make sure the mo unting surface is cle an. A textured
surface or any im perfections to a smoot h surface can
keep the mounti ng tape from making a strong bo nd.
Align the mag net unit with sensor uni t when mounting.
The distan ce between the sensor un it and magnet unit
must be less t han 1 cm (0.4 inch).
•
•
•
•
With spacer (optional)
Without spacer
* The door fram e is thicker than
the door.
* The door is
thicker tha n
the door fra me.
BB
3
Check and locate
Check your Open/Closed
sensor before use
Test the sensor signal strength
After testing t he sensor sign al strength, mar k the mounting lo cation
on the door, window, or med icine cabin et and its respec tive frame.
Then, remove the ad hesive tape and pro ceed to the moun ting
process.
Use your parent unit t o enter the Senso r settings me nu, and then
select the Ch eck signal me nu. Follow the steps to t est the sensor ’s
signal stren gth, and then exit t he sensor setup mo de. Make sure
there is a good s ignal received w hen you open the d oor as usual.
Make sure both baby u nit and parent unit
are on. Then, separ ate the sensor uni t
from the magnet u nit.
The parent unit wi ll emit an aler t tone,
and announce “O pen/Closed X* is open ”.
The screen wil l display Open /Closed X
is open.
If your package includes an Open/Closed sensor,
please read the following section.
Open/Closed sensor installation
1
Parts checklist
2
Power on
NOTES
The batteries are pre-installed in
your Open/ Closed sensor.
The Open/ Closed sensor is
already
pre-registered to the baby monitor.
The batteries operate properly
under the temperature between
0°F (-18°C) and 130°F (55°C).
•
•
•
REMOVE
BEFORE
USE
Use adhesive tape to hold the sensor temporarily in place.
Mount the sensor to a higher position to avoid obstacles or blockages.
Depending on surroundings and obstructing fac tors, like walls or
cabinets, the sensor may not transmit to the baby unit properly.
•
•
NOTES
If No signal o r Weak signa l message is displayed in s ensor setup mode,
or if you do not rec eive an alert when you ope n the door, move the baby unit
closer to the m ounting location or m ove the sensor cl oser to the baby unit.
•
Sensor unit Magnet unit
Spacer for
sensor unit
(optiona l)
Double- sided
mounting ta pe C
Spacers for
magnet unit
(optiona l)
Large screw x 2
(for spacer o f
sensor unit )
Small screw x 2
(for fixing se nsor
unit’s back c over
on spacer)
Double- sided
mounting
tape A
1 set for DM251-102
Double- sided
mounting
tape B
NOTES
The door imag es in this installati on guide are for concept ual reference only.
•
*
X refers to the sys tem-assigned numb er
of the sensor.

This manual suits for next models

2

Other V-tech Baby Monitor manuals

V-tech BM2000 User manual

V-tech

V-tech BM2000 User manual

V-tech DM221 User manual

V-tech

V-tech DM221 User manual

V-tech VM5251 User manual

V-tech

V-tech VM5251 User manual

V-tech BM2800 User manual

V-tech

V-tech BM2800 User manual

V-tech BM2050 User manual

V-tech

V-tech BM2050 User manual

V-tech VM344 User manual

V-tech

V-tech VM344 User manual

V-tech DM1111 User manual

V-tech

V-tech DM1111 User manual

V-tech VM305 User manual

V-tech

V-tech VM305 User manual

V-tech RM5762 User manual

V-tech

V-tech RM5762 User manual

V-tech VM310 User manual

V-tech

V-tech VM310 User manual

V-tech Safe & Sound BM1000 User manual

V-tech

V-tech Safe & Sound BM1000 User manual

V-tech BM5750HD User manual

V-tech

V-tech BM5750HD User manual

V-tech VM5261 User manual

V-tech

V-tech VM5261 User manual

V-tech VM3261 User manual

V-tech

V-tech VM3261 User manual

V-tech VM311 User manual

V-tech

V-tech VM311 User manual

V-tech DM111 User manual

V-tech

V-tech DM111 User manual

V-tech BM3450N User manual

V-tech

V-tech BM3450N User manual

V-tech VM342-2 User manual

V-tech

V-tech VM342-2 User manual

V-tech DM221 User manual

V-tech

V-tech DM221 User manual

V-tech VM4261-2 User manual

V-tech

V-tech VM4261-2 User manual

V-tech 80-102200 - Crystal Sounds DECT Digital... User manual

V-tech

V-tech 80-102200 - Crystal Sounds DECT Digital... User manual

V-tech VM341 User manual

V-tech

V-tech VM341 User manual

V-tech VM511 User manual

V-tech

V-tech VM511 User manual

V-tech BM2500 User manual

V-tech

V-tech BM2500 User manual

Popular Baby Monitor manuals by other brands

Time2 MIA Startup guide

Time2

Time2 MIA Startup guide

Philips SBC SC 368 Instructions for use

Philips

Philips SBC SC 368 Instructions for use

Philips SBCSC468/00 quick start guide

Philips

Philips SBCSC468/00 quick start guide

switel SP200 user manual

switel

switel SP200 user manual

Gilis Bebe Stars 9501 user manual

Gilis

Gilis Bebe Stars 9501 user manual

Bayby BBM 7030 manual

Bayby

Bayby BBM 7030 manual

Baby Control Digital BC-2200 Short instructions for use

Baby Control Digital

Baby Control Digital BC-2200 Short instructions for use

Philips SCD463 Specifications

Philips

Philips SCD463 Specifications

AT&T 05010 user guide

AT&T

AT&T 05010 user guide

Safety 1st MO180 Getting started

Safety 1st

Safety 1st MO180 Getting started

Uniden Guardian UBR223 user guide

Uniden

Uniden Guardian UBR223 user guide

Oricom Secure895 user guide

Oricom

Oricom Secure895 user guide

SecurityMan PalmWatch II user manual

SecurityMan

SecurityMan PalmWatch II user manual

BT PARAGON 400 user guide

BT

BT PARAGON 400 user guide

BabyOno 198 manual

BabyOno

BabyOno 198 manual

jablotron Nanny BM-02 user manual

jablotron

jablotron Nanny BM-02 user manual

Philips SBC SC466/00 Instructions for use

Philips

Philips SBC SC466/00 Instructions for use

Uniden BW3451R+1 owner's manual

Uniden

Uniden BW3451R+1 owner's manual

manuals.online logo
manuals.online logoBrands
  • About & Mission
  • Contact us
  • Privacy Policy
  • Terms and Conditions

Copyright 2025 Manuals.Online. All Rights Reserved.