V-tech Digiart Colour by Lights Assembly Instructions

91-003519-001 UK
Parent’s Guide
Colour by Lights

C
M
Y
CM
MY
CY
CMY
K
Grow with VTech(105x148)bw1P-V2.pdf 1 08/18/2014 9:35:53

3
3
INTRODUCTION
Thank you for purchasing VTech®DigiArt Colour by Lights.
Follow the light up dots to draw more than 70 shapes, objects and
animals, or slide in a Magic Colouring Page and follow the lights to
colour it in step by step.
Enjoy drawing or colouring while listening to 15 different melodies. Use
the stencil to draw a variety of shapes and explore your creativity.
INClUDeD IN ThIs PaCkage
• OneColour By Lights Board
• 50MagicColouringPagesand10blankpaperpages
• Sixcrayons
• Onestencil
• Oneparent'sguide
• TwoAAbatteriesfordemopurposes
WARNING: All packing materials such as tape, plastic sheets,
packaging locks, removable tags, cable ties and
packaging screws are not part of this toy, and
should be discarded for your child’s safety.
NOTE: Please keep this parent's guide as it contains
important information.
Unlock the packaging locks:
Rotate the packaging locks 90 degrees
anticlockwise.
Pull out the packaging locks.

Colour by Lights
TM & © 2018 VTech.
4
4
Volume
Button
Colour It
Button
Previous
Button
Next
Button
Magic Light
Button
Battery
Compartment
Storage
Compartment
Stencil
Paper Lock
On/Off
Button
Connect the Dots
ShapesButton
Connect the Dots
ObjectsButton
Light Up Dots
Area&White
BoardSurface
Connect the Dots
AnimalsButton
OKButton
50 Magic Colouring Pages

5
5
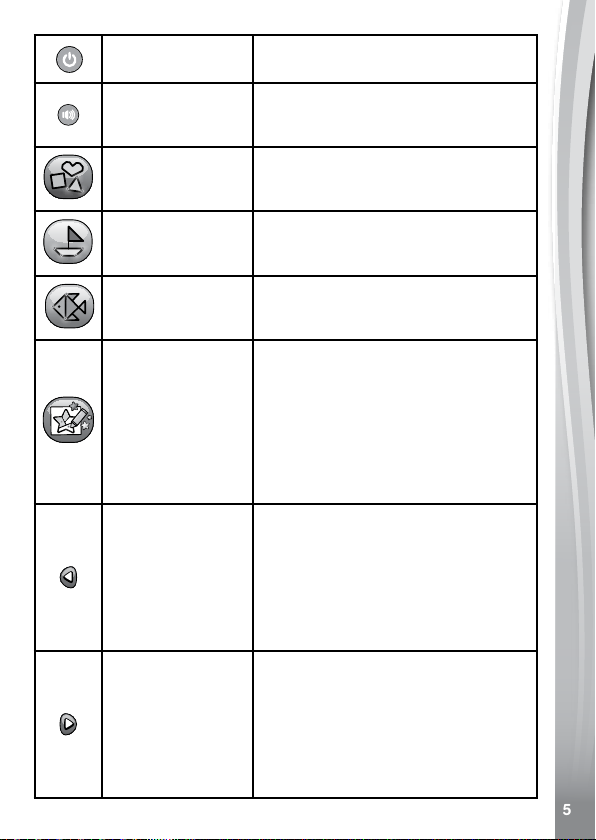
On/OffButton Press this button to turn the unit on or
off.
Volume Button
Press this button to adjust the
volume. Choose between four volume
levels.
Connect the Dots
ShapesButton
PressthisbuttontogototheShapes
Selectionmenu,thenselectashape
to start drawing.
Connect the Dots
ObjectsButton
PressthisbuttontogototheObjects
Selectionmenu,thenselectanobject
to start drawing.
Connect the Dots
AnimalsButton
PressthisbuttontogototheAnimals
Selectionmenu,thenselectan
animal to start drawing.
Colour It Button
SlideinaMagicColouringPageto
startcolouring.Whilecolouring,press
this button to restart the colouring
instructions from the beginning.
WhenthereisnoMagicColouring
Page in the board, press this button
to enjoy free play colouring while
listening to 15 different melodies.
Previous Button
In Free Play mode, press this button
to play the previous melody.
IntheSelectionmenu,pressthis
button to go to the previous option.
In Connect the Dots or Colour It
Modes, press this button to go back
one step.
Next Button
In Free Play mode, press this button
to go to the next melody.
IntheSelectionmenu,pressthis
button to go to the next option.
In Connect the Dots or Colour It
Modes, press this button to go to the
next step.

6
6
OKButton
In Free Play mode, press this button
to toggle between the light up dot
animations.
IntheSelectionmenu,pressthis
buttontoconrmtheselection.
In Connect the Dots or Colour It
Modes, press this button to go to the
next step.
Magic Light
Button
In Free Play mode, press this button
to toggle between the light up dot
animations.
In Connect the Dots or Colour It
Modes, press this button to repeat the
current step.
Activating Normal Play (Exiting try me mode)
1. Press the On/Off Button to turn the unit ON.
2.SlideinaMagic Colouring Page and the unit will restart in
normal play mode.
geTTINg sTaRTeD
BATTERY INSTALLATION
1. Make sure the unit is turned OFF.
2. Locate the battery compartment
onthebackoftheunit.Openthe
battery cover by sliding the tab.
3.Install2newAA(AM-3/LR6)
batteriesfollowingthediagraminsidethebatterybox.(Theuseof
newalkalinebatteriesisrecommendedformaximumperformance).
4. Replace the battery cover and push down until it clicks into position.

7
7
BaTTeRY NOTICe
• UsenewalkalinebatteriesorfullychargedNI-MH(NickelMetal-
hydride)rechargeablebatteriesforbestperformance.
• Useonlybatteriesofthesameorequivalenttypeasrecommended.
• Donotmixdifferenttypesofbatteries:alkaline,standard(carbon-
zinc)orrechargeable,ornewandusedbatteries.
• Donotusedamagedbatteries.
• Insertbatterieswiththecorrectpolarity.
• Donotshort-circuitthebatteryterminals.
• Removeexhaustedbatteriesfromthetoy.
• Removebatteriesduringlongperiodsofnon-use.
• Donotdisposeofbatteriesinre.
• Donotchargenon-rechargeablebatteries.
• Removerechargeablebatteriesfromthetoybeforecharging(if
removable).
• Rechargeablebatteriesareonlytobechargedunderadult
supervision.
Disposal of batteries and product
The crossed-out wheelie bin symbols on products and
batteries, or on their respective packaging, indicates they
must not be disposed of in domestic waste as they contain
substances that can be damaging to the environment and
human health.
ThechemicalsymbolsHg,CdorPb,wheremarked,indicate
thatthebatterycontainsmorethanthespeciedvalueof
mercury(Hg),cadmium(Cd)orlead(Pb)setoutinBattery
Directive(2006/66/EC).
The solid bar indicates that the product was placed on the
marketafter13thAugust,2005.
Helpprotecttheenvironmentbydisposingofyourproductor
batteries responsibly.
Formoreinformation,pleasevisit:
www.recycle-more.co.uk
www.recyclenow.com.

8
8
hOW TO PlaY
Press the On/Off Button to turn the unit ON.
Drawing on Paper:
In any of the Connect the Dots drawing activities, put a piece of blank
paper on the Light Up Dots Area & White Board Surface to draw. It
is not necessary to slide the paper into the unit.
Blanksheetsofpapershouldbe210x148mm(8.3x5.8inches),the
sizeofanA5pieceofpaper(orhalfthesizeofA4).Donotfoldthe
paper before placing it on the Light Up Dots Area & White Board
Surface, as the light up dots cannot be seen clearly if the paper is too
thick or creased. To be environmentally friendly, we recommend using
recycled paper.
The Paper Lock will help keep the paper secure. To open the Paper
Lock,useyourngertopushonthetopoftheclip.Tocloseit,push
the clip down.
Drawing on the White Board Surface:
Useadry-erasemarkerorwater-basedmarker(eachsoldseparately)
to draw on the White Board Surface.
To clean the White Board Surface, wipe with a slightly damp cloth to
remove the drawing or any dirt.
Note:
Not all dry-erase markers can be cleaned off thoroughly. Every time
you use a new marker, draw a small line in the corner of the board to
see if it can be erased easily.
Do not use oil-based markers or the included crayons to draw on the
White Board Surface, as they cannot be erased thoroughly.
Storage Compartment and Stencil:
Atthebackoftheunit,thereisaStorage Compartment for storing the
colouring pages and crayons. The Stencil slides into the back of the
unit to complete the Storage Compartment.

9
9
Toopenit,placeangeronthegap
of the Stencil,then lift it up and slide
up and out to pull the Stencil out of
the unit.
To close it, align the bottom corners
of the Stencil to the two triangular
holders on the bottom of the back of
theunit.SlidetheStencil down into
the holders and push down to lock it
into position.
aCTIvITIes
Connect the Dots – Shapes
Press the Shapes ButtontogototheShapesSelectionMenu,press
the Previous or Next Buttons to select a shape, then press the
OK Button to start drawing. Follow the voice instructions and trace
the light up dots to learn how to draw.
Duringtheprocess:
• PresstheOK Button or Next Button to go to the next step
when one step is completed.
• PresstheMagic Light Button to repeat the current step.
• PressthePrevious Button to go back one step.
12 Shapes to Draw:
Square
Arrow
Triangle
Hexagon
Rectangle
Heart
Diamond
Octagon
Trapezoid
Lightning Bolt
Pentagon
Star
Connect the Dots – Objects
Press the Objects ButtontogototheObjectsSelectionMenu,press
the Previous or Next Buttons to select an object, then press the
OK Button to start drawing. Follow the voice instructions and trace
the light up dots to learn how to draw.

10
10
Duringtheprocess:
• PresstheOK Button or Next Button to go to the next step
when one step is completed.
• PresstheMagic Light Button to repeat the current step.
• PressthePrevious Button to go back one step.
30 Objects to Draw:
Flag
Mountains
Barn
Bow
Torch
Ladder
T-Shirt
Bow Tie
Umbrella
Tree
Horn
Computer
Tulip
Sweeties
Watering
Can
Sailboat
House
Kite
Castle
Handbag
TopHat
Dress
Rocket
Snowake
Pyramid
Envelope
Crown
Ice Cube
UFO
Ship

11
11
Connect the Dots – Animals
Press the Animals ButtontogototheAnimalsSelectionMenu,press
the Previous or Next Buttons to select an animal, then press the
OK Button to start drawing. Follow the voice instructions and trace
the light up dots to learn how to draw.
Duringtheprocess:
• PresstheOK Button or Next Button to go to the next step
when one step is completed.
• PresstheMagic Light Button to repeat the current step.
• PressthePrevious Button to go back one step.
30 Animals to Draw:
Fish
Rabbit
Buttery
Sheep
Seal
Snail
Pony
Turtle
Crab
Swan
Duck
Camel
Mouse
Lion
Squirrel
Fox
Cat
BlueWhale
Monkey
Jellysh
Bird
Ladybird
Penguin
Snake
Elephant
Whale
Parrot
Porcupine
Dog
Dragony

12
12
Colour It
SlideinaMagic Colouring Page to
start the Magic Colouring activity
any time the unit is on.
Follow the voice instructions and the
light up dots to colour the picture
step by step. Use the suggested
colour or be creative and choose your
favourite!
Duringtheprocess:
• PresstheOK Button or Next Button to go to the next step
when one step is completed.
• PresstheMagic Light Button to repeat the current step.
• PressthePrevious Button to go back one step.
Magic Colouring Pages
The top left corner of the Magic Colouring Page indicates the type of
picture, while the top right corner indicates the skill level.
MagicCodeArea
Type icon Level mark
Note: Do not draw or colour on the Magic Code area of the Magic
Colouring Page, as it will affect the colouring page recognition.

13
13
Wehave3typesofpictureswithdifferentskilllevels:
Type Level Examples
Colouring
HiddenPicture
Colour the picture to
make the hidden object
appear.
Lines Exercise

14
14
Extra Magic Colouring Pages (free download)
Download replacement and new Magic Colouring Pagesfrom:
www.vtech.co.uk/downloads/digiart/colour_by_lights_colouring_
download
Printing Tips (how to correctly print Magic Colouring Pages)
Afterdownloadingtheprintingle,pleaseseethefollowinginformation
to print the Magic Colouring Pages.
• SetPaperScalingto"None"orselectthe"ActualSize"printing
setting.
• MakesurethatthepapersizeissettoA4.
• Setthepaperorientationto"Landscape".
• Useplainpapertoprint.TheunitwillnotrecognisetheMagic
Colouring Pages if glossy paper or photo paper is used.
• Besuretheprinterisnotsetto"ecoprint"or"greyscale"asnot
enough black ink will be used for the pages to be recognised by the
DigiArt Colour by Lights.
• CutoutthepicturesoitwilltontotheLight Up Dots Area & White
Board Surface.
Free Play
Turn on the unit and do not insert a Magic Colouring Page to play in
Free Play mode. Enjoy 15 melodies while you draw and colour.
Press the OK Button or Magic Light Button to toggle the
light up dots animations.
Press the Previous or Next Buttons to go to the previous or next
melody.
Automatic Shut Off
To preserve battery life, the DigiArt Colour by Lights will
automatically power down after 3 minutes without operation in the
SelectionMenu.IntheFree Play, Shapes, Objects, Animals, and
Colour It modes, the auto off time is 20 minutes.

15
15
Low Battery
Whenthebatteriesareexhausted,theLight Up Dots will show the low
battery icon and then automatically shut off.
Please replace the batteries with a brand new set of batteries before
further use.
CaRe & MaINTeNaNCe
1. Please store and use the unit in dry areas.
2. Keep the unit clean by wiping it with a slightly damp cloth.
3. Keep the unit out of direct sunlight and away from any direct heat
sources.
4. Remove the batteries when the unit is not in use for an extended
period of time.
5. Do not drop the unit on a hard surface and do not expose the unit to
excess moisture.
TROUBleshOOTINg
Problem Possible Solution(s)
The unit does not
turn on.
1. Reload the batteries to reset the unit.
Please refer to the Battery Installation
section for the instructions.
2. Batteries may be exhausted. Please
replace with a new set of batteries.
The unit gives an
incorrect response.
1. Batteries may be exhausted. Please
replace with a new set of batteries.
2.Humiditymaycauseinterferencewiththe
unit. Please be sure the unit is in a dry
area.
Printed Magic
Colouring Pages
not in correct size or
cannot be recognised.
Please read and follow the printing tips in
the Colour It section to correctly print the
pages.
Iftheproblempersists,pleasecallourConsumerServicesDepartment
on03306780149(fromUK)or+443306780149(outsideUK)anda
service representative will be happy to help you.

16
16
IMPORTANT NOTE:
Creating and developing VTech®products is accompanied by a
responsibilitythatwetakeveryseriously.Wemakeeveryeffortto
ensure the accuracy of the information, which forms the value of
ourproducts.However,errorssometimescanoccur.Itisimportant
for you to know that we stand behind our products and encourage
youtocallourConsumerServicesDepartmenton03306780149
(fromUK)or+443306780149(outsideUK)withanyproblemsand/
orsuggestionsthatyoumighthave.Aservicerepresentativewillbe
happy to help you.
ConformstoASTMD-4236.

P
R
O
D
U
C
T
W
A
R
R
A
N
T
Y
ONE
YEAR

91-003519-001
TM & © 2018 VTech Holdings Limited.
All rights reserved.
Printed in China.
UK
Visit our website for more
information about our products,
downloads, resources and more.
www.vtech.co.uk
Table of contents