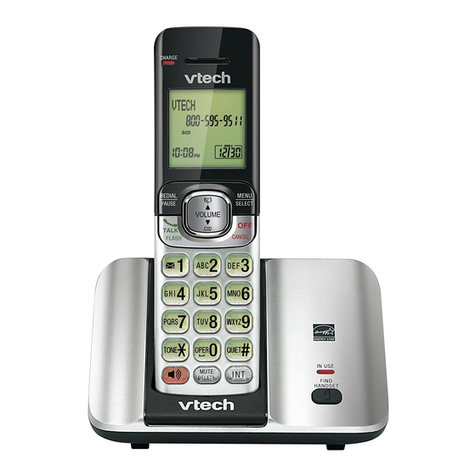
V-tech VT 9162 User manual

1
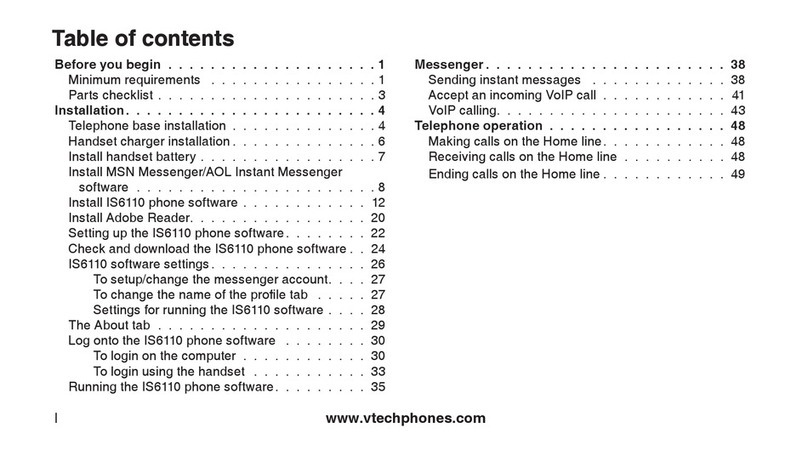
TABLE OF CONTENTS
IMPORTANT SAFETY INSTRUCTIONS ............................................................................3
PARTS CHECK LIST.............................................................................................................4
HANDSET LAYOUT ..............................................................................................................5
BASE UNIT LAYOUT .............................................................................................................6
GETTING STARTED ........................................................................................................7
INSTALLATION OF BATTERY PACK IN HANDSET .....................................7
RINGER SELECTION....................................................................................8
TONE/PULSE SELECTION .............................................................................8
ANSWERING SYSTEM - INTRODUCTION ........................................................8
WALL MOUNTING ...........................................................................................9
THE HANDSET DISPLAY ...........................................................................10
BASIC OPERATION ..................................................................................................11
MAKING CALLS ......................................................................................11
VOLUME CONTROL ................................................................................11
CHANNEL CHANGING .............................................................................11
USING REDIAL ......................................................................................12
ANSWERING CALLS ...............................................................................12
FLASH ..................................................................................................12
HOLD ...................................................................................................13
PAGE ...................................................................................................13
ADVANCED OPERATION ......................................................................................14
CALLER ID/CALL WAITING ID ...........................................................................14
RECEIVING AND STORING CALLS .......................................................................14
ABOUT CALL HISTORY ....................................................................................14
REVIEW CALLER ID ...........................................................................................14
DELETING RECORDS FROM CALL HISTORY .....................................................15
DIAL A DISPLAYED NUMBER ................................................................................15
STORE A CALLED ID RECORD IN PHONE BOOK MEMORY ................................15
DISPLAY SCREEN MESSAGES .............................................................................16
PHONE BOOK .......................................................................................................17
STORE MEMORY NUMBERS ..................................................................................17
EDIT NUMBERS STORED IN MEMORY ...............................................................18
DELETE NUMBERS STORED IN MEMORY .........................................................18
DIAL MEMORY NUMBERS ...................................................................................18
OPTIONAL HEADSET INSTALLATION & OPERATION INSTRUCTIONS .............19
ITAD OPERATION ..............................................................................20
ANSWERING SYSTEM PROGRAMMING OVERVIEW ..........................................20
SET OUTGOING MESSAGE (OGM) ........................................................................20
SET SECURITY CODE .............................................................................................21
DAY AND TIME .........................................................................................................22
SET AUDIBLE MESSAGE ALERT ...........................................................................22
SET ANNOUNCE ONLY .........................................................................................23
SET BASE RINGER ON/OFF .................................................................................23
SET NUMBER OF RINGS ....................................................................................23
TOLL SAVER ...................................................................................................23
LEAVING A MESSAGE (INCOMING MESSAGE) ....................................................24
LISTENING TO MESSAGES/MEMOS ...............................................................24
SAVING MESSAGES ........................................................................................25
DELETING MESSAGES .....................................................................................25
TURNING THE ANSWERING MACHINE ON/OFF ..........................................25
CHECK CURRENT DAY AND TIME ....................................................................26
CHANGING SPEAKER VOLUME .......................................................................26

2
CHANGING PLAYBACK SPEED ...............................................................................26

AUTO DISCONNECT FOR EXTENSION PHONE PICK-UP .......................................27
MEMORY FULL ......................................................................................................27
POWER FAILURE ....................................................................................................27
BASE UNIT MESSAGEWINDOW (LED) ....................................................................28
REMOTE OPERATION OF ANSWERING SYSTEM ..................................................29
TO ACTIVATE REMOTE OPERATION FROM A DIFFERENTTELEPHONE LINE .....29
PLAYING MESSAGES REMOTELY .........................................................................29
REPEAT MESSAGES DURING PLAYBACK ..............................................................29
SKIP MESSAGES DURING PLAYBACK ................................................................. 30
STOP MESSAGE PLAYBACK .................................................................................30
DELETING MESSAGES ...........................................................................................30
MEMO RECORDING ................................................................................................30
CHANGE OGM REMOTELY ....................................................................................30
CHECK OGM REMOTELY .......................................................................................30
TURNING ANSWERING SYSTEM ON OR OFF .......................................................30
VOICE MENU FOR REMOTE OPERATION ..............................................................31
EXITING REMOTE OPERATION ..............................................................................31
ADDITIONALINFORMATION.......................................................................................32
MAINTENANCE .........................................................................................................32
IN CASE OF DIFFICULTY .........................................................................................33
WARRANTY STATEMENT .........................................................................................35
FCC AND IC REGULATIONS ....................................................................................37
RBRC SEAL ..........................................................................................................40
TECHNICAL SPECIFICATIONS ................................................................................41
TABLE OF CONTENTS
R

3
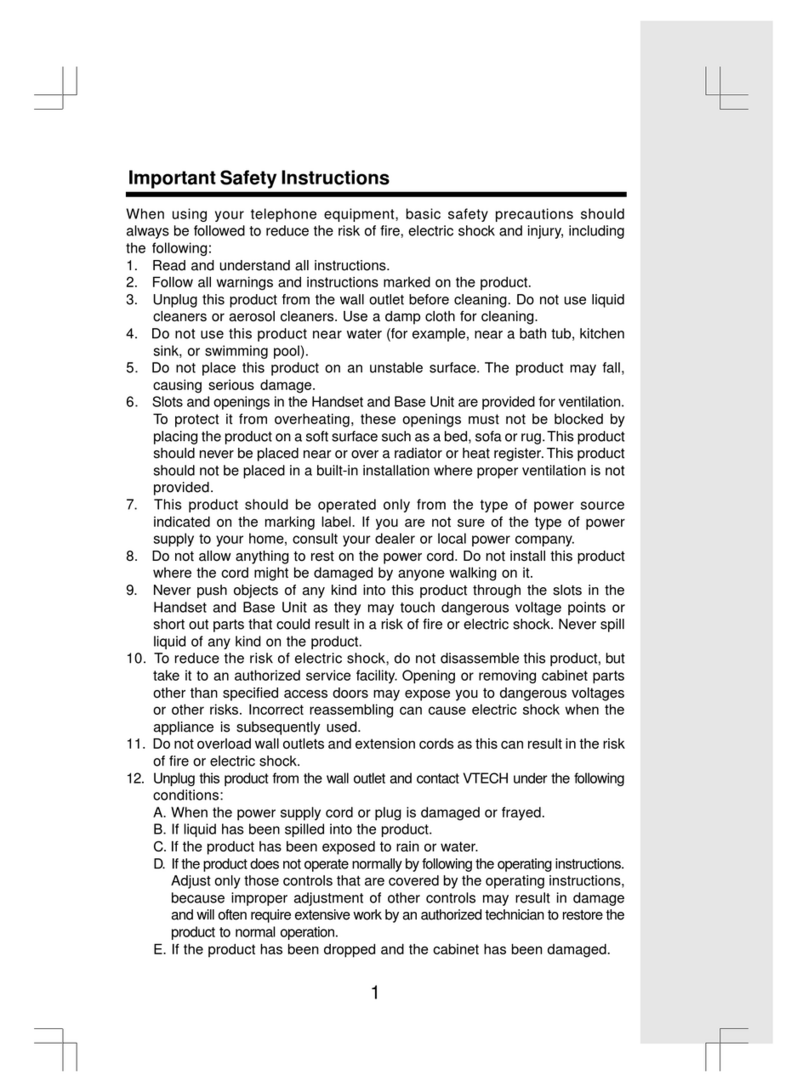
IMPORTANT SAFETY INSTRUCTIONS
When using your telephone equipment, basic safety precautions should always be followed to
reduce the risk of fire, electric shock and injury, including the following:
1. Readandunderstand all instructions.
2. Followallwarnings andinstructions marked on the product.
3. Unplugthisproductfromthewalloutlet before cleaning. Do not use liquidcleanersoraerosol
cleaners. Use a damp cloth for cleaning.
4. Do not use this product near water (for example, near a bath tub, kitchen sink, or swimming
pool).
5. Do not place this product on an unstable cart, stand, or table.The product may fall, causing
serious damage to the product.
6. Slots and openings in the cabinet and the back or bottom are provided for ventilation.To
protect it from overheating, these openings must not be blocked by placing the product on
thebed, sofa, rug, or othersimilar surface.Thisproductshouldnever beplaced near orover
a radiator or heat register.This product should not be placed in a built-in installation where
properventilation is not provided.
7. Thisproductshouldbeoperated only from the typeofpowersourceindicatedon the marking
label. If you are not sure of the type of power supply to your home, consult your dealer or
localpowercompany.
8. Donotallowanythingto rest on the powercord.Donotlocatethis product where the cordwill
be abused by persons walking on it.
9. Never push objects of any kind into this product through cabinet slots as they may touch
dangerousvoltagepoints or shortout partsthat could resultin ariskof fire orelectricshock.
Never spill liquid of any kind on the product.
10. Toreducethe risk ofelectric shock,donotdisassemblethisproduct.If service orrepair work
isrequired,contactVTECHCustomerServiceat1-800-595-9511.Openingorremovingcabi-
netpartsother than specified access doorsmayexpose youtodangerousvoltagesorother
risks. Incorrect reassembling can cause electric shock when the appliance is subsequently
used.
11. Do not overload wall outlets and extension cords as this can result in the risk of fire or
electric shock.
12. Unplug this product from the wall outlet :
A. When the power supply cord or plug is damaged or frayed.
B. If liquid has been spilled into the product.
C. If the product has been exposed to rain or water.
D. If the product does not operate normally by the following the operating instructions.
Adjust only those controls that are covered by the operating instructions because
improper adjustment of other controls may result in damage and will often require
extensive work to restore the product to normal operation.
E. If the product has been dropped and the cabinethas beendamaged.
F. If the product exhibits a distinct change in performance.
13. Avoid usingatelephone(other than a cordlesstype)during an electrical storm.Theremay be
a remote risk of electric shock from lightning.
14. Do not use the telephone to report a gas leak in the vicinity of the leak.
SAVETHESE INSTRUCTIONS

4
PARTS CHECK LIST
Parts Check List:
1. Base Unit
2. Handset
3. Wall Mount Bracket
4. Owner’sManual
5. AC Adaptor
6. TelephoneLineCord
7. Battery Pack
8. Belt Clip
To purchase replacement battery
packs,callVTECHCommunicationsat
1-800-595-9511. In Canada, call
VTECHElectronicsat1-800-267-7377.

5
HANDSET LAYOUT
1. LCDDisplay
2.SELECT
3.NAVIGATION/VolumeKeys
4.PHONE
5.FLASH
6.HOLD
7.Antenna
8.Headset Jack
9.OFF
10.Dialing Keys
11.REDIAL/PAUSE
12.PROG/CHAN
3
5
6
7
4
1
2
8
9
10
11
12

6
BASE UNIT LAYOUT
1. MENU
2. SELECT
3.TIME/SET
4. REPEAT/SLOW
5. MESSAGE WINDOW
6. DELETE
7. MAILBOX PLAY/STOP
8. REC/MEMO
9. VOLUME
10. ANSWER ON/OFF
11. SKIP/QUICK
12. IN USE/CHARGING
13. PAGE
14. Power Jack
15. Telephone Line Jack
9162
CANADA 1135 101 611A
0.1
COMPLIES WITH 47 CFR PART 68
REGISTRATION NO.:EW7CHN-36166-W9-E
RINGER EQUIVALENCE:0.1B
USOC JACK: RJ11C/RJ11W EW79108
14
15
11
12
10
13
21
3
4
65
7
9
8

7
INSTALLATION OF BATTERY PACK IN HANDSET
GETTING STARTED
The Handset of your
VT 9162
is powered by a rechargeable battery pack. It charges automati-
cally whenever the Handset is in the Base Unit.The battery pack needs charging when:
• The low battery icon and message are displayed:
• A double beep will be generated every 5 seconds.
To charge thebattery pack, place theHandset in theBase
Unit. The IN USE/CHARGE indicator will light toshowthe
Handsetis seated properly and thebattery pack ischarging. It is recommended that thebattery
pack should be charged for at least 16 hours initially. Afterwards, 8 hours of maintenance
charging should be sufficient.
To replace the battery pack, follow the steps below:
1. Remove the battery case cover by pressing on the ridged lines and sliding downward.
2. Discard the old battery pack by pulling firmly on the battery cords. Don’t put the old
battery pack in a trash compactor or a fire - it could burst. Please recycle.
3. Snap in the new battery pack, with the wires in the lower left corner. Insert the battery
plug into the socket, aligning the two holes in the plug with the socket pins.
4. Place the cord in the case so it rests below the battery pack.
5. Replace the battery case cover by sliding the cover upwards.
6. Place the Handset in the cradle of the Base Unit to allow it to
charge for 16 hours.
CAUTION:ToReducetheRiskofFireorInjury,Read and Follow
the Instructions
IMPORTANT:
Do not dispose of this battery pack into household garbage. For
information on recycling or proper disposal, consult your
local solid waste collection or disposal organization.
1. Use only VTech rechargeable battery pack, or equivalent.
2. Do not dispose of the battery pack in a fire. The cell may
explode.
3. Do not open or mutilate the battery pack. Released electrolyte
is corrosive and may cause damage to the eyes or skin. It may
be toxic if swallowed.
4. Exercise care in handling batteries in order not to short the
battery with conducting materials such as rings, bracelets, and
keys. The battery pack or conductor may overheat and cause
burns.
To purchase replacement battery packs, call VTech at 1-800-595-9511.

8
GETTING STARTED
SETTING UPYOURVT9162
When fully charged, you will experience up to 5hours of continuous talk, or up to 6days of
standby (off the cradle, but not in use).
RINGER SELECTION
1. PressPROG/CHAN.
2. Press or until RINGER is displayed.
3. Press SELECT.The current selection will be dis-
played, and you will hear a sample of the selected
ring.
4. Press or toselectadifferent ring style(there
are4),orturn theringerOFF.
5. Press SELECT to confirm your choice.
NOTE: If the ringer is set to OFF, the display will
show “RINGER OFF” in idle mode.
TONE/PULSE SELECTION
NOTE:Your
VT 9162
isfactory-preset for TONE
dialing.
1. To changedialing mode, press PROG/CHAN,
2. Press or until DIAL MODE is displayed.
3. Press SELECT.The current setting is displayed.
4. Press or to change the setting.
5. Press SELECT to confirm your choice.
ANSWERING SYSTEM - INTRODUCTION
YourVT9162includesa digital answering system in
the Base Unit. Setup of the answering system is
easy.Step by step instructions can be found in the
sectionentitled
Answering System Setup
,lateron
in this user’s manual.

9
WALL MOUNTING
GETTING STARTED
TheWall Mount bracket is designed for use on standardWall Mount plates only.
1. Line up the tabs on the wall mount adaptor with the holes on the bottom of the Base Unit.
Snap the wall mount bracket firmly in place.
2. Plugthe AC adaptor into anelectrical outlet, andthe DC connector to thebottom of theBase
Unit.If the Handset battery pack has not been charged previously, place the Handset in the
Base Unit cradle, and allow it to charge for 16 hours.
3. Connect the telephone line cord to the jack on the bottom of the Base Unit, and the other
and to the wall jack.
4. Mount the Base Unit on the wall.Position the Base Unit so the mounting stubs will fit into
the holes on the wall mount bracket. Sllde Base Unit down on the mounting stubs until it
locks into place.
wooden
stud
wallboard

10
THE HANDSET DISPLAY
It means:
The Handset is in idle mode
A telephone line has not been
connected to the Base Unit.
Or the line is out of service.
Indicates incoming call
Waitingfor dialtone
Handset is in use
A parallel phone is in use
If the display says:
GETTING STARTED

11
BASIC OPERATION
BASIC OPERATION
MAKING CALLS
Method 1------Live Dialing
Press PHONE. Dial the phone number.
Press OFF to end your call.
Method 2------Pre-dialing
Dialthephone number. Use the key to backspace
if you make a dialing mistake. Then press PHONE.
Press OFF to end your call.
Whenthehandsetisinuse,theINUSE/CHARGElight
onthe Base Unit will flash.WhentheHandset is inthe
Base Unit cradle, the IN USE/CHARGE light glows
steadily.
VOLUME CONTROL
While you are on a call, press to raise the inbound volume and to lower it.The handset
will display the relative volume setting as you adjust it.
CHANNEL CHANGING
If you experience noise or interference while on a call, you may be too far
from the Base Unit, or in an obstructed area. Try moving to a different
location. If this does not improve the transmission, press PROG/CHAN.
You can press this key more than once, if necessary.
NOTE:This feature only operates while you are on an active call.

12
BASIC OPERATION
USING REDIAL
1. Press PHONE. Listen for dial tone.
2. Press REDIAL/PAUSE. The last number you called will
automatically be redialed.
OR
1. Press REDIAL.The number will appear on the display.
2. PressPHONE.
NOTE: If you press REDIAL twice, the redial number will be deleted.
ANSWERING CALLS
To answer a call, press any key other than the OFF key.
Duringan incomingcall, totemporarily mutetheringing, pressOFF.
(Note:This feature is not available when the Handset is in its cradle.)
FLASH
When you receive a
CallWaiting
alert, press
FLASH to switch to the incoming call.
Press FLASH again to return to the first call.
BASIC OPERATION

13
BASIC OPERATION
HOLD
To place your call on hold,
press HOLD. PressHOLD
again to return to your call.
NOTE: If you have a call on hold, and pick up a parallel extension phone, your
VT 9162
will
automatically drop the call and return to idle mode.
PAGE
The Base can signal the Handset by means of the PAGE key. This is helpful in locating a
misplaced Handset. Press PAGE at the Base. The Handset will generate a series of tones
(different than inbound call ringing) for a maximum of 60 seconds, and will display:
Press PAGE at the Base or OFF key on the
Handset to end the Page.
BASIC OPERATION

14
NOTE:Caller ID and CallWaitingIDaresubscription services,providedbyyourregionalphone
company. You must subscribe to these services in order to benefit from the Caller ID features of
your
VT 9162.
Contact your regional phone service provider for details.
RECEIVING AND STORING CALLS
AsnewCaller ID/CallWaitingID recordsare received,
NEW followedby the number of new Caller IDrecords
received will be displayed on the Handset.
Your
VT 9162
will store the most current 50 Caller
ID and CallWaiting ID records. To review Caller ID
records, press while the Handset is in the idle mode.
Keep pressing toscroll through morerecords.
ABOUT CALL HISTORY
Thisphone assigns each incoming call a numberfrom1 to 50.The mostrecent call will have the
highestnumber.When the memory is full,the oldestcall information is deleted tomakeroom for
newincoming call information.
For each call that comes in, the screen displays the following information between the first and
secondrings:
• Your caller’s name (15 letters are sent by your telephone company);
• Thecaller’s areacodeand telephone number;
• The time and date of the call; and
• The position of the call in call history.
If you answer a call before the information appears on the screen, it will not be in the call history.
Note: Press OFF at any time to exit Caller ID review mode.
REVIEW CALLER ID
The screen displays call information for about 15 seconds after it has been received.
1. Press (CID) to view Caller ID.
2. Use and to scroll through records in call history.
CALLER ID/CALLWAITING ID
ADVANCED OPERATION

15
CALLER ID /CALLWAITING ID
ADVANCED OPERATION
DELETING RECORDS FROM CALL HISTORY
DELETE A SPECIFIC CALL
1. Locate the record you want to delete from call history.
2. Press SELECT, then press until ERASE flashes.
3. Press SELECT. The screen displays ERASE NO YES
ALL and the phone number.The current choice flashes.
4. Press until YES flashes.
5. Press SELECT.You’ll hear a series of beeps confirming
the deletion.
DELETE ALL CALLS
1. While viewing call history, press SELECT, then press
until ERASE flashes.
2. Press SELECT. The screen displays ERASE NO YES
ALL and the phone number.The current choice flashes.
3. Press until ALL flashes, then press SELECT. The
screen displays ERASE ALL NO YES. The current
choice flashes.
4. Press until YES flashes.
5. Press SELECT.You will hear a series of beeps confirm-
ing the deletion.
DIAL A DISPLAYED NUMBER
1. Locate the record in call history that you want to dial.
2. If you wish to change how the number is dialed, press
#. Pressing #repeatedly will display all alternate dialing
sequencesavailablefor this call (areacode+ number; 1+
areacode+ number; 1+number;number only).
3. PressSELECT. DIALwill be flashing.
4. Press SELECT again.The number will be dialed.
STORE A CALLER ID RECORD IN PHONE
BOOKMEMORY
1. Use the key to locate the desired CID record.
2. If you wish to change how the number is dialed, press#.
Pressing #repeatedlywill display all alternate dialing se-
quence available for this call (area code + number; 1 +
areacode +number; 1+ number; numberonly).
3. Press SELECT, then press until PGM flashes.
4. Press SELECT.You can now edit the NAME if you wish.
Press to backspace in order to edit the name.
.

16
5. Press SELECT.You can now edit the PHONE NUMBER.Press to backspace in order to
editthephonenumber.
6. Press SELECT.Your CID record is now in your Phone Book directory.
DISPLAY SCREEN MESSAGES
Screen Display: When:
PRIVATE NAME The other party is blocking name information.
PPP The other party is blocking number information.
PRIVATE CALLER The other party is blocking name and number information.
UNKNOWNNAME Your phone company is unable to receive information about this
caller’sname.
UUU Your phone company is unable to receive information about this
caller’snumber.
UNKNOWNCALLER Your phone company is unable to receive information about this
caller’s name andnumber.
EXTENSION IN USE An extension phone on this line is being used, so call information
cannotbe received.
Err There is a problem with Caller ID transmission from the telephone
company.
CALLER ID/CALLWAITING ID
ADVANCED OPERATION

17
This cordless phone can store 20 telephone numbers with names, each up to 16 digits long.
Entries are stored alphabetically.For consistency with Caller ID entries, you may wish to enter
last names first.
Note: Press OFF at any time to exit memory.
STORE MEMORY NUMBERS
1. Press PROG/CHAN.Thescreendisplays DIRECTORY.
2. PressSELECT.The screen displays ENTER NAME.
3. Usingthechart below, enterup to 15characters for the nameyou’re storing with the number.
Use to backspace and make corrections; use to advance and add a space.
Presses
Dial Key 1 23456
1 1
2 A B C 2
3 D E F 3
4 G H I 4
5 J K L 5
6 M N O 6
7 P Q R S 7
8 T U V 8
9 W X Y Z 9
0 0
* *
# & ’ ,-.#
4. When you finishentering thename, press SELECT.Thescreen displays ENTER NUMBER.
5. Enter the telephone number. Use to backspace and make a correction. Press REDIAL/
PAUSE to store a pause in the dialing sequence.
6. Press SELECT to storeyourentry.ThescreendisplaysSAVING... and you’llhear a series of
beepsconfirmingthe entry.
Note:When memory is full the screen displays MEMORY FULL, an error tone sounds, and you
will not be able to store a new number until you delete a stored number.
PHONE BOOK
ADVANCED OPERATION

18
PHONE BOOK
EDIT NUMBERS STORED IN MEMORY
1. Press (DIR).The screen displaysDIRECTORY.
2. Press or to scroll alphabetically through numbers stored in memory
-OR-
Press the dial pad key for the first letter of the entry you want to edit.
3. When the screen displays the number you want to
edit, press SELECT. Then press until EDIT flashes.
4. Press SELECT.The screen displays the name and
number.The flashing cursor appears at the end of
the name. Use , and the dial pad keys to edit the name. Press SELECT to move on to
editthe number.
5. Press SELECT to save the edited information.You’ll hear a series of beeps confirming the
change.
DELETE NUMBERS STORED IN MEMORY
1. Press (DIR).The screen displaysDIRECTORY.
2. Press or to scroll alphabetically through numbers stored in memory
-OR-
Press the dial pad key for the first letter of the entry
you want to delete.
3. When the screen displays the number you want to
delete, press SELECT.Then press until ERASE
flashes.
4. Press SELECT.The screen displays ERASE NO
YES and the number.The current choice flashes.
5. Press until YES flashes.
6. Press SELECT.You’ll hear a series of beeps confirming the deletion.
DIAL MEMORY NUMBERS
1. Press (DIR).The screen displaysDIRECTORY.
2. Press or to scroll alphabetically through numbers stored in memory,
-OR-
Press the dial pad key for the first letter of the entry
you want to dial.
3. When the screen displays the number you want to
dial, press SELECT.Then press or until DIAL
flashing.
4. PressSELECT,Thephone automatically dials the number.
ADVANCED OPERATION

19
ADVANCED OPERATION
OPTIONAL HEADSET INSTALLATION & OPERATING INSTRUCTIONS
Your
VT 9162
cordless telephone is equipped with a 2.5mm Headset Jack for use with an
optional
accessory Headset forhands-free operation.
If you choose to use the Headset option, you must do the
following:
INSTALLATION
*Obtainan optional accessoryHead set, which iscompat-
ible with the
VT 9162
.
PleasecontactVTECHCommunicationsCustomer Ser-
vice, in the U.S.toll-free at 1-800-595-9511, in Canada
call 1-800-267-7377 for dealer information in your local
area.You can also purchase a compatible Headset di-
rectlyfromVTECHCommunicationsCustomer Service.
*Once you have a compatible 2.5mm Headset, locate the
Headset Jack on the Handset of your
VT 9162
. Connect
theplugon the Headsettothe jack on thecordless Hand-
set. The plug should fit securely. Do not force the con-
nection. See illustration.
OPERATION
NOTE:Whenever a compatible Headset is connected to the cordless Handset, the microphone
on the Handset will be MUTED. This is done to limit the effect of background noise.
*ManycompatibleHeadsetshaveamonauraldesignwhichisreversible,soyoucanwear your
Headset on either the left or right ear, leaving one ear free for room conversation.
BELT CLIP
*The
VT 9162
isalsoequipped with a detachablebeltclip.
Align the pins on the inside edge of the belt clip with the
notches on the side of the
VT 9162
Handset. The belt
clip should snap securely into place. Do not force the
connection. See Illustration.

20
ANSWERING SYSTEM SETUP
Answering System Programming Overview
Setup order for the Answering System is:
During Answering System setup, the display will flash “ -- ”. If no key is pressed for 20 seconds,
theAnsweringSystem will beep, and exit programmode.Youcan also exitprogrammodeatany
time by pressing any MAILBOX key.
Set Outgoing Message (OGM)
SelectingAnnouncement
Thereare 2 choices of announcements:
Normaloutgoing message & Outgoing messageforAnnounceOnly.
1. Normal answering mode.(Announce Only: OFF)
Inthismode, the callerisable to leave hismessage. If no announcementisrecorded, the default
announcement“Hello,I’munableto answeryourcallrightnow.Pleaseleave yourname,number
and message after the tone.”will be used.
2.Announce Only mode
If this mode is set, the caller is not able to leave his message. If no announcement is recorded,
the factory default greeting is:”Hello, I’m unable to answer your call right now.Please call again.
Thank you.” will be used.
Example for OGM1 (for multi - user application);
“Hi! We can’t come to the phone right now.If you have a message for John press 1 (‘star 1’),
for Jane press 2 (‘star 2’), for Jack press 3 (‘star 3’), Or just stay on the line and record after
the beep.Thank you.”
Example for OGM2 (Announce Only):
“Hi!You have reached Jack and Jill.We will be back after 1 p.m.Please call back then.Thank
you.”
*
**
1. Set Outgoing Message.
2. Set Security Code
3. Set Day and Time
4. Set Audible Message Alert
5. Set Announce Only
6. Set Base Ringer
7. Set Number of Rings
ItadOperation
Table of contents
Other V-tech Telephone manuals

V-tech
V-tech DS6751-2 User manual

V-tech
V-tech i5868 User manual

V-tech
V-tech ip5852 User manual

V-tech
V-tech CM18245 User manual

V-tech
V-tech DS6611 User manual

V-tech
V-tech i6772 User manual

V-tech
V-tech VT 2961 User manual

V-tech
V-tech S1100 User manual

V-tech
V-tech CD1113 User manual

V-tech
V-tech CD1291 User manual

V-tech
V-tech Vonage IP 8100-2 User manual

V-tech
V-tech ia5878 User manual

V-tech
V-tech VSP735 User manual

V-tech
V-tech T1300 User manual

V-tech
V-tech LS1500-B User manual

V-tech
V-tech 912 User manual

V-tech
V-tech A1100 Analog Classic Series User manual

V-tech
V-tech TZ-2526 User manual

V-tech
V-tech ia5824 Setup guide

V-tech
V-tech i6764 Setup guide