Hilm Anderssons gt 15 | 421 31 Västr Frölund | +46 (0)31-23 56 00 | info@vadsbo.net | order@vadsbo.net
www.vadsbo.net
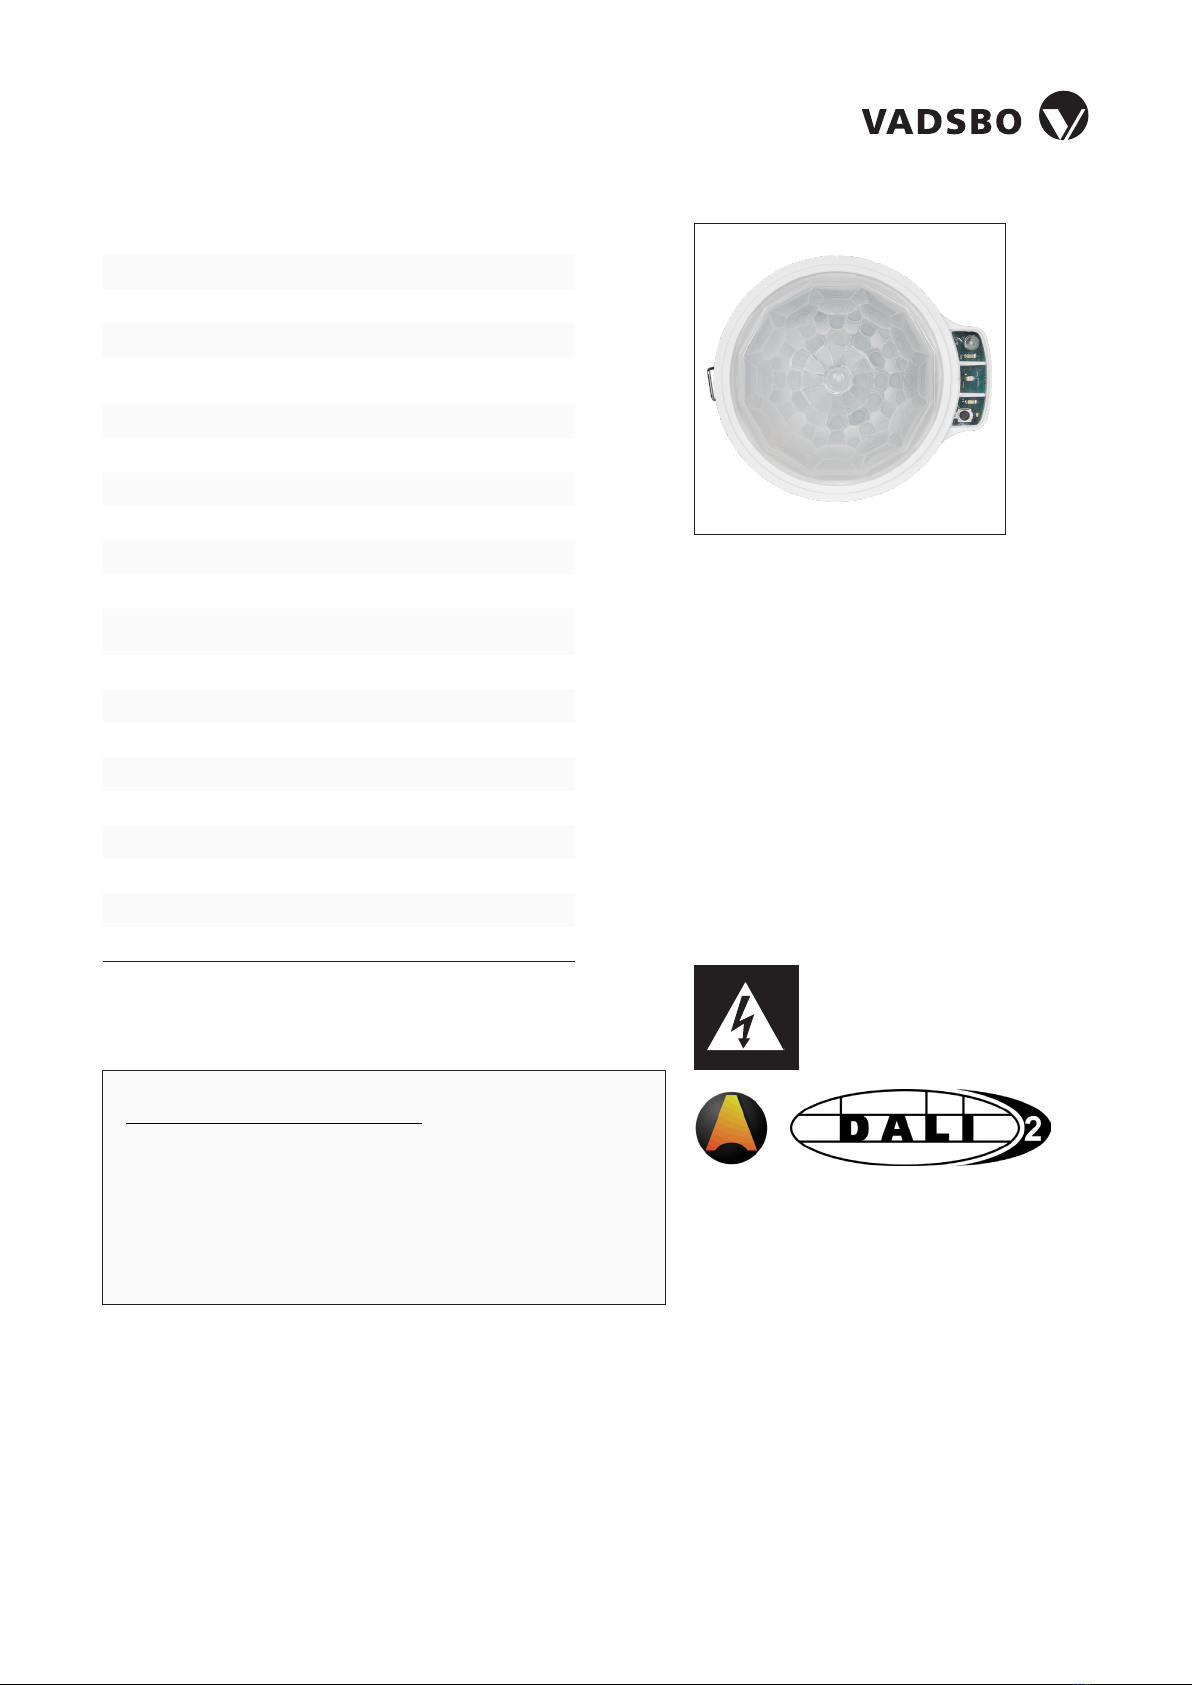
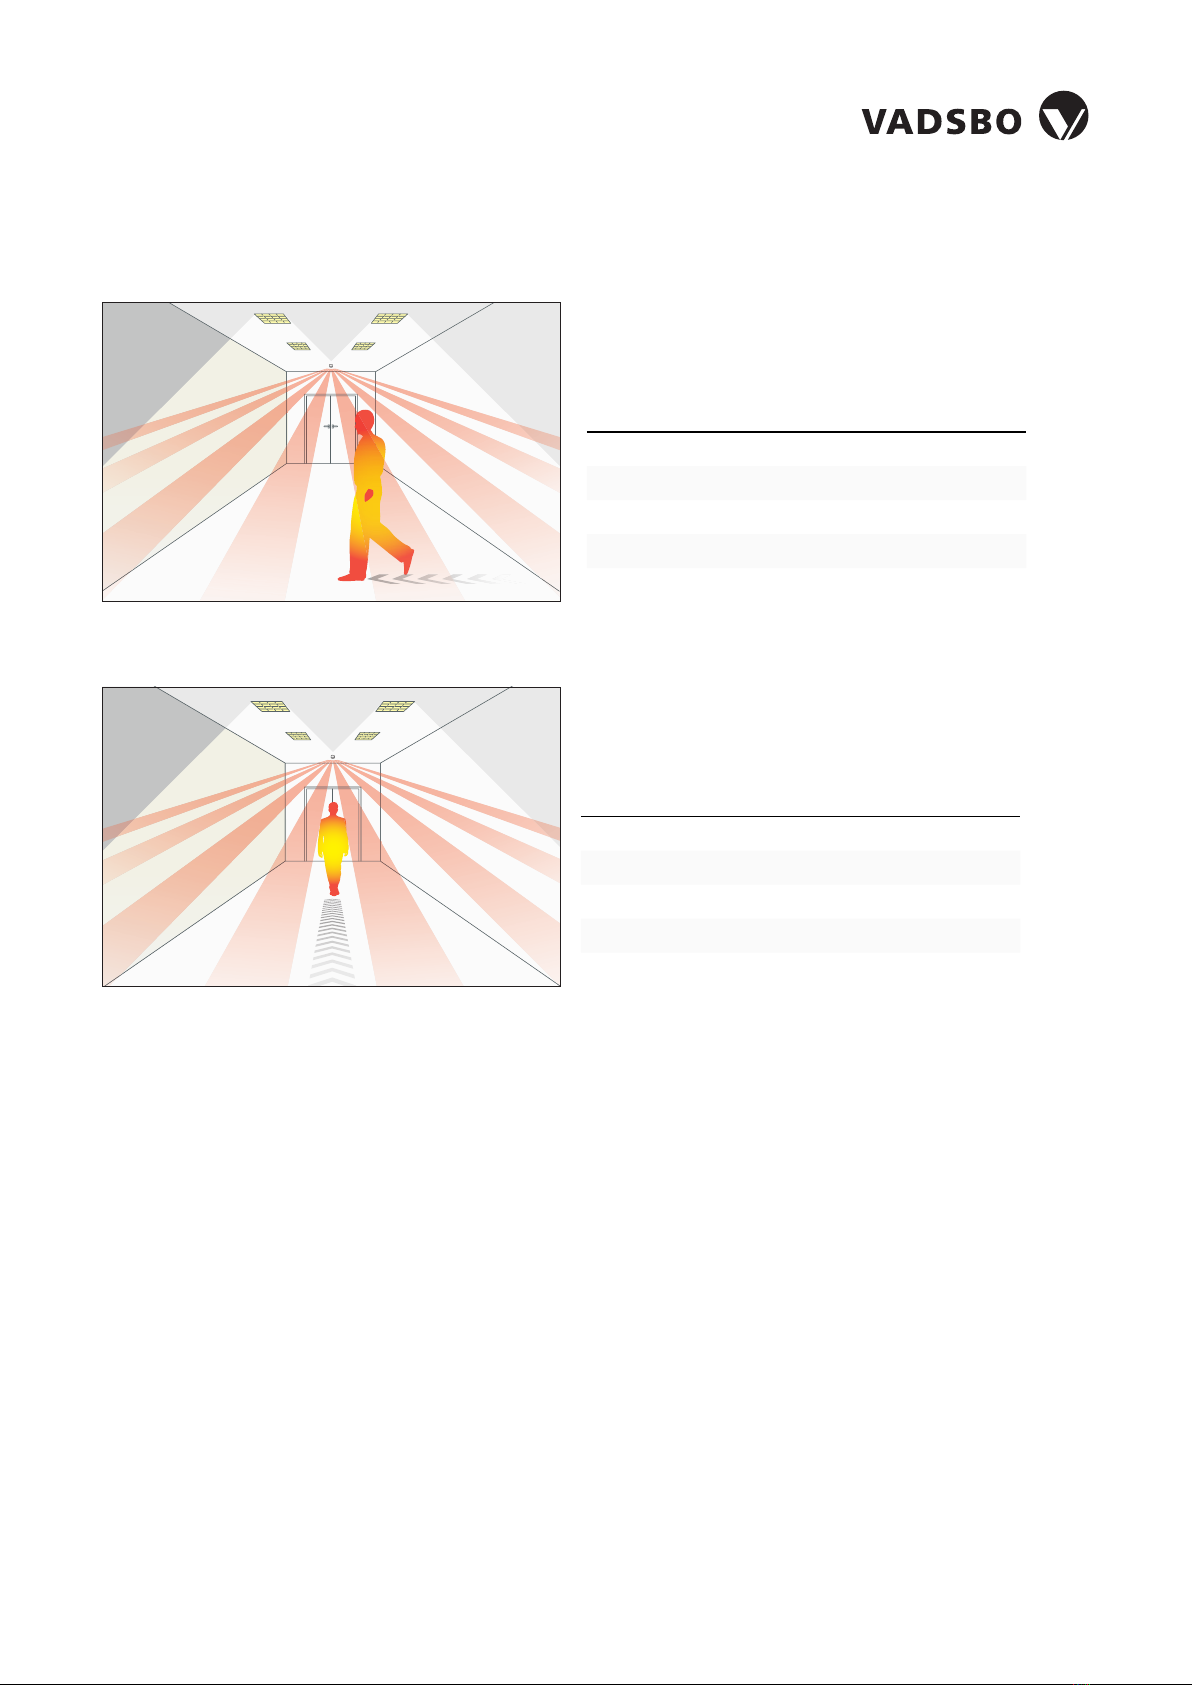
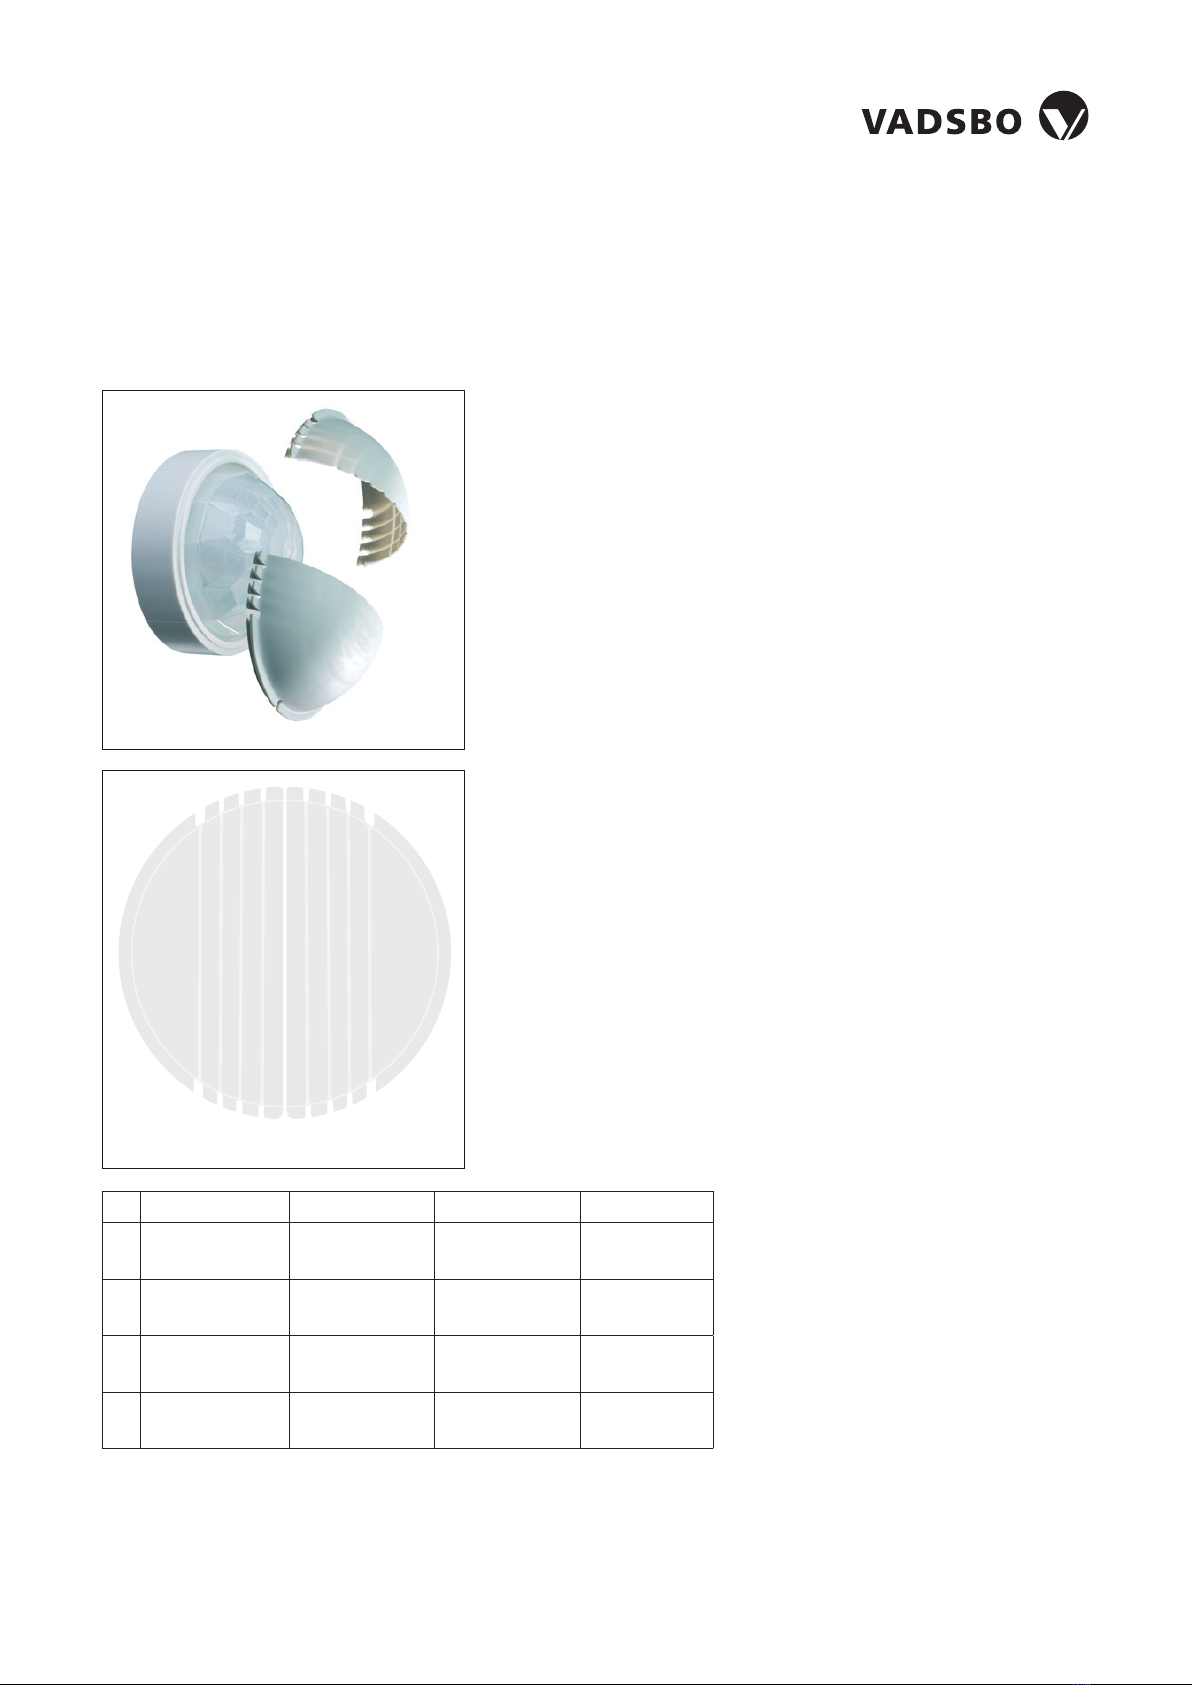
Sensor CBU-PIRDALI-HB
Rekommendtions for cble scling
5
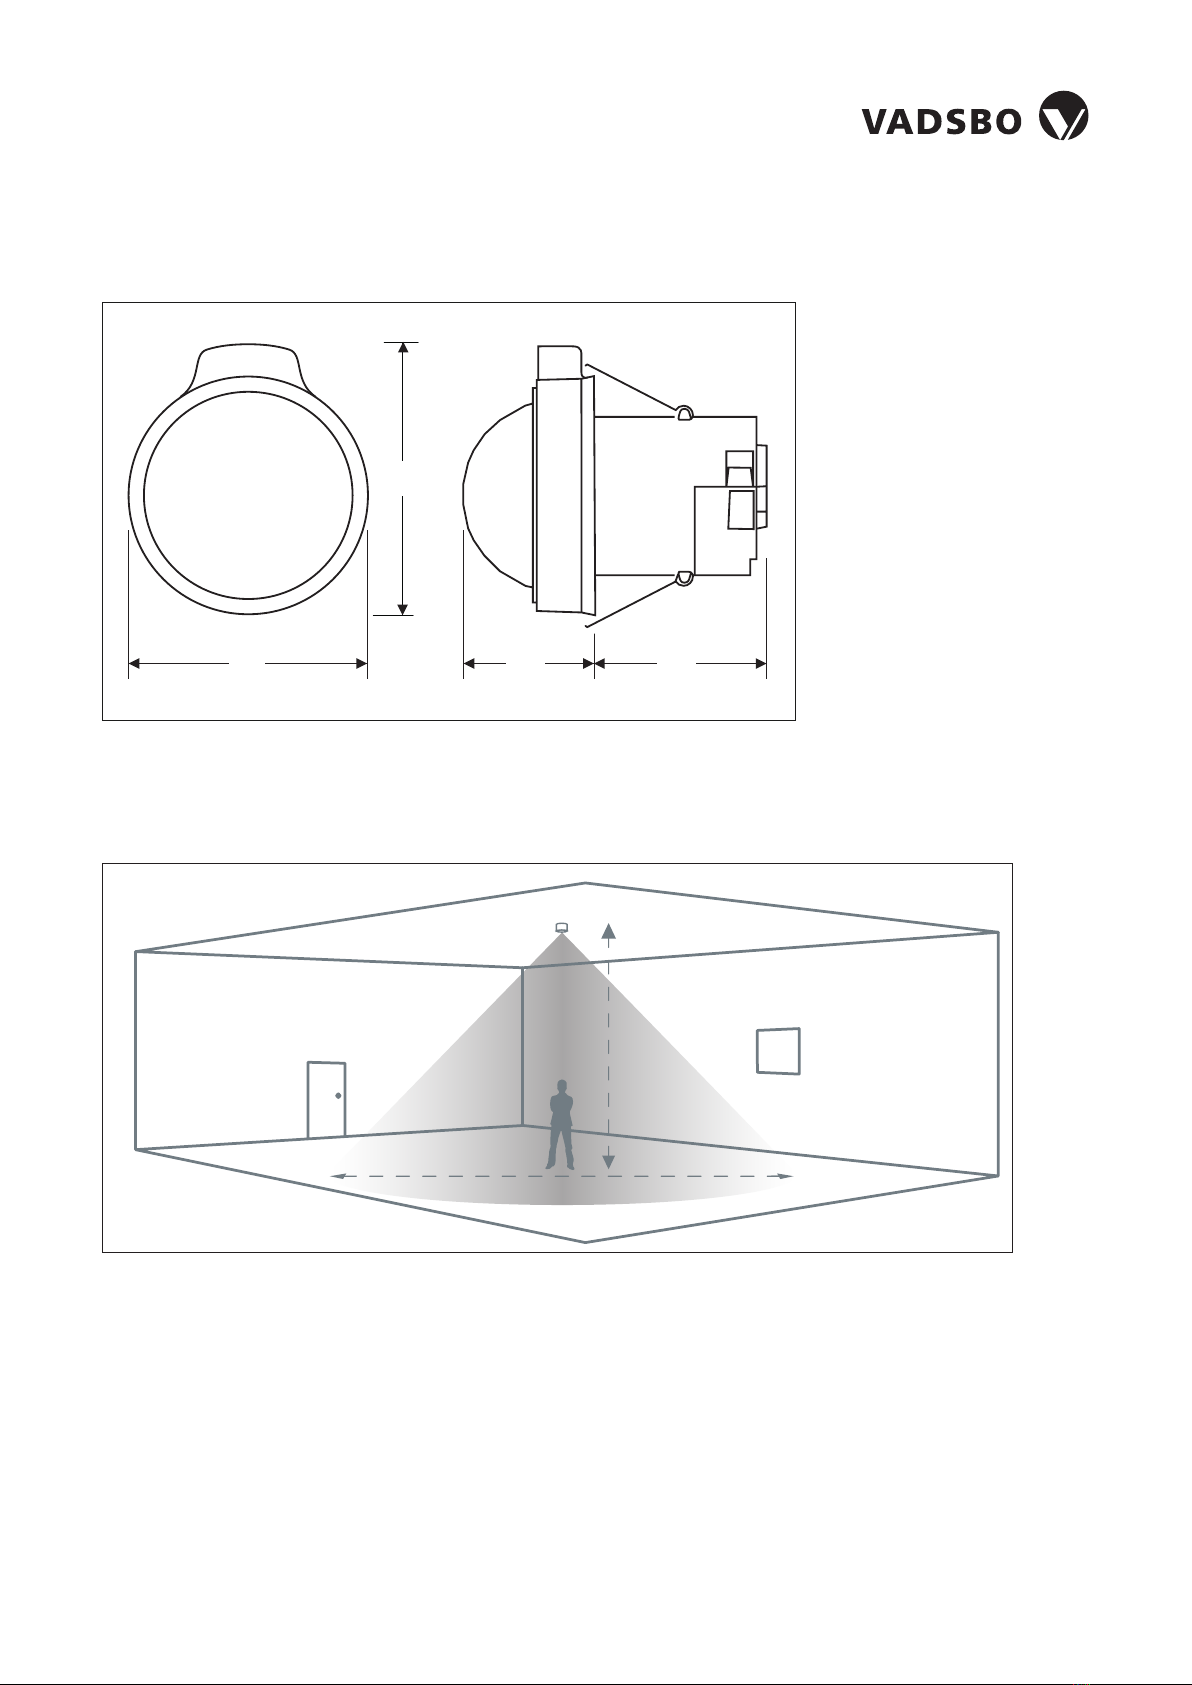
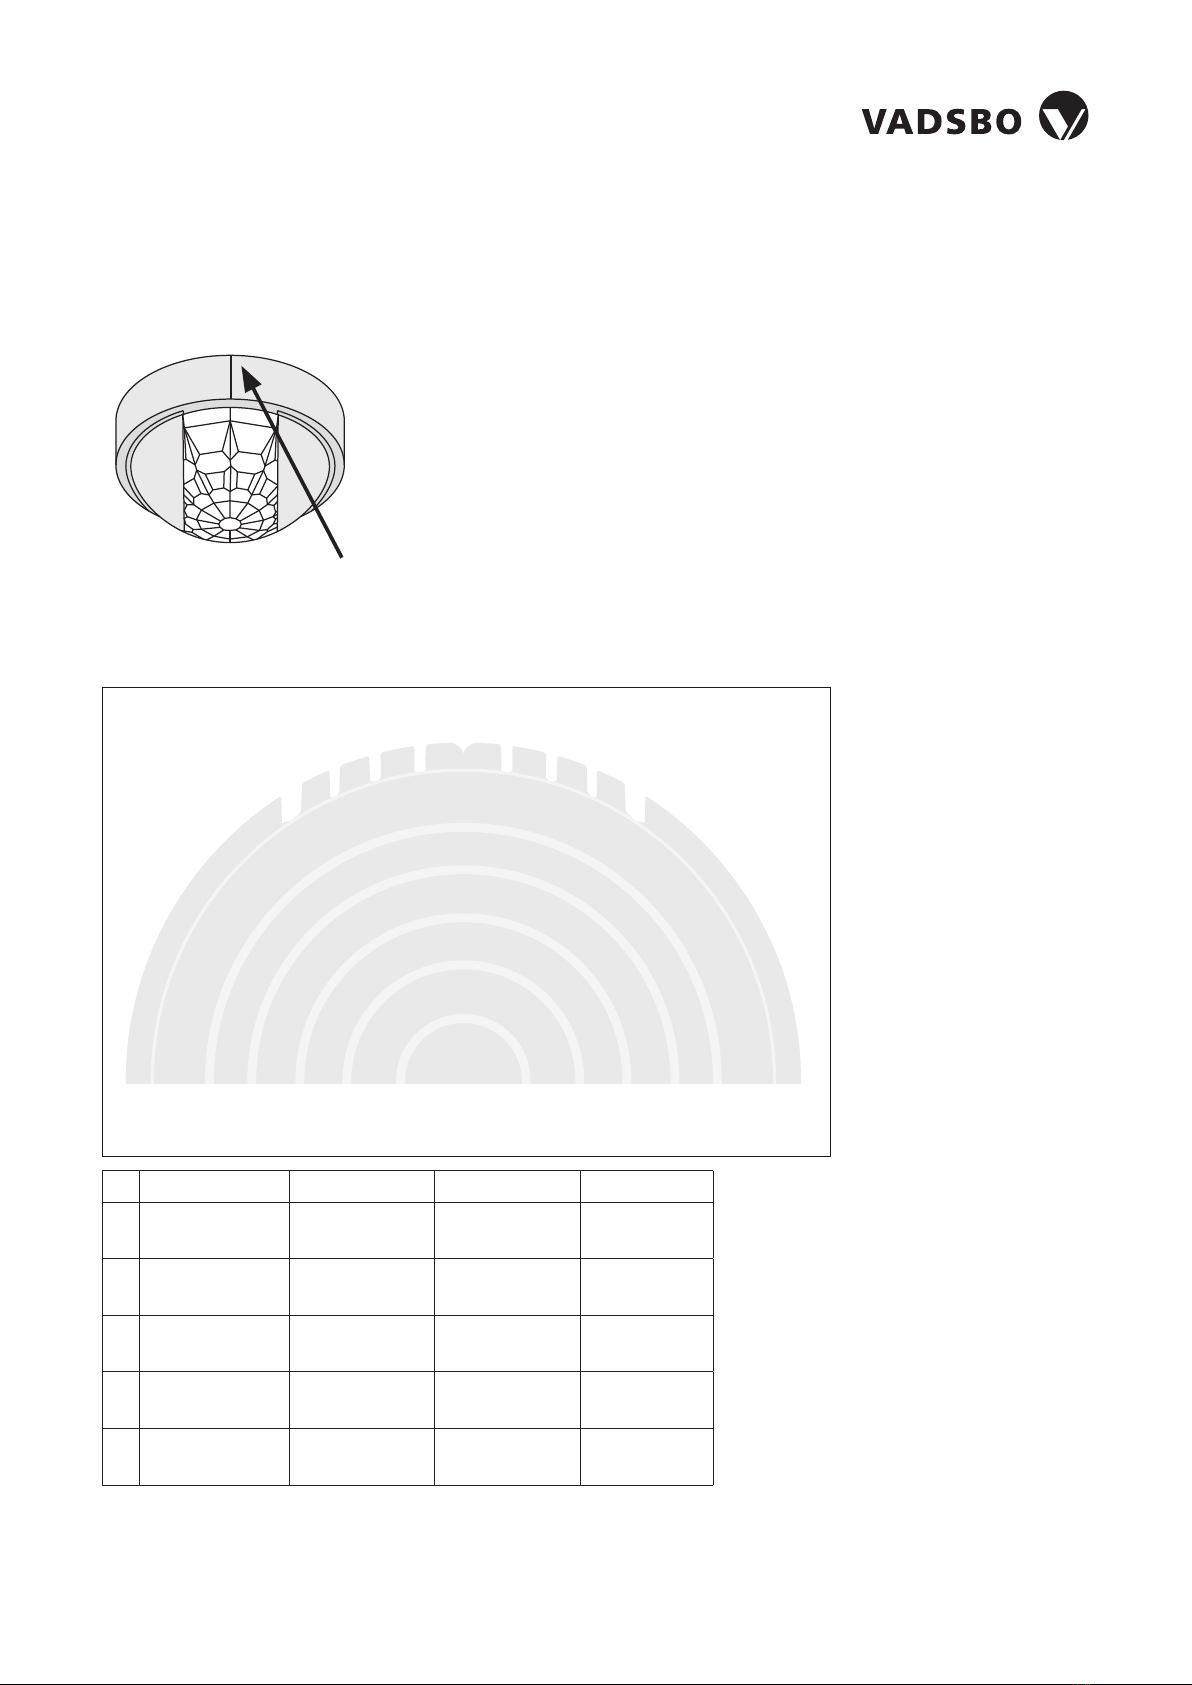
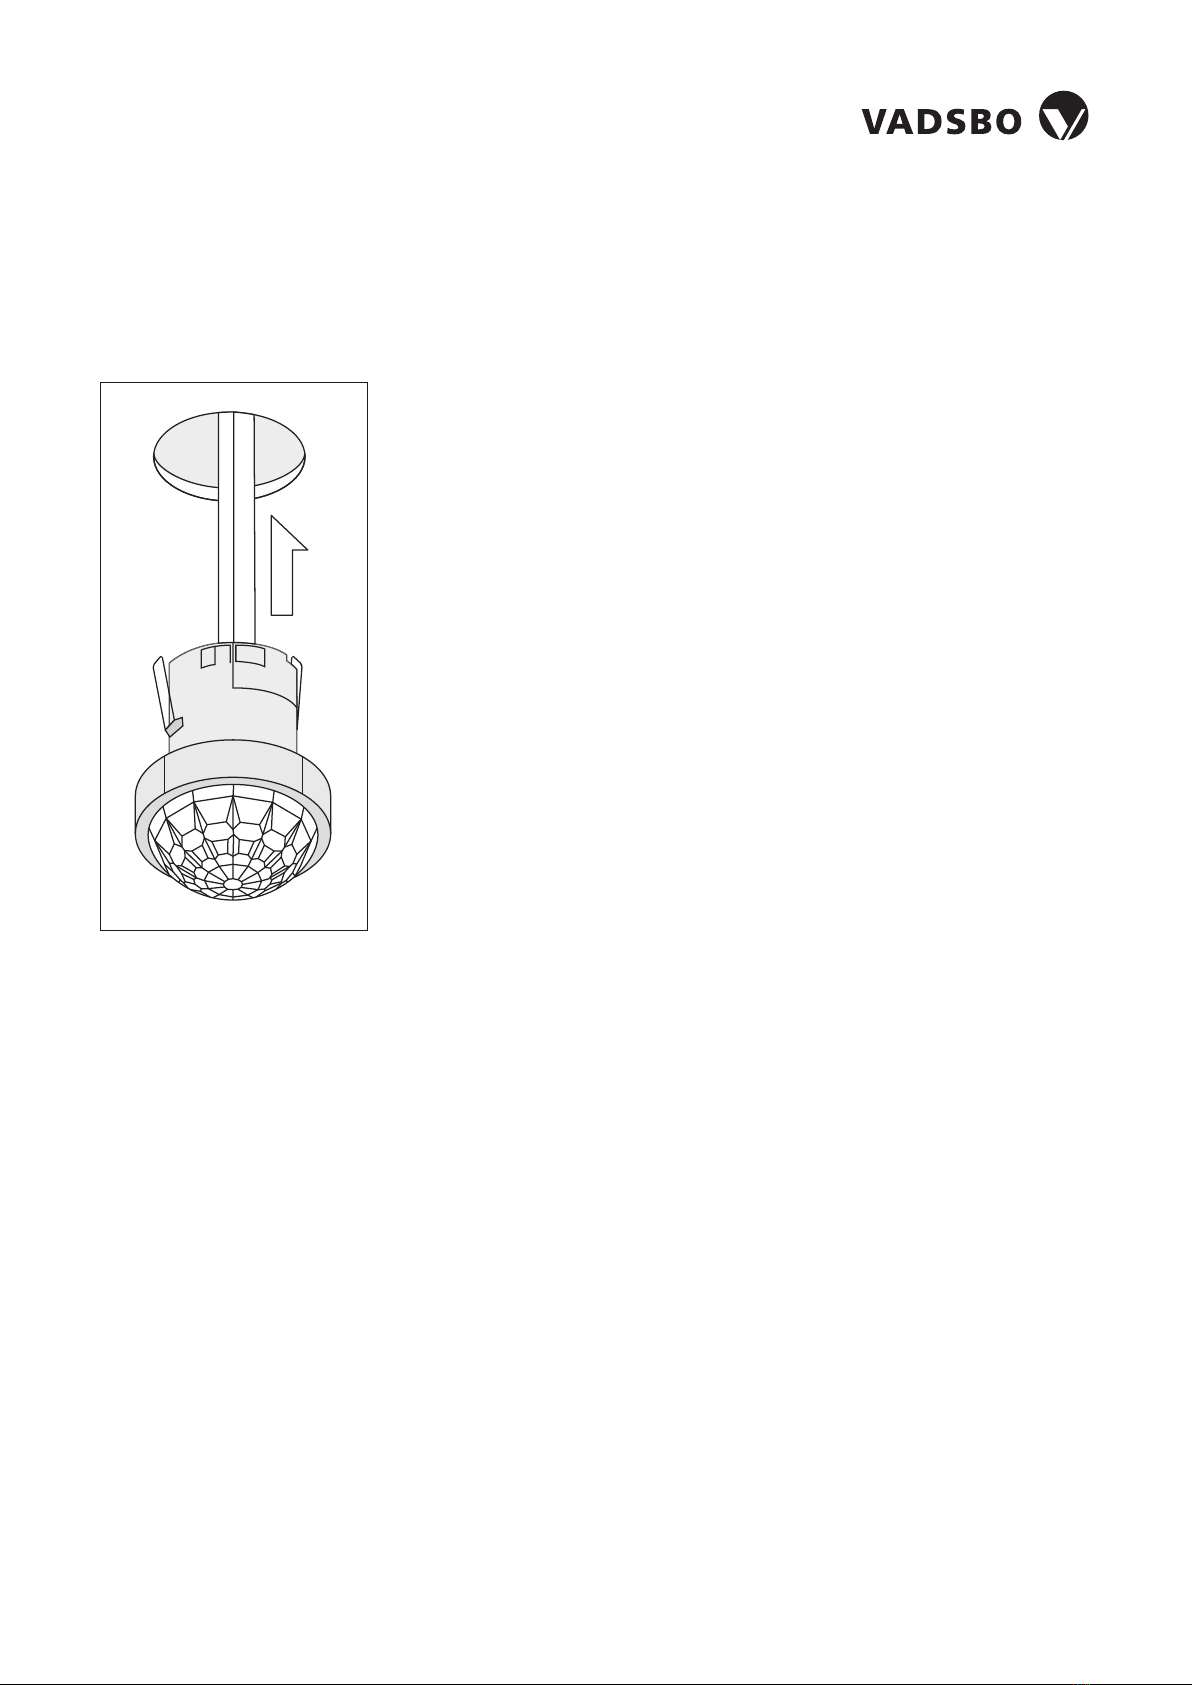
EN This device is designed to be ush ceiling-mounted.
• Do not site the unit where direct sunlight might enter the sensor.
• Do not site the sensor within 1m of any lighting, forced air
heating or ventilation.
• Do not x the sensor to an unstable or vibrating surface.
• Occupancy is best detected when the ambient temperature is
dierent to that of the human body, thus, use within -20 to 35ºC
ambient temperature.
DE Das Modell ist für den Deckeneinbau vorgesehen.
• Einheit so anbringen, dass der Sensor vor direkter
Sonneneinstrahlung geschützt ist.
• Sensor mit Mindestabstand von 1m zu Lichtquellen,
Luheizung oder Ventilation anbringen.
• Sensor nicht an einer instabilen oder vibrierenden Oberäche
montieren.
• Bezetting wordt het best gedetecteerd wanneer de
omgevingstemperatuur anders is dan die van het menselijk
lichaam, dus gebruik binnen een omgevingstemperatuur van
-20 tot 35 ° C.
ES Este producto está diseñado para montarse empotrado en techo.
• Evite que la luz del sol incida directamente sobre el sensor.
• No coloque el sensor a menos de 1m de fuentes de iluminación,
salidas de calefacción por aire forzado o ventilación.
• No je el sensor a supercies que vibren o no sean estables.
• La ocupación se detecta mejor cuando la temperatura ambiente
es diferente a la del cuerpo humano, por lo tanto, use dentro de
-20 a 35ºC de temperatura ambiente.
PT Este dispositivo foi projetado para ser montado no teto.
• Não instale a unidade num local onde a luz solar direta possa
incidir no sensor.
• Não coloque o sensor a menos de 1m de qualquer iluminação,
aquecimento ou ventilação de ar forçado.
• Não xe o sensor em uma superfície instável ou sujeito a vibrações.
• A ocupação é melhor detectada quando a temperatura
ambiente é diferente da do corpo humano, portanto, use entre
-20 a 35ºC.
FR Le produit est conçu pour être monté au plafond en encastré.
• Ne pas placer l’unité dans une position où la lumière directe du
soleil pourrait pénétrer dans le capteur.
• Ne pas placer le capteur à moins d’unmètre de tout dispositif
d’éclairage, de chauage ou de ventilation à air forcé.
• Ne pas xer le capteur sur une surface instable ou vibrante.
• L’occupation est mieux détectée lorsque la température
ambiante est diérente de celle du corps humain, utilisez donc
entre -20 et 35 ° C de température ambiante.
IT Questo dispositivo è progettato per essere a lo sotto.
• Non collocare l’unità in una posizione in cui la luce diretta del
sole possa entrare nel sensore.
• Non posizionare il sensore a meno di un metro da un qualsiasi tipo
di illuminazione, sistema di riscaldamento o ventilazione.
• Non installare il sensore su superci instabili o soggette a vibrazioni.
• L’occupazione viene rilevata meglio quando la temperatura
ambiente è diversa da quella del corpo umano, quindi utilizzare
entro -20 a 35 ° C.
NL Dit apparaat is ontworpen voor inbouwmontage in het plafond.
• Plaats het apparaat niet op een locatie waar direct zonlicht de
sensor kan binnendringen.
• Plaats de sensor niet op minder dan 1 meter afstand van verlichting,
geforceerde luchtverwarming of ventilatie.
• Bevestig de sensor niet op een onstabiel of trillend oppervlak.
• Bezetting wordt het best gedetecteerd wanneer de
omgevingstemperatuur anders is dan die van het menselijk
lichaam, dus gebruik binnen een omgevingstemperatuur van
-20 tot 35 ° C.
Installation | Instalación | instalação | Installazione | Installatie
Ø 64mm
1
35mm
6mm
2
Create cut out | Erstellen Sie einen Ausschnitt | Oricio de corte | Fixação no teto | Percer | Creare il foro | Sparing maken
EN Cut a 64mm diameter
hole in the ceiling.
DE Deckenausschnitt 64mm.
ES Cortar un oricio de 64
mm de diámetro en el techo
PT Efectuar um corte de
diâmetro de 64mm no teto.
FR Percer un trou de 64mm
de diamètre dans le plafond
IT Realizzare un foro di
64mm di diametro a sotto.
NL Maak een 64mm
diameter sparing in het plafond.
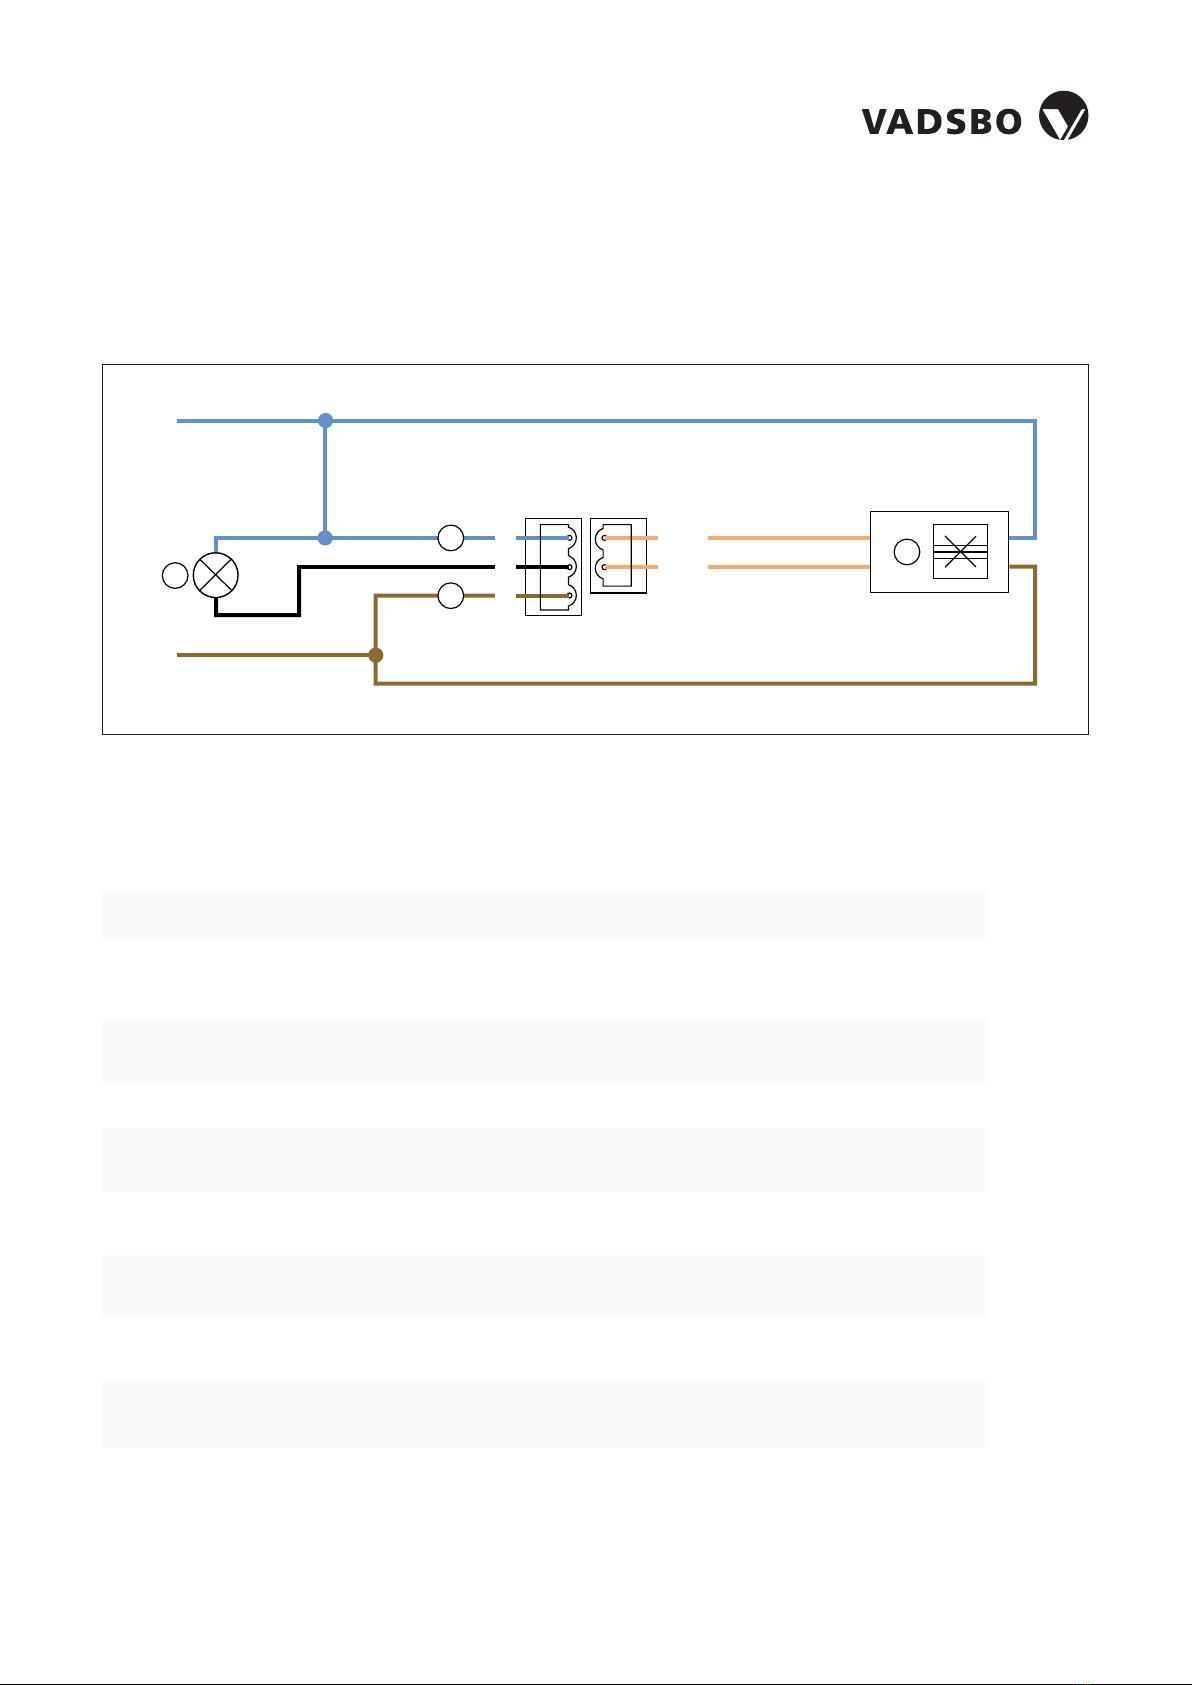
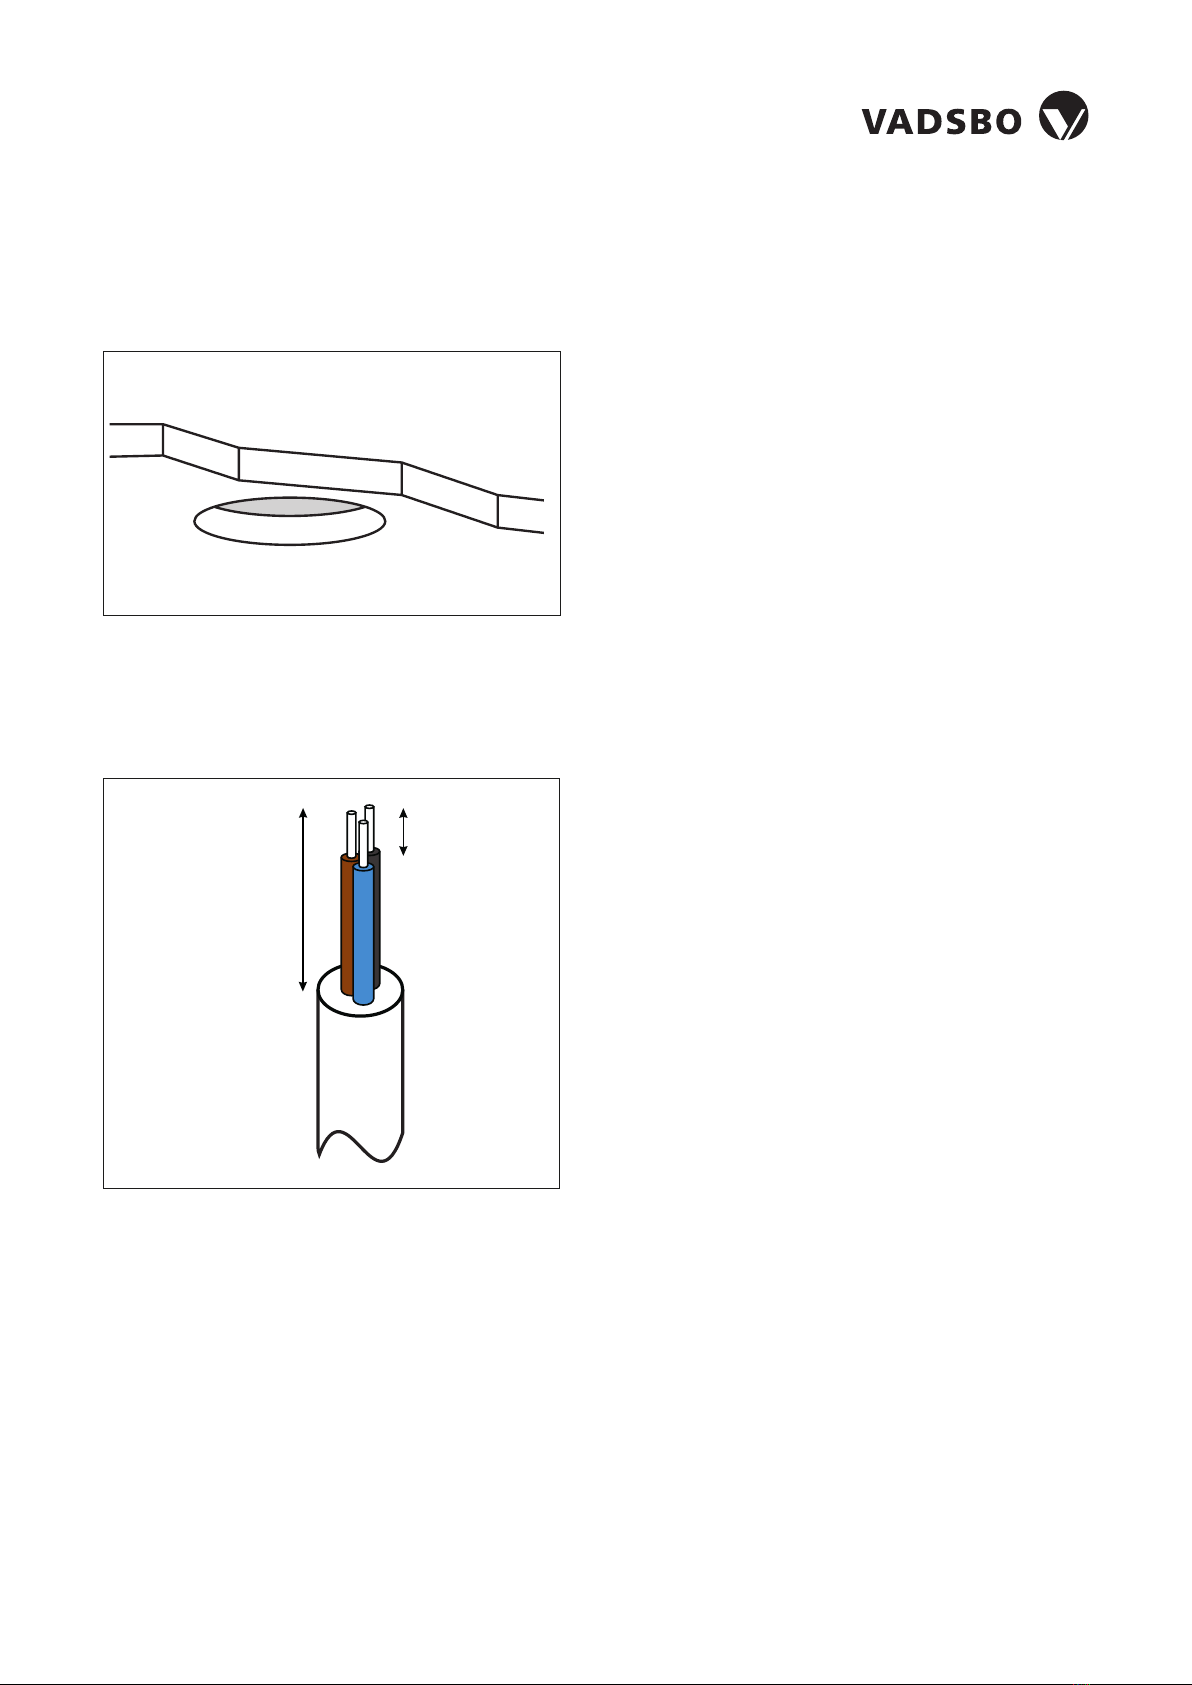
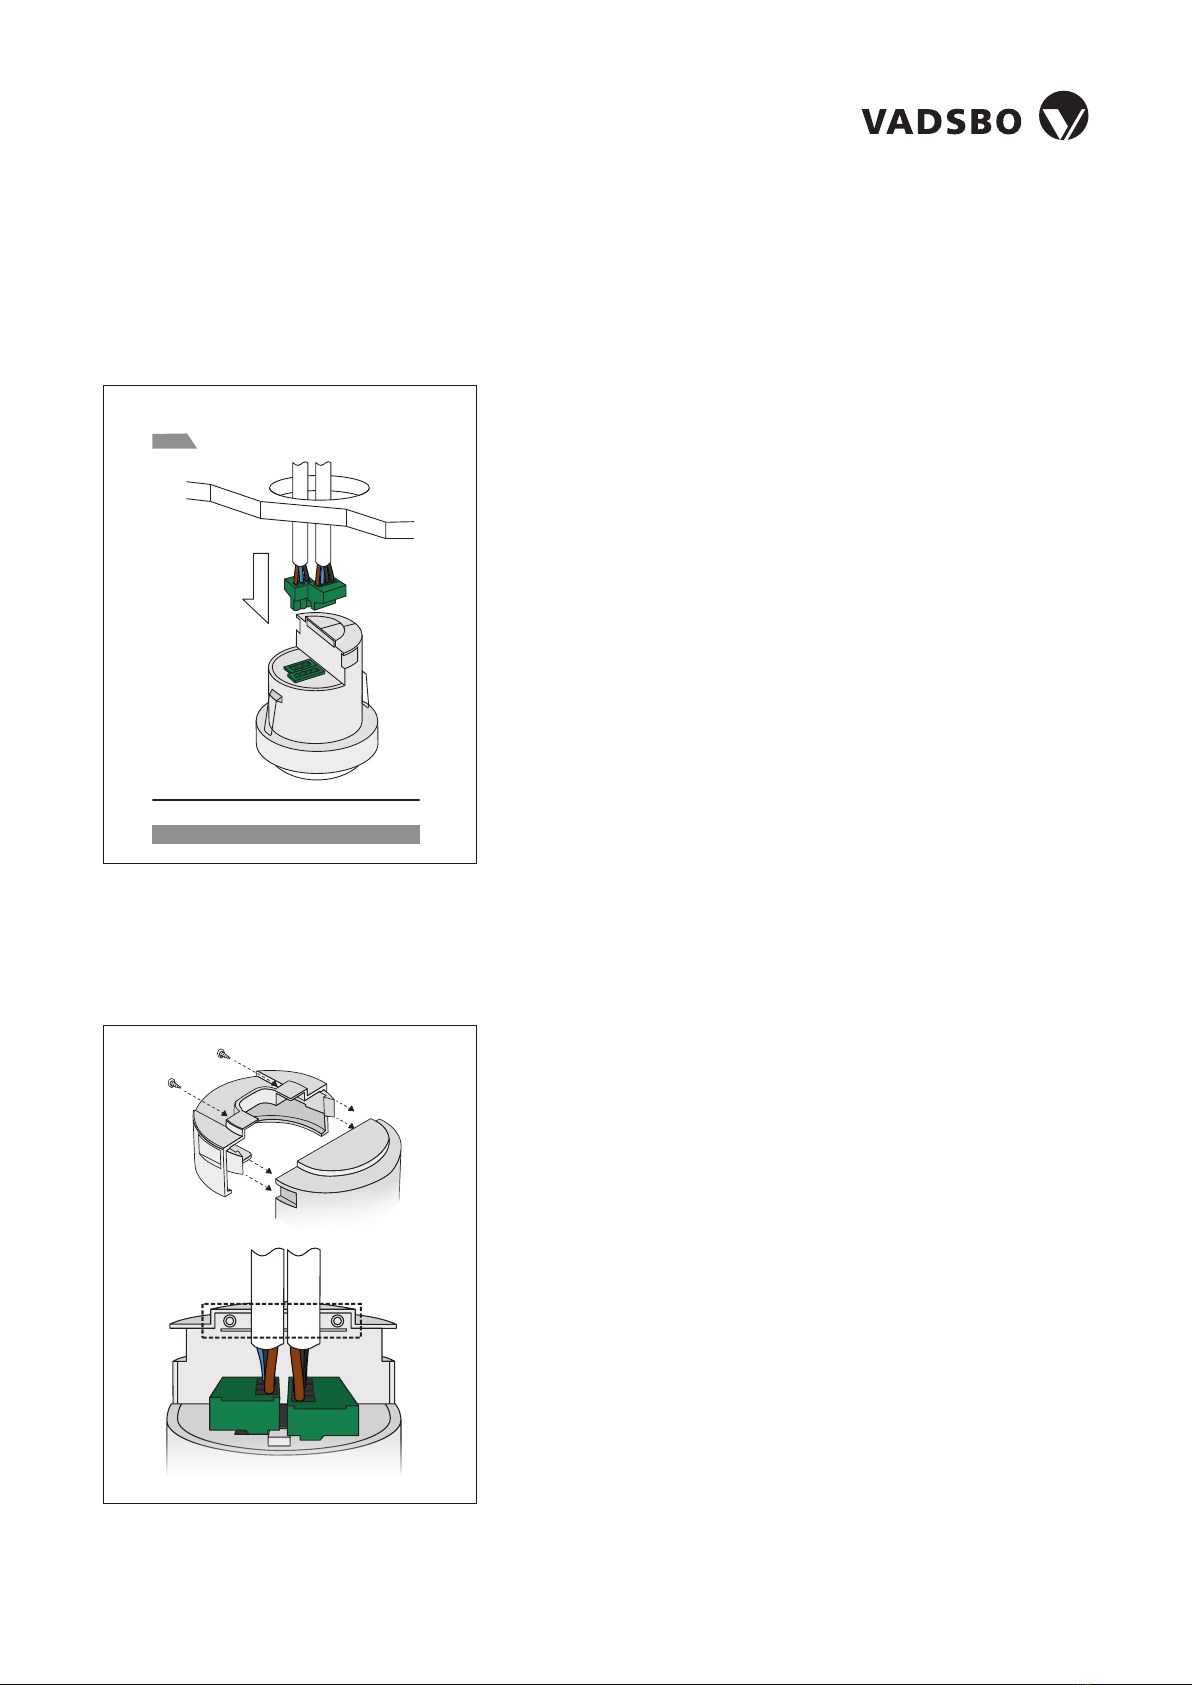
Wire stripping | Abisolieren | Pelado de cables | Descascamento do o | Dénudage des câbles | Spelatura del lo | Kabelstrippen
EN Strip the wires as shown opposite. Presence
detector does not require earth conductor.
DE Abisolieren Sie die Kabel wie dargestellt. Der
Melder benötigt keinen Erdanschluß.
ES Pele los cables como se muestra en el
dibujo. El detector no requiere cable de tierra.
PT Descarne os cabos como mostrado ao
lado. Este detector não requer conductor de terra.
FR Dénudez les câbles comme indiqué
ci-contre. Le détecteur de présence ne nécessite
pas de conducteur de terre.
IT Spelare i li come mostrato. Il rilevatore di
presenza non richiede il cavo di terra.
NL Strip de aders zoals weergegeven op de
aeelding hiernaast. Aardingsdraad is niet vereist.
Rekommendtions for piercing
5
EN This device is designed to be ush ceiling-mounted.
• Do not site the unit where direct sunlight might enter the sensor.
• Do not site the sensor within 1m of any lighting, forced air
heating or ventilation.
• Do not x the sensor to an unstable or vibrating surface.
• Occupancy is best detected when the ambient temperature is
dierent to that of the human body, thus, use within -20 to 35ºC
ambient temperature.
DE Das Modell ist für den Deckeneinbau vorgesehen.
• Einheit so anbringen, dass der Sensor vor direkter
Sonneneinstrahlung geschützt ist.
• Sensor mit Mindestabstand von 1m zu Lichtquellen,
Luheizung oder Ventilation anbringen.
• Sensor nicht an einer instabilen oder vibrierenden Oberäche
montieren.
• Bezetting wordt het best gedetecteerd wanneer de
omgevingstemperatuur anders is dan die van het menselijk
lichaam, dus gebruik binnen een omgevingstemperatuur van
-20 tot 35 ° C.
ES Este producto está diseñado para montarse empotrado en techo.
• Evite que la luz del sol incida directamente sobre el sensor.
• No coloque el sensor a menos de 1m de fuentes de iluminación,
salidas de calefacción por aire forzado o ventilación.
• No je el sensor a supercies que vibren o no sean estables.
• La ocupación se detecta mejor cuando la temperatura ambiente
es diferente a la del cuerpo humano, por lo tanto, use dentro de
-20 a 35ºC de temperatura ambiente.
PT Este dispositivo foi projetado para ser montado no teto.
• Não instale a unidade num local onde a luz solar direta possa
incidir no sensor.
• Não coloque o sensor a menos de 1m de qualquer iluminação,
aquecimento ou ventilação de ar forçado.
• Não xe o sensor em uma superfície instável ou sujeito a vibrações.
• A ocupação é melhor detectada quando a temperatura
ambiente é diferente da do corpo humano, portanto, use entre
-20 a 35ºC.
FR Le produit est conçu pour être monté au plafond en encastré.
• Ne pas placer l’unité dans une position où la lumière directe du
soleil pourrait pénétrer dans le capteur.
• Ne pas placer le capteur à moins d’unmètre de tout dispositif
d’éclairage, de chauage ou de ventilation à air forcé.
• Ne pas xer le capteur sur une surface instable ou vibrante.
• L’occupation est mieux détectée lorsque la température
ambiante est diérente de celle du corps humain, utilisez donc
entre -20 et 35 ° C de température ambiante.
IT Questo dispositivo è progettato per essere a lo sotto.
• Non collocare l’unità in una posizione in cui la luce diretta del
sole possa entrare nel sensore.
• Non posizionare il sensore a meno di un metro da un qualsiasi tipo
di illuminazione, sistema di riscaldamento o ventilazione.
• Non installare il sensore su superci instabili o soggette a vibrazioni.
• L’occupazione viene rilevata meglio quando la temperatura
ambiente è diversa da quella del corpo umano, quindi utilizzare
entro -20 a 35 ° C.
NL Dit apparaat is ontworpen voor inbouwmontage in het plafond.
• Plaats het apparaat niet op een locatie waar direct zonlicht de
sensor kan binnendringen.
• Plaats de sensor niet op minder dan 1 meter afstand van verlichting,
geforceerde luchtverwarming of ventilatie.
• Bevestig de sensor niet op een onstabiel of trillend oppervlak.
• Bezetting wordt het best gedetecteerd wanneer de
omgevingstemperatuur anders is dan die van het menselijk
lichaam, dus gebruik binnen een omgevingstemperatuur van
-20 tot 35 ° C.
Installation | Instalación | instalação | Installazione | Installatie
Ø 64mm
1
35mm
6mm
2
Create cut out | Erstellen Sie einen Ausschnitt | Oricio de corte | Fixação no teto | Percer | Creare il foro | Sparing maken
EN Cut a 64mm diameter
hole in the ceiling.
DE Deckenausschnitt 64mm.
ES Cortar un oricio de 64
mm de diámetro en el techo
PT Efectuar um corte de
diâmetro de 64mm no teto.
FR Percer un trou de 64mm
de diamètre dans le plafond
IT Realizzare un foro di
64mm di diametro a sotto.
NL Maak een 64mm
diameter sparing in het plafond.
Wire stripping | Abisolieren | Pelado de cables | Descascamento do o | Dénudage des câbles | Spelatura del lo | Kabelstrippen
EN Strip the wires as shown opposite. Presence
detector does not require earth conductor.
DE Abisolieren Sie die Kabel wie dargestellt. Der
Melder benötigt keinen Erdanschluß.
ES Pele los cables como se muestra en el
dibujo. El detector no requiere cable de tierra.
PT Descarne os cabos como mostrado ao
lado. Este detector não requer conductor de terra.
FR Dénudez les câbles comme indiqué
ci-contre. Le détecteur de présence ne nécessite
pas de conducteur de terre.
IT Spelare i li come mostrato. Il rilevatore di
presenza non richiede il cavo di terra.
NL Strip de aders zoals weergegeven op de
aeelding hiernaast. Aardingsdraad is niet vereist.
Cut a hole with a diameter of 66mm in the ceiling.
Ø 66mm
Strip the wires as shown opposite. Presence
detector does not require earth conductor.