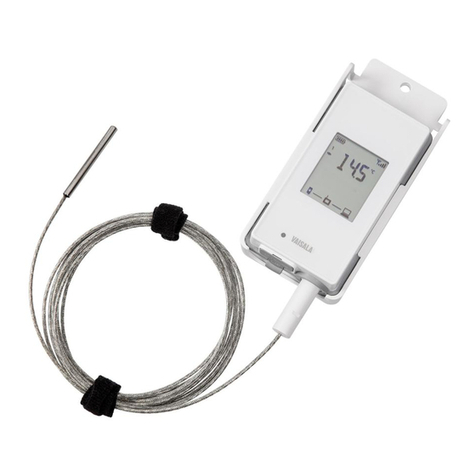
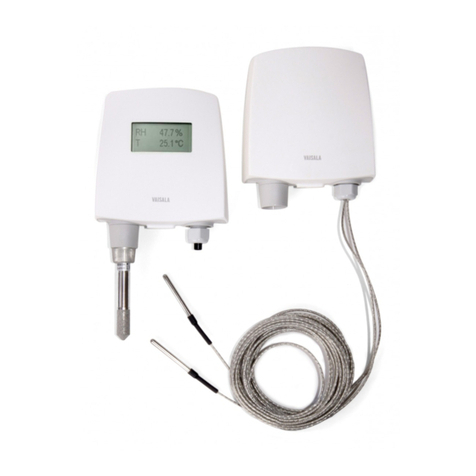
Vaisala VaiNet RFL100 User manual

EN
DE
FR
ES
PT
ZH
M211822EN-D
Quick Guide
Vaisala VaiNet Wireless Data Logger
RFL100

PUBLISHED BY
Vaisala Oyj
Vanha Nurmijärventie 21, FI-01670 Vantaa, Finland
P.O. Box 26, FI-00421 Helsinki, Finland
+358 9 8949 1
Visit our Internet pages at www.vaisala.com.
No part of this document may be
reproduced, published or publicly
displayed in any form or by any
means, electronic or mechanical
(including photocopying), nor
may its contents be modified,
translated, adapted, sold or
disclosed to a third party without
prior written permission of the
copyright holder. Translated
documents and translated
portions of multilingual
documents are based on the
original English versions. In
ambiguous cases, the English
versions are applicable, not the
translations.
The contents of this document are
subject to change without prior
notice.
Local rules and regulations may
vary and they shall take
precedence over the information
contained in this document.
Vaisala makes no representations
on this document’s compliance
with the local rules and
regulations applicable at any
given time, and hereby disclaims
any and all responsibilities related
thereto.
This document does not create
any legally binding obligations for
Vaisala towards customers or end
users. All legally binding
obligations and agreements are
included exclusively in the
applicable supply contract or the
General Conditions of Sale and
General Conditions of Service of
Vaisala.
This product contains software
developed by Vaisala or third
parties. Use of the software is
governed by license terms and
conditions included in the
applicable supply contract or, in
the absence of separate license
terms and conditions, by the
General License Conditions of
Vaisala Group.
This product may contain open
source software (OSS)
components. In the event this
product contains OSS
components, then such OSS is
governed by the terms and
conditions of the applicable OSS
licenses, and you are bound by
the terms and conditions of such
licenses in connection with your
use and distribution of the OSS in
this product. Applicable OSS
licenses are included in the
product itself or provided to you
on any other applicable media,
depending on each individual
product and the product items
delivered to you.

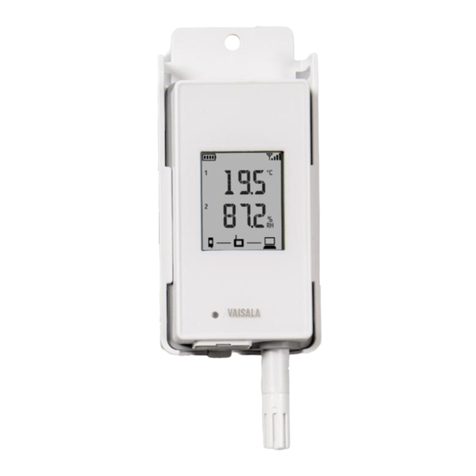
Table of Contents
English.............................................................................................................................................5
Deutsch......................................................................................................................................... 17
Français........................................................................................................................................29
Español..........................................................................................................................................41
Português.................................................................................................................................... 53
中文...............................................................................................................................................65
3

4 M211822EN-D

Setting Up RFL100 Data Logger
1
2
3
1Power switch.
2Protection cap. Remove after
installation is complete.
3Latch of the battery cover.
1. Open the battery cover of the data logger.
2. Move the power switch to the On position.
3. Close the battery cover of the data logger. Push the latch down until you hear a click. If
the cover does not close easily, push the probe (or the probe cable) in and try again.
4. Look at the display and verify that:
• Battery indicator shows full batteries .
• Display shows measurement readings instead of dashes or error codes.
If measurement readings are not shown after a few seconds, check that the probe is
properly connected. It is possible to disconnect the probe by pulling on the probe with
the battery cover open. In that case the display will show error code Err 202.
When you turn on the RFL100 it starts to scan for VaiNet access points that are in
installation mode. RFL100 will connect to the access point with the best signal
strength, and wait to be accepted by the administrator of the viewLinc Enterprise
Server.
5
ENGLISH

Mounting RFL100
A B
DC
68 [2.65]
mm
[in]
Figure 1 RFL100 Mounting Methods
AMounting with screws. Screws and wall plugs are included with the data logger.
BMounting with zip ties. Zip ties are included with the data logger.
CMagnetic mounting (with optional magnetic mounting bracket)
DMounting with a hook (hook not included)
6 M211822EN-D

1. Select a suitable mounting location. A good location is easily accessible, protected from
water and condensation, and remains within the operating temperature range of the
RFL100 Data Logger:
• +2 ... +60 °C (+35.6 ... +140 °F) with alkaline batteries
• -20 ... +60 °C (-4 ... +140 °F) with lithium batteries
If you need to measure a wider temperature range, use a HMP110 or TMP115
probe and connect it using a cable. This way you can leave the data logger in
an environment that is suitable to its specification.
2. Attach the mounting bracket using one of the mounting methods shown in Figure 1
(page 6). Orient the bracket vertically so that the probe or probe cable points down after
installation. Do not attach the RFL100 without the mounting bracket.
If you are mounting the data logger higher than 2 m (6 ft) or in
a location where it would pose a hazard if dropped, ensure the mounting
bracket is securely fixed with screws or zip ties.
CAUTION!
3. Slide the logger into the mounting bracket with the probe or probe cable pointing
downward.
4. Peel o the protective film from the display and remove the yellow plug from the probe.
5. If the probe is attached with a cable, mount the probe in the desired measurement
location and secure the cable.
6. Recommended: Apply location labels to the mounting bracket and the RFL100 Data
Logger according to your installation plan and company policy.
7
ENGLISH

Mounting HMP110 Probes
Robust stainless steel probe for humidity and temperature measurement in demanding
conditions. Suitable for measurement inside chambers, fridges, and freezers in temperature
range -40 ... +80 °C (-40 ... +176 °F). Must be connected using a cable - the probe is not
designed to be integrated with the RFL100 housing. Probe diameter 12 mm (0.47 in).
2 31
Figure 2 HMP110 Probe
1M12x1 thread for mounting the probe in a through-wall installation using mounting nuts.
2Attach from this area if using mounting clamps or zip ties.
3Sensor protection filter. Do not attach from this area.
Mounting HMP115 Probes
Probe for general purpose humidity and temperature measurement. Designed to be integrated
with RFL100 housing for minimum footprint, but can be connected using a cable as well.
Operating temperature range -40 ... +60 °C (-40 °F ... +140 °F).
2 31
Figure 3 HMP115 Probe
1Plastic sleeve that locks the probe in place when integrated with the RFL100 housing.
2Attach from this area using mounting clamps or zip ties.
3Sensor protection filter. Do not attach from this area.
8 M211822EN-D

Mounting TMP115 Probes
Wide-range temperature-only probe for measurement in extreme conditions. Probe body can
be integrated with RFL100 housing or connected using a cable. Sensor tip is permanently
connected to the probe body with a thin cable. Available as 50 cm (1 ft 7.7 in) and 3 m (9.8 ft)
long versions. Sensor tip diameter 4.8 mm (0.19 in).
3 421
Figure 4 TMP115 Probe
1Plastic sleeve that locks the probe body in place when integrated with the RFL100
housing.
2Probe body with measurement electronics. Operating temperature range
-40 ... +60 °C (-40 ... +140 °F).
3Sensor cable. Do not cut or bend into a tight loop.
4Sensor tip. Secure using a zip tie or insert into thermal dampener block for added thermal
mass. Operating temperature range -196 ... +90 °C (-320.8 ... +194 °F).
The operating temperature range of the sensor tip is much wider
than that of the probe body. Leave the probe body outside the measured
environment if possible, and avoid inserting it in environments that are outside
its operating range.
CAUTION!
When working with equipment in extremely cold temperatures, use
appropriate personal protective equipment such as thermally
insulated gloves and clothing. Wear protective eyewear if working
with coolants such as liquid nitrogen, and observe safe handling and
storage precautions.
9
ENGLISH

Connection Indicators
Table 1 Symbols
Symbol Description Symbol Description
Data logger Connection OK
Access point Connection currently
unavailable
viewLinc Enterprise Server
Table 2 Connection States
Symbols on Display Description
Data logger is searching for an access point.
Data logger has failed to find an access point that is in installation
mode. viewLinc server icon is not shown, as the data logger has
not been accepted to a viewLinc system yet.
The data logger has failed to connect to an access point that
belongs to its own network.
Data logger is successfully connected to an access point, but
there is no connection between the access point and viewLinc
server. Data logger has not been accepted to a viewLinc system
yet.
Data logger is successfully connected to an access point, but
there is no connection between the access point and viewLinc
server. Data logger has been accepted to a viewLinc system.
Data logger is successfully connected to an access point, and
connection between the access point and viewLinc server is also
OK. The viewLinc symbol is flashing to indicate that the data
logger is waiting to be accepted to the viewLinc system as a new
device.
Data logger is successfully connected to an access point, and
connection between the access point and viewLinc server is also
OK. Data logger has been accepted to the viewLinc system.
10 M211822EN-D

RFL100 Overview
Vaisala RFL100 Data Logger is a completely wireless, battery powered data logger. It supports
several types of Vaisala humidity and temperature measurement probes. RFL100 is intended
as a data collection point in a Vaisala viewLinc Monitoring System.
viewLinc
Enterprise Server
AP10
Access Point
RFL100
Data Loggers
VaiNet wireless
>100 m (328 ft) range
NTP Server
Wired
network
Figure 5 Connecting RFL100 to the viewLinc Monitoring System
The wireless connection of the RFL100 requires a Vaisala AP10 Access Point. AP10 can connect
up to 32 loggers to the viewLinc Monitoring System, and you can have up to 8 access points in
range of each other. In a typical indoor space, install the AP10 within 100 meters (328 ft) of the
RFL100. In an open space with line-of-sight and no interfering structures, the range can be
over 500 m (1640 ft). The wireless connection operates on 868 MHz or 915 MHz frequency
band depending on the model.
RFL100 is optimized for low power operation. It reads the probe once a minute, and transmits
measurement data to the access point every four minutes. Because the radio link is not
continuous, remote management actions and system joining status may take some time to be
updated on the display of the data logger.
Before you start installing RFL100 Data Loggers, install the viewLinc Enterprise
Server and at least one AP10 Access Point within range of the RFL100. This way
RFL100 can immediately discover your access point and join your system.
For more information on viewLinc Monitoring System installation, see viewLinc
Setup Guide (M211820EN).
Delays in a VaiNet Network
VaiNet protocol and VaiNet devices are designed for power-ecient operation. Some of the
design choices that enable long battery life also create significant delays that the users should
be aware of.
Intermittent Radio Connections
Radio connections between VaiNet access points and data loggers are not continuous. Access
points take turns communicating in a two-minute cycle, and connected data loggers send their
measurement data to their connected access point every four minutes. This introduces various
delays:
11
ENGLISH

• Data loggers that are not currently connected (new devices or ones that have fallen out of
radio contact) have to scan for available access points for a complete cycle before they
can decide what is the optimal access point for them. This means that connection
attempts typically take at least a couple of minutes. Additionally, some joining scenarios
may take multiple attempts. For example, when filling a single access point up to its full
capacity of 32 data loggers, it may take an hour for the last data logger to successfully
connect to the access point.
• Access points request missing data and issue management commands to data loggers
within their communication window. Transferring a full month's worth of measurement
data from 32 data loggers using one access point takes several hours.
Data Logger Scanning Interval
Scanning for available access points consumes power. To prevent repeated scanning from
draining their batteries, RFL100 Data Loggers shut down their radio temporarily if they can
find no access points to join. They will resume scanning after a waiting interval that gets
progressively longer if they keep failing to find an access point. The maximum interval is 8
hours and 30 minutes.
This means that when access points become available after an outage, it may take several
hours for data loggers to discover them. This is why you should always keep your access points
powered up, and why you should start your network installation by installing the viewLinc
Enterprise Server and access points first.
You can manually wake up the radio of an RFL100 Data Logger by pressing its
Refresh button. The button is located next to the service port under the silicone
plug.
12 M211822EN-D

RFL100 Parts
1
2
3
4
5
6
7
8
Figure 6 Front and Display
1Service port connection indicator.
2Battery level indicator.
3Currently measured values.
4Connection indicators.
5Status LED. Blinks green for normal
operation, red for error or alarm.
6Signal strength of access point
connection.
7Alarm indicators. Alarms are
configured in viewLinc Enterprise
Server software.
8Detachable probe or probe cable.
1
2
Figure 7 Under the Silicone Plug
1Service port (Micro-USB).
2Refresh button. Push to enable a faster
wireless scanning interval for one hour.
Also wakes up the display if it has
been turned o remotely, and shows
firmware version and currently
connected VaiNet channel.
13
ENGLISH

1
2
3
4
5
6
7
8
Figure 8 Rear and Inside
1Type label.
2On/o switch.
3Clock battery.
4Probe orientation mark. When
connecting the probe, line up the
markings on the probe and above the
connector before pushing the probe to
the connector.
5Humidity and/or temperature sensors
under the filter.
6Release button. Push to release
RFL100 from its current viewLinc
system, and allow it to connect to any
viewLinc system.
7Main batteries. Use only non-
rechargeable, AA size, 1.5 V alkaline
(LR6) or lithium (FR6) batteries.
8Battery cover.
1
2
5
4
3
2
Figure 9 Mounting Bracket
16 mm (0.23 inch) hole for hook
mounting.
2Holes for mounting with zip ties.
3Strong magnet (in magnetic mounting
bracket only). Handle with care.
4Suitable area for attaching labels.
53.80 mm (0.15 inch) holes for screw
mounting.
14 M211822EN-D

RFL100 Batteries
Main Batteries
RFL100 Data Logger is powered by two AA size primary (non-chargeable) batteries with 1.5 V
nominal voltage. Operation of the data logger always requires that compatible batteries with
sucient voltage are in place. When replacing batteries, always use new batteries, not partially
discharged ones. Minimum battery voltage for operation is 2.15 V in series.
Compatible battery types are:
• 1.5 V alkaline batteries, designation IEC-LR6, ANSI 15A. Standard choice for most
applications.
• 1.5 V lithium batteries, designation IEC-FR14505 (FR6), ANSI 15-LF. Typically higher
capacity, better in cold temperatures.
Do not use batteries with a nominal voltage higher than 1.5 V.CAUTION!
Use of rechargeable batteries is not recommended. RFL100 will not charge
batteries even if the service port is connected to a power supply.
Clock Battery
RFL100 also has a separate 3 V lithium battery (type CR1/3N button cell) to keep the real-time
clock powered when the device is otherwise turned o. This battery is good for 10 years, and
should only be replaced if the data logger display shows the low clock battery error code ERR
200.
More Information
For more information on RFL100 Data Logger, see RFL100 User Guide (M211861EN) available at
www.vaisala.com/rfl100.
15
ENGLISH

Technical Support
Contact Vaisala technical support at helpdesk@vaisala.com. Provide at least the
following supporting information:
• Product name, model, and serial number
• Name and location of the installation site
• Name and contact information of a technical person who can provide further
information on the problem
For more information, see www.vaisala.com/support.
Warranty
For standard warranty terms and conditions, see www.vaisala.com/warranty.
Please observe that any such warranty may not be valid in case of damage due to normal wear
and tear, exceptional operating conditions, negligent handling or installation, or unauthorized
modifications. Please see the applicable supply contract or Conditions of Sale for details of the
warranty for each product.
Recycling
When preparing to recycle the data logger, open the battery cover and remove the main
batteries and the clock battery.
Recycle all applicable material.
Follow the statutory regulations for disposing of the product, batteries, and
packaging.
16 M211822EN-D

Einrichtung des RFL100-Datenloggers
1
2
3
1Ein-/Ausschalter.
2Schutzkappe. Nach Abschluss der
Installation entfernen.
3Verriegelung des Batteriedeckels.
1. Önen Sie den Batteriedeckel des Datenloggers.
2. Den Netzstecker in die An-Stellung bringen.
3. Schließen Sie den Batteriedeckel des Datenloggers. Drücken Sie die Verriegelung nach
unten, bis Sie ein Klicken hören. Wenn sich der Deckel nicht leicht schließen lässt,
drücken Sie die Sonde (oder das Sondenkabel) ein, und versuchen Sie es erneut.
4. Betrachten Sie den Bildschirm und überprüfen Sie Folgendes:
• Ladestandanzeige zeigt volle Batterien an .
• Der Bildschirm zeigt die Messwerte anstelle von Bindestrichen oder Fehlercodes an.
Wenn die Messwerte nicht nach einigen Sekunden angezeigt werden, überprüfen Sie, ob
die Sonde richtig angeschlossen ist. Es ist möglich, die Sonde abzuziehen, indem Sie bei
geöneter Batterieabdeckung an der Sonde ziehen. In diesem Fall wird auf dem Display
der folgende Fehlercode angezeigt: Err 202.
Nach dem Einschalten scannt der RFL100 nach VaiNet Access Points, die sich im
Installationsmodus befinden. RFL100 stellt eine Verbindung mit dem Access Point
mit der höchstmöglichen Signalstärke her und wartet, bis die Verbindung vom
Administrator des viewLinc Enterprise Servers akzeptiert wurde.
17
DEUTSCH

Montieren des RFL100
A B
DC
68 [2,65]
mm
[in]
Abbildung 10 Befestigungsarten des RFL100
AMontage mit Schrauben. Schrauben und Dübel sind im Lieferumfang des Datenloggers
enthalten.
BMontage mit Kabelbindern. Kabelbinder sind im Lieferumfang des Datenloggers
enthalten.
CMagnetische Montage (mit optionaler magnetischer Halterung)
DMontage an einem Haken (Haken nicht enthalten)
18 M211822EN-D

1. Wählen Sie eine geeignete Stelle für die Montage aus. Die Stelle sollte gut zugänglich, vor
Wasser und Kondensierung geschützt sein und dem Betriebstemperaturbereich des
RFL100-Datenloggers entsprechen:
• +2 ... +60 °C mit Alkaline-Batterien
• -20 ... +60 °C mit Lithiumbatterien
Wenn Sie einen breiteren Temperaturbereich messen müssen, verwenden Sie
eine HMP110 oder TMP115 Sonde und verbinden Sie diese mit einem Kabel. So
kann der Datenlogger in einer Umgebung bleiben, die den Spezifikationen
entspricht.
2. Bringen Sie die Halterung mit einer der in Abbildung 10 (Seite 18) beschriebenen
Befestigungsarten an. Richten Sie die Halterung vertikal aus, sodass die Sonde oder das
Sondenkabel nach der Installation nach unten zeigt. Bringen Sie den RFL100 nicht ohne
die Halterung an.
Achten Sie darauf, dass die Halterung sicher mit Schrauben
oder Kabelbindern befestigt ist, wenn Sie den Datenlogger in einer Höhe
von über 2 m oder an einer Stelle montieren, an der er ein Sicherheitsrisiko
darstellen würde, wenn er herunterfiele.
ACHTUNG
3. Schieben Sie den Datenlogger in die Halterung, sodass die Sonde oder das Sondenkabel
nach unten zeigt.
4. Ziehen Sie die Schutzfolie vom Bildschirm und entfernen Sie den gelben Stecker der
Sonde.
5. Wenn die Sonde mit einem Kabel befestigt ist, montieren Sie sie an der gewünschten
Messposition und sichern Sie das Kabel.
6. Empfohlen: Bringen Sie entsprechend Ihrem Installationsplan und Ihrer
Unternehmensrichtlinie Positionsetiketten an der Halterung und am RFL100-Datenlogger
an.
19
DEUTSCH

Montieren der HMP110 Sonden
Robuste Edelstahlsonde zur Feuchte- und Temperaturmessung unter anspruchsvollen
Bedingungen. Geeignet für Messungen in Kammern, Kühlschränken und Gefriergeräten im
Temperaturbereich von -40 bis +80 °C . Muss über ein Kabel angeschlossen werden – die
Sonde ist nicht für die Integration in das RFL100-Gehäuse vorgesehen. Sondendurchmesser
12 mm.
2 31
Abbildung 11 Sonde HMP110
1M12x1 Gewinde zur Montage der Sonde mit Befestigungsmuttern bei der Installation durch
eine Wand.
2Befestigung über diesen Bereich, wenn Halteklammern oder Kabelbinder verwendet
werden.
3Sensorschutzfilter. Nicht von diesem Bereich aus befestigen.
Montieren der HMP115 Sonden
Sonde zur allgemeinen Feuchte- und Temperaturmessung. Entwickelt für die Integration in das
RFL100-Gehäuse für minimalen Platzbedarf, kann aber auch über ein Kabel angeschlossen
werden. Betriebstemperaturbereich: -40 bis +60 °C .
2 31
Abbildung 12 Sonde HMP115
1Kunststohülse, die die Sonde arretiert, wenn sie in das RFL100-Gehäuse integriert wird.
2Befestigung über diesen Bereich mit Halteklammern oder Kabelbindern.
3Sensorschutzfilter. Nicht von diesem Bereich aus befestigen.
20 M211822EN-D
Other manuals for VaiNet RFL100
4
Table of contents
Languages:
Other Vaisala Data Logger manuals

Vaisala
Vaisala HUMICAP HMT140 User manual

Vaisala
Vaisala VaiNet RFL100 User manual

Vaisala
Vaisala VaiNet RFL100 User manual

Vaisala
Vaisala CWL100 User manual

Vaisala
Vaisala VaiNet RFL100 User manual

Vaisala
Vaisala MRG112 Use and care manual

Vaisala
Vaisala HUMICAP HMT140 User manual

Vaisala
Vaisala HUMICAP HMT140 User manual
Popular Data Logger manuals by other brands

NexSens Technology
NexSens Technology iSIC-OEM Operation manual

AEM
AEM AQ-1 instruction manual

AEMC instruments
AEMC instruments 1246 quick start guide

Reed Instruments
Reed Instruments R4500SD instruction manual

Datalogic
Datalogic Memor 1 quick start guide

Sigma Controls
Sigma Controls 700 PDL Series instruction manual