Valterra Products Go Power! GP-SW1500TS User manual

PURE SINE WAVE INVERTER
GP-SW1500TS
User Manual
GP-SW1500TS
© 2019 Go Power!® By Valterra Products, LLC
Worldwide Technical Support and Product Information gpelectric.com
Go Power! Corporate Headquarters
201-710 Redbrick St, Victoria, BC Canada V8T 5J3
Tel: 1.866.247.6527
79570_MAN_GP-SW1500TS_RevB

[page 2] | gpelectric.com
CFB
CFB
3
4
7
CFB
CFB
3
4
7
GP-SW1500TS is new generation power inverter equipped and AC transfer switch.
GP-SW1500TS is suitable for RV, Marine and Emergency appliances
• User-friendly remote control
• Automatic master mechanism to eliminate single point failure and optimize
reliability
• Built-in ATS (Automatic Transfer Switch) and AC circuit breaker
• Input & output fully isolation
• Output voltage / power saving mode is selectable by DIP switch
•
Input Protection: Reverse Polarity (Fuse) / Under Voltage / Over Voltage
Protection
•
Output Protection: Short Circuit / Overload / Over Temperature / Over Voltage
Protection
To get the most out of the power inverter, it must be installed and used properly. Please read
the instructions in this manual before installation and operation of this model.
Product Packaging
Please safely store the packaging the GP-SW1500TS was delivered in or
please recycle the packaging components as outlined below;
Plastic Bag
Plastic Foam
Plastic Bubble
Wrap
LDPE
Low Density
Polyethylene
CFB
CFB
3
4
7
CFB
CFB
3
4
7
CFB
CFB
3
4
7
Corrugated berboard
Main box &
Internal sleeve
CFB
CFB
3
4
7
Corrugated
Recycles
www.corrugated.org
www.earth911.com/recycling-center-search-guides
Local recycling centres can be found here;

gpelectric.com | [page 3]
1. CONTENTS
2. GENERAL INFORMATION .................................................................................................4
2.1 CAUTIONS / WARNINGS.................................................................................4
2.2 DISCLAIMERS................................................................................................10
2.3 GP-SW1500TS KIT PARTS............................................................................ 11
2.3.1 PARTS CHECKLIST ......................................................................... 11
2.4 GP-SW1500TS FEATURES ...........................................................................12
2.5 UNIT DIMENSIONS........................................................................................14
2.6 POWER DE-RATING CURVE AND TRANSFER TIME..................................15
3. INSTALLATION .................................................................................................................16
3.1 TYPICAL SYSTEM OVERVIEW.................................................................... 16
3.2 MOUNTING REQUIREMENTS ..................................................................... 20
3.3 DC WIRING ................................................................................................... 22
3.3.1 DC WIRING SIZING .........................................................................23
3.3.2 DC OVERCURRENT PROTECTION ...............................................24
3.3.3 PREPARING THE DC CABLES .......................................................24
3.3.4 DC CABLE CONNECTIONS ............................................................24
3.3.5 WIRING THE INVERTER TO THE BATTERIES ..............................25
3.3.6 DC GROUNDING .............................................................................25
3.4 AC WIRING.................................................................................................... 26
3.4.1 GP-SW1500TS AC WIRING TABLE.................................................26
3.4.2 HARD-WIRE INSTALLATION ...........................................................27
3.4.3 AC OUTPUT AND TERMINALS OF THE GP-SW1500TS ...............29
3.4.4 GFCI (GROUND FAULT CIRCUIT INTERRUPTION) OUTLETS .....29
4. OPERATION......................................................................................................................30
4.1 FINAL INSPECTION.......................................................................................30
4.2 TESTING THE INSTALLATION ......................................................................30
4.3 CONNECTING THE AC LOADS.....................................................................30
4.4 LED INDICATOR ............................................................................................31
4.5 DIP SWITCH (S1~S8) ....................................................................................32
4.5.1 POWER SAVING MODE ..................................................................33
4.6 REMOTE PORT..............................................................................................34
4.6.1 REMOTE CONTROL GREEN TERMINAL .......................................35
4.7 TROUBLESHOOTING....................................................................................36
5. WARRANTY RETURN PROCEDURE ..............................................................................37
6. SPECIFICATIONS .............................................................................................................38
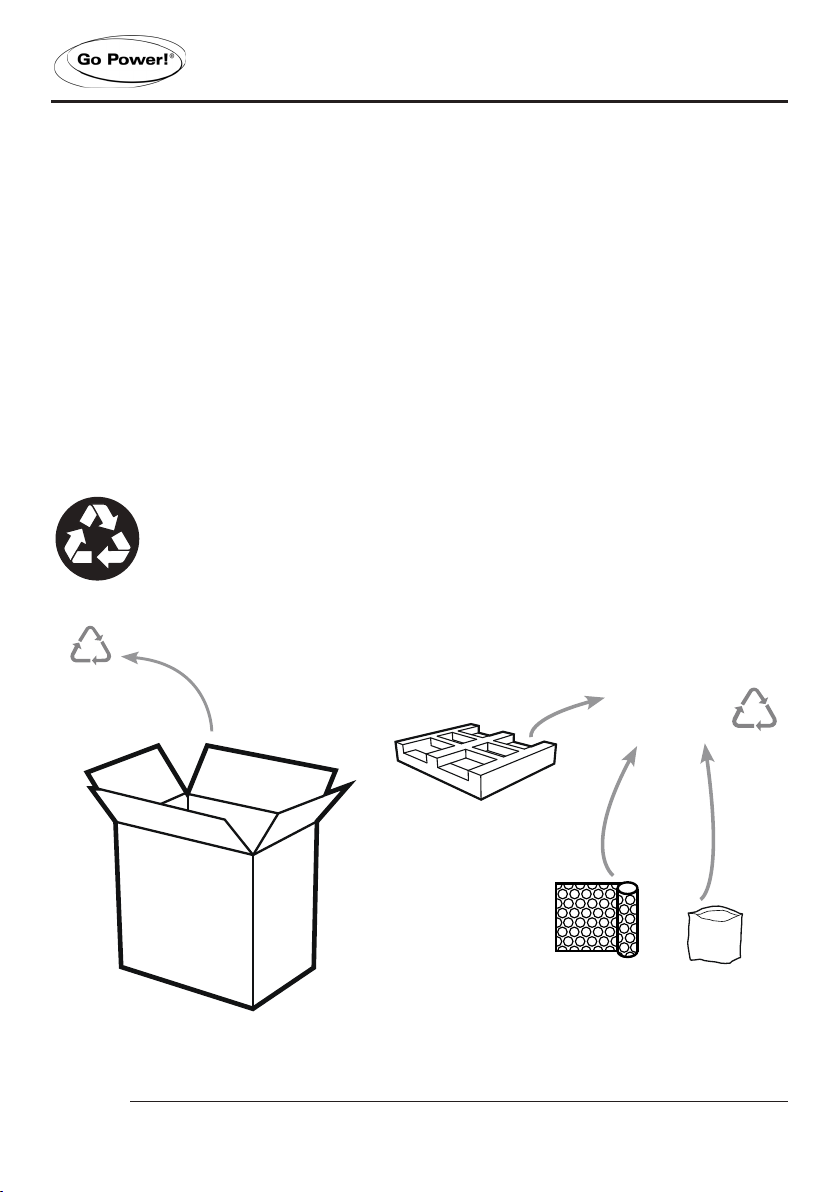
7. PRODUCT END OF LIFE - RECYCLING .........................................................................39
www.earth911.com/recycling-center-search-guides

[page 4] | gpelectric.com
2.1 CAUTIONS / WARNINGS
This document contains important safety instructions for the products produced by
Go Power!. Read all instructions and cautionary markings on the product and on any
accessories or additional equipment included in the installation. Failure to follow these
instructions could result in severe shock or possible electrocution. Use extreme caution at
all times to prevent accidents.
All electrical work must be performed in accordance with local and national electrical codes.
These instructions are for use by qualied personnel who meet all local and governmental
code requirements for licensing and training for the installation of electrical power systems
with AC and DC voltage up to 600 volts.
Installation, maintenance, and connection of inverters must be performed by qualied
personnel, in compliance with local electrical standards, wiring rules, and the requirements
of local power authorities and/or companies.
Safety regulations relevant to the location shall be followed during installation, operation and
maintenance. Improper operation may have a risk of electric shock or damage to equipment
and property.
2. GENERAL INFORMATION

gpelectric.com | [page 5]
GENERAL INFORMATION
General Safety
WARNING!
Limitations on Use
CAUTION!
Equipment Damage
This equipment is NOT intended for use with life support
equipment or other medical equipment or devices.
This product is designed for indoor/compartment
installation. It must not be exposed to any liquids, moisture
of any type.
Only use components or accessories recommended or sold
by Go Power! or its authorized agents.
IMPORTANT
Do not attempt to install this equipment if it appears to
be damaged in any way. See the Warranty section for
instructions on returning the equipment.
WARNING!
Hazard to Human Life
This type of notation indicates that the
hazard could be harmful to human life.
WARNING!
Shock Hazard Danger of Shock or electrocution.
WARNING!
Burn / Fire Hazard Danger of hot surface and/or re.
CAUTION!
Hazard to Equipment
This type of notation indicates that
the hazard may cause damage to the
equipment.
IMPORTANT
This type of notation indicates that the
information provided is important to the
installation, operation and/or maintenance
of the equipment. Failure to follow the
recommendations in such a notation could
result in annulment of the equipment
warranty.
i

[page 6] | gpelectric.com
GENERAL INFORMATION
Personal Safety
WARNING!
Personal Injury
Use safe lifting techniques when lifting this equipment as
recommended by the Occupational Safety and Health
Association (OSHA) or other local codes.
Use standard safety equipment when working on this
equipment, such as safety glasses, ear protection, steel-
toed safety boots, safety hard hats, etc.
Use standard safety practices when working with electrical
equipment. (Remove all jewelry, use insulated tools, wear
cotton clothing, etc.)
Never work alone when installing or servicing this
equipment. Have someone nearby that can assist if
necessary.
Ensure that children, pets, and other animals are kept away
from the inverter, solar arrays, battery bank, and utility grid
components.
If the equipment is used in a manner not specied by the
manufacturer, the protection provided by the equipment may
be impaired.

GENERAL INFORMATION
Equipment Safety
WARNING!
Lethal Voltage
Review the system conguration to identify all possible
sources of energy. Ensure ALL sources of power are
disconnected before performing any installation or
maintenance on this equipment. Conrm that the terminals
are de-energized using a validated voltmeter (rated for
a minimum 1000 VAC and 1000 VDC) to verify the de
energized condition.
Do not perform any servicing other than that specied in the
installation instructions unless qualied to do so, or have
been instructed to do so by Go Power! Technical Support
personnel.
To avoid electric shock, disconnect the DC input and AC
input of the inverter at least 5 minutes before performing any
installation or maintenance.
Do not tighten the AC and DC terminals or pull on the AC and
DC wiring when the inverter is running.
WARNING!
Fire Hazard
Do not keep combustible or ammable materials in the same
room with the equipment. Some products contain relays with
moving parts and are not ignition-protected.
Ensure AC, DC, and ground cable sizes conform to local
codes. See product manuals for minimum size requirements.
Ensure all conductors are in good condition.
Do not operate the unit with damaged or substandard cabling.
CAUTION!
Equipment Damage
When connecting cables from the inverter to the battery
terminals, ensure the proper polarity is observed. Connecting
the cables incorrectly can damage or destroy the equipment
and void the product warranty.
Thoroughly inspect the equipment prior to energizing. Verify
that no tools or equipment have been inadvertently left
behind.
Keep all vents clear of obstructions that can prevent proper air
ow around, or through, the unit.
CAUTION!
Equipment Damage
Static electricity may damage electronic components. Take
appropriate steps to prevent such damage to the inverter;
otherwise the warranty may be annulled.
gpelectric.com | [page 7]

[page 8] | gpelectric.com
GENERAL INFORMATION
Battery Safety
WARNING!
Explosion, Electrocution,
or Fire Hazard
Ensure the cables (conductors) are properly sized.
Ensure clearance requirements are strictly enforced around
the batteries.
Ensure the area around the batteries is well ventilated and
clean of debris.
Never smoke, or allow a spark or ame near, the batteries.
Always use insulated tools. Avoid dropping tools onto
batteries or other electrical parts.
Never charge a frozen battery.
Never use old or untested batteries. Check each battery’s
label for age, type, and date code to ensure all batteries are
identical.
If a battery must be removed, always remove the grounded
terminal from the battery rst. Make sure all devices are de-
energized or disconnected to avoid causing a spark.

gpelectric.com | [page 9]
IMPORTANT
Use the battery types recommended by Go Power!. Follow
the battery manufacturer’s recommendations for installation
and maintenance.
Insulate batteries as appropriate against freezing
temperatures. A discharged battery will freeze more easily
than a charged one.
If a remote or automatic generator control system is used,
disable the starting circuit and/or disconnect the generator
from its starting battery while performing maintenance to
prevent accidental starting.
Wear complete eye and clothing protection when working
with batteries. Avoid touching bare skin or eyes while working
near batteries.
Keep plenty of fresh water and soap nearby in case battery
acid contacts skin, clothing, or eyes.
If battery acid contacts skin or clothing, wash immediately
with soap and water. If acid enters the eye, immediately
ood it with running cold water for at least 20 minutes and get
medical attention as soon as possible.
CAUTION!
Equipment Damage
When connecting cables from the inverter to the battery
terminals, ensure the proper polarity is observed. Connecting
the cables incorrectly can damage or destroy the equipment
and void the product warranty.
Thoroughly inspect the equipment prior to energizing. Verify
that no tools or equipment have been inadvertently left
behind.
Ensure clearance requirements are strictly enforced.
Keep all vents clear of obstructions that can prevent proper
air ow around, or through, the unit.
CAUTION!
Equipment Damage
Static electricity may damage electronic components. Take
appropriate steps to prevent such damage to the inverter;
otherwise the warranty may be annulled.
i

[page 10] | gpelectric.com
2.2 DISCLAIMERS
IMPORTANT: Please follow installation and wiring instructions exactly as outlined to ensure
safety. We recommend installation by an RV technician or professional electrician to ensure
adherence to relevant electrical codes. We have made every reasonable effort to ensure
the accuracy of the instructions in this manual, but Go Power! does not guarantee that the
information is error free, nor do we make any other representation, warranty or guarantee that
the information is accurate, correct, reliable or current. The specications in this manual are for
reference purposes only and are subject to change without notice. For additional information
please see www.gpelectric.com.
DISCLAIMER: Go Power! disclaims liability for any direct, indirect or incidental damages
caused by, or in case of, installation not performed following the instructions and cautions in this
manual. Go Power! will refuse requests for exchanges or returns, resulting from the purchase
and installation of items which do not comply with local codes. To avoid such concerns Go
Power! recommends installation by a professional electrician or RV technician. Examples that
are shown within this manual are for illustrative purposes only.
GENERAL INFORMATION

gpelectric.com | [page 11]
GENERAL INFORMATION
2.3 GP-SW1500TS KIT PARTS
Please unpack and make sure all parts shown in the list below are included in the kit. If any
parts are missing please contact Go Power!’s customer service team at customerservice@
gpelectric.com or 1.866.247.6527.
2.3.1 PARTS CHECKLIST
ITEM # DESCRIPTION
01 GP-SW1500TS Unit 1
02 Ring lugs 2
2 1

[page 12] | gpelectric.com
GENERAL INFORMATION
2.4 GP-SW1500TS FEATURES
4
5
6
7
8
3
2
1ON / OFF / REMOTE- Use this button to turn the inverter ON, OFF or to switch the
inverter into REMOTE MODE.
Status LED - This LED is used to display (1) Input Voltage Level, (2) Output Load Level,
(3) Fault Conditions (see page 30).
Function Switch - This dip switch controls output voltage, output frequency, power saving
parameters (see page 31).
DC Negative Input Connector - Use these connection points to secure the battery bank
negative cable to the Inverter.
DC Positive Input Connector - Use these connection points to secure the battery bank
positive cable to the Inverter.
Chassis Ground - Use this connection to ground the exposed chassis of the inverter to
the chasis ground with wire # 8 AWG.
AC Output - Use these terminals to connect the AC loads (appliances) to the Inverter.
By-pass AC Input - Use these terminals to connect the AC shore power to the Inverter.
1
2
3
6
7
8
4 5
9
1011
12

gpelectric.com | [page 13]
GENERAL INFORMATION
AC Input Circuit Breaker. The AC input circuit breaker protects the model from overload.
When an overload condition exists, the circuit breaker stops supplying output AC grid
power. To reset it, push the circuit breaker switch then the model will be back in normal
operation. The source fault should be corrected before you reset it.
Remote control green terminal
Remote port - Use this port to connect the optional remote control unit to the Inverter.
Fan - The rear panel must keep the distance at least 1 inch from any surrounding items.
Main switch ON / OFF does not control AC Grid input. Therefore when performing
maintenance please remove the AC Grid connection to prevent damage to the
GP-SW1500TS, then ensure the Main switch is in the OFF position.
12
11
10
9
1
2
3
6
7
8
4 5
9
1011
12

[page 14] | gpelectric.com
GENERAL INFORMATION
2.5 UNIT DIMENSIONS
268.6 [10.575]
11.5 [0.453]
8.5 [0.335]
160 [6.299]93.1 [3.665]
351 [13.81]
283 [11.146]
128.4 [5.056]

gpelectric.com | [page 15]
GENERAL INFORMATION
2.6 POWER DE-RATING CURVE AND TRANSFER TIME
Mode/Transfer Switch ATS
Haphazard Inverter to utility AC: <5ms.;
Utility AC to inverter: 10~35ms.
Normal Inverter to utility AC: <5ms.;
Utility AC to inverter: <10ms
Exacting Inverter to utility AC: <5ms.;
Utility AC to inverter: 10~35ms.
Online
Inverter to utility AC: <5ms.;
Utility AC to inverter: <10ms

[page 16] | gpelectric.com
Cable to
GP-SW1500TS Unit
FM
80
30 Amp
Breaker
Fuse
Block
Battery Bank
MC4 Connector
Refrigerator
Vent Cover
100W or 160W
Solar Panel
Mate 2
Legend
Remote
10 Ft Extension Cable
10AWG (Included)
25 Ft Cable
10AWG (Included)
For this system we
recommend a minimum of
6 batteries / 600 Amp Hour
Battery Bank
RV Console
Area
Solar
Controller
Cable to
Battery Bank
Battery Bank
GP-SW1500TS
Inverter
Solar Panels
Cables From
Solar Charge Controller
Internal
View
GP-SWR-A or GP-SWR-B
Remote
Refrigerator
Vent Cover
100W or 160W
Solar Panel
Solar
Controller
Fuse
Block
Inverter
Inverter
Remote
AC
Loads
AC
Panel
Transfer
Switch
Fuse
Block
Converter /
Charger
Shore Power
/ Generator
AC Power OUTPUT
- to RV appliances
Cables to / from
Battery Bank
AC Power INPUT
- shore power
3. INSTALLATION
3.1 TYPICAL SYSTEM OVERVIEW
The following diagrams on pages 16-19 show how the GP-SW1500TS and GP-SWR-A (or
B) Remote are typically installed in a mobile RV application. The diagrams show where the
remote and Inverter are installed and how the mobile power system can be integrated with a
Go Power! RV Solar Kit (sold separately by Go Power, please contact us direct.)

gpelectric.com | [page 17]
Cable to
GP-SW1500TS Unit
FM
80
30 Amp
Breaker
Fuse
Block
Battery Bank
MC4 Connector
Refrigerator
Vent Cover
100W or 160W
Solar Panel
Mate 2
Legend
Remote
10 Ft Extension Cable
10AWG (Included)
25 Ft Cable
10AWG (Included)
For this system we
recommend a minimum of
6 batteries / 600 Amp Hour
Battery Bank
RV Console
Area
Solar
Controller
Cable to
Battery Bank
Battery Bank
GP-SW1500TS
Inverter
Solar Panels
Cables From
Solar Charge Controller
Internal
View
GP-SWR-A or GP-SWR-B
Remote
Refrigerator
Vent Cover
100W or 160W
Solar Panel
Solar
Controller
Fuse
Block
Inverter
Inverter
Remote
AC
Loads
AC
Panel
Transfer
Switch
Fuse
Block
Converter /
Charger
Shore Power
/ Generator
AC Power OUTPUT
- to RV appliances
Cables to / from
Battery Bank
AC Power INPUT
- shore power
INSTALLATION

[page 18] | gpelectric.com
ON
OFF
Sub Panel
GP-SWR-A or GP-SWR-B
(Optional)
Solar Panel
Solar Panel
Solar Charge
Controller
Refrigerator
Vent Cover
or
Cable Entry Plate
Fuse
Typical RV Solar Kit
(sold separately by Go Power)
Battery Disconnect Switch
(not required if circuit breaker is used)
Battery Bank
Fuse or Circuit Breaker
GP-SW1500TS
To Battery
Bank
To Battery
Bank
DC Panel
Earth Ground (RV Ground)
AC
Output
Loads
GP-SW1500TS
AC
Input
AC Power Input (Shore Power)
AC Power Output
AC
Output
AC
Input
INSTALLATION

gpelectric.com | [page 19]
ON
OFF
Sub Panel
GP-SWR-A or GP-SWR-B
(Optional)
Solar Panel
Solar Panel
Solar Charge
Controller
Refrigerator
Vent Cover
or
Cable Entry Plate
Fuse
Typical RV Solar Kit
(sold separately by Go Power)
Battery Disconnect Switch
(not required if circuit breaker is used)
Battery Bank
Fuse or Circuit Breaker
GP-SW1500TS
To Battery
Bank
To Battery
Bank
DC Panel
Earth Ground (RV Ground)
AC
Output
Loads
GP-SW1500TS
AC
Input
AC Power Input (Shore Power)
AC Power Output
AC
Output
AC
Input
INSTALLATION
6V
6V
6V
6V

[page 20] | gpelectric.com
3.2 MOUNTING REQUIREMENTS
1. TEMPERATURE
Make sure the GP-SW1500TS is installed in a location where the normal air temperature is
between -20°C and 40°C. The cooler the better within this range.
2. MOISTURE
Do not allow water or other uids to come into contact with the GP-SW1500TS. Do not expose
to rain, snow or water.
3. VENTILATION
For optimum Inverter performance the GP-SW1500TS must be installed so the front and rear
air vents are not blocked or obstructed in any way. Do not install the GP-SW1500TS in an
area with limited air ow. Allow as much space around the Inverter as possible, leaving at least
6” of airspace clearance around all ventilation areas.
CAUTION! Equipment Damage. Do not mount the GP-SW1500TS in a zero
clearance compartment. Do not cover the ventilation openings. Overheating and
mechanical failure may occur.
4. FIRE
Install the GP-SW1500TS away from the battery bank, away from any ammable or combustible
material (paper, ammable liquids, gasoline, cloths) that may be ignited by heat, sparks or
ames. Never place the Inverter directly above the battery bank - gases from the batteries will
corrode and damage the Inverter, never allow battery acid to drip onto the unit.
5. ACCESSIBILITY / ORIENTATION
Do not block access to the GP-SW1500TS remote control access port, status LEDs and the On/
Off switch. Allow enough room to access the AC and DC wiring terminals and connections as
they will need to be checked and tightened periodically. The GP-SW1500TS must be installed in
one of the approved mounting orientations detailed on page 21. DO NOT MOUNT VERTICALLY.
6. CLEAN
The GP-SW1500TS should be installed in a location which is clean and limits the introduction of
dust, fumes, insects or rodents which could enter and block the Inverter ventilation openings.
7. PROXIMITY TO BATTERY BANK
The GP-SW1500TS should be located as close to the batteries as possible but not within the
same compartment. The length and size of the DC Cables will affect performance. Long DC
wires tend to lose efciency and reduce the overall performance of the Inverter/Charger. Use
the DC cables recommended on page 23.
INSTALLATION
Table of contents
Other Valterra Products Inverter manuals