VAN CAFE RTD User manual

RTD SIDE LADDER
FORD TRANSIT
INSTRUCTION MANUAL
Thank you for purchasing the Van Cafe RTD Side Ladder. Finally gain access to the gear
you have mounted on the top of your van - securely and comfortably! The Van Cafe RTD
Side Ladder was designed with function in mind, but we didn't skimp on the aesthetics,
either.
Created in Fort Collins, Colorado, the Van Cafe Rooftop Deck system is the product of
years of manufacturing expertise. Here at Van Cafe, we are innovators, thinkers, creators,
doers and, most importantly, users! We love the outdoors and the idea of sharing experi-
ences and memories with our families, friends, and our customers.

RTD SIDE LADDER - TRANSIT
page | 2
Installation questions? Email support@vancafe.com
CONTENTS
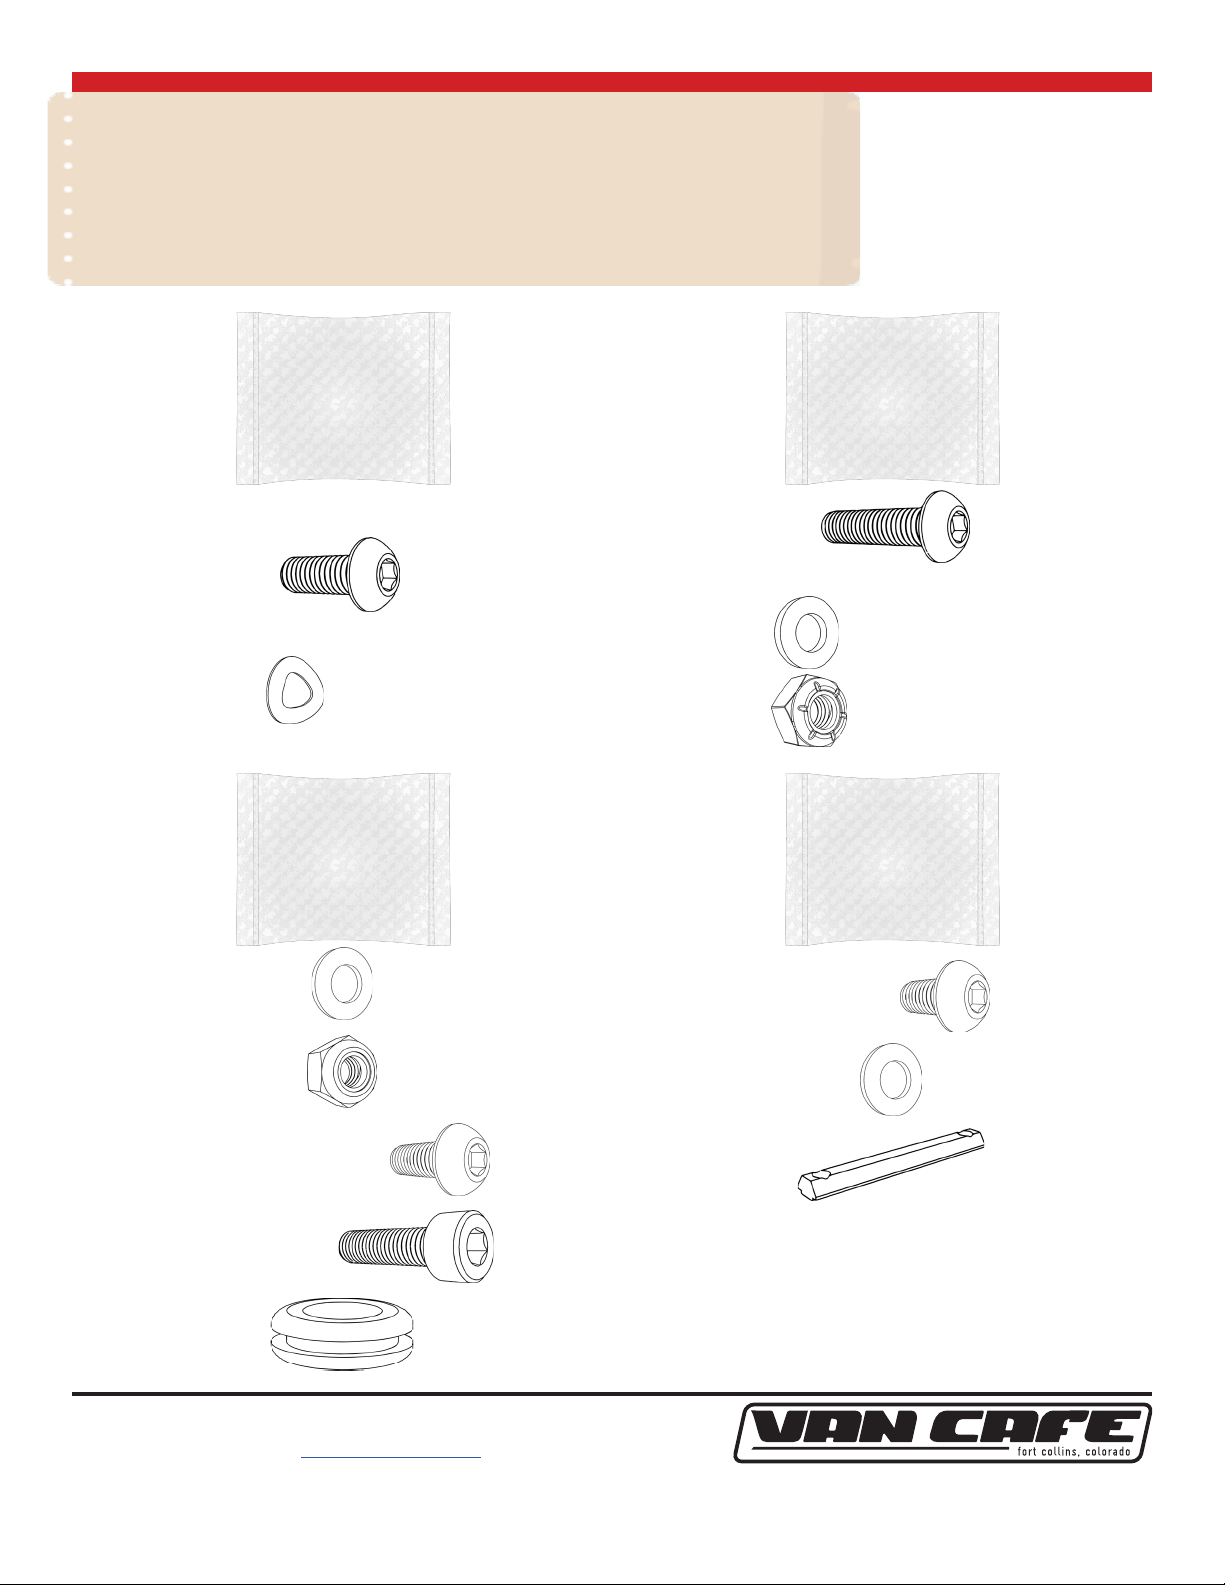
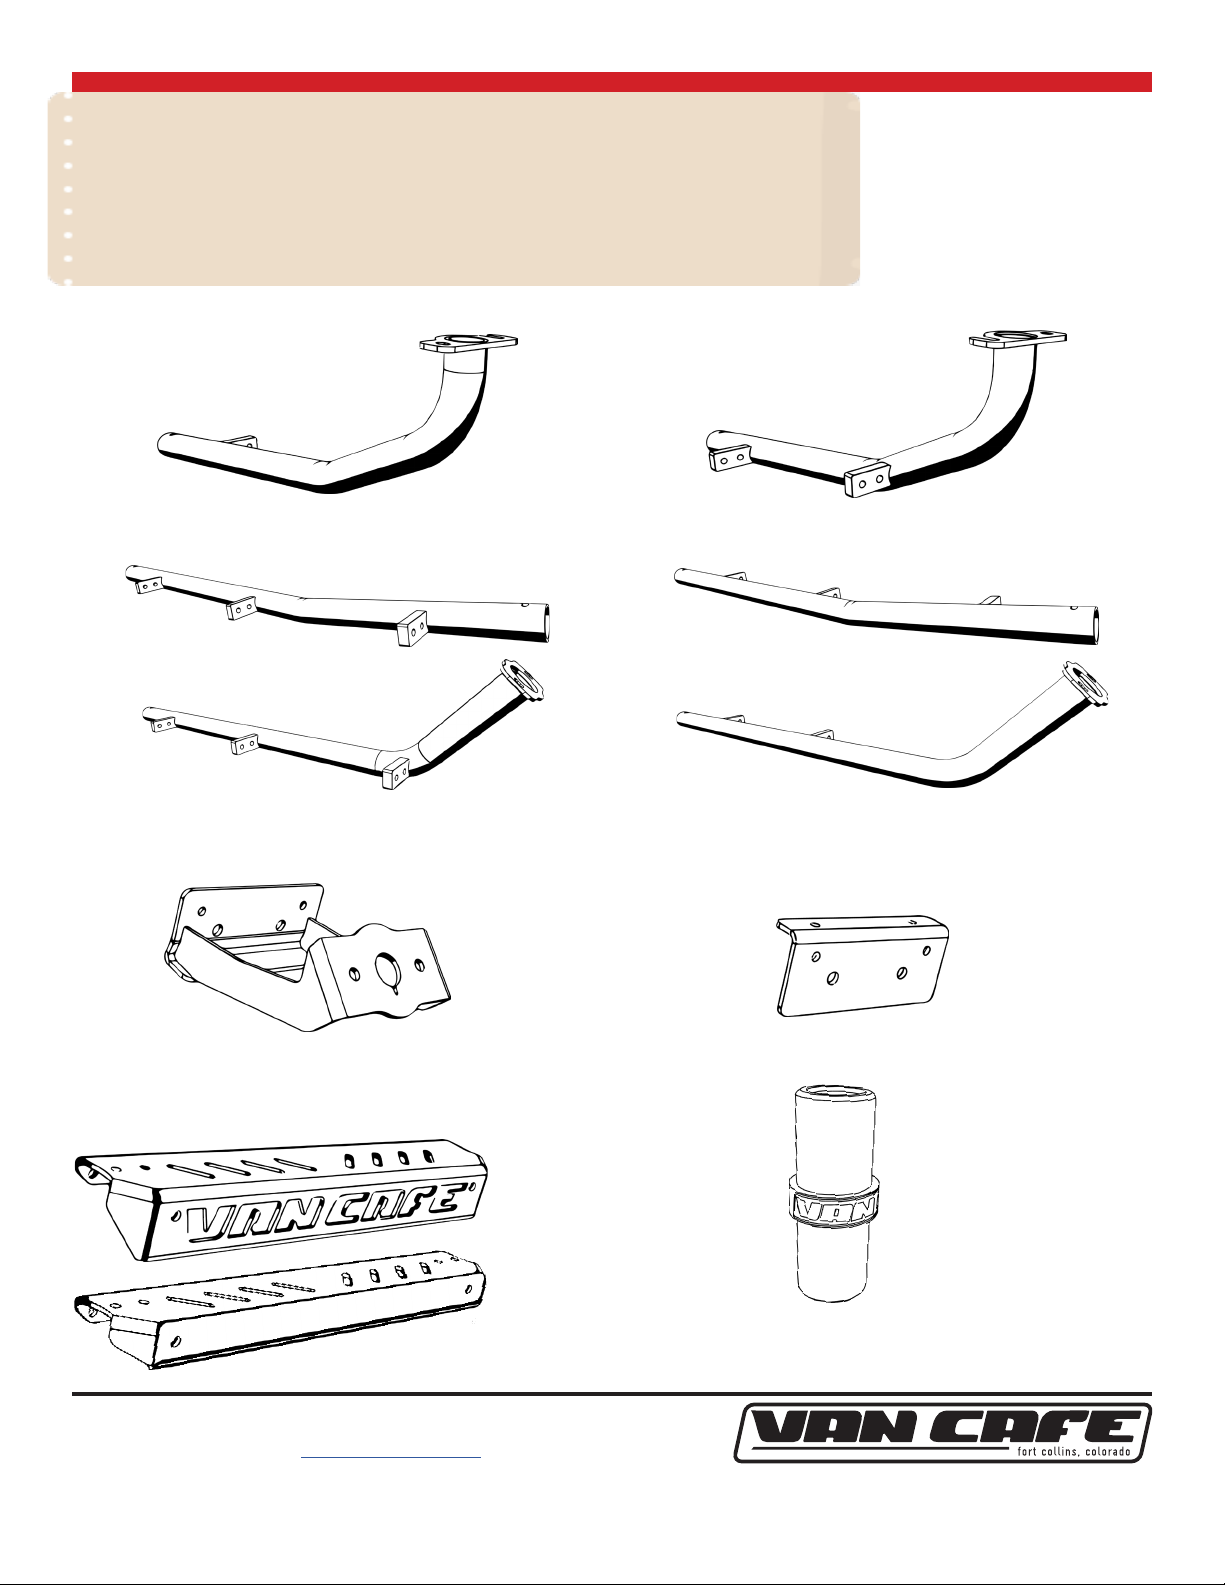
Unboxing..........................................................................................3-4
Required Tools ................................................................................... 5
Transit Van Fitment ........................................................................... 6
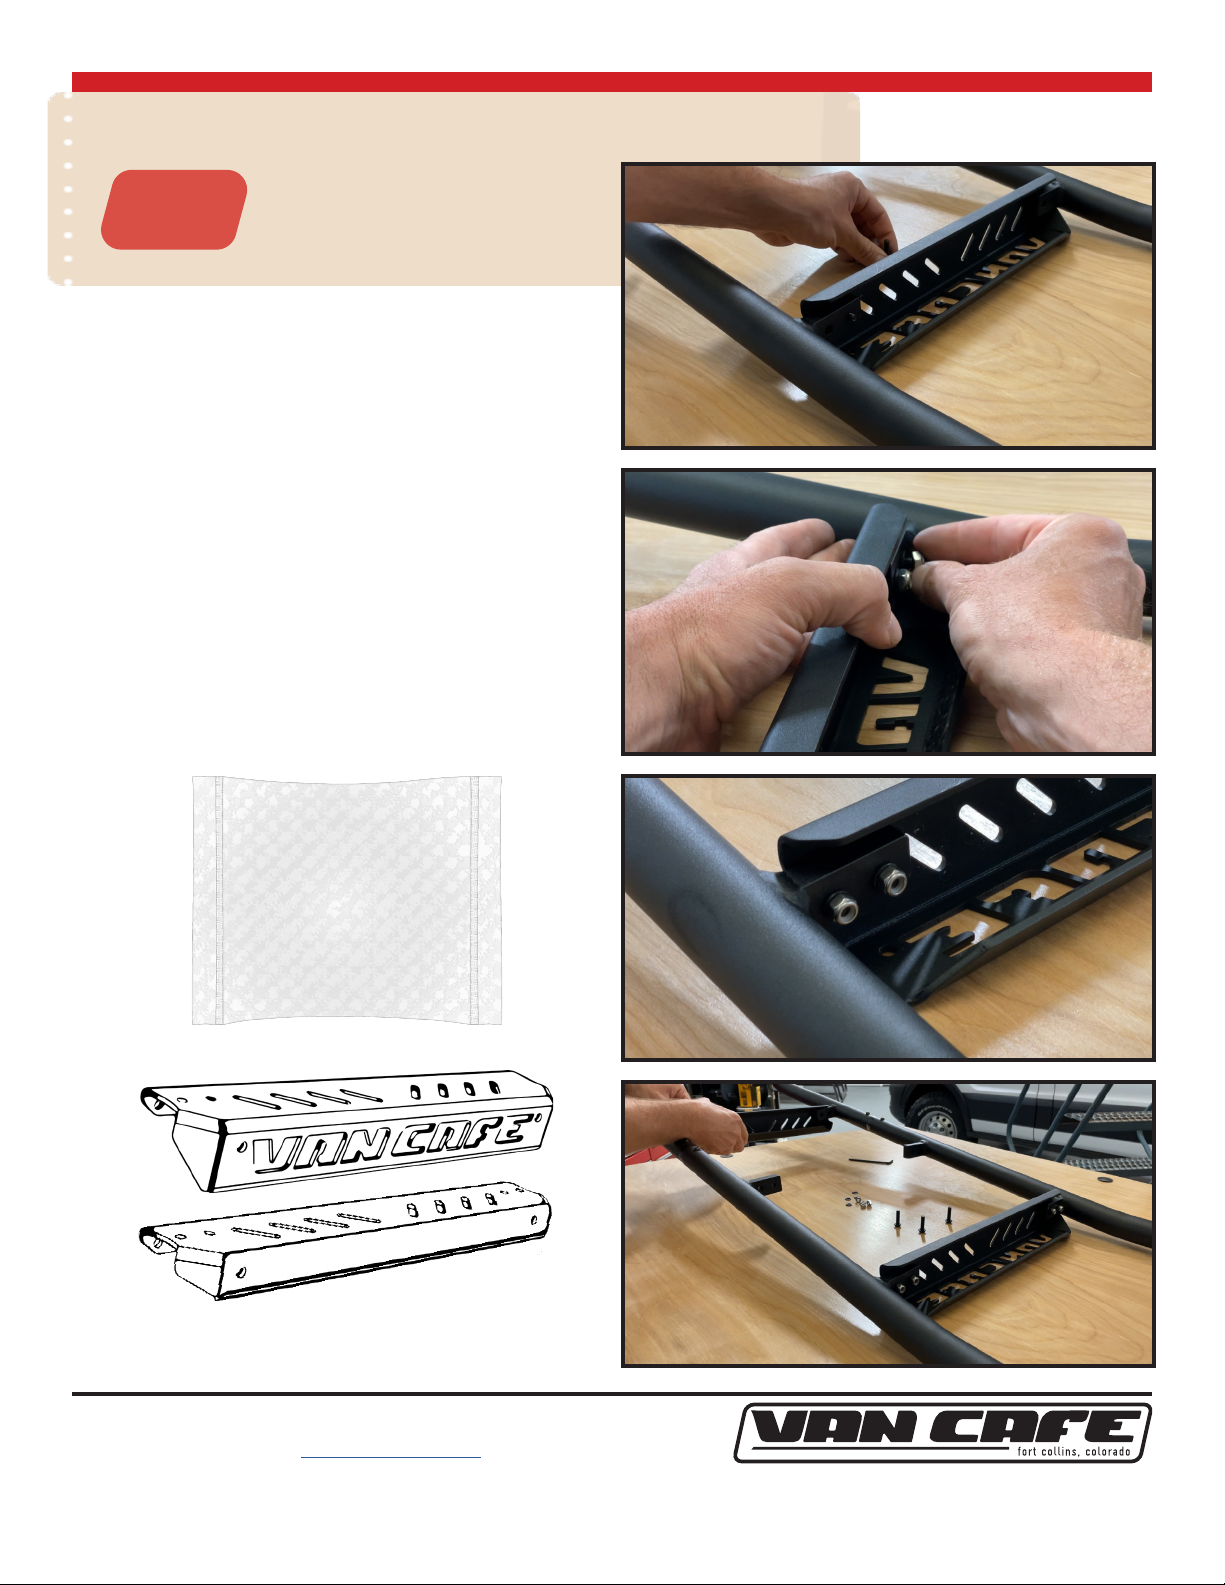
Installation Step - 1 ............................................................................ 7
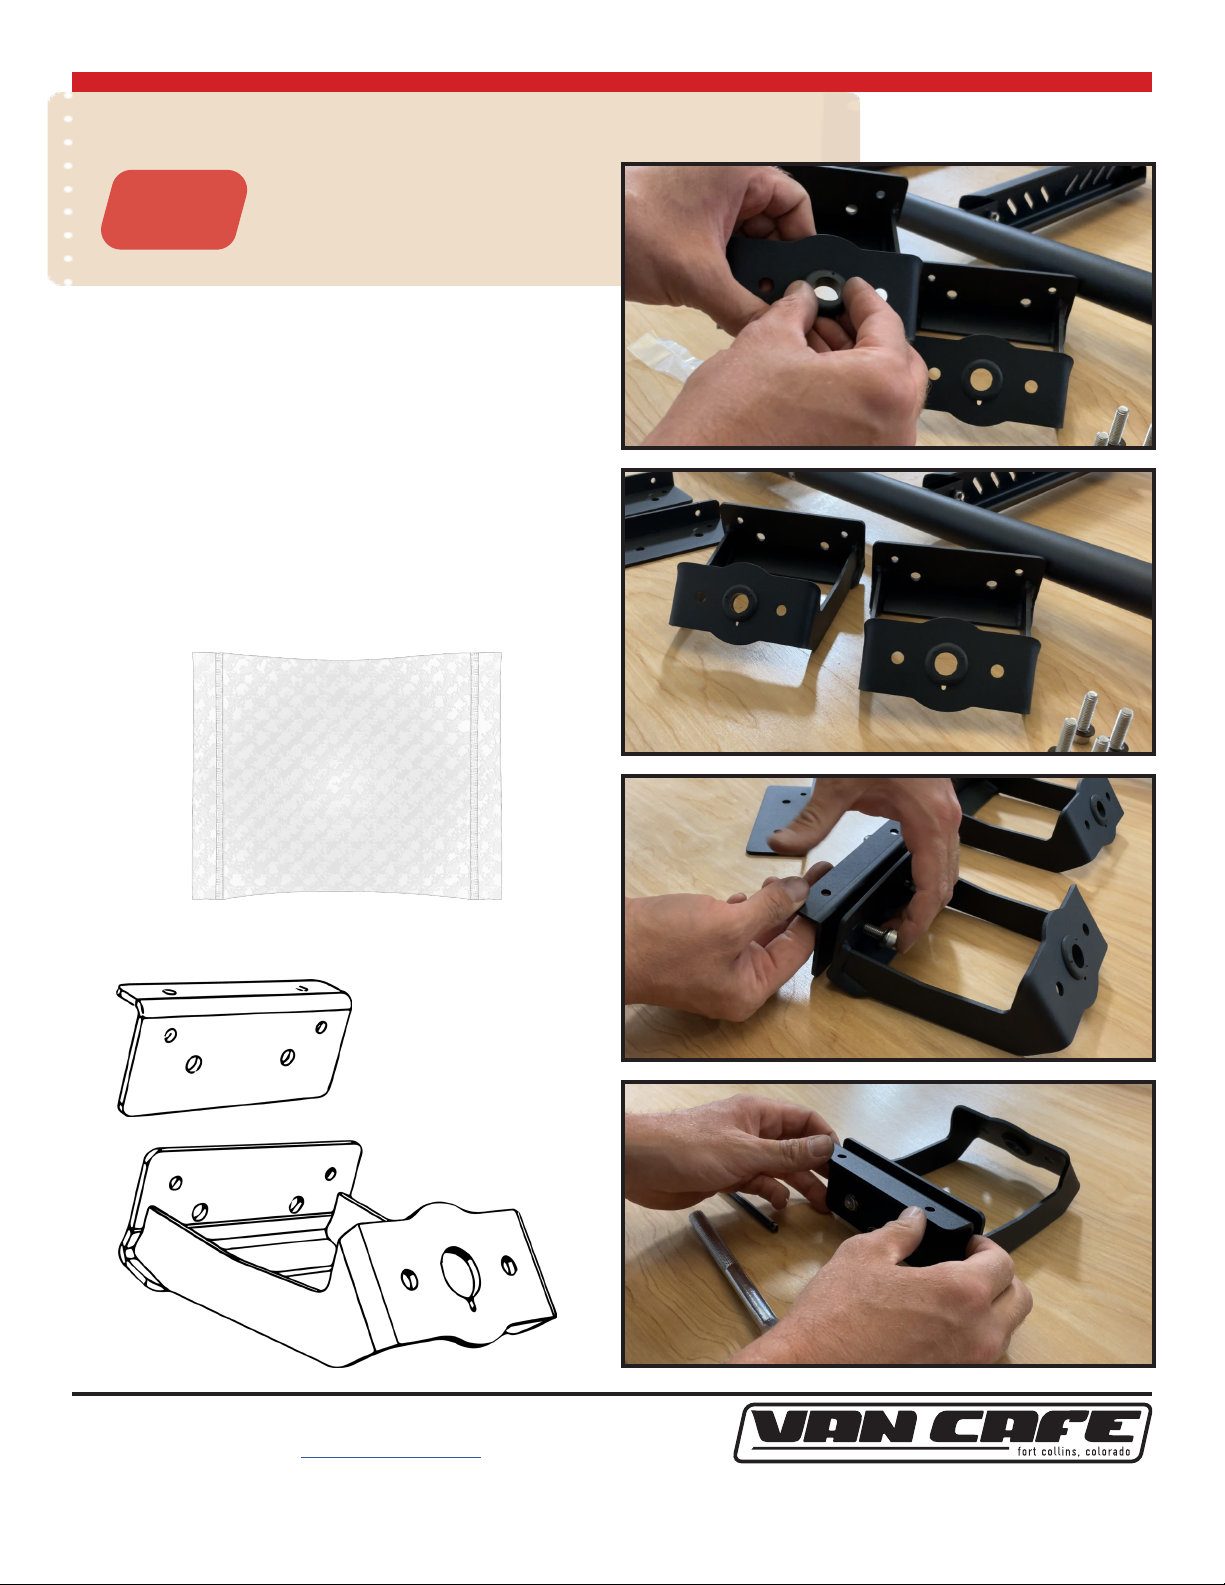
Installation Step - 2 ............................................................................ 8
Installation Step - 3 ............................................................................ 9
Installation Step - 4 ..........................................................................10
Installation Step - 5 ..........................................................................11
Installation Step - 6 ..........................................................................12
Installation Step - 7 ..........................................................................13
Finished ............................................................................................14
TRANSIT PRODUCT &
COMPONENT LINKS
Rooftop Deck: Plank Kit
Rooftop Deck: Deck Board Kit
Rooftop Deck: Filler Panel Kit

RTD SIDE LADDER - TRANSIT
page | 3
Installation questions? Email support@vancafe.com
UNBOXING AND REQUIRED TOOLS
Hardware KIT contents
A
HARDWARE BAG
8x
M6 wavy washer
#006006
32x
M6 Nyloc Nut
#005989
M6 x 16mm
button Head Screw
#005991
8x
M6 x 25mm
button Head Screw
#005990
32x
M6 washer
#004095
64x
B
HARDWARE BAG
C
HARDWARE BAG D
HARDWARE BAG
16x
M8 Washer
#004096
8x
M8 Nyloc Nut
#000834
4x
M8 x 20 button head screw
#003094
4x
M8 x 30 socket head screw
#003001
2x
Push-in grommet
#006082
4x
M8 x 16 button head screw
#003095
4x
M8 washer
#004096
2x
3in T-Nut
#003681

RTD SIDE LADDER - TRANSIT
page | 4
Installation questions? Email support@vancafe.com
UNBOXING AND REQUIRED TOOLS
transit ladder kit CONTENTS
1x
transit rail - Upper left
#005923
1x
transit rail - Upper right
#005924
1x
transit rail - mid left
#005925
1x
transit rail - mid right
#005926
1x
transit rail - lower left
#005927
1x
transit rail - lower right
#005928
2x
transit ladder - outside pinch weld bracket
#005929 2x
inside pinch weld bracket
#005930
top
bottom
top
bottom
top
bottom
top
bottom
top
bottom
top
bottom
4x
ladder bung
#005930
8x
steps
#005931 - 1x logo step
#005932 - 7x regular steps

RTD SIDE LADDER - TRANSIT
page | 7
Installation questions? Email support@vancafe.com
INSTALLATION STEP
Start by assembling the left and right
ladder rails
Insert the bungs in the ends of the tubes
With a 4mm allen wrench, thread M6 with
wavy washers into the holes
*Make sure the VAN CAFE etched into the
bungs isn’t upside down
*Refer to page 4 for which rail goes where
*Leave the screws loose, we’ll tighten them
up at the end when everything is aligned
1
A
+

RTD SIDE LADDER - TRANSIT
page | 8
Installation questions? Email support@vancafe.com
INSTALLATION STEP
With both ladder rails assembled, start
installing the steps (face down) with the
M6 screws, lock nuts, and washers
Install one step per section
(Lower, Middle, Top)
Pick where you want your ‘VAN CAFE’
step (the 5th step is roughly eye-height)
Fill in the rest of the steps
*Tighten down just enough to engage the
Nyloc nut, tighten down with ladder on the
van
B
2
+

RTD SIDE LADDER - TRANSIT
page | 9
Installation questions? Email support@vancafe.com
INSTALLATION STEP
Insert the grommet into the large holes in
the outer bracket
With a 6mm allen wrench and 13mm
wrench, screw the inside and outside
pinch weld brackets together
*Leave assembly loose enough to t over
the pinch weld on the van
3
C
+

RTD SIDE LADDER - TRANSIT
page | 10
Installation questions? Email support@vancafe.com
INSTALLATION STEP
Install the bottom brackets on the pinch
weld
We designed the brackets to t in behind
the factory plastic rocker panel cover
Once in place, tighten enough so that it
doesn’t fall off
Brackets should be 16.5” apart
center-to-center or about 12” apart at
the ends
*Ladder was designed to t anywhere be-
hind the front door and in front of the rear
wheel
*Pinch weld bracket was designed to t over
the smaller ‘boxed’ sheet metal sections on
the backside of the pinch weld
4
16.5”

RTD SIDE LADDER - TRANSIT
page | 11
Installation questions? Email support@vancafe.com
INSTALLATION STEP
Head up your ladder and install the 3”
T-Nuts
Screw a M8 with washer into the inside
hole on each T-Nut, leave loose enough to
easily slide
Visually line up vertically with where you
installed the Bottom Brackets
Inside screws should be 13.5” apart
Hang your completed ladder assembly
on the inside screws, make sure washers
stay on the outside
Screw in the M8s with washers on in the
outside holes
*Leave loose enough to slide in perimeter
track
5
D+

RTD SIDE LADDER - TRANSIT
page | 12
Installation questions? Email support@vancafe.com
INSTALLATION STEP
Get back to the bottom of the ladder and
lineup the Lower Rail Bracket with the
holes in the Bottom Bracket
Insert the M8 screws with washers on
both sides and Nyloc nuts in
all 4 holes
Tweak the ladder around to get
the brackets centered and tighten down
6
Table of contents
Other VAN CAFE Automobile Accessories manuals