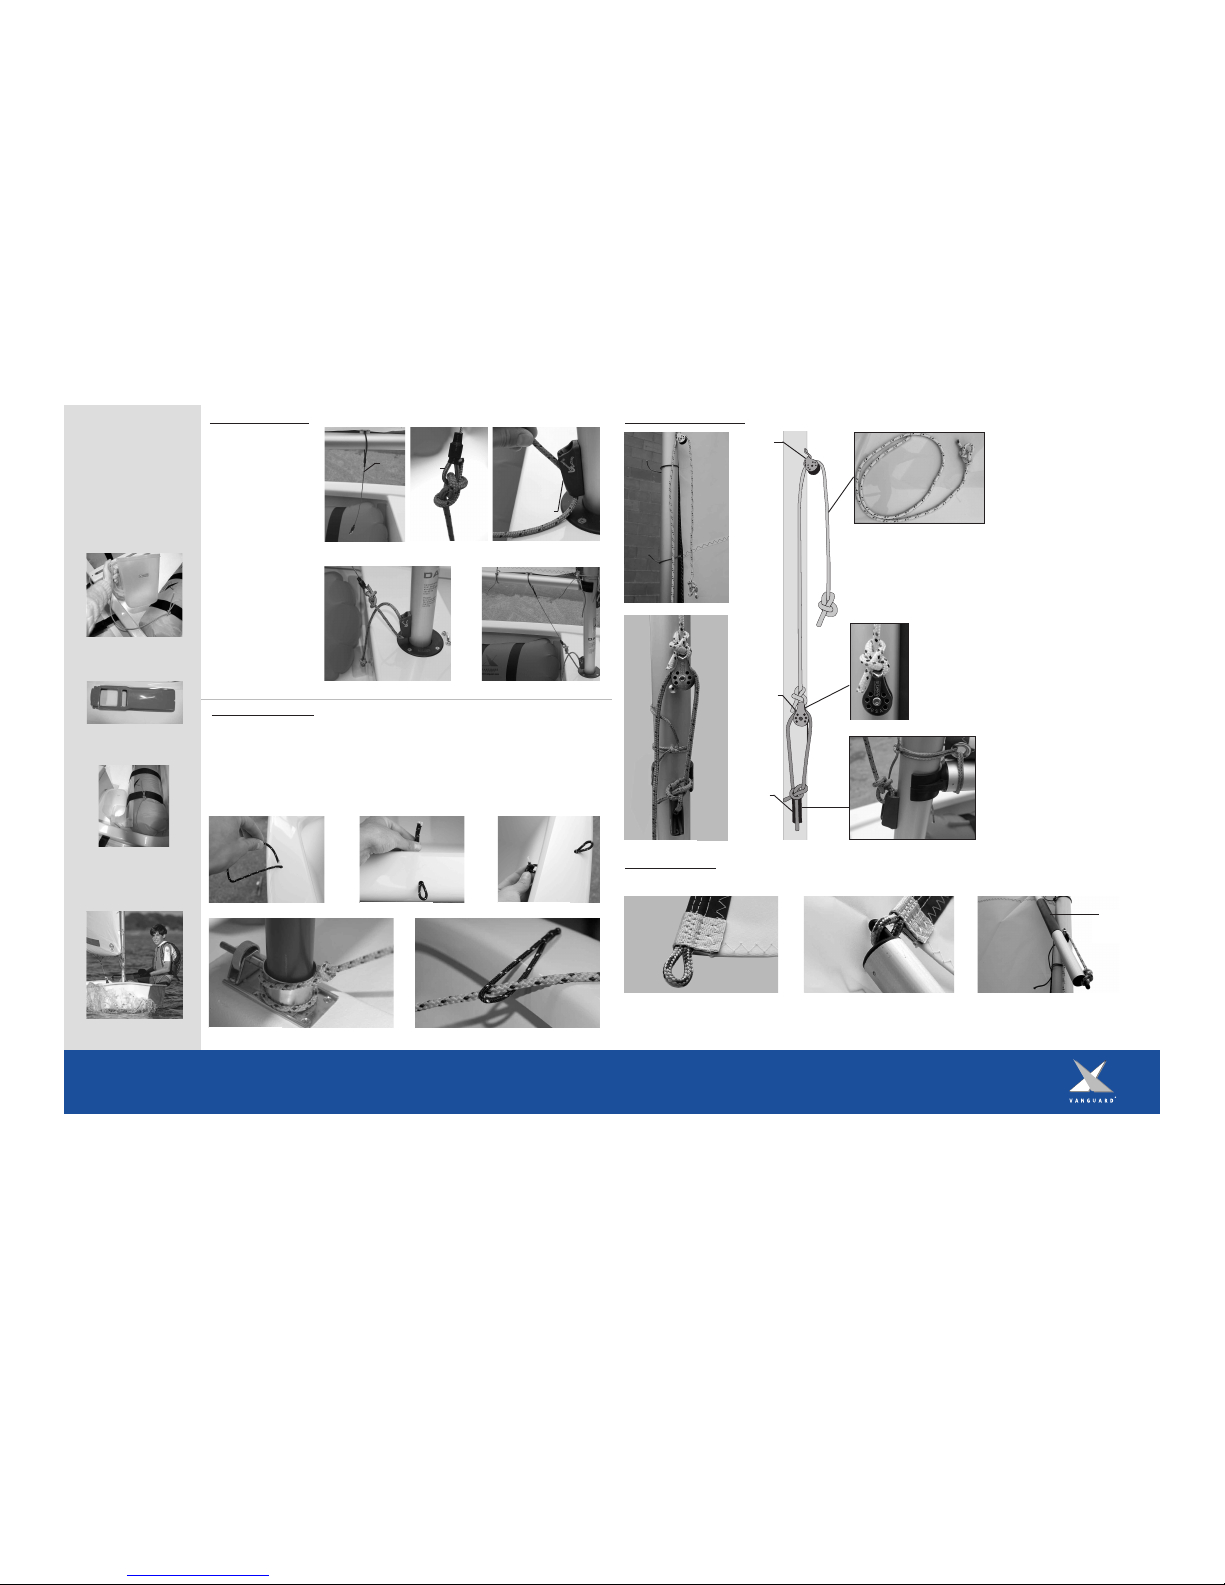
Rigging the Mainsheet Bridle:
1.Locate the mainsheet snap shackle
with pennant from the delivery kit and
the mainsheet bridle line from the line
bag (Figure 43).
2.Find the center of the mainsheet
bridle line and at the midpoint tie a
luggage knot onto the ring of the snap
shackle pennant (Figure 44).
3. Located on the topside of the boom
you will findtwo boom buttons
(Figure 45). Take one end of the
mainsheet bridle line and lead it through
oneof the boom buttons, around the
boom and secure with a bowline
(Figure 46). Repeat with the free end of
the line at the other boom button
(Figure 47), tying the line as tight as
possible. Make sure the mainsheet
shackle is suspended evenly between the
two boom buttons (Figure 48) and that
the bridle runs beneath the outhaul line.
Figure 47
Figure 43 Figure 45Figure 44
Figure 48
1. Locate the mainsheet bridle safety
line from the line bag. The mainsheet
bridle safety is used to secure the
mainsheet bridle closer to the boom.
Takethesafety lineandlead it around
the boom and through the ring of the
snap shackle pennant twice. Secure with
a squareknot (Figure 49).
Figure 46
Safety Issue: The mainsheet bridle
should not span from the boom further
than 100mm (~ 4”). A quick guide
would be thewidth of three fingers
(Figure50). Refer to theOptimist class
rules for complete details www.usoda.orgFigure49 Figure50
Rigging the Mainsheet Bridle Safety:
Rigging the Mainsheet :
Figure52
1. Locate the carbo block with becket
from thedelivery kit. The hole located
in the center of the block is the beckett
(Figure 51).
2. Retrieve the mainsheet line from the
line bag. Lead one end of the mainsheet
through the becket (Figure 52) and
secure the end with a stopper knot
(Figure 53).
Boom Button
Figure51 Figure53
Rigging the Mainsheet Continued :
3. Lead the mainsheet from the beckett down to the
forward mainsheet block on the cockpit floor (Figure 54).
Lead the line back up through the carbo block (Figure 55).
Continue the line down through the mainsheet ratchet block
(Figure 56).
Note: Make sure while pulling the mainsheet the block
makes a ratcheting noise. If the block does not make a
ratchet sound one of two things could be the problem. First
try running the mainsheet through the block the opposite
way. If this does not work, locate the lever on the
mainsheet block and switch it to the ratchet position.
Figure 54
Figure 55
Safety: The mainsheet is connected to the bridle by a snap
shackle configuration. The snap shackle is provided as a
safety device that can quickly be disconnected by pulling on
the shackle pin to release the shackle open (Figure 57 &
58). Press the bottom of the shackle back over the pin to
close.
Figure 56
Figure 57
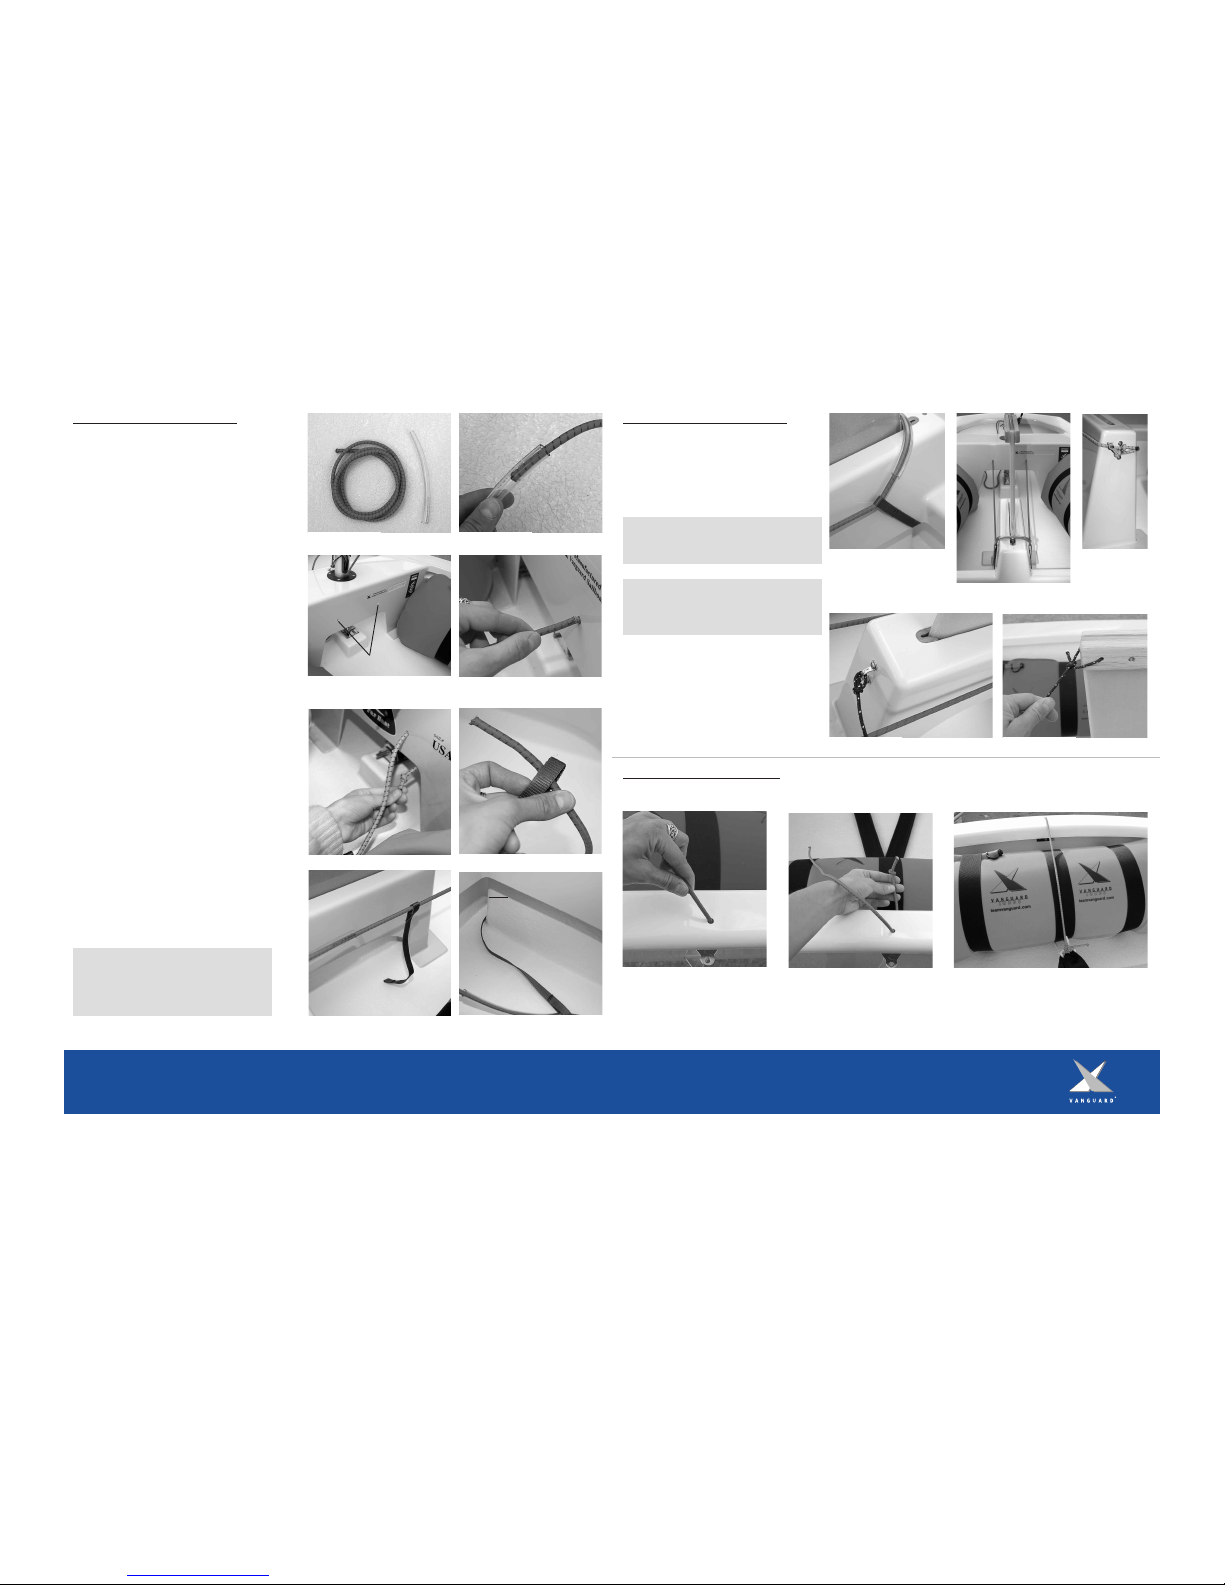
Rigging the Rudder:
1. Locate the rudder and tiller from the blade delivery box.
The tiller screws and washers should already be attached to
the tiller. Remove the screws. Align the two holes in the
tiller with the two holes in the top of the rudder
(Figure 59). Make sure that the tiller extension faces
upward (Figure 60).
2. Place onewasher over each hole and insert the screw
(Figure 61). On the opposite side place one washer over
each screw. Using pliers or a crescent wrench, secure the
nylon lock nuts over the screws (Figure 62). The lock nuts
should be tightened so that the tiller is snug. Do not over
tighten!
3. Align the pintles on the rudder over the holes in the
gudgeons on the boat (Figure 63). Press down making sure
the pintles are locked in place (Figure 64).
4. To remove the rudder, press in the retaining clip while
pulling straight up on the rudder (Figure 65). Once the
upper pintle clears the retaining clip the rudder will be
released.
Figure 59 Figure 60
Figure63 Figure64 Figure65
Pintle
Gudgeon
The rudder in the picture is only to depict what the rudder
attached looks like. Do not attach the rudder to the boat
until the boat is in deep enough water.
Becket
Figure 61 Figure62
Figure 58
Outhaul Line Mainsheet Bridle
Mainsheet Carbo Block
Max 4”
Rudder
Retaining
Clip