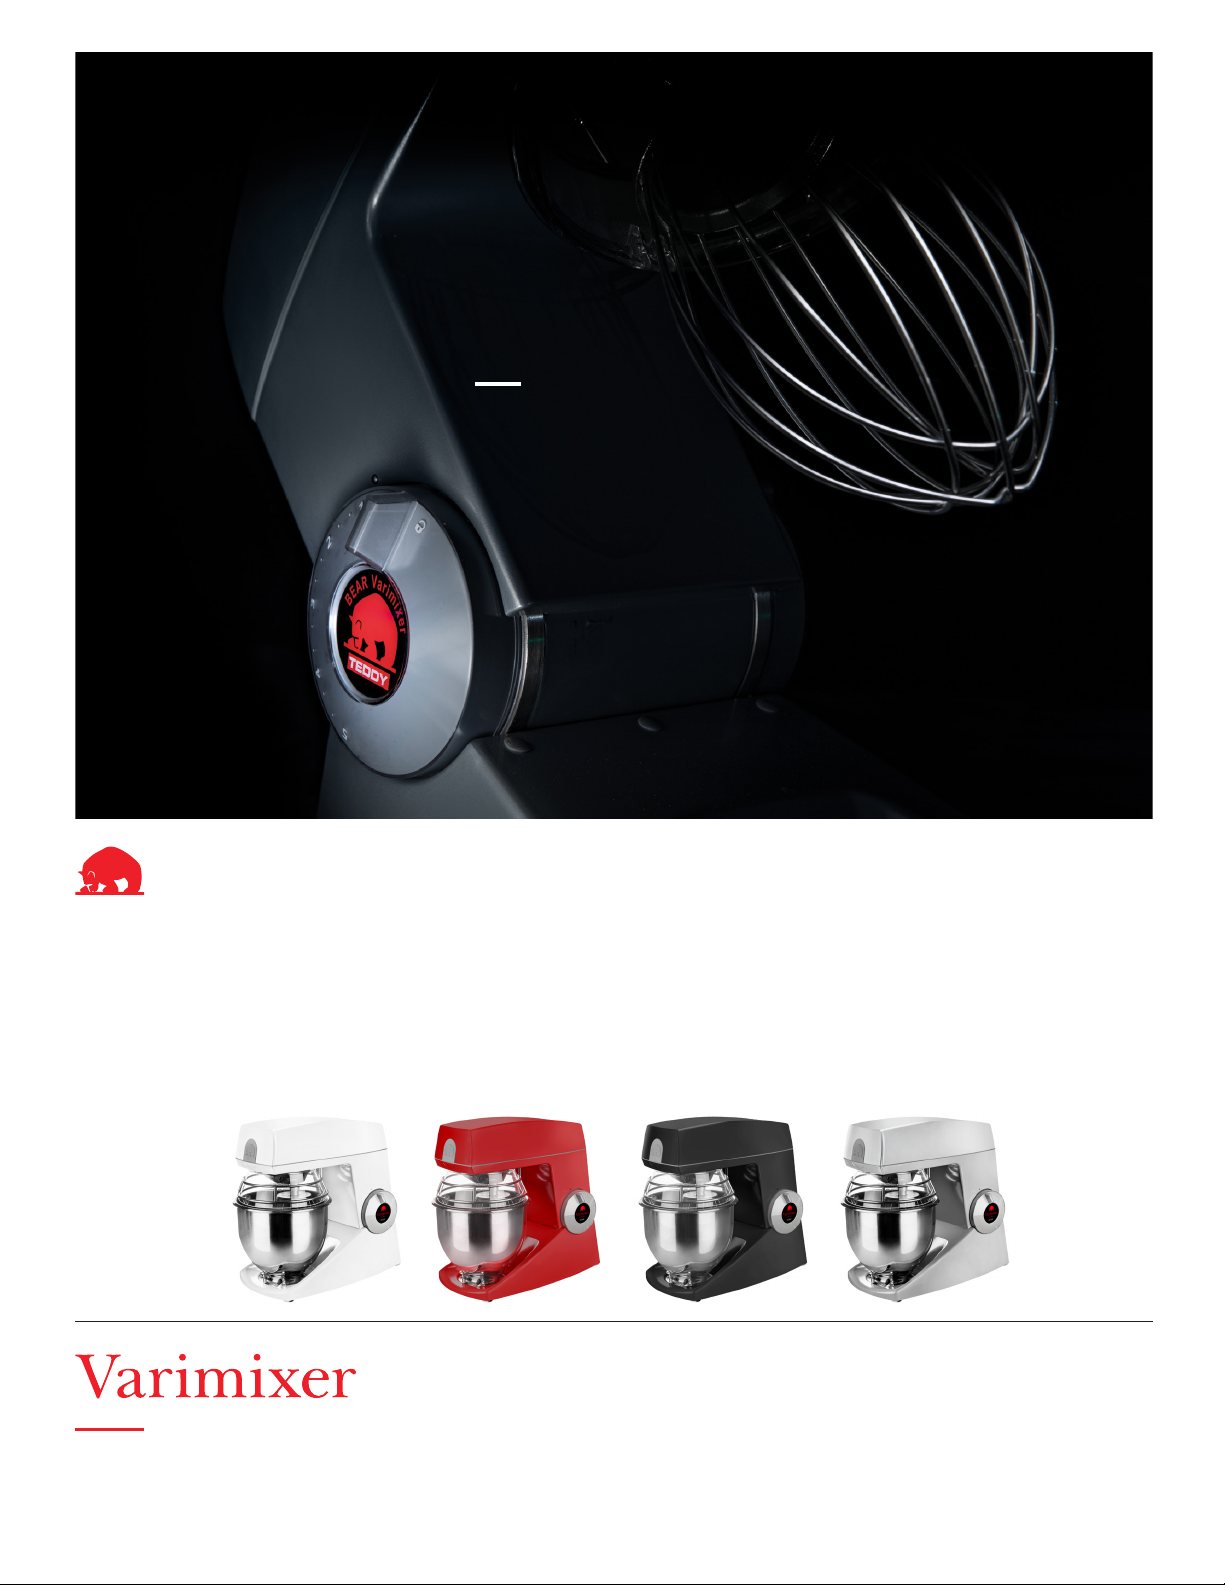
Varimixer V5A TEDDY User manual

V5A TEDDY
™TEDDY is a registered trademark belonging to Varimixer A/S.
Operating Instructions
And Spareparts
Valid from machine number:
5900000
DRN: 20005-2136
2022 01 17
Varimixer USA
2215 East River Road
Moraine, Ohio 45439
P: (800) 222-1138
varimixerusa.com

Limited Mixer Warranty - 5 qt
VARIMIXER warrants to the original purchaser of new equipment that said equipment, when installed in accordance
with our instructions within North America and subjected to normal use, is free from defects in material or workmanship
for a period of 1 year. Wear parts, such as belts, are excluded. Hub attachments, such as shredders, slicers and
grinders have a 1 year warranty that only covers parts. Warranty begins on date of factory shipment to an end user, or
up to 6 months after factory shipment to a dealer or distributor. Payment by VARIMIXER for service under this warranty
requires that service be authorized in advance. Contact VARIMIXER Technical Support to arrange for service.
THIS WARRANTY IS IN LIEU OF ALL OTHER WARRANTIES, WHETHER EXPRESSED OR IMPLIED. VARIMIXER
EXPRESSLY DISCLAIMS ANY IMPLIED WARRANTY OF MERCHANTABILITY OR EXPRESSED OR IMPLIED
WARRANTY OF FITNESS FOR A PARTICULAR PURPOSE.
VARIMIXER’S OBLIGATION AND LIABILITY UNDER THIS WARRANTY IS EXPRESSLY LIMITED TO REPAIRING
AND REPLACING EQUIPMENT WHICH PROVES TO BE DEFECTIVE IN MATERIAL OR WORKMANSHIP WITHIN
THE APPLICABLE WARRANTY PERIOD. All repairs pursuant to this Warranty will be performed by an Authorized
Designated VARIMIXER Service Location during normal working hours. IN NO EVENT SHALL VARIMIXER BE
LIABLE FOR INCIDENTAL OR CONSEQUENTIAL DAMAGES TO BUYER OR ANY THIRD PARTY, INCLUDING,
WITHOUT LIMITATION, LOSS OF PROPERTY, PERSONAL INJURY, LOSS OF BUSINESS OR PROFITS OR OTHER
ECONOMIC LOSSES, OR STATUTORY OR EXEMPLARY DAMAGES, WHETHER IN NEGLIGENCE, WARRANTY,
STRICT LIABILITY, OR OTHERWISE.
This warranty is given only to the rst purchaser from a retail dealer. No warranty is given to subsequent transferees.
This warranty does not cover product failures caused by: failure to maintain, neglect, abuse, damage due to excess
water, re, normal wear, improper set up and use. Periodic maintenance is not covered.
Example of items not covered under warranty, but not limited to just these items:
1. Acts of God, re, water damage, vandalism, accident, theft.
2. Freight damage.
3. Improper installation or alteration of equipment.
4. Use of generic or after market parts.
5. Repairs made by anyone other than a VARIMIXER designated servicer.
6. Lubrication.
7. Expendable wear parts. (This includes the bowl, at beater, wire whip, spiral dough hook,
and the pastry knife.)
8. Cleaning of equipment.
9. Misuse or abuse.
This warranty is not in force until such time as a properly completed, digitally signed Installation/Warranty Registration
has been received by VARIMIXER within 30 days from the date of installation.
Register online at www.varimixerusa.com/support/warranty-registration-form.
THE FOREGOING WARRANTY PROVISIONS ARE A COMPLETE AND EXCLUSIVE STATEMENT BETWEEN THE
BUYER AND SELLER. VARIMIXER NEITHER ASSUMES NOR AUTHORIZES ANY PERSONS TO ASSUME FOR IT
ANY OTHER OBLIGATION OR LIABILITY IN CONNECTION WITH SAID EQUIPMENT.
WARRANTY REGISTRATION
GO TO WWW.VARIMIXERUSA.COM
TO FILL OUT AND SUBMIT YOUR WARRANTY REGISTRATION.
WWW.VARIMIXERUSA.COM/SUPPORT/WARRANTY-REGISTRATION-FORM

1
The mixer is listed by:
The following equipment is included:
√ Cable √ Hook √ Bowl
√Beater √ Whip √ Lid for the bowl
√Ingredient chute
Before taking the mixer into use, check that all parts are delivered.
Dimensions and weight:
TEDDY inclusive equipment:
• Net weight with equipment: 44 Lbs.
• Outside dimensions of mixer: 18¼ “ x 9½ “ x 15¾ “
Location:
The mixer is to be placed on a stable and horizontal table.
The machine is a technical tool, and is intended solely for working
purposes.
The constant noise level of the workplace of the operator is lower
then 70 dB (A).
•The mixer will only start when the upper part is lowered.
•The upper part can only be tilted up when the mixer is
stopped.
•Protection from excess current, excess voltage and too
low voltage.
•The mixer is provided with xed bowl screen.
•The mixer is equipped with a safety-timeout that turns o the
mixer after 45 minutes continuous operation.
The machine must be monitored while it is in
operation.
The mixer is designed for manufacture of prod-
ucts which do not during processing cause
reactions or emit substances which may be
detrimental to the user.
Putting your ngers in the bowl while the mixer
is running may cause injuries.
....................................................................................................................................................... 1
......................................................................................................................... 1
................................................................................................................................ 2
........................................................................................................................ 2
................................................................................................................ 2
............................................................................................................................. 3
............................................................................................................... 3
...................................................................................................................................................... 3
................................................................................................................................ 3
................................................................................................................................................ 4
.................................................................................................. 4
.................................................................................................................................................. 4
................................................................................................................................................... 5
O
TM V5A Food Mixer
4002624

2
K
•Position 1-2: Low speed Kneading
•Position 1-3: Medium speed Mixing
•Position 1-5: High speed Whipping
TEDDY is a small professional mixer for kneading, mixing and whip-
ping in all environments where professional equipment is required.
Any operation of the mixer is made by means of the rotary knobs
on the sides of the mixer. The two knobs can be used simultane-
ously or individually and are used both for speed regulation and
as opening/closing function.
The enclosed cable must be used.
The mixer must be connected to ground!
•Only single phase power supply with ground must be used
for the mixer. Use the enclosed cable.
•A plug with 2 pins + ground must be used.
•Check that the voltage of the power supply corresponds
the voltage printed on the rating plate placed in the bottom
of the mixer and stated on the packing.
•The mixer must be protected by a dierential circuit breaker
and a fuse of max. 10 A.
A fuse is built into the cable plug.
The power characteristics of the mixer:
As standard the mixer comes with the following accessories:
• Bowl in stainless steel.
•
Snap-in splash guard.
• Ingredient chute.
• Dough hook in stainless steel for kneading of dough.
• Beater in stainless steel for mixing.
• Whip in stainless steel for whipping.
B Housing of the planetary gear
C Bowl screen in stainless steel
D Bayonet shaft
Lid
F Upper part
Ingredient chute
H Rotary knobs (two pcs.)
I Base
J
Bowl in stainless steel, contents 5 quarts
K Locking arm
Hook Beater
Whip Bowl
Ingredient chute
Fig. 1 The construction of the mixer
Fig. 2 Recommended working speeds
Supply Output Frequency Voltage
voltage (V) (W) (Hz) (A) (hp)
115 300 50/60 3.4 0.4
Splash guard

3
The bowl must be mounted when the mixer is
started!
The machine must be monitored while it is in
operation
A. Turn the rotary knobs to the locking symbol .
B. Tilt backwards the upper part of the mixer.
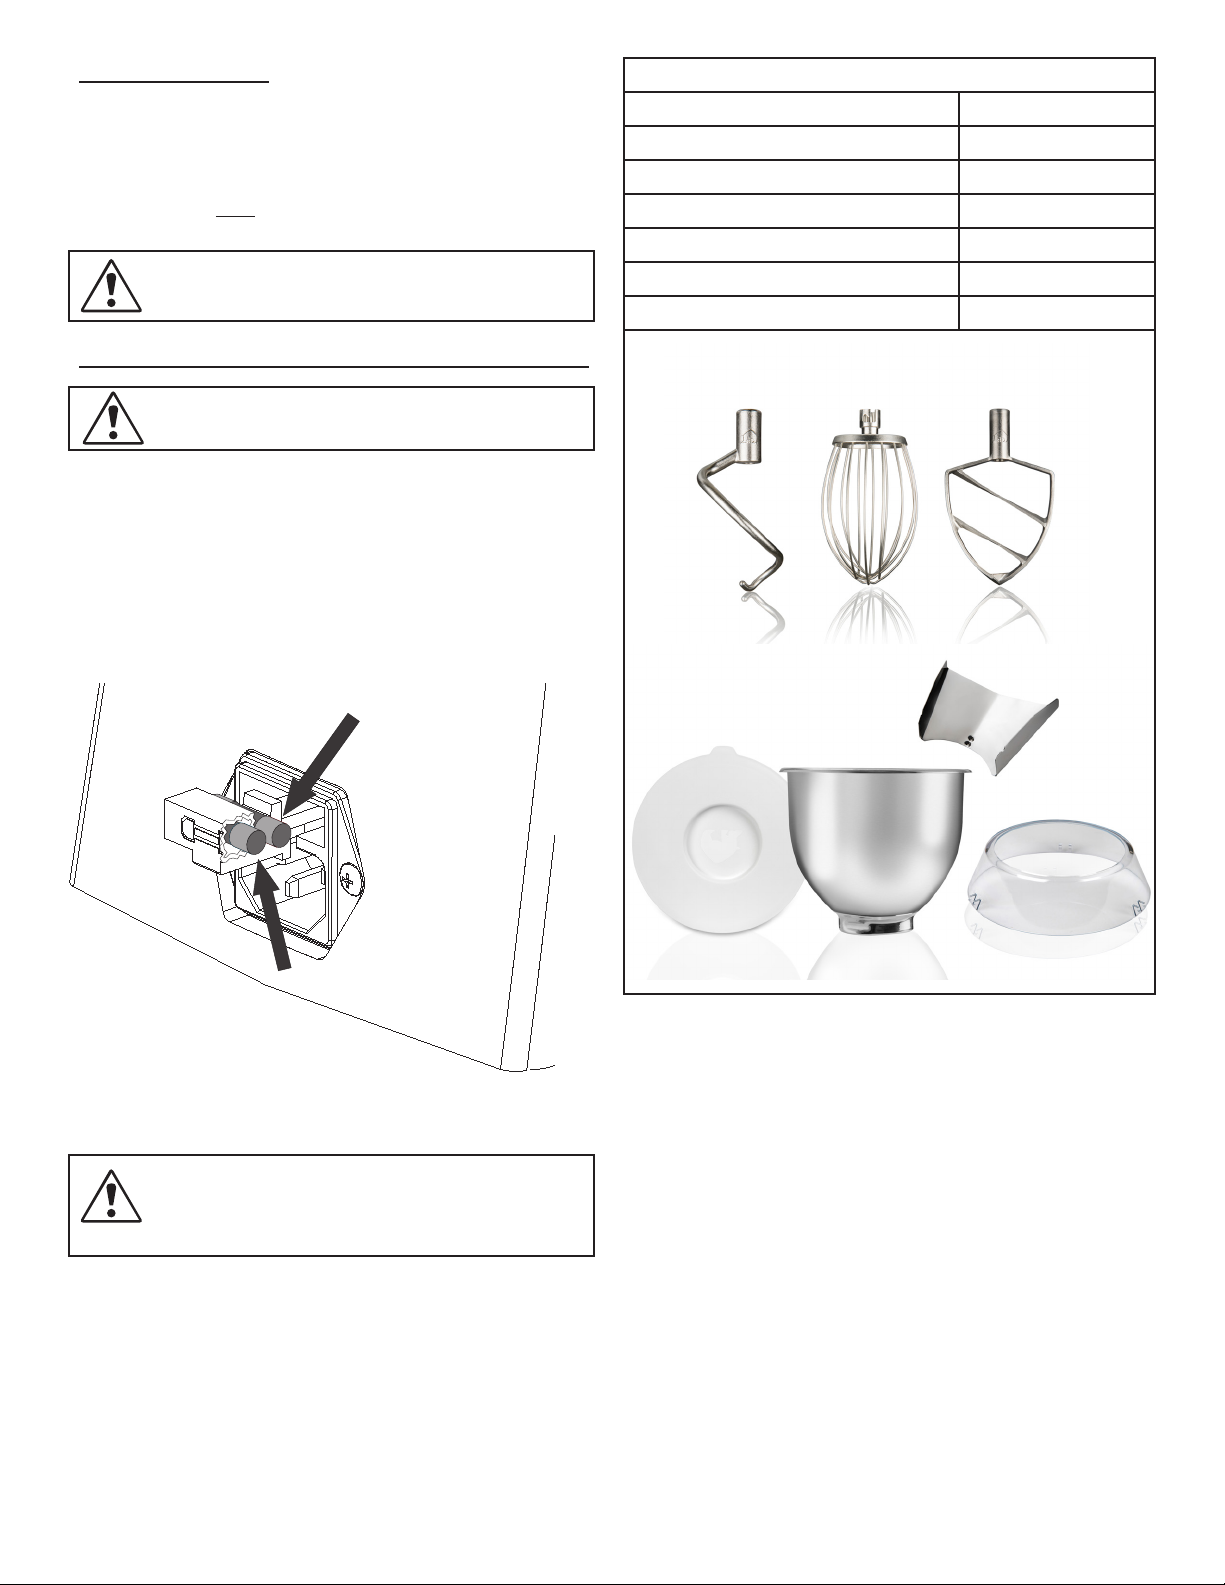
C. Place a tool in the bayonet shaft and turn it counter-clockwise
to lock it in position .
D. Place the bowl in the mixer (1), turn it to be xed in the lock-
ing bolts (2) and turn the handle (3) .
Fill the ingredients in the bowl.
F. Tilt the upper part of the mixer, including tool, down.
Start the mixer by turning the rotary knobs away from the
locking symbol and past 1. To avoid splashing and dust from
our, it is recommended to increase the speed gradually
until the required speed is obtained , (see for
recommended working speeds).
H. Stop the mixer by turning the rotary knobs back to neutral
position .
I. The upper part of the mixer can only be tilted backwards
when the rotary knobs is turned to the locking symbol
.
The working capacity of the mixer depends of:
• The tool used.
• Sort and quantity of the raw materials.
• The optimum speed for a good result.
Too big quantities will always reduce the quality
of the product and the life of the mixer. Overload-
ing can also result in sudden stops.
If the mixer is moving e.g. kneading dough, this is not due to er-
rors or overloading.
In case of overloading the electronic variator will reduce the current
to the motor and stop it.
In case of stop due to overloading, turn the
rotary button back to neutral position, and
the mixer can be started again.
If the motor stops after long time of operation, and cannot be
started immediately after, the temperature sensor of the motor has
switched o the current, and the mixer needs to cool down before
it can be re-started. This protects the motor from overheating.
The mixer contains two thermal cut-outs, which automatically
reconnect in case of previous disconnection by the temperature
sensor.
After use:
• Remove bowl and tools.
• Wash the bowl and the tools in hot water and detergent /
degreaser / disinfectant. Rinse with pure water and dry.
Do not spray water on the mixer
Tools and bowl can be cleaned in dishwasher.
• Wipe the housing of the planetary gear, the bayonet shaft
and the bowl screen. Use a damp sponge and a detergent
/ disinfectant. Rinse the parts with sponge and pure water.
• Check that the various parts have been cleaned thoroughly.
• Do not use abrasive detergents, which could scratch the
surface.
• Use detergents suited for use on aluminium and plastic
(polycarbonate).
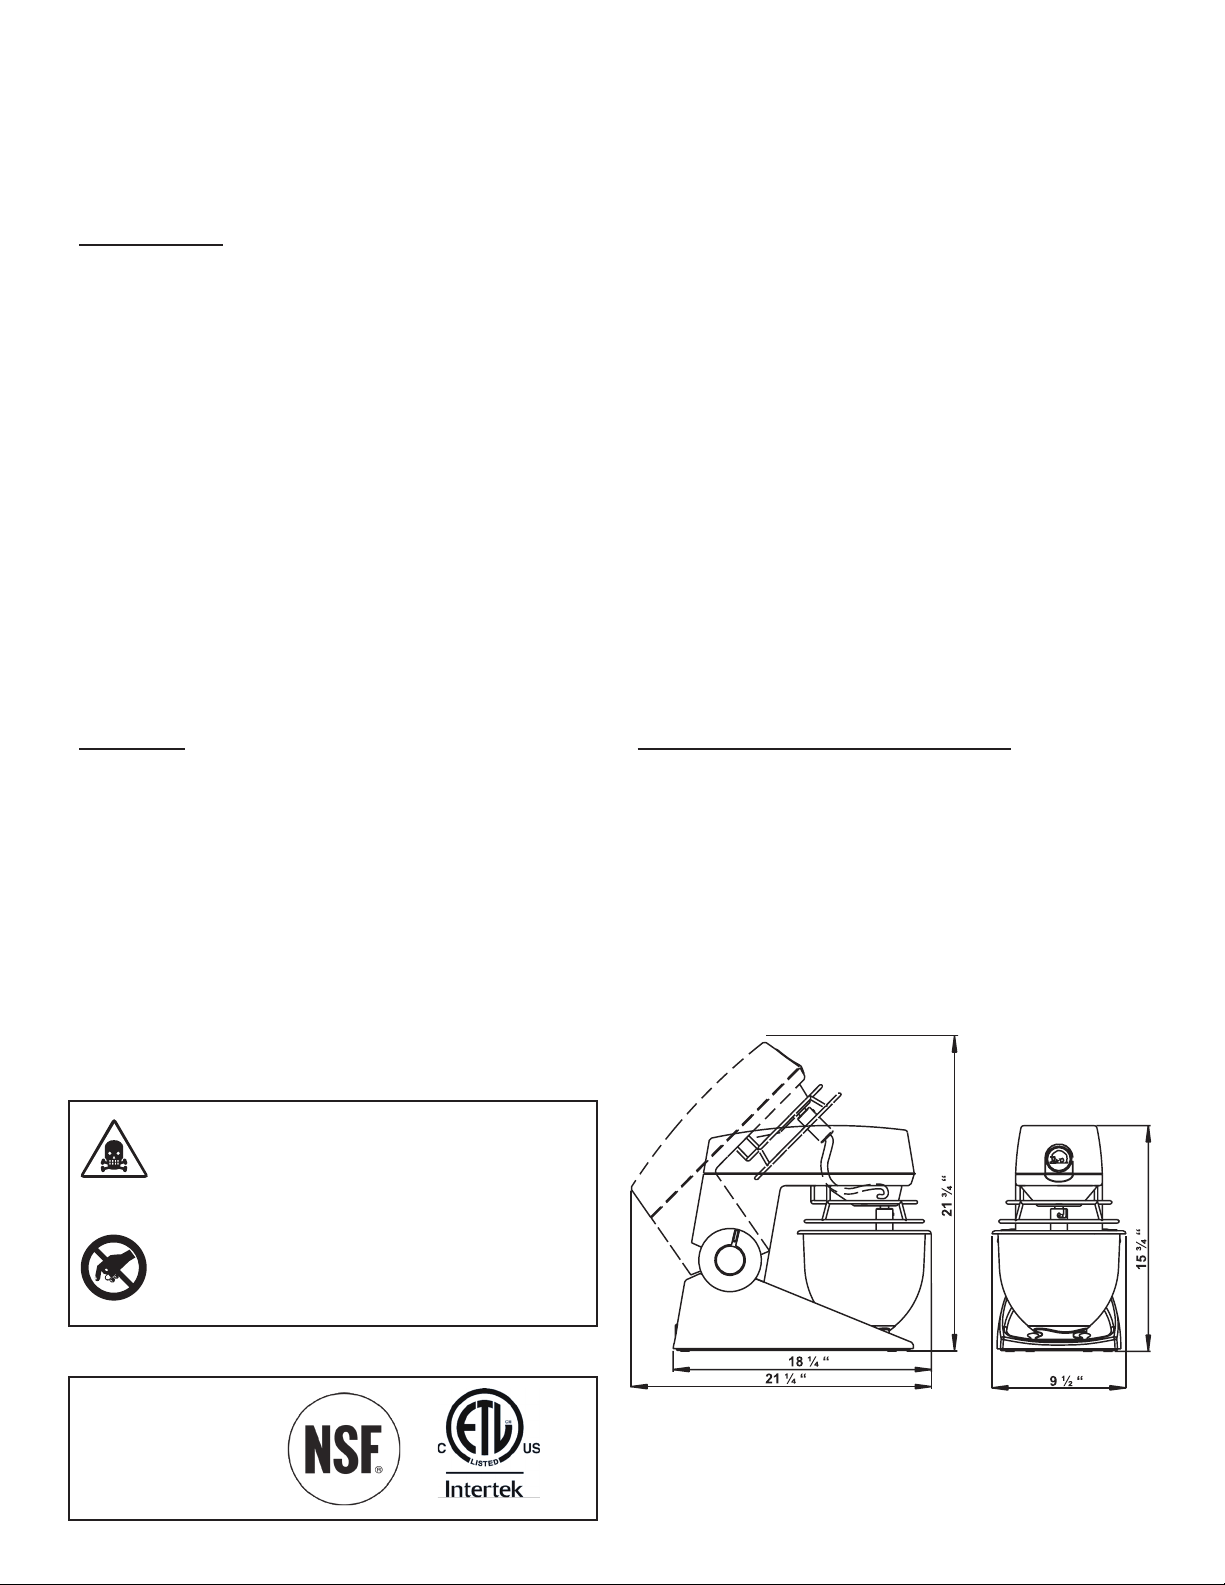
A: Locking symbol B: Neutral position C: Speeds
Fig. 4 Mounting of tool in the bayonet shaft.
Fig.3 The three positions of the rotary knobs.
Raw material Approx. max.
quantity
Bread dough, 60% Lbs 5
Mashed potatoes Lbs 4
Whipped cream Qt 1
Layer cake Lbs 6
Cake donuts Lbs 6
Locking bolts
3
locking bolts and turn the locking arm anticlockwise.
Close the ma-
chine by press-
ing down on the
top of the head
section.
click when the
machine has
closed properly

4
Stainless steel dough hook VHOOK-05
Stainless steel wire whip VWHIP-05
Stainless steel at beater VBEAT-05SS
Plastic bowl lid VBLID-05
Stainless steel bowl VBOWL-05
Ingredient chute VCHUTE-05
Splash guard VRING-05
2
1
The mixer requires no maintenance (motor and bearings for the
mechanical parts are greased for life).
Safety device:
Check the function of the safety device regularly:
• The motor must stop when the rotary knobs is in neutral
position .
If the safety device does not function, do
not use the mixer. Contact your dealer.
If the problem cannot be solved, contact
your dealer.
The mixer does not start:
Check that ...
• The upper part of the mixer is in its down position.
• The mixer is plugged in and connected to power.
• The electrical power supply is correct.
• The fuse in the cable plug has not been burned.
If the fuse is defective, it can be replaced by the extra fuse
that is also available in the cable plug.
The mixer stops during work:
• The mixer is overloaded due to too high speed or too
heavy loading. See the paragraph “Overloading”.
In case of power failure set the rotary but-
ton back to neutral position, and the mixer
can be started again.
The tool is stuck in the bayonet shaft:
This is normally due to insucient cleaning or damaged hole in
the tool:
• When the tool is stuck, do not force it free. Apply a little
oil and let this work a couple of minutes.
• Turn the tool backwards and forwards until it can be removed.
Abnormal noise:
Metallic noise ...
• The tool is distorted and hits the bowl.
• The bowl has been damaged or is not in its proper position.

Spare parts
1.........Control Button, Left and Right ...................................................................................... AR005-178-TZ001
2.........Base .............................................................................................................................. AR005-022-TZ0xx
2.1......Fuse 5 A, slow, 120V..................................................................................................... AR005-418-00001
3.........Cover Plate.................................................................................................................... AR005-347-TZ001
4.........Cable with Rheostat and Microswitches........................................................................ AR005-193-TZ002
5.........Tilt Bearing, Left and Right............................................................................................ AR005-337-TZ001
6.........Lid.................................................................................................................................. AR005-024-TZ0xx
7.........Intermediate shaft.......................................................................................................... AR005-325-TZ001
8.........Upper Part ..................................................................................................................... AR005-023-TZ0xx
9.........Lock Pin......................................................................................................................... AR005-332-TZ001
10.......Planetary Head..............................................................................................................AR005-002-TS001
11 .......Control Board ................................................................................................................AR005-378-TS003
12.......Cable .............................................................................................................................AR005-193-TS004
13.......Motor ............................................................................................................................. AR005-339-TZ001
13.1....Poly-V Belt.....................................................................................................................AR005-090-TD001
13.2....Poly Belt ........................................................................................................................AR005-090-TD001
14.......Release Housing ...........................................................................................................AR005-372-TS001
15.......Weight Compensator..................................................................................................... AR005-352-TZ001
17.......Machine Feet................................................................................................................. AR005-213-TZ001
18.......Fixing of Bowl ................................................................................................................ AR005-340-TZ001
19.......Bowl Lock ......................................................................................................................AR005-336-TS010
20.......Power Cable..................................................................................................................AR005-194-TD006
# Please state the color when ordering
20
#
#
#
5
6
7
8
16
1313.113.2
10 10.1
19
9
5
14
15
18
22.12.2
3
11
1
17
44.1
12

Varimixer USA
2215 East River Road
Moraine, Ohio 45439
P: (800) 222-1138
varimixerusa.com
Table of contents
Other Varimixer Commercial Food Equipment manuals
Popular Commercial Food Equipment manuals by other brands

Lucky Lifestyle
Lucky Lifestyle LHC01 instructions

Buffalo
Buffalo CK916 instruction manual

Belshaw Brothers
Belshaw Brothers F-YRD F0050000 Operator's manual

saro
saro LORENA instruction manual

Hussmann
Hussmann ECOSHINE ULTRA LED INSTALLATION & SPECIFICATIONS

TAM
TAM SB 40 C B Instructions for installation and use