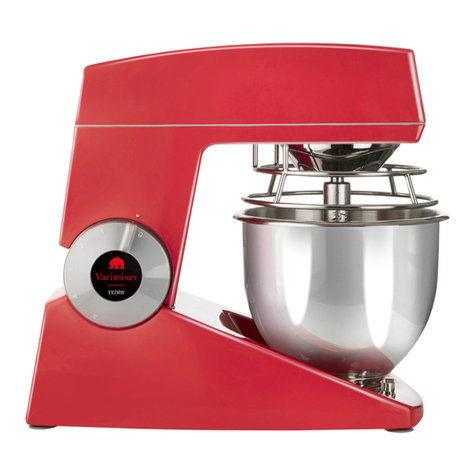
Varimixer ERGO60 User manual

2023 05 25
Varimixer A/S
Elementfabrikken 9
DK-2605 Brøndby
Denmark
P: +45 4344 2288
E: info@varimixer.com
www.varimixer.com
ERGO
ERGO60, ERGO100,
ERGO140, AR200
VL-5
EN
Operating Instructions
DR N: 21060 -1802
Original user manual

2
General...........................................................................................................................................................................2
Unpacking.......................................................................................................................................................................2
Safety .............................................................................................................................................................................3
Installation of the mixer...................................................................................................................................................3
Construction of the mixer................................................................................................................................................4
Operating the mixer........................................................................................................................................................5
Filling chute ....................................................................................................................................................................6
Cleaning .........................................................................................................................................................................6
The maximum capacity of the mixer...............................................................................................................................7
Recommended maximum speeds..................................................................................................................................7
Touch panel ....................................................................................................................................................................8
How to execute a recipe.................................................................................................................................................9
Menu overview .............................................................................................................................................................10
Error codes machine ....................................................................................................................................................15
Error codes Frequency inverter....................................................................................................................................16
Varimixer Recipe Manager (VRM)................................................................................................................................18
Adjustment of bowl centering .......................................................................................................................................20
Replacement of lift actuator..........................................................................................................................................20
Replacement of lift actuator contacts ...........................................................................................................................20
Replacement of drive belt.............................................................................................................................................22
List of mechanical errors and solutions ........................................................................................................................22
Lubrication overview.....................................................................................................................................................23
Cleaning guide..............................................................................................................................................................24
Contents of the Declaration of conformity for machinery..............................................................................................26
This manual should be seen as an integral part of the machine and should be kept by the
machine throughout its working life.
Before the machine is commissioned, it is important to read these instructions thoroughly,
particularly the section on user safety.
The manufacturer may update the product manual without updating this copy of the manual.
The manufacturer will not be liable for faults caused by:
• Careless, improper or incorrect use of the machine
• Non-standard use (not for the purposes described in the manual)
• Incorrect installation
• Incorrect power supply to the machine
• Failure to comply with maintenance instructions
• Modications to the machine
• Spare parts and accessories that are not original or specied for this model.
• Failure to comply with instructions in this manual
In case of faults with the machine, please contact the supplier.
The guarantee does not cover damage caused by misuse, overloading or the user’s failure
to comply with the maintenance instructions.
The machine should be unpacked and the packaging disposed of according to regulations
applicable in the country concerned.
Before the machine is removed from the pallet, check that all parts are present with the ma-
chine:
• Safety guard, Filling chute, Bowl.
• Rubber feet and Spacers for height adjustment.
• Bowl trolley, whip, beater, hook, scraper with blade and attachment drive, if these were
selected with the order.
The machine is mounted onto the pallet with four bolts. To release the machine from the pallet,
unscrew the 4 nuts with the supplied tool and hammer out the bolts.

3
Warning for users with im-
plants (e.g. pacemakers,
Mixer and safety guard are
equipped with strong mag-
nets.
The mixer may only be used, cleaned and maintained by
trained personnel over 14 years of age. Always observe
local laws and regulations, paying particular attention to
the operator’s age, and physical and mental condition.
The constant noise level of the workplace of the operator
is lower then 70 dB (A).
The mixer is designed for commercial use in kitchens,
catering outlets and bakeries.
The mixer must not be used in an explosive atmosphere.
The mixer may only be used as specied in this manual.
The mixer is designed for manufacture of pro-
ducts which do not during processing cause
reactions or emit substances which may be
detrimental to the user.
Putting your ngers in the bowl while the mix-
er is running may cause injuries.
The electrical connection must only be carried
out by a certied electrician.
Lifting equipment should always be used to
move the mixer.
When the mixer is moved, it should be in an
upright position at all times.
Powdery ingredients:
Do not pour powdery ingredients into the
bowl from a great height.
Bags of e.g. our should be opened at the
bottom, down into the bowl.
Do not increase to maximum speed too quickly.
Install the machine to insure there is enough workspace
for normal use and maintenance.
The work oor where the machine is installed must be
rm, even and level.
The mixer must be mounted with rubber feet, to eliminate
both shaking and rusting. If the floor is not completely
even, spacers can be inserted under the mixer’s feet to
ensure the machine is level.
The machine is placed directly on the oor.
THE MACHINE MUST BE BOLTED TO THE FLOOR
Load per leg not to exceed
ERGO60 2500 N
ERGO100 3200 N
ERGO140 4000 N
AR200 4500 N
The ambient temperature around the machine must not
exceed 45
º
C.
Connection to power
Before the mixer is connected to power, check that the
voltage printed on the machine label are correct in rela-
tion to the installation site. The machine label is located
on the top right side of the mixer.
The mixer is supplied with a 3 m long power cable.
Commissioning
The machine, bowl, tools safety guard and lling chute
must be cleaned before use – see section on Cleaning,
page 6.
Net weight of the machine
ERGO60 330 kg
ERGO100 450 kg
ERGO140 500 kg
AR200 510 kg
Area on safety guard with magnets.
Area on machine with
magnets

4
Power switch
Safe disconnection of the machine during cleaning,
maintenance and when not in use.
USB service port
For fast and secure software upgrades, recipe down-
loads, workload data history.
VL-5 Touch panel
See page 8 for explanation of the touch panel.
Emergency stop
Push both left / right side buttons at the same time.
The safety guard must be closed for the tool to rotate.
Bowl can be raised with the guard open, but tools rotate
(jog) only when the guard is closed and with the two-
handed operation function.
Bowl lift and “JOG” function
The mixer is provided with a “JOG” function.
Before the bowl reaches its top position, the tool starts
rotating to dig its way into the ingredients.
The bowl lift requires two-hands operation for safety
reasons.
Bowl detection with non-contact sensor
The non-contact sensor for the bowl detection is
located on the back of the bowl arms.
Dismantling the safety guard
The safety guard is dismantled by open-
ing and then lifting the safety guard out
of the hinges. The safety guard can then
be machine washed.

5
Before starting the mixer:
Mount the required tool in the bayonet shaft. Place the bowl in the bowl arms and close the safety guard.
To lift the bowl, simultaneously activate the two lifting buttons, located on each side of the upper part of the machine,
until the bowl has reached its upper position.
Incorrect placement and attempted lift trigger the display to show EE03. Correct the bowl placement when EE03 is
displayed
“JOG” function: When the bowl is approx. 20 cm from the top position, the tool starts to rotate at low speed. The rotation
of the tool and lifting of the bowl stops the bowl at its top position.
Start mixer:
Press to start the mixer. Press to increase speed. Press to reduce speed.
Lowest speed
30% speed
60% speed
Maximum speed
Reading of operating time:
When the machine is started, the clock counts up.
After 5 seconds the digits are magnied.
When the display is activated, the enlarged digits disappear.
Indication of operating time:
When the time is set and the machine is started, the time counts down.
After 5 seconds the digits are magnied.
Operating time can be set up or down by pressing or .
The desired operation can be preset by pressing the minute digit or second digit.
The desired operating time is entered on the keyboard that appears.
The bowl can be lowered automatically after the timer expires.
The bowl button is pressed twice for activation (press twice again for deactivation).
When the function is activated, the bowl button ashes.
Inspection of the ingredients during operation:
If the machine has to stopped without changing the operating time, press . The machine slows down and then stops,
while the operating time stops. The safety guard can be opened/closed and the bowl lowered/raised without the time being
set to 0. If desired set the time to 0 by pressing the stop button twice.
Bowl lowering:
When the ingredients in the bowl have been mixed, the machine stops when is pressed. The bowl is lowered by
pressing on . When the bowl has reached its bottom position, the safety guard can be opened.
Display_ERGO_Rentegning_ai.indd 1 27/09/2021 09.02Display_ERGO_Rentegning_ai.indd 1 27/09/2021 08.46
F2F1

6
When the bowl is placed in the mixer, the bowl arms must
be lowered to the lowest position, the bowl is pushed all
the way back into the arms, and if correctly positioned, a
short beep will sound.
NOTE. Bowl for ERGO60 and ERGO100 must be rotated
correctly.
If there is no signal for correct positioning, the bowl
cannot be lifted and . EE03 appears in the display.
Overload:
The mixer must not be overloaded. Tough and heavy
doughs can overload the mixer. The overload is further
increased if the speed of the stirring tool is increased
above the recommended speed or the wrong stirring
tool is used. Larger lumps of fat or chilled ingredients
must be crushed before they are placed in the bowl.
Prolonged overload will interrupt the machine.
An error code appears in the display.
Procedure in case of overload:
• Press emergency stop
• Open the safety guard
• Reduce the content in the bowl
• Close the safety guard and release the emergency stop
If the emergency stop has been activated while
working with a full bowl, it may be necessary to lower
the bowl to empty it:
• Release the emergency stop to connect the power to
the machine.
• The bowl is lowered and emptied
• The mixer can now be operated normally again
Instructions for stopping the machine:
If the mixer is stopped by opening the safety guard,
pressing twice cancels the error message.
The mixer should only be stopped by pressing
the emergency stop when an emergency
situation has occurred.
When ingredients are to be added while the
machine is working, use the supplied lling
chute made of stainless steel.
Cleaning may only be performed by trained
personnel and must be over 14 years of age.
Before any cleaning, turn o the machine’s
power switch on the back of the machine.
To assist in the preparation of customer-
specic cleaning plans, Varimixer A/S has,
based on current legislation, prepared detailed
cleaning instructions, included at the end of
this manual and the latest version can be
found at varimixer.com

7
60 100 140 200
L 3 5 7 10
L 12 25 35 50
L 24 45 63 90
Kg 16 26 37 -
L 24 40 56 -
Kg 32 54 76 107
Kg 30 55 77 110
Kg 24 40 56 80
Kg 18 35 49 70
Kg 36 60 84 120
Kg 24 45 63
Kg 34 50 70
Kg 35 58 81
Kg 40 65 91
Kg 36 65 85
Kg 42 80 112
Kg 36 65 85
Kg 28 47 66
Korrekte Benutzung der Werkzeuge:
Für die Herstellung von Kartoelpüree den
speziellen Rührbesen oder einen Besen mit
dickeren Drähten benutzen. Alternativ kann
der Rührer und dann ein Standardbesen be-
nutzt werden.
Besen dürfen nicht gegen harte Gegenstände,
wie z. B. den Kesselrand, geschlagen werden.
Dies verkürzt wegen zunehmender Verfor-
mung die Lebensdauer des Werkzeugs.
53
47
47
155
137
137
224
183
183
286
257
257
Mixer
60
100
140/200
omdr/min
53
47
47
155
137
137
224
183
183
286
257
257
Mixer
60
100
140/200
omdr/min
Capacities per mix Tool
Egg whites
Whip
Whipped cream
Buttercream frosting
Layer Cake Sponges
Mayonnaise
Mashed potatoes
Beater
Cakes (US Pound cake)
Icing, Fondant
Herb butter
Meatball mix/- vegan mix
Pasta, noodles (50%AR )
Hook
Dough, wheat 50%AR
Dough, wheat 55%AR
Dough, wheat 60%AR
Dough, whole wheat 70%AR
Dough, rye bread
Dough, sourdough bread
Dough, gluten free
= Apply scraper, for the best and most ecient result
= Always make sure the ingredients are at room temperature/soft. If not, this can damage the tools
= Low speed operation recommended
= Medium speed operation recommended
Local variations in the characteristics of the ingredients can inuence water absorption, volume and baking characteristics, etc.
Correct use of tools
When making mashed potatoes, the special
wing whip or the whip with thicker wires
should be used, alternatively use the beater
and the whip.
Whips should not be struck against hard
surfaces e.g. the edge of the bowl. This
will reduce the tool’s lifespan due to risk of
deformity.
(Liquid in % of solids)
Calculation AR
1 kg of solids and 0.6 kg of liquid:
AR = 0.6 x 100 = 60%
1
Calculation Solids and Liquid
91 kg Dough, 60% AR
(table, maximum capacity for mixer
ERGO140)
Solid = Max. capacitet x 100
AR + 100
=91 kg x 100 = 57 kg
60 + 100
Liquid = 91 kg - 57 kg = 34 kg
RPM

8
Display_ERGO_Rentegning_ai.indd 1 27/09/2021 08.46
Display_ERGO_Rentegning_ai.indd 1 27/09/2021 09.02Display_ERGO_Rentegning_ai.indd 1 27/09/2021 08.46
F2F1
Display_ERGO_Rentegning_ai.indd 1 27/09/2021 08.46
137 O/min
Bowl up
Push both left / right side
buttons at the same time
Bowl up
Push both left / right side
buttons at the same time
Stop
Double tap for
reset time
Bowl down
Double tap for
automatic bowl
lowering
Decrease speed Increase speed
Speed indicator
Value is shown while the RPM changes
Start
Shortcut to xed speed settings
Press minute and second digits to preset
time. Time is displayed in a large frame after
5 seconds of operating Buttons for selecting favourite recipe.
Only visible when selecting a favourite recipe
Decrease time Increase time Menu

9
START OF RECIPE
Press .
Press Recipe.
Press for the desired pre-programmed recipe.
Press to execute the recipe.
Press to stop recipe.
• When restarting the selected recipe, execution starts at the
recipe line where it was stopped
• If the safety guard is opened during the execution of a
recipe, the machine stops and the screen informs, EE02 is
displayed on the screen. Close safety guard
• Error message is reset by double pressing
EDIT RECIPE
• If the PIN code is activated, press and access is opened
with PIN code 2345
• Press
• Press
• Press the button for the desired recipe number.
• Tap the title bar to enter the name of the recipe.
Two lines are possible
• Press to pause the recipe process. Text for the pause can
be entered in the pause eld
• Press digit for RPM to enter desired RPM for each recipe
line
• Press the digits for minutes and seconds to enter the de-
sired time for each recipe line
• Tap the text line next to each recipe line to enter the desired
text
• is inserted in the last recipe line for automatic bowl lower-
ing after the recipe is nished
START OF RECIPE WHEN A FAVOURITE BUTTON
IS PROGRAMMED
Press or for the desired favourite program.
The selected recipe appears on the screen.
The recipe can now be started by pressing .

10
5.0
Settings
· Language
· Clock
· Default settings
5.1
Default settings
· PIN code
· Frequency inverter
settings
PIN-kode 2345PIN-kode 2345
Factory settings (PIN code)
5.1.1
PIN code
Enable/Disable
5.1.2
Frequency inverter
settings
4.0
Operating log
· Recipe log
· Machine log
· Download operating
data to USB
4.1
Recipe log
4.2
Machine log
3.0
Recipe
· Recipe
· USB up/download
3.1
Recipe overview
3.2
USB
Up/download recipe
6.0
Operating
Instructions
7.0
Alarms
· Errors Machine
· Errors Frequency
Inverter (FI).
2.0
Menu
1.0
Operating screen

11
1.0 OPERATING SCREEN
•Start and stop press /
On restart, the timer continues
•Double press to reset timer
•Press to lower bowl
•Double tap for automatic bowl lowering
• Press for menu overview
• Press (Favourite button) to select a recipe
(favourite must be activated)
3.1 RECIPE
• Press to start the selected recipe
• Press for stop the selected recipe
• Press to lower bowl
• Press to return to the recipe menu
• Press for access to recipe programming
PIN code 2345
• Press the value or text you want to change or enter or press
to delete a recipe
• Press to save changes
• Press empty button to enter a new recipe
• Press to return to overview
• See page 18 instructions in the Varimixer Recipe Manager for
detailed instructions to modify the recipe on the computer
2.0 MENU
• Press for desired action
- Recipe
- Operating log
- Settings
- Operating Instructions
- Alarms
• Press to return to the operating screen
3.0 RECIPE OVERVIEW
• Press desired recipe for operation
• Press empty button to enter recipe
• Select the favourite button followed by the desired recipe,
for favourite button programming
• Press to return to the menu

12
4.0 OPERATING LOG
• Press the Machine Log button to display the machine’s log
operating log
• Press Recipe Log to display the machine’s recipe log
• Operating data is downloaded to a USB ash drive by
inserting the key into the back of the machine and then
pressing the download button
• Green USB button indicates that the USB ash drive is
inserted
• The icon is displayed for started and completed downloads
3.2 USB DOWNLOAD/SAVE RECIPE
• Insert an empty USB ash drive (FAT32) into the USB port on
the back of the machine to download or save recipes
• Press [Recipe -> USB] to copy recipes from the mixer
to USB ash drive
• Press [USB -> Recipe] to copy recipes from USB ash drive
to mixer
4.1 RECIPE LOG
Next to each recipe number is read:
• Number of started recipes in the period Mon-Sun
• Total number of recipe starts in machine time
• Max load for prescription no. measured in A[%].
Maximum readout is 180%

13
4.2 MACHINE LOG
Horizontal -
• Read operating data in the selected time interval
- Log data is read in intervals:
- 0:00-23:59 shows data for the current day
- Mon-Sun shows data for the current week
- Month shows data for the current month
- Total shows data from the machine’s first start
Vertical -
• Number of starts shows the number of times the machine has
been started
• Operating time shows the number of hours the machine has
been operating
• Number of alarms shows the number of cases an alarm has
been activated
• Number of maximum engine loads shows the number of
cases where the load of the motor has been loaded to max or
overloaded
• Number of maximum temperature frequency inverter, is the
number of cases where the temperature of the frequency
inverter has been too high
• Max motor current shows the maximum load on
the frequency inverter in %. Max value is 180%
• Max engine temperature shows the maximum temperature
the engine has achieved measured in °C 5.1 DEFAULT SETTINGS
• Press PIN code for off/on PIN code protection when changing
recipes
- for changing the PIN code, the code is: 2345
• Access to Basic Settings requires the factory PIN code.
In Basic settings, set up e.g. frequency inverter parameters and
screen settings.
• Setting the time and date. Press time/date to open panel for
changing time and date.
5.0 LANGUAGE
• Press the desired ag for language selection
• Press Default settings to access PIN code, setup, and mixer
basic settings.

14
7.0 Alarms
• Error codes Machine:
- Operating errors that have prevented starting the machine are
registered in the table with code description and time.
• Error codes Frequency inverter:
- Error codes reported by the frequency inverter are noted in
the table with code description and time.
• Descriptions of error codes based on the code no. found
elsewhere in the guide.
6.0 OPERATING INSTRUCTIONS AND
SPARE PARTS MANUAL
• QR code, link for access to the desired manual.
Alternatively, the manual is available at varimixer.com

15
Error description Action
EE01 Start is pressed without the bowl being raised to working
height
Raise the bowl to working height
EE02 Start is pressed without the safety guard tted Mount and close the safety guards.
Double press to reset alarm
EE03 Bowl not detected Check if the bowl is positioned correctly - (It is possible to
lower the bowl even if the error code is displayed).
If/when the bowl is positioned correctly, it is pushed all the way
back into the bowl arms, the sensor is thereby activated and
the bowl can be lifted.
If the contact between sensor and bowl is broken again, the
error code is displayed.
During the rst 5 seconds when the error code is displayed, it
is possible to continue lifting the bowl, after which the lifting
movement stops. The bowl is pushed all the way back into
the bowl arms so that the contact between bowl and sensor is
re-established. The error code disappears and the bowl can be
lifted again.
EE04 Motor thermal sensor Read Error codes for FI for detailed error description.
Wait with further operation until the engine temperature has
dropped to a level where the machine can be restarted.
Check main engine external ventilation is working properly.
Reduce the load and/or the machine’s ambient temperature.
EE05 Overload switch for lift motor Check whether the lifting actuator has moved past switch and
hits the xed end stop.
Detach lift actuator from bowl arms. Check friction between
bowl arms and shaft is OK.
Check lifting actuator without it tted to bowl arms.
EE06 The control panel has lost connection to the frequency inverter Call a technician.
The cause may be a fault in the wiring, control panel or fre-
quency inverter.
EE07 Fault in the internal speed drive Call a technician.
Read Error codes for FI for detailed error description.
EE08 Thermal sensor in internal speed drive Read Error codes for FI for detailed error description.
The fault disappears when the temperature has dropped.
Reduce load, and/or machine’s ambient temperature.
EE09 Too low voltage Voltage must be checked by a technician.
Read Error codes for FI for detailed error description.
EE10 High supply voltage is periodically detected Read Error codes for FI for detailed error description.
Call a technician.
Check power supply
EE15 2-hand sync error See operating instructions for guidance.
Call a technician.
Error on the buttons for bowl lift
OL01 Continuous overload Read Error codes for FI for detailed error description.
Procedure in case of overload
• Press emergency stop
• Open the security screen
• Reduce the content in the bowl
• Close the safety guard and release the emergency stop.
After a short time, the display switches back to normal mode
and the machine can be started again.
OL02 Periodic overload
OL03 Blocked
Less than 100 rpm and full torque
ELECTRICAL DOCUMENTATION
Contact the dealer if electrical documentation is required.

16
For detailed information see also manufacture manual NORDAC FLEX ”bu 0200 - en”
HMI code Error description Cause Action
E0010 Inverter overtemperature FI heatsink is too hot Check cooling fan/Reduce
mixer load
E 0 011 Internal FI overtemperature FI is internally too hot
E0020 Overtemperature motor thermistor Motor is too hot
E0021 Motor overtemperature I²t
E0022 Overtemperature of external brake
resistor
E0030 I2t overcurrent limit FI current higher than permitted Reduce the mixer load
E0031 Chopper overtemperature I2t Current level measured in brake resistors too high Call a technician
E0032 IGBT overcurrent - 125% monitoring FI current higher than permitted Reduce the mixer load
E0033 IGBT overcurrent fast - 150%
monitoring
FI current higher than permitted
E0040 Overcurrent module FI measures the current level internally
Call a technician
E0041 Overcurrent measurement
E0050 Overvoltage UZW Braking resistor may be faulty
E0051 Mains overvoltage Supply voltage is too high
E0060 Charging error Supply voltage is too high
E0061 Mains undervoltage
E0070 Mains phase error A phase in supply is faulty
E0080 Parameter loss - maximum EEPROM
value exceeded
FI has lost the parameters
E0081 Inverter type incorrect Error in EEPROM
E0083 EEPROM KSE error
E0084 Internal EEPROM error
E0087 EEPR copy not the same
E0100 Bus Timeout BUS communication error
E0102 Bus Timeout Option
E0104 Init error Option
E0101 System error option - See manual
E0103 System error option - See manual
E0105 System error option - See manual I/O error
E0106 System error option - See manual
E0107 System error option - See manual
E0109 Module missing / P120 Error in parameter
E0110 Error in analog-digital converter EMC error
E0120 External watchdog Monitoring has detected an error
E0121 EDrive switch-off limit FI overloaded Reduce the mixer load
E0122 Generator switch-off limit
E0123 Torque limit The torque/current limit has been exceeded Call a technician
E0124 Current limit
E0125 Load monitor FI overloaded Reduce the mixer load
E0128 Analogue In minimum Signal error Call a technician
E0129 Analogue In maximum
E0130 Encoder error
E0131 Speed slip error Motor cannot achieve the expected speed
E0132 Shut-down monitoring
E0160 Motor phase error The motor is missing a phase
E0161 Magnetisation current monitoring Error in supply voltage
E0180 Error in Safe Pulse Block Pulse error
E0190 Parameter identication Motor control
E0191 Star/Delta circuit incorrect

17
This page intentionally left blank

18
VRM is a tool that makes it possible to write new or edit exist-
ing recipes on a computer.
The nished recipe is saved on a USB Flash drive, which is then
connected to the machine for transfer using the control panel
on the mixer.
VRM program is downloaded from varimixer.com.
1. Transfer from mixer to USB Flash drive
When a new recipe for the mixer is written or an existing recipe
needs to be adapted, start by transferring the recipe le from
the mixer to a USB Flash drive.
1.1 Connect the USB Flash drive to the post located on the
back of the machine.
1.2 Select on the machine’s control panel:
1.2.1 Menu
1.2.2 Recipe
1.2.3 USB (PIN code 2345)
USB button on control panel lights up green)
1.2.4 Recipe -> USB
see also 3.2.
PIN code protection can be selected or unselected, see menu 5.1.
2. Work with recipe le in Varimixer Recipe Manager (VRM)
2.1 Open recipe le from USB Flash drive in VRM
2.1.1 Open the Varimixer Recipe Manager in Excel, see 3
enable macros
2.1.2 Press Import le to transfer recipe le from USB Flash
drive to VRM. File name is 00003_Recipelist
2.1.3 Mark mixer size in the checkbox.
60 or 100/140
2.1.4 To correct the transferred recipe le, press Edit recipe.
User interface for changing recipe steps opens.
2.1.5 After the recipe change is completed, the recipe is
transferred to the USB Flash drive by pressing Export
le
2.2 Editing the transferred recipe le.
2.2.1 Editing a recipe line is started by double-
click on the recipe line, alternatively highlight the line
and press Edit.
2.2.2 Other editing functions can be read in Figure 1
2.2.3 After nishing editing, press the Save button and then
Close
2.2.4 The edited recipe le is now ready for transfer to the
USB Flash drive
2.3 Transferring recipe from USB Flash drive to mixer
2.3.1 After nished editing recipe le, transfer the le to
USB Flash drive, and then to the machine
2.3.2 Insert the USB Flash drive into the PC’s USB port
2.3.3 Press Export le in VRM. Accept overwriting of the
the existing le. The edited recipe le is now saved on
USB Flash drive
2.3.4 Insert USB Flash drive into the port located at the
back of the mixer.
2.3.5 Select on the mixer’s control panel:
2.3.5.1 Menu
2.3.5.2 Recipe
2.3.5.3 USB (PIN code 2345)
USB button on control panel lights up green)
2.3.5.5 Press recipe -> USB for transfer
2.3.5.6 Receipt shows that the recipe le has been
transferred
The new recipes can now be checked in the recipe overview on
the machine. See Menu overview 3.0 in operating instructions.
3. Enable Excel to work with macros
Excel must be set to work with macros to enable the Varimixer
Recipe Manager.
1. File
2. Options
3. Trust centre
4. Trust centre settings
5. Macro settings
6. Enable trust VBA projects
4. Handle more than one recipe le
The Varimixer Project Manager can handle one recipe le.
This le is always named 00003_Recipelist.
If more recipe les are needed, different recipe les with the
same name (00003_Recipelist) are saved in different folders,
where the different folders have different names.

19
A B C D E GF H I
A
Recipe No.
24 individual recipe programs can be selected
B
Step No.
Each recipe can contain up to 9 recipe lines
C
Active
Active describes whether the current recipe line is included
in the recipe with a green tick, or is de-selected with a red
cross
D
Pause
By ticking the Pause eld, a pause is activated after the
recipe line is executed. Explanatory text can be written in
the Pause text eld
E
Auto bowl down
With a tick in Auto bowl down, the bowl is lowered auto-
matically after the recipe line has been executed
F
Tool speed
The speed of the tool is entered.
60l: 58-288 rpm. 100/140l: 47-257 rpm
G
Min/Sec
Run time for the specic recipe line is entered in minutes
and seconds
H
Recipe step text
Text is written for the step
I
Recipe pause text
Text is written for the pause
JRecipe headline
Recipe heading is written on 1 or 2 lines
KEnter data
Data for each recipe line is entered in the work eld
L
Num steps
Number of lines in the recipe is entered
MEntries are Edit/Save/Delete.
The Recipe Manager is closed by pressing Close
M
K
JL

20
First nd the present bowl centering:
1. Mount the beater and the bowl, then raise the bowl
arms up to normal working position.
2. Turn o the power to the machine at the switch on the
back of the machine.
3. Open safety guard, rotate the beater by hand and
measure the distance between the beater and the
bowl.
Adjustment:
4. To access the bowl arm guide plate (A), remove the
rear cover.
5. Loosen the screws (B) and move the bowl arm guide
plate in the required direction. Again turn the beater
and measure the distance between beater and bowl.
6. When the bowl has been centred, fasten the bowl arm
guide plate in the new position and screw on the rear
cover.
Bowl arms not loaded are moved to the upper position.
Bowl arms are moved down to a suitable relief support
established approx. midway.
ATTENTION HIGH WEIGHT! The bowl arms
must be safely unloaded before the lifting
actuator is dismantled.
• Turn o the power to the machine at the switch on the
back of the machine
• Dismantle the three connectors for the switches on the
lift actuator
• Dismantle the cable for lifting actuator
• The lifting actuator is dismantled from the bowl arms by
removing the pin bolts
• Lift the actuator out of the machine
• Install the new actuator, if the lower actuator bracket
is replaced, use Loctite 638 to lock the bracket
• Power on the machine
• Then follow the section “Fine adjustment actuator
switches”
There are 3 switches on the lift actuator which control
the position of the bowl. In case of a defective switch,
mark the position of the switch and replace with a new
one in the same place, pay attention to connection and
wiring g. 3.
Follow the instructions below to ensure the correct
position of the switch.
Fine adjustment actuator switches
• Check that the location of the contacts corresponds to
the dimensions in g. 3
• Connect the contacts with the corresponding cables
• Adjustment of the three contacts must take place in
the following order:
1 Adjustment of upper contact (Top position of the
bowl)
• The switch must be positioned in accordance with the
target g. 5
• The bowl is moved upwards to a location that
matches with the target X, g. 5
• The upper switch is adjusted upwards until the LED
on the switch lights up
2Adjustment of lift switch
• See opposite page g. 4.
3 Adjusting the actuator switch for the JOG movement
• This switch B, g. 3, is decisive for when the
machine’s JOG movement starts, see also the section
“Bowl lift and JOG function”, page 4
• The switch must be positioned in accordance with g.
3and does not need further adjustment
4Adjustment of lower actuator switch
• This contact C, g. 3, determines the bottom position
of the bowl
• The switch must be positioned in accordance with the
measurement in g. 3
• The bowl is moved downwards to a position that
corresponds to the measure Y, g. 5
• The lower actuator switch is adjusted downwards until
the LED on the switch lights up
Other manuals for ERGO60
1
This manual suits for next models
4
Table of contents
Other Varimixer Commercial Food Equipment manuals
Popular Commercial Food Equipment manuals by other brands

Trixie
Trixie TR1000 operating instructions

Anets
Anets GoldenFRY FM-14 Installation, user operation & maintenance manual

Moffat
Moffat Versicarte-Pro OPERATING & SERVICE MANUAL

MEFE
MEFE CAT 340MT instruction manual

radiance
radiance TACM-24 Owner & operator instruction manual

Cornelius
Cornelius ABS 2.0 Operator's manual

Electrolux
Electrolux Smart installation instructions

Hatco
Hatco SWC Series Installation and operating manual

HL Display
HL Display Multivo Max Mounting instruction

Wessamat
Wessamat W20W-V5 Installation instruction

Fusion
Fusion GHPF456LB.6165 user manual

Rational
Rational SelfCooking Center Applications manual