manuals.online logo
Brands
  1. Home
  2. •
  3. Brands
  4. •
  5. Vax
  6. •
  7. Vacuum Cleaner
  8. •
  9. Vax Force2 User manual

Vax Force2 User manual

Vaxcare:
AUST: 1300 36 4040
NZ: 0800 800 900
• NSW/ACT
Unit 2, 30 Heathcote Road,
Moorebank, NSW 2170
Telephone: (02) 9602 6800
Facsimile: (02) 9602 6900
• VICTORIA/TASMANIA
Unit 3, 46 Burgess Road,
Bayswater North, VIC 3153
Telephone: (03) 9761 7160
Facsimile: (03) 9761 7175
• SOUTH AUSTRALIA/
NORTHERN TERRITORY
Unit 3, 75-77 Grange Road,
Welland, SA 5007
Telephone: (08) 8340 2222
Facsimile: (08) 8346 7933
• QUEENSLAND
186 Kerry Road,
Archerfield, QLD 4108
Telephone: (07) 3216 7350
Facsimile: (07) 3216 7375
• WESTERN AUSTRALIA
296 Victoria Road,
Malaga, WA 6090
Telephone: (08) 9247 8100
Facsimile: (08) 9247 8192
• VAX APPLIANCES
NEW ZEALAND
27 Clemow Drive
Mt Wellington, Auckland
Telephone: (09) 5736220
Facsimile: (09) 5736224
Email: [email protected]
AUST. & NZ BRANCHES
Please register your warranty. Send in your completed Warranty Card.
If you require further assistance or advice about any
VAX please call VAXCARE on
1300 36 4040 (Australia - cost of a local call)
and 0800 800 900 (NZ)
VAX Appliances (Australia) Pty Ltd
A.C.N. 009099736
296 Victoria Road Malaga Western Australia 6090.
EMAIL: [email protected]
WEBSITE: www.vax.com.au
VAXCARE
MODIFIED OCTOBER 2007 / P/N 23410
www.vax.com.au
Instruction Manual Please read carefully before using the cleaner.
Always fully extend the mains cable before use.
2000 WATT BAGLESS
2 7
1. Safety Instructions
For Household Use Only
When using the vacuum cleaner, basic safety
precautions should always be observed,
including the following:
1. Only use the vacuum cleaner indoors on
dry surfaces.
2. Turn off the vacuum cleaner controls
before connecting or disconnecting from
the mains supply.
3. Always unplug the vacuum cleaner before
connecting or disconnecting the vacuum
hose and accessories.
4. This appliance is not intended for use
by young or infirm persons unless they
have been adequately supervised by a
responsible person to ensure that they
can use the appliance safely.
Young children should be supervised
to ensure that they do not play with the
appliance.
5. Use only as described in this manual.
Useonlythemanufacturer’srecommended
attachments.
6. Do not use the vacuum cleaner if it has
been dropped, damaged, left outdoors
or dropped into water. Do not use the
vacuum cleaner with a damaged cord
or plug. If the supply cord or plug is
damaged, return the vacuum cleaner
to an Authorised Vax Service Agent for
examination, repair or adjustment.
7. Do not pull or carry by the cord. Do not
use the cord as a handle, close a door
on the cord or pull the cord around sharp
edges or corners. Do not run the vacuum
cleaner over the cord. Keep the cord
away from heated surfaces.
8. Do not handle the plug or vacuum cleaner
with wet hands. Do not use outdoors or
on wet surfaces.
9. Do not put any objects into openings. Do
not use with any openings blocked and
do not restrict air flow. Keep all openings
free of dust, lint, hair or anything that may
reduce airflow.
10. Keep hair, loose clothing, fingers and all
parts of the body away from openings
and moving parts.
11. Do not pick up hot coals, cigarette butts,
matches or any hot, smoking or burning
objects.
12. Do not pick up flammable or combustible
materials (lighter fluid, petrol, kerosene,
etc) or use in the presence of explosive
liquids or vapours.
13. Do not vacuum up harmful or toxic
material (chlorine bleach, ammonia, drain
cleaner, etc).
14. Do not vacuum up hard or sharp objects
such as glass, nails, screws, coins, etc.
15. Do not use without the filters in place.
16. Take extra care when vacuuming stairs.
17. Keep vacuuming area well lit.
18. Store the vacuum cleaner indoors in a
cool, dry area.
19. Turn off the on/off switch before
unplugging the vacuum cleaner.
WARNING: Always switch off and unplug
the vacuum cleaner from the electrical outlet
before assembling, opening or emptying
the dirt container, or before connecting/
disconnecting the attachments.
CAUTION: The vacuum cleaner is a very
powerful unit. Before plugging the cord into
the electrical outlet, make sure the switch is in
the ‘off’ position.
IMPORTANT: If the inlet, hose or telescopic
tube is blocked, switch off the vacuum
cleaner and remove the blockage(s) before
re-starting.
IMPORTANT: Cleaning filters improves
vacuum performance. Make sure all washable
filters are completely dry before inserting back
into the vacuum cleaner.
This vacuum cleaner is intended for household
use only and not for commercial or industrial
use.
Motor Thermostat
IMPORTANT: The motor is equipped with a
thermal cut-out. If for any reason, the vacuum
cleaner should over-heat, the thermostat will
automatically turn the unit off. Should this
occur, unplug the vacuum cleaner from the
electrical outlet and turn off the switch.
Remove the dirt container and empty. Clean
or replace the filters. Allow the cleaner to
cool for approximately one (1) hour before re-
starting.
9. VAXCARE Service & Help:
AUSTRALIA 1300 36 4040
NEW ZEALAND 0800 800 900
If you have any queries or concerns about
using your Vax, call VAXCARE. Please make a
note of the serial number and model number
of the appliance before calling.
(Aust only: Mon-Fri. 10.00am to 6.00pm. EST)
Calls are charged at the local rate.
An answerphone is available outside of
these hours. We will return your call the next
working day.
There are over 300 approved Vax Service Agents
in Australia and New Zealand. For the nearest
Service Agent, please refer to your Vax warranty
or call VAXCARE or visit www.vax.com.au
Technical Specification
Voltage: 220-240V~50Hz
Wattage: 2000W
Capacity: 2 litres
Filters: Dirt Container - Washable
Pre-motor - Washable
Post-motor - Washable
Cord length: 6.0m
Weight: 6.7kg
Part No.: 23000
Subject to technical change without notice.
10. Troubleshooting
WARNING: To reduce the risk of personal
injury, unplug the vacuum cleaner before
performing maintenance or troubleshooting
checks.
PROBLEM: Vacuum cleaner won’t run
Cause: Not properly plugged into electrical
outlet.
Solution: Plug in securely.
Cause: No electricity in the electrical outlet.
Solution: Check fuse or breaker.
Cause: On/off switch not turned on.
Solution: Push on/off switch to ‘on’.
Cause: Motor thermostat has tripped.
Solution: Switch off and unplug the vacuum
cleaner. Leave for one (1) hour before switching
the vacuum cleaner back on.
Cause: Blown fuse/tripped breaker.
Solution: Reset circuit breaker or replace fuse.
PROBLEM: Cleaner won’t pick up/
loss of suction
Cause: Dirt container not installed properly.
Solution: Review dirt container replacement.
Cause: Dirt container full or blocked.
Solution: Empty dirt container.
Cause: Clogged filters.
Solution: Remove, clean and replace filters.
PROBLEM: Accessories won’t pick up
Cause: Accessories are not attached correctly.
Solution: Refer to section 5.
Cause: Hose is not installed correctly.
Solution: Refer to section 3.
PROBLEM: Dust escaping from the
vacuum cleaner
Cause: Dirt container full.
Solution: Empty dirt container.
Cause: Dirt container not installed correctly.
Solution: Review dirt container replacement.
Cause: Hose is not installed correctly.
Solution: Review installation.
Cause: Filter not installed completely.
Solution: Remove, clean and replace filters.
36
2. Parts Overview
The central filters, may then be wiped with a
damp cloth to remove dirt residue. Allow to
air dry completely before replacing back in
the dirt container lid and using the vacuum
cleaner.
Cleaning the Pre-motor Filter
Remove the dirt container as previously
directed.
Remove the filters as shown (Fig.7/3).
To remove the central filters, rotate the filters
anticlockwise and pull away from the dirt
container lid (Fig.7/2).
Cleaning the Post Motor Filter
NOTE: This is located at the rear of the
vacuum cleaner.
Release the post-motor cover by pressing in
the catch at the top of the cover (Fig.7/5).
The HEPA pre-motor filter, foam filter and
frame may be rinsed in luke warm water max
(40°C). Allow to thoroughly air dry before
replacing (Fig.7/4).
Return the pre-motor and foam filter to the
unit before replacing the dirt container.
The post-motor filter can be removed from
the unit and may be rinsed in luke warm water
max (40°C). Allow to thoroughly air dry before
replacing (Fig.7/6).
Replace the post-motor filter back in the case
and return to the vacuum cleaner.
Replacement Filters
Replacement filters are available from your
Vax stockist or Vax direct. Phone VAXCARE
or visit www.vax.com.au
8. Storage
IMPORTANT: Always unplug the vacuum
cleaner from the electrical outlet and rewind
the power cord as directed before storing.
NOTE: Always store the vacuum cleaner
base down.
3. How to Assemble
IMPORTANT: Always unplug the vacuum
cleaner from the electrical outlet before
assembling or removing the accessories.
1. Insert the flexible hose into the inlet on the
main body of the vacuum cleaner. Push in
until it clicks into position (Fig.3/1).
4 5
5. Accessories
The accessories can be attached directly to
the handle by removing the telescopic tube
and pushing in the desired accessory.
The accessories can also be attached to
the telescopic tube for extra reach. Remove
the combination floor head and push on the
desired accessory.
Dusting brush: for delicate surfaces.
Upholstery tool: for carpets, upholstery,
stairs, etc.
Crevice Tool: for crevices, corners, sills
and cracks, etc.
6. Dirt Container:
Removal and Replacement
WARNING: Always unplug the vacuum
cleaner from the electrical outlet before
removing the dirt container.
WARNING: Do NOT use the vacuum cleaner
without ALL of the filters and dirt container in
place.
NOTE: For best performance, replace filters
annually.
Emptying the Dirt Container
NOTE: The dirt container must be emptied
every time the dirt reaches the max line.
After removing the flexible hose, press the
dirt container locking button on the top of the
machine (Fig.6/1)
3. The telescopic extension tube can be
lengthened or shortened by pushing the
button in and sliding the tube apart or
together as required (Fig.3/3).
2. Push the telescopic extension tube on to
the end of the handle (Fig.3/2).
4. Fit the combination floor head by pushing
onto the extension tube (Fig.3/4).
4. How to Operate
Cord Release
Fully unwind the power cord. A yellow
mark on the power cord indicates the
recommended cord length. Do not extend
the cord length beyond this mark.
On/Off Button
Insert the power plug into the electrical outlet.
Ensure the vacuum cleaner is switched off.
Press the on/off button located on the top of
the vacuum cleaner to start. Press the button
again to turn the vacuum cleaner off.
Carpet Cleaning
For carpet and rug cleaning press the rocker
switch on the combination floor head to raise
the brushes.
Hard floor cleaning
For hard floor cleaning, press the rocker
switch on the combination floor head to lower
the brushes.
Cord Rewind
To rewind the power cord, press the cord
rewind button and guide the power cord
with one hand. Rewind 1-11/2metres
of cord at a time. This will prevent the
cord from whipping which could cause
damage or injury.
Carry Handle
Use the carry handle located on the top of the
machine to move the vacuum cleaner from
room to room.
Hose Storage
For convenience there is a slot located on the
rear of the vacuum cleaner where the floor
tool and hose can be parked for carrying and
storage.
Power Indicator
Located on the top of the machine, a green
light will indicate that the machine is working
correctly.
Blocked Central Filter Indicator
Located behind the carry handle on the unit,
the indicator light will illuminate red when the
filter or dirt container has become blocked.
Empty the dirt container and check the
filters.
Remove the dirt container and position over
a rubbish bin.
Press the button located under the safety
latch to empty the dirt container (Fig.6/2)
When empty, the dirt container may be wiped
with a damp cloth to clean. Allow to air dry
completely before closing the dirt container
bottom and replace back in the unit until a
click is heard.
7. Cleaning the Pre- and Post-
motor filters
NOTE: The pre-motor filter should be cleaned
frequently and the post-motor filter should be
cleaned every 3 - 6 months. Vax recommends
frequently cleaning the filters to optimise the
performance of the vacuum cleaner.
NOTE: Do not use any detergents or boiling
water to wash the filters.
Cleaning the Central Dirt container
Filters
Remove the dirt container as previously
directed.
Lift the release catch as shown to access the
central filters, and pull the dirt container lid
away from the dirt container (Fig.7/1).

Other Vax Vacuum Cleaner manuals

Vax Washvax V-020 Series Installation instructions

Vax

Vax Washvax V-020 Series Installation instructions

Vax Mach Air SERIES User manual

Vax

Vax Mach Air SERIES User manual

Vax MACH7 VZL-6017 SERIES User manual

Vax

Vax MACH7 VZL-6017 SERIES User manual

Vax VMUB1900 User manual

Vax

Vax VMUB1900 User manual

Vax C85-AC-PH-E User manual

Vax

Vax C85-AC-PH-E User manual

Vax VO-4000 Product information sheet

Vax

Vax VO-4000 Product information sheet

Vax V-109 User manual

Vax

Vax V-109 User manual

Vax Rapide Classic V-026CC User manual

Vax

Vax Rapide Classic V-026CC User manual

Vax 6151 SX User manual

Vax

Vax 6151 SX User manual

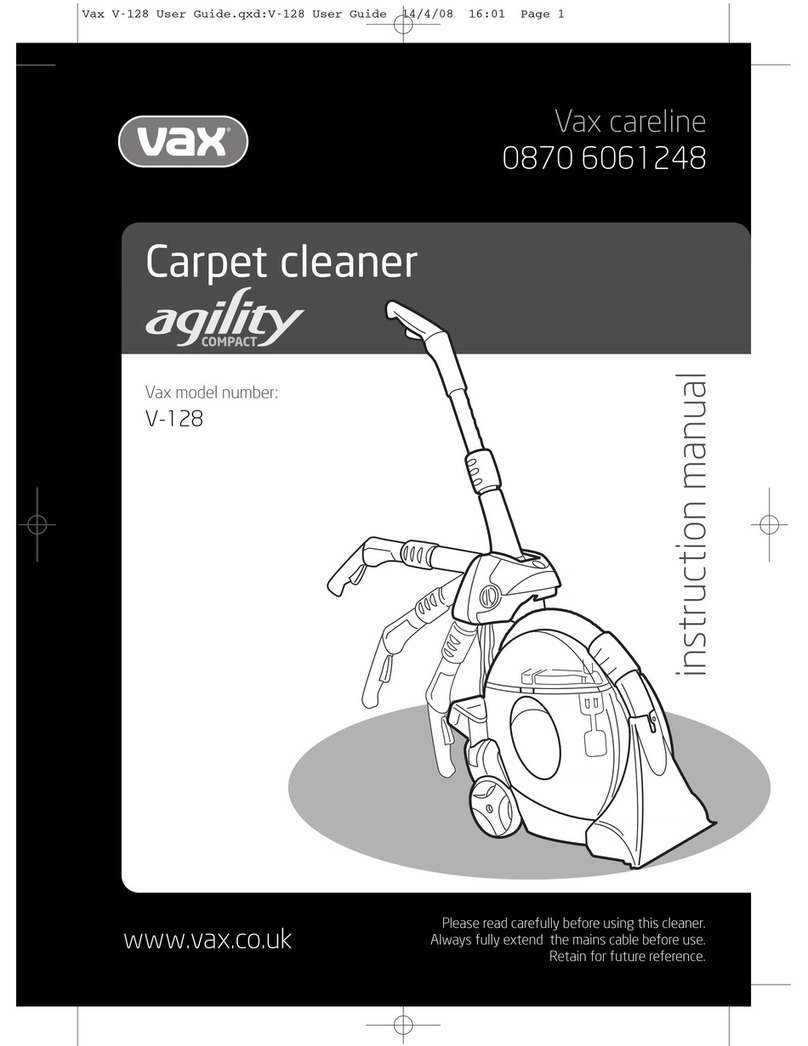
Vax Agility Compact V-128 User manual

Vax

Vax Agility Compact V-128 User manual

Vax H87-T1-B User manual

Vax

Vax H87-T1-B User manual

Vax Power8 C84-TJ-Be User manual

Vax

Vax Power8 C84-TJ-Be User manual

Vax Essentials VEU-01 User manual

Vax

Vax Essentials VEU-01 User manual

Vax Rapide V-028PX User manual

Vax

Vax Rapide V-028PX User manual

Vax VCU-03 User manual

Vax

Vax VCU-03 User manual

Vax V-2300U User manual

Vax

Vax V-2300U User manual

Vax Power 1 Series User manual

Vax

Vax Power 1 Series User manual

Vax Zoom U87-ZM-B User manual

Vax

Vax Zoom U87-ZM-B User manual

Vax Oasis User manual

Vax

Vax Oasis User manual

Vax VZL-801 User manual

Vax

Vax VZL-801 User manual

Vax Mach 1 SERIES User manual

Vax

Vax Mach 1 SERIES User manual

Vax U91-LF Series User manual

Vax

Vax U91-LF Series User manual

Vax Power Reach V-015 User manual

Vax

Vax Power Reach V-015 User manual

Vax VZL-6013 User manual

Vax

Vax VZL-6013 User manual

Popular Vacuum Cleaner manuals by other brands

Samsung VC-5953 operating instructions

Samsung

Samsung VC-5953 operating instructions

Di4 Gyro Laser 2000 manual

Di4

Di4 Gyro Laser 2000 manual

Bort BSS-1440-Pro manual

Bort

Bort BSS-1440-Pro manual

Rowenta SILENCE FORCE instructions

Rowenta

Rowenta SILENCE FORCE instructions

KRAFT TCH-KVC163F user guide

KRAFT

KRAFT TCH-KVC163F user guide

Blaupunkt VCP501 owner's manual

Blaupunkt

Blaupunkt VCP501 owner's manual

iRobot Roomba 4230 user manual

iRobot

iRobot Roomba 4230 user manual

Klarstein 10029117 manual

Klarstein

Klarstein 10029117 manual

Viper ECO15 quick start guide

Viper

Viper ECO15 quick start guide

Sanyo SC-X2015N instruction manual

Sanyo

Sanyo SC-X2015N instruction manual

Vacmaster VFB511B 0201 Operator's manual

Vacmaster

Vacmaster VFB511B 0201 Operator's manual

Makita CL107FD instruction manual

Makita

Makita CL107FD instruction manual

PROFILO VS1PE Series instructions

PROFILO

PROFILO VS1PE Series instructions

Kirby 519 Instruction book

Kirby

Kirby 519 Instruction book

V-TUF XR11000 Operator's manual

V-TUF

V-TUF XR11000 Operator's manual

Philips FC8749 manual

Philips

Philips FC8749 manual

Hilti VC 30L Original operating instructions

Hilti

Hilti VC 30L Original operating instructions

JIGOO P300 user manual

JIGOO

JIGOO P300 user manual

manuals.online logo
manuals.online logoBrands
  • About & Mission
  • Contact us
  • Privacy Policy
  • Terms and Conditions

Copyright 2025 Manuals.Online. All Rights Reserved.