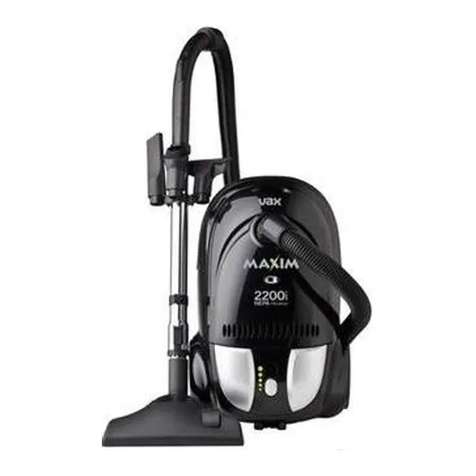
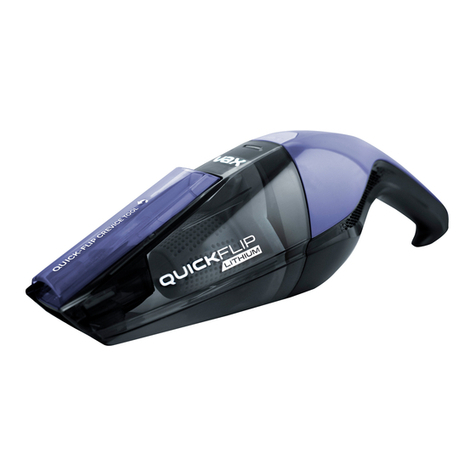
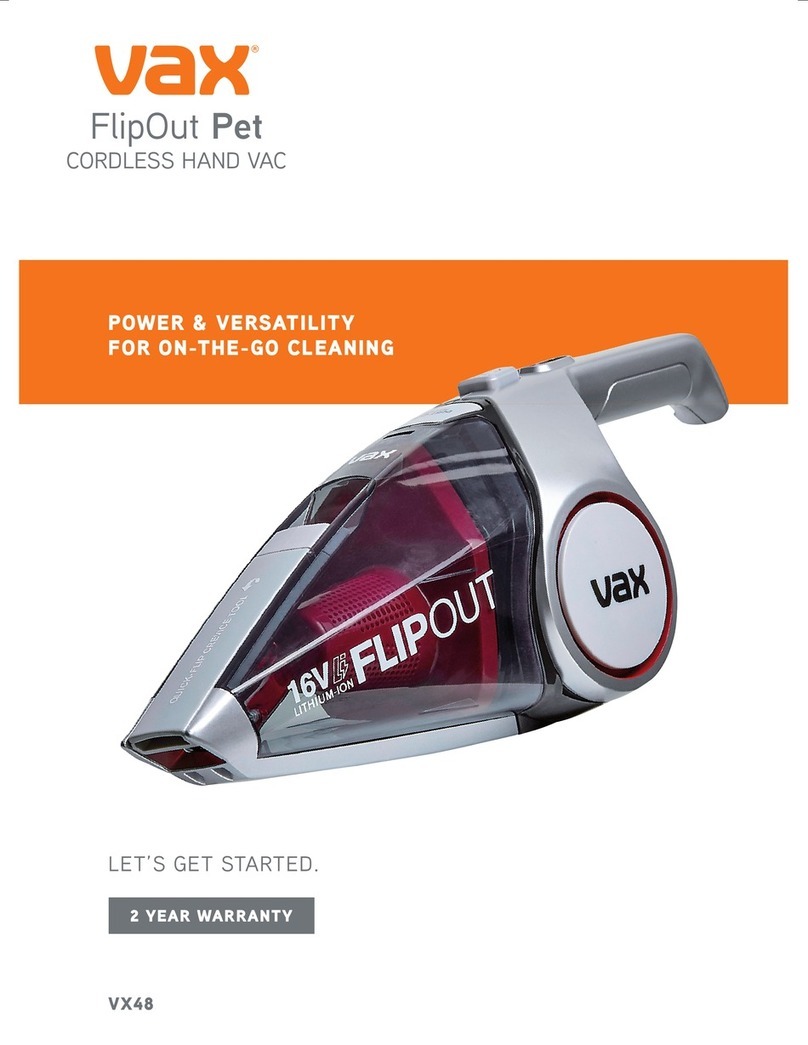
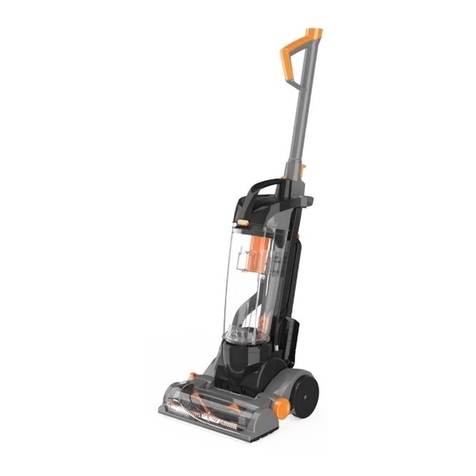
Vax X3 User manual

OWNER’S MANUAL
Operating and Servicing Instructions
Please read these instructions
carefully before using your new
vacuum.
Designed with you in mind.™

You are now the proud owner of a VAX®.We trust your new purchase will bring you many years of satisfaction.
Vax was invented to change the way you vacuum. Using a design philosophy we call NEXT CLEAN™,Vax has combined
proven cleaning effectiveness with user-focused engineering, so you can clean more with less strain and bending.
That’s deep cleaning at a higher level.
Thank you for your support of VAX®products.
Visit our website at www.vaxusa.com
LIMITED WARRANTY
To the consumer, Royal Appliance Mfg. Co. warrants this VAX®brand vacuum cleaner to be free of defects in material or workmanship commencing
upon the date of the original purchase. Refer to your vacuum cleaner carton for the length of warranty and save your original sales receipt to validate
startof warranty period.
If the vacuum cleaner should become defective within the warranty period, we will repair or replace any defective parts free of charge. The complete
machine must be delivered prepaid to any VAX®Authorized Sales & Warranty Service Station. Please include complete description of the problem, date
of purchase, copy of original sales receipt and your name, address and telephone number. If you are not near a Warranty Station, call the factory for
assistance at USA & Canada: 1-877-VAX-USA-9 (1-877-829-8729). Use only genuineVAX®replacement parts.
The warranty does not include unusual wear, damage resulting from accident or unreasonable use of the vacuum cleaner. This warranty does not cover
brushes, filters and bulbs.This warranty does not cover unauthorized repairs. This warranty gives you specific legal rights and you may also have other
rights other rights, which mayvary from state to state in the USA.

ENGLISH
2
Safety Instructions Page 3, 4
Features Page 5
Assembly Page 6
How To Operate Page 7-9
Starting Up Page 7
Brush Vacuuming Page 7
Brushroll Reset Page 7
Vacuuming With Accessories Page 8
Vacuuming Upholstery, Furniture, and Curtains Page 9
After Use Page 9
Dirt Container and Filter Page 10-12
Dirt Container Removal and Cleaning Page 10
HEPA Filter Removal and Cleaning Page 10, 11
Exhaust Filter Removal and Cleaning Page 12
General Maintenance Page 13
Lightbulb Removal and Replacement Page 13
Troubleshooting Guide Page 14
TABLE OF CONTENTS

3
When you use an appliance, basic precautions should always be followed, including the following:
• READ ALL INSTRUCTIONS BEFORE USING THE APPLIANCE.
• ALWAYS FOLLOW THESE SAFETY INSTRUCTIONS.
• BRING VACUUM CLEANER TO UPRIGHT POSITION WHEN USING THE HOSE AND ATTACHMENTS.
• DO NOT LEAVE VACUUM CLEANER UNATTENDED WHEN PLUGGED IN.
• REGULARLY CHECK THE FILTER TO CLEAN OR REPLACE.
• WARNING: FULLY ASSEMBLE CLEANER BEFORE OPERATING.
• WARNING: DO NOT USE SHARP OBJECTS TO CLEAN OUT THE HOSE SINCE THEY COULD CAUSE DAMAGE.
• WARNING: THE CORDS, WIRES, AND/OR CABLES SUPPLIED WITH THIS PRODUCT CONTAINS CHEMICALS,
INCLUDING LEAD OR LEAD COMPOUNDS, KNOWN TO THE STATE OF CALIFORNIA TO CAUSE CANCER
AND BIRTH DEFECTS OR OTHER REPRODUCTIVE HARM. WASH HANDS AFTER USING.
IMPORTANT SAFETY INSTRUCTIONS
THIS VACUUM CLEANER IS INTENDED FOR HOUSEHOLD USE ONLY.
• Do not leave appliance when plugged in. Unplug from
outlet when not in use and before servicing.
• Do not use outdoors or on wet surfaces. Electrical shock
could occur.
•Do not allow to be used as a toy.Close attention is
necessary when used by or near children.
• Use only as described in this manual. Use only
manufacturer’s recommended attachments.
• Do not use with damaged cord or plug. If appliance is not
working as it should, has been dropped, damaged, left
outdoors, or dropped into water,return it to a service
center for inspection. Call 1-877-VAX-USA-9 (1-877-829-
8729) for the nearest service center.
•Do not pull or carryby cord, use cord as handle, close a
door on cord, or pull cord around sharp edges or corners.
Do not run appliance over cord. Keep cord away from
heated surfaces.
• Do not unplug by pulling on cord. To unplug, grasp the
WARNING: TO REDUCE THE RISK OF FIRE, ELECTRIC SHOCK, OR INJURY:

4
Your cleaner contains a thermal protective device to shut off the motor to avoid overheating. If this happens, turn switch off and unplug the cleaner. Inspect
the exhaust, inlet, hose, and filters for any blockage. Empty the dirt container and clean filters. After approximately 30 minutes the motor will have
cooled and the vacuum will be ready to use. NOTE: The cleaner must remain unplugged during the 30 minute cooling period.
WARNING:
To reduce the risk of electric shock, this appliance has a polarized plug (one blade is wider than the other). This plug will fit in a polarized
outlet only one way. If the plug does not fit fully in the outlet, reverse the plug. If it still does not fit, contact a qualified electrician to install
the proper outlet. Do not change the plug in any way.
plug, not the cord.
• Do not handle plug or appliance with wet hands.
• Do not put any objects into openings. Do not use with
any opening blocked; keep free of dust, lint, hair, and
anything that may reduce air flow.
• Keep hair, loose clothing, fingers, and all parts of body
away from openings and moving parts.
• Do not pick up anything that is burning or smoking, such
as cigarettes, matches, or hot ashes.
• Do not use without dirt container and filters in place.
• Turn off all controls before unplugging.
• Look on your vacuum cleaner and follow all label and
marking instructions.
• Use extra care when cleaning on stairs.
• Do not use to pick up flammable or combustible liquids,
such as gasoline, or use in areas where they may be present.
• Keep the vacuum cleaner on the floor. Only the hand-
held vacuum cleaners may be set on furniture.
• Vacuum cleaner must be in the upright position to lift the
rotating brush off the carpet when doing above floor
cleaning.
• Do not use an extension cord with this vacuum cleaner.
• Store the vacuum cleaner indoors. Put the vacuum cleaner
away after use to prevent tripping accidents.
• Using improper voltage may result in damage to the
motor and possible injury to the user. Proper voltage is
listed on the cleaner plate.
• Hold plug when rewinding cord onto reel. Do not allow
plug to whip when rewinding.
• Unplug before connecting Turbo Tool.
• Do not carry vacuum cleaner by the cleaning wand tube.
This is not a carry handle.
SAVE THESE INSTRUCTIONS
5
FEATURES
1. Soft touch handle
2. ON/OFF button for brushroll
3. ON/OFF power button for vacuum
4. Soft touch cleaning wand handle
5. Cleaning wand release button
6. Hose fastening ring
7. Hose release button
8. Cleaning wand
9. Dirt container bottom release door
10. Hose clip
11. Reset button (located on back of nozzle)
12. Headlight
13. Brushroll
14. Soft touch furniture guard
15. Power cord hook
16. Crevice tool
17. Rotating upholstery tool
18. Accessory storage
19. Suction hose
20. Dirt container release and carry handle
21. Dirt container lid and lifetime HEPA filter
22. Bottom release lever
23. Dirt container
24. Exhaust filter (permanent filter)
25. Automatic cord rewind pedal
26. Exhaust grille
27.Power cord
28. Wheels
1
3
4
56
7
8
9
12
14
10
2
16
17
18
19
20
21
23
24
28
11
27 26
25
15
13
22

ASSEMBLY
6
TOOL REQUIRED: PHILLIPS OR FLATHEAD SCREWDRIVER
Using a Phillips or Flat Head screwdriver,
secure the handle by inserting the
provided four screws into the back of
the handle.
4.
Align handle onto base of cleaner.
3.
Pull cleaning wand to the front
of the cleaner and press hose
into handle assembly.
Insert excess cord into handle of
the cleaner by pushing down into
lower handle. CAUTION: AVOID
PINCHING CORD WHILE
INSERTING INTO HANDLE.
Connect the cleaning wand to
the opening on the base and push
the wand handle towards unit
until it snaps into place.
1. 2.
5.
Use carry handle located on dirt
container lid.
1.
TRANSPORTING
YOUR CLEANER
NOTE: Do not
carry vacuum
cleaner by the
cleaning wand
tube.This is not
acarry handle.

7
HOW TO OPERATE
STARTING UP
BRUSHROLL RESET
BRUSH VACUUMING
Holding the power cord by the plug, pull the
cordout completely. Red tag will indicate the
end of the cord. Plug into the outlet.
1.
Tilt the upright vacuum cleaner
back before you start vacuuming.
At the same time, use your foot
to press the nozzle down onto
the carpet.
1.
If something becomes lodged and
brushroll shuts off, turn cleaner off
and remove obstruction. Once the
problem has been fixed, the vacuum
cleaner can be switched back on
again after approximately 2 minutes
by pressing the reset button.
1.
Switch the upright vacuum
cleaner on or off bypressing the
on/off switch.
3.
For easier handling while
vacuuming, hook the power
cordonto the power cord
hook.
2.
Brush Vacuuming on carpeted floors:
•The brushroll is switched on or off
using the brushroll on/off switch
(Diagram 2). Switch brushroll on for
carpeted floors.
• The rotating brushroll loosens deeply
embedded dirt and brings it to the
surface.
Vacuuming on smooth surfaces:
• Switch brushroll off to obtain the
best results when vacuuming smooth
barefloor surfaces.
2.
NOTE:The brushroll is automatically switched off when it is in the vertical upright position.
RESET BUTTON

HOW TO OPERATE
8
VACUUMING WITH ACCESSORIES
1. 3.
5.
2.
6. 6a.
4.
NOTE: The two accessory parts may be used on the suction hose and cleaning wand.
NOTE: For safety reasons when vacuuming stairs, leave the upright vacuum cleaner on the bottom stair.
HOSE
CLIP
CREVICE
TOOL
UPHOLSTERY
TOOL
FASTENING
RING
• Bring the upright vacuum cleaner into its vertical locking position. The brushroll switches off automatically in this position, thus preventing any damage to the
carpet while cleaning with hose or tools.
• To switch the upright vacuum cleaner on again when you resume vacuuming, tilt it back. The brushroll switches on again automatically.
Straighten the hose and hook the hose clip
into the fastening ring to prevent the upright
vacuum cleaner from toppling over during use.
While pressing the hose release
button, pull out the suction hose
to release from cleaning wand.
Press the release button to release the
cleaning wand.The cleaning wand with built-
in brush can be used for cleaning surfaces.
To access tools, rock upholstery tool
away from cleaner. To remove tools,
grasp tool and pull up and out of
accessory clip.
Then attach the accessory to the
suction hose.
The rotating upholstery tool may be turned through 360˚ to allow
vacuuming in poorly accessible areas such as corners, edges, stairs
and vertical surfaces.

9
HOW TO OPERATE
VACUUMING UPHOLSTERY, FURNITURE, AND CURTAINS
AFTER USE
1.
Switch off the upright vacuum
cleaner and unplug the power
cordfrom the wall socket.
1.
Pressing the button for automatic cordrewind
draws in the power cordautomatically. NOTE:
Hold onto the power cordto prevent the cord from
whipping during the automatic cord rewind.
2.
After vacuuming, slide the suction
hose back into the cleaning wand
while holding the hose release button.
3.
Use the cleaning wand as an
extension for long reaches.
2.
Slide the hose into the cleaning wand
until locking mechanism engages.

DIRT CONTAINER
AND FILTER
10
Push down on carry handle and
pull dirt container away from unit.
WARNING: MAKE SURE VACUUM HAS BEEN SWITCHED OFF AND UNPLUGGED BEFORE REMOVING DIRT CONTAINER.
NOTE: For best results, empty the dirt container before dirt reaches the maximum fill line labeled on the dirt container.
NOTE: If necessary, the dust compartment can be cleaned with a dry dust cloth/dust brush.
1.
Close bottom cover on the dirt
cup until it snaps shut.
3.
Hold dirtcontainer over trash can and push down on bottom
release lever to release debris.
2. 2a.
DIRT CONTAINER
REMOVAL EMPTY DIRT CONTAINER
CLEANING YOUR LIFETIME HEPA FILTER
Twist lid to the left to remove lid and filter from
container.
1.
Remove foam filter from dirt
container.
2.
Tap filter firmly against inside of
trash can to remove loose dirt.
3.
1a.
NOTE: For best results,
tap filter clean periodically
to maximize cleaning
performance.

11
DIRT CONTAINER
AND FILTER
CLEANING YOUR LIFETIME HEPA FILTER (CONTINUED)
REPLACE FOAM FILTER
3.
Twist filter handle to the left and
pull out of lid.
4.
Hold filter under running water to wash.
Ring excess water out of filter. Allow
filter to dry for at least 24 hours.
5.
Place filter under water to clean. Make
sure filter is completely dry before
returning to cleaner.
2.
Return filter to the dirt container
lid.
REPLACE PLEATED FILTER
1.
Replace filter inside filter cup by
aligning with tabs inside of filter
cup.Twist to the right until filter
locks in place.
Place filter lid on top of dirt container and
align arrows (Diagram 3). Push down gently
and twist filter cup to the right until lid is
secureand snaps in place (Diagram 3a).
3. 3a.
NOTE: Let filter dry for at
least 24 hours before placing
back in cleaner.
VAX Tip:
For your convenience while
your lifetime HEPA filter is
drying, pick up an additional
filter at a retailer near you or
online at www.vaxusa.com.

DIRT CONTAINER
AND FILTER
12
CLEANING THE EXHAUST FILTER
REPLACE THE EXHAUSTFILTER
Remove the exhaust filter and shake it clean.
2.1.
Loosen the exhaust grille by
pressing the locking tab, and
remove it.
3.
The exhaust filter that comes
with this unit is a lifetime filter
and can be washed. Make sure
filter is completely dry before
returning to cleaner.
2a.
1.
Replace the cleaned exhaust filter and cover with exhaust grille.
1a.
REPLACE THE DIRT CONTAINER
1.
Replace the dirt container.
NOTE: Dirt container will not
align on base if filter is not
aligned properly.
NOTE: Let filter dry for at
least 24 hours before placing
back in cleaner.

13
GENERAL
MAINTENANCE
CHANGING THE LIGHT BULB
1.
Makesurevacuum has been
switched off and unplugged
before changing light bulb.Also,
allow the light bulb to cool.
Remove the two screws and
remove the light cover.
Remove the burned out light
bulb and pull it from the socket.
Insert the new bulb.
2. 3.
Attach the light cover using
both screws.
4.
WARNING: TO REDUCE THE RISK OF ELECTRIC SHOCK, UNPLUG CLEANER BEFORE REMOVING OR REPLACING LIGHTBULB.
NOTE: This cleaner uses a common automotive lamp #906, 13.0 volts. For bulb replacement call 1-877-VAX-USA-9 (1-877-829-8729) or visit our
website at www.vaxusa.com to locate a dealer nearest you.

TROUBLESHOOTING
GUIDE
14
PROBLEM POSSIBLE CAUSE POSSIBLE SOLUTION
Cleaner won’t run
Cleaner won’t pick up
or low suction
Dust escaping from
cleaner
Cleaner tools won’t
pick up
Headlight not working
Dirt container won’t
lock into place
Brushroll not rotating
1. Plug unit in firmly.
2. Check fuse or breaker in home. Replace fuse/reset breaker.
3. Take to service center or call 1- 877-VAX-USA-9 (1-877-829-8729).
4. Allow cleaner to cool - Pg. 4.
1. Review dirt container removal & replacement - Pg. 10 & 12.
2. Empty dirt container - Pg. 10.
3. Turn on brushroll - Pg. 7.
4. Remove HEPA filter and clean - Pg. 10-12.
5. Remove dirt container and cleaning wand then check hose inlets for obstructions - Pg. 10.
6. Review cleaning wand installation - Pg. 6.
1. Empty dirt container - Pg.10.
2. Review dirtcontainer removal & replacement - Pg. 10 & 12.
3. Review cleaning wand installation - Pg. 6.
4. Review filter removal & replacement - Pg. 10.
1. Remove dirt container and cleaning wand then check hose inlets for obstructions - Pg. 10.
2. Empty dirt container - Pg. 10.
3. Clean filter - Pg. 11 & 12.
4. Review dirt container removal & replacement - Pg. 10 & 12.
1. Replace bulb - Pg. 13.
2. Call 1- 877-VAX-USA-9 (1-877-829-8729) for nearest authorizedVAX®Dealer.
1. Remove and realign lid - Pg. 11.
2. Realign tab - Pg. 12.
1. Unplug unit. Remove debris from brushroll.
2. Slide brushroll ON/OFF switch to the ON position to activate brushes.
3. Press brushroll reset button - Pg. 7.
ANY OTHER SERVICING SHOULD BE DONE BY AN AUTHORIZED SERVICE REPRESENTATIVE
CUSTOMER SERVICE 1-877-VAX-USA-9 (1-877-829-8729)
In the event that further assistance is required, see your Yellow Pages for an authorizedVAX®Dealer. Costs of any transportation to and from any place of repair are to be paid by the
owner. The service parts used in this unit are easily replaced and readily available from an authorizedVAX®Dealer or retailer. Always identify your cleaner by the model number and
manufacturing code when requesting information or ordering replacement parts. (The model number appears on the bottom of the cleaner.)
1. Power cord not firmly plugged into outlet.
2. Blown fuse or tripped breaker.
3. Needs service.
4. Thermal Protector activated.
1. Dirt container not installed correctly.
2. Dirt container full.
3. Brushroll not on.
4. Dirty/clogged filter.
5. Dirt passage clogged.
6. Cleaning wand not installed correctly or misaligned.
1. Dirt container full.
2. Dirtcontainer not installed correctly.
3. Cleaning wand not installed correctly or misaligned.
4. Filter not installed completely.
1. Dirt passage clogged.
2. Dirt container full.
3. Filter clogged.
4. Dirtcontainer not installed correctly.
1. Bulb burnt out.
2. Loose electrical wires.
1. Dirt container lid not aligned properly.
2. Alignment tab not aligned.
1. Brushes clogged.
2. Brushroll switch in OFF position.
3. Brushroll needs to be reset.
WARNING: TO REDUCE THE RISK OF FIRE, ELECTRIC SHOCK, OR INJURY, UNPLUG CLEANER BEFORE SERVICING.

MANUEL DU PROPRIÉTAIRE
Notice d’utilisation et d’entretien
Veuillez lire attentivement ces
instructions avant d’utiliser votre
aspirateur.
Designed with you in mind.™
©2005 Tous droits réservés

Vous êtes désormais l’heureux propriétaire d’unVAX®. Nous sommes persuadés que cet appareil vous satisfera pendant
plusieurs années.
Le Vax a été inventé pour changer votre manière de nettoyer. Grâce à la philosophie de conception dite
« NEXT CLEAN™»,Vax allie l’efficacité de nettoyage éprouvée à une ingénierie axée sur l'utilisateur, de sorte que vous
pouvez nettoyer davantage en vous fatigant moins et en vous penchant moins.
Vous nettoyez en profondeur à un niveau plus élevé.
Merci d’utiliser les produits VAX®.
Visitez notresite Web : www.vaxusa.com
GARANTIE LIMITÉE
Royal Appliance Mfg. Co. garantit au consommateur que cet aspirateur est exempt de vices de matériau ou de fabrication à compter de sa date d’achat
d’origine. Consultez le carton d’emballage de l’appareil pour déterminer la durée de la garantie et conservez votre reçu d’achat d’origine pour justifier la
date d’entrée en vigueur de la période de garantie.
Si l’appareil tombe en panne pendant la période couverte par la garantie,nous réparerons ou remplacerons gratuitement toute pièce défectueuse. L’appareil
entier doit être renvoyé port payé à n’importe quel point de vente ou de réparation sous garantie deVAX®. Veuillez inclure une description détaillée du
problème, la date d’achat, une copie du reçu d’achat d’origine ainsi que vos nom, adresse et numéro de téléphone. Si aucun centre de réparation ne se
trouvedans votre région, appelez l’usine au 1-877-VAX-USA-9 (1-877-829-8729), au CANADA et aux ÉTATS-UNIS. N’utilisez que les pièces de rechange
VAX®.
Cette garantie ne couvre pas l’usure inhabituelle, les dommages causés par les accidents ou un usage abusif de l’appareil. Elle ne couvre pas non plus les
brosses, les courroies plates, les filtres et les ampoules. Cette garantie ne couvre pas les réparations non autorisées. Cette garantie vous offre des droits
spécifiques mais il se peut que vous ayez d’autres droits (Ces derniers varient d’état à état au sein des États-Unis).

FRANÇAIS
F2
Consignes de sécurité Page F3, F4
Caractéristiques Page F5
Assemblage Page F6
Fonctionnement Page F7-F9
Démarrage Page F7
Nettoyage avec l’aspirateur-brosse Page F7
Rénitialisation du rouleau brosse Page F7
Nettoyage avec les accessoires Page F8
Nettoyage des tissus d’ameublement, du mobilier et des rideaux Page F9
Après utilisation Page F9
Godet à poussière et filtrePage F10-F12
Enlèvement et nettoyage du godet à poussière Page F10
Enlèvement et nettoyage du filtre HEPA Page F10, F11
Enlèvement et nettoyage du filtre d’évacuation. Page F12
Entretien général Page F13
Ampoule : dépose et remplacement Page F13
Guide de dépannage Page F14
TABLE DES MATIÈRES

CET APPAREIL A ÉTÉ CONÇU EXCLUSIVEMENT POUR UN USAGE DOMESTIQUE.
• Ne laissez jamais l’appareil sans surveillance quand il est
branché. Débranchez-le quand il n’est pas utilisé ainsi qu’avant
de procéder à son entretien.
• N’utilisez pas l’appareil à l’extérieur ou sur des surfaces
mouillées.Vous pourriez vous électrocuter.
• Ne laissez pas les enfants jouer avec l’appareil. Exercez une
surveillance étroite quand l’appareil est utilisé par des
enfants ou à proximité de ceux-ci.
• Utilisez l’appareil en respectant à la lettre les consignes de
ce manuel. Utilisez seulement les accessoires recommandés
par le fabricant.
• N’utilisez pas l’appareil si la fiche ou le cordon est endommagé.
Si l’aspirateur ne fonctionne pas comme prévu, s’il est tombé,
s’il a été endommagé, laissé à l’extérieur ou s’il est tombé
dans l’eau, expédiez-le à un centre de réparation pour qu’il
soit vérifié. Appelez le 1-877-VAX-USA-9 (1-877-829-8729)
AVERTISSEMENT : POUR RÉDUIRE LES RISQUES D’INCENDIE,
DE DÉCHARGE ÉLECTRIQUE ET DE BLESSURE :
F3
Lorsque vous utilisez un appareil ménager, vous devez prendre certaines précautions de sécurité, telles que :
• LISEZ TOUTES LES INSTRUCTIONS AVANT D’UTILISER L’APPAREIL.
• RESPECTEZ TOUJOURS À LA LETTRE CES CONSIGNES DE SÉCURITÉ.
• METTRE L’ASPIRATEUR EN POSITION VERTICALE QUAND VOUS UTILISEZ LE TUYAU ET LES ACCESSOIRES.
• NE LAISSEZ PAS L’APPAREIL SANS SURVEILLANCE QUAND IL EST BRANCHÉ.
• VÉRIFIEZ RÉGULIÈREMENT LES FILTRES À NETTOYER OU À REMPLACER.
• AVERTISSEMENT :
ASSEMBLEZ ENTIÈREMENT L’ASPIRATEUR AVANT DE LE METTRE EN MARCHE.
• AVERTISSEMENT : N’UTILISEZ PAS D’OBJETS TRANCHANTS POUR NETTOYER LE TUYAU : ILS POURRAIENT
L’ENDOMMAGER.
• AVERTISSEMENT : LES CORDONS, FILS ÉLECTRIQUES ET/OU CÂBLE FOURNIS AVEC CE PRODUIT CONTIENNENT
DES PRODUITS CHIMIQUES Y COMPRIS DU PLOMB OU DES COMPOSÉS DU PLOMB CONNU PAR L’ÉTAT DE
CALIFORNIE POUR SON EFFET CANCÉRIGÈNE, POUVANT ENTRAÎNER DES MALFORMATIONS CONGÉNITALES
OU ENDOMMAGER LES ORGANES DE REPRODUCTION. LAVEZ-VOUS LES MAINS APRÈS TOUTE UTILISATION.
CONSIGNES DE SÉCURITÉ IMPORTANTES

Votre aspirateur est muni d'un protecteur thermique afin de couper le moteur en cas de surchauffe. Si cela se produit, arrêtez l'aspirateur
et débranchez-le. Vérifiez le système d'évacuation, d'aspiration et les filtres pour détecter toute obstruction. Videz le vide-poussière
et nettoyez les filtres. Au bout de 30 minutes, le moteur aura refroidi et l’aspirateur sera de nouveau prêt à être utilisé.
REMARQUE : L’aspirateur doit rester débranché pendant la période de refroidissement de 30 minutes.
AVERTISSEMENT :
Afin de réduire les risques de choc électrique, cet appareil est muni d’une fiche polarisée une tige est plus large que l’autre). Cette fiche ne
peut être insérée dans une prise de courant polarisée que dans un sens. Si la fiche ne s’insère pas complètement dans la prise, inversez-la. Si
elle ne s’insèretoujours pas, demandez à un électricien qualifié d’installer la prise appropriée. Ne modifiez jamais la fiche.
pour savoir quel est le centre de réparation le plus proche.
• Ne tirez pas l’appareil par son cordon, ne vous servez pas
du cordon comme poignée, ne fermez pas de portes sur le
cordon et ne tirez pas le cordon sur des coins ou des
bords tranchants. Évitez de passer l’appareil sur le cordon
d’alimentation.Tenez le cordon hors de portée des surfaces
chauffées.
• Ne pas débrancher en tirant sur le câble. Pour débrancher,
tenir la fiche, non le câble.
• Ne pas manipuler la prise ou le dispositif avec des mains
mouillées.
• Ne pas introduire d’objets dans les ouvertures. Ne pas
utiliser avec une ouverture bloquée; maintenir celles-ci
exemptes de poussière, de peluche, de cheveux, et de tout
ce qui pourrait affecter le passage de l’air.
• Garder les cheveux, les vêtements, les doigts et toutes les
parties du corps loin des ouvertures et des pièces en mouvement.
• Ne pas ramasser quoi que ce soit qui brûle ou qui fume, tel
que les cigarettes,les allumettes, ou les cendres chaudes.
• N’utilisez pas l’aspirateur sans le collecteur de poussière ni
les filtres.
• Mettre tous les commandes sur arrêt avant de débrancher.
• Examinez votreaspirateur et suivez toutes les instructions
inscrites sur les étiquettes.
• Être particulièrement attentif lors du nettoyage d’escaliers.
• Ne pas utiliser pour ramasser des liquides inflammables ou
combustibles, tels que l’essence, ou utiliser le dispositif
dans des endroits où ceux-ci pourraient être présents.
• Maintenir l’aspirateur à même le sol. Seuls les aspirateurs
tenus en main peuvent être utilisés sur du mobilier.
• L’aspirateur doit être en position verticale pour soulever la
brosse pivotante de sur le tapis lorsque l’on nettoie au-
dessus du plancher.
• Ne pas utiliser de rallonge électrique avec cet aspirateur.
• Ranger l’aspirateur à l’intérieur. Ranger l’aspirateur après
usage pour éviter les accidents.
• L’emploi d’une tension incorrecte peut endommager le
moteur et potentiellement blesser l’utilisateur. La tension
adéquate est indiquée sur la plaque de l’aspirateur.
• Tenez la fiche lors de l’enroulement du cordon.Veillez à ce
que la fiche ne cingle pas lors de l’enroulement du cordon.
• Débranchez l’appareil avant de connecter la Turbo Tool.
• N'utilisez pas le tube de nettoyage pour transporter
l’appareil. Ceci n’est pas une poignée de transport.
VEUILLEZ CONSERVER CES
INSTRUCTIONS
F4
Table of contents
Languages:
Other Vax Vacuum Cleaner manuals

Vax
Vax C91-MJ-B-P User manual

Vax
Vax V-091 User manual

Vax
Vax LiFE2-in-1 Specification sheet

Vax
Vax Compact VX56 Installation instructions

Vax
Vax Energise Vibe C86-E2e Series User manual

Vax
Vax VCW-02 User manual

Vax
Vax VRS203 User manual

Vax
Vax SWIFT V-106AA User manual

Vax
Vax POWERFLEX V-010 Product information sheet

Vax
Vax FORCE 10 CYCLONIC User manual

Vax
Vax Impact 302 C86-ID-Pe User manual

Vax
Vax VCW-04 User manual

Vax
Vax Kruz K-020 User manual

Vax
Vax V-2400C User manual

Vax
Vax SlimVac VX50 Installation instructions

Vax
Vax Force2 User manual

Vax
Vax VPS4 User manual

Vax
Vax Agility Compact V-128 User manual

Vax
Vax V-020/V-020TF User manual

Vax
Vax ultrixx V-040 User manual