Vaxcel T0240 Instruction manual

Fig.1
Bulb type B Max. 60W
(not include)
ASSEMBLY AND INSTALLATION
INSTRUCTIONS
NOTES: 1. Before installing, consult local electrical codes for wiring and grounding requirements.
2. READ AND SAVE THESE INSTRUCTIONS.
T0240
WARNING:
TO AVOID RISK OF ELECTRICAL SHOCK, BE SURE TO SHUT OFF
POWER BEFORE INSTALLING OR SERVICING THIS FIXTURE.
160303
Glass Panel
Clip
Metal Frame
Fixture
Glass Panel
Set Screw
Set Screw
Slot
Wire Nut (B)
Fitter Screw (A)
Hardware Package (included):
Fixture
Grounding Wire
Fixture Wire
Wire Nut (B)
Post
Fitter Screw(A)
Socket
Fitter
Photocell
Metal Frame
Glass Panel
IMPORTANT:
The sensor has an excellent photocell function to
enable the light to turn on at dusk and off at dawn
automatically.
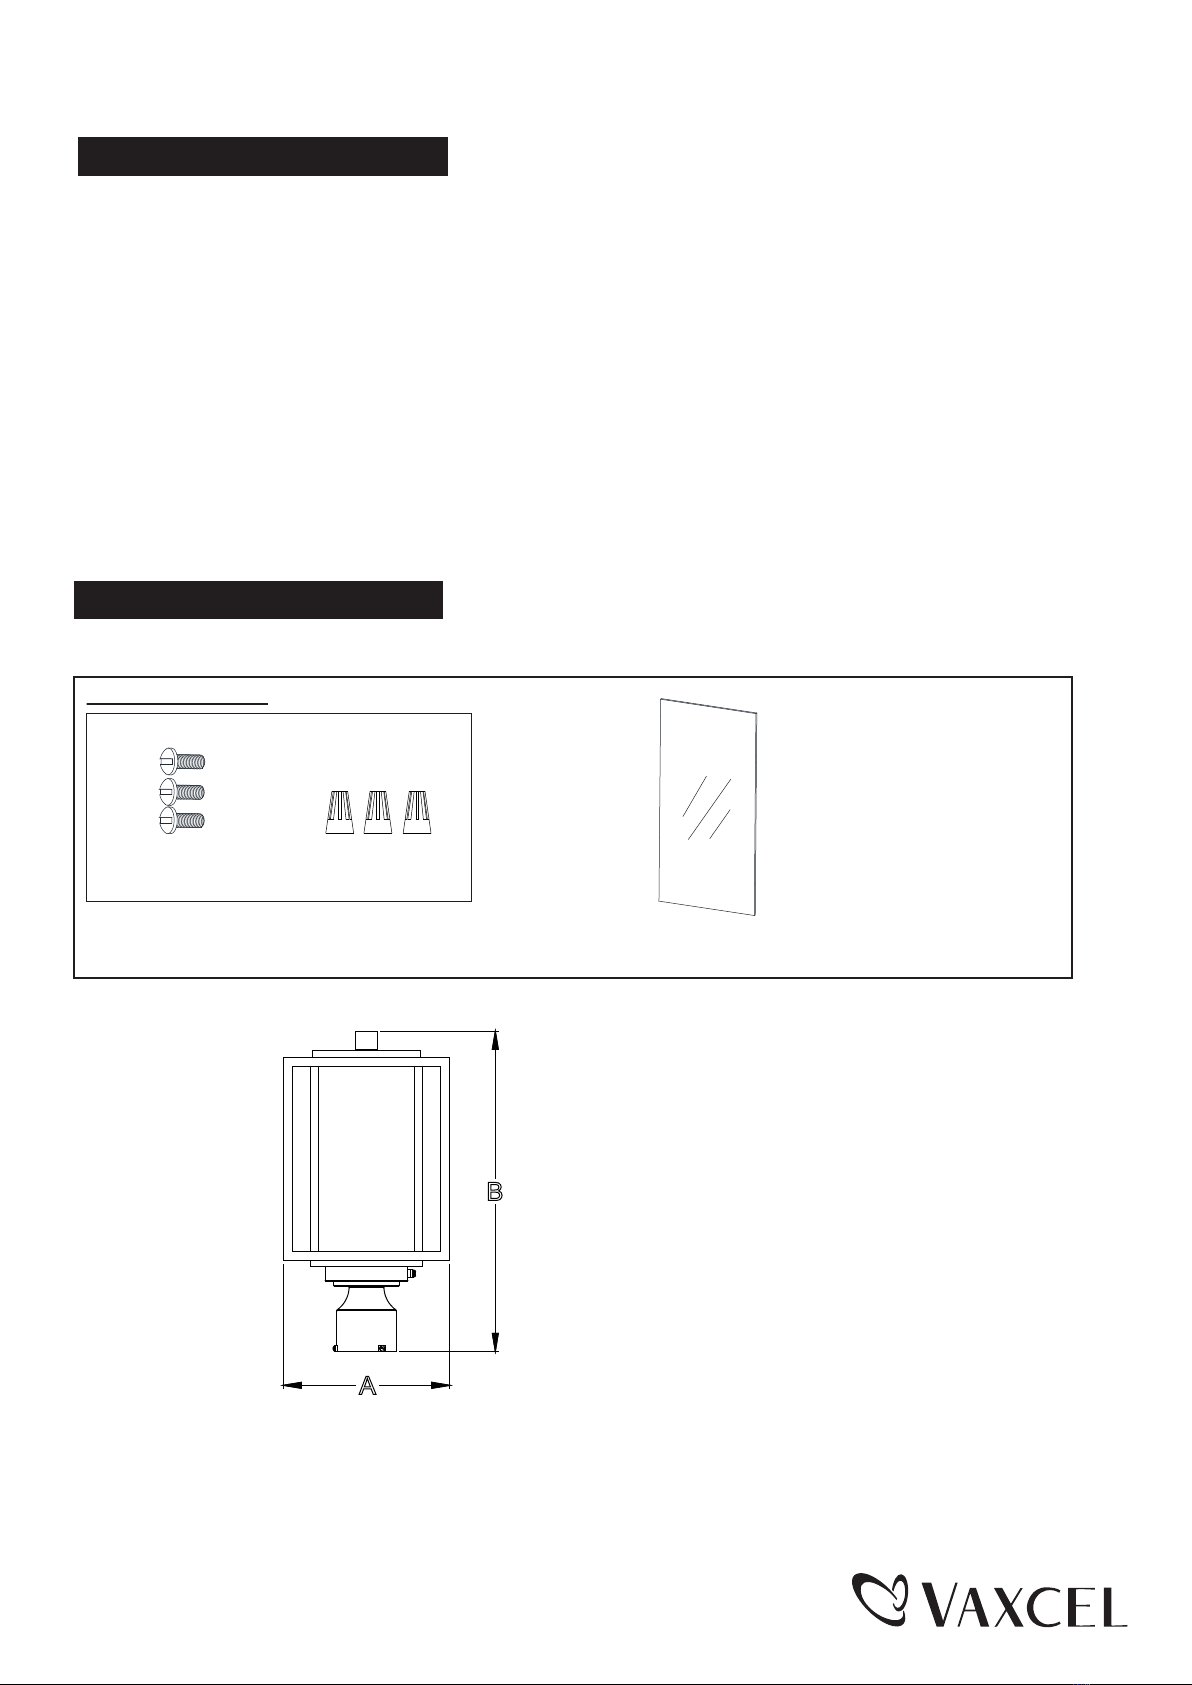
A
B
160303
Turn on the power at fuse or circuit box
Turn off the power at fuse or circuit box.
Installation Steps
1. Remove two set screws to separate the metal frame from the fixture.
2. Install three bulbs (not included). Check relamping label at socket area or packaging for maximum allowed wattage.
3. Take a glass panel, insert it into the slot at one side of the metal frame carefully, secure it by pressing clips. Repeat
with the other glass panels.(See Fig.1)
4. Attach the metal frame back to fixture, and then secure it with two set screws.(See Fig.1)
5. Pull out the source wires from the post. Make wire connections using wire nuts as follows:
---Connect the hot wire (usually black insulation) from the fixture to the black wire from the post
---Connect the neutral wire (usually white insulation) from the fixture to the white wire from the post
---Attach the fixture grounding wire (usually green insulation or bare wire) to the grounding wire from the post.
Carefully put the wires back into the post.
6. Place the fitter on the post, and then secure it with the fitter screws.
The following parts are available for re-order if damaged or missing.
Spare Parts List:
Assembly Kit
5537MM (1 SET)
A: 9"
B: 17-1/4"
Wire Nut (B)
Fitter Screw (A)
Glass Panel
9806RG (4PCS)
Other Vaxcel Lantern manuals


