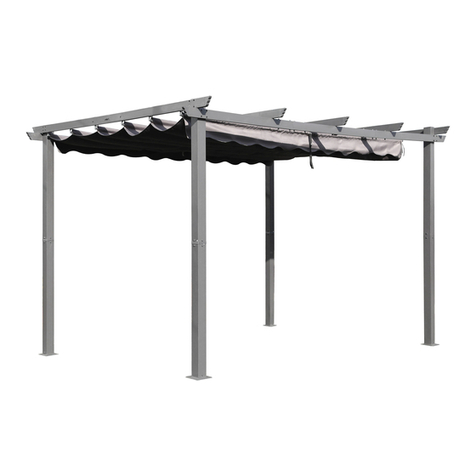
VEIKOUS PG0202-03 User manual

Wood Pergola
Scan for Installation Video
Instruction Manual

STOP
MISSING A PART?
CALL US BEFORE GOING
BACK TO THE STORE
The store where you made your purchase
Does not stock parts for this item.
If you have assembly questions or you are missing or
have damaged parts,please call
The store where you made your purchase
Does not stock parts for this item.
If you have assembly questions or you are missing or
have damaged parts,please call
The store where you made your purchase
Does not stock parts for this item.
If you have assembly questions or you are missing or
have damaged parts,please call
Please prefer email contact. Due to busy lines,
there may be a wait for calls to be answered.
1-858-324-1911
(Mon - Fri, 10:00 am to 7:00 pm EST)
you can also e-mail [email protected]
or visit www.veikous.com
Please have the following information ready when you make your call:
Read entire assembly manual,paying special attention to the important tips and safety information .
Ensure there are no missing pieces by first separating and identifying all parts.
Make sure to check packing material for small parts that may have fallen out during shipment.
Structures are not intended for public use.The Company does not warranty any of its residential
structures subjected to commercial use such as:Daycare,Preschool,Nursery School,Recreational
Park,or any similar Commercial Application.
This manual contains helpful information concerning assembly preparation,installation procedure
and required maintenance.
Always keep safety in mind as your structure is being built.
Keep these instructions for future reference.
Model Number of the product located on the frond of the assembly manual
Description of the part from the parts list


22
16
Parts Identification

01 x4
10 x8 x9
09 x8
08 x8
13 x4
x4
05 x14
06 x2
07 x2
02
04
03
x16
11 x2
12 x4


REPEAT 4 TIMES
STEP1-1
J
JG01
G
01
---------
---------
---------
---------
---------
---------
50MM
x4 x8 x24
---------
---------
---------
<1>
Place an L-shaped Bracket (J) at the bottom of the Post ( ), noting that the top and bottom of the Post
are different. Place the L-shaped Bracket (J) flush at the bottom, and then fasten it to the Post
with three Screws (G) through the pre-drilled holes.Turn the Post around.
Install the second Bracket on the Post as shown. (Two L-Brackets per Post).
01

---------
---------
---------
---------
---------
---------
---------
---------
---------
---------
---------
---------
---------
---------
---------
---------
---------
---------
---------
---------
---------
---------
---------
---------
STEP1-2
JG
01 x4 x8 x24
lnstall the rest six Brackets(J) on the other three Posts( )as shown.
#Totally four Posts( ), eight L-shaped Bracket (J) and twenty-four Screws(G).
<2>
01
01

REPEAT 2TIMES
STEP2
07 12
06 x2 x2 11 x2 x4 Bx40
Connect the two long Header Boards( & ) and three short Header
Boards(one and two ) together with twenty Screws(B) as shown.
<3>
11 12
---------
---------
---------
---------
---------
---------
---------
---------
---------
---------
---------
---------
---------
---------
---------
---------
---------
---------
---------
---------
06
07
B
12
12
11
06 07

STEP3
A
Bx12 x16 13 x4
<4>
Keep the assembled Header at an angle of 90 and push it against the Post.
Fasten it to the Post with sixteen Screws(A) and twelve Screws(B) through all pre-drilled holes.
(Four Screws(A) and three Screws(B) per Post.)
---------
---------
---------
---------
---------
---------
---------
---------
---------
---------
---------
---------
---------
---------
---------
---------
---------
---------
---------
---------
A
---------
---------
---------
B
13

04 E05 x14 x7 Gx28 x28
STEP4-1
REPEAT 7TIMES
<5>
Fasten the Top Rafter Board( ) to the two Bottom Rafter Boards( ) with four
Screws(G) and four Screws(E).Then install the rest Rafter Boards.
Finally you will get seven assembled Inner Rafters.
G 50MM
G 50MM
G 50MM
E 90MM
E 90MM
E 90MM
E 90MM
04
05
05
04 05

04 E03 x4 x2 Gx8 x8
STEP4-2
REPEAT 2TIMES
<6>
Next,fasten the Top Rafter Board( ) to the two Bottom Rafter Boards( ) with four Screws(G)
and four Screws(E).(Totally two Outside Rafters Assembled.)
04
03
03
G 50MM
G 50MM
G 50MM
E 90MM
E 90MM
E 90MM
E 90MM
04 03

---------
---------
---------
---------
Cx8
STEP5
<7>
Lift the two Outer Rafts into the notches of the Headers. Place
the Rafters so that the marks on the Rafters are flush with the outside of the Headers.
Connect the Rafters to the Headers on both sides with eight Screws (C)
through the pre-drilled holes. (Two Screws on each side of the Rafter.)
---------
---------
---------
---------
C X8

STEP6-1
<8>
x2
C
Now install the inner Rafter and lift it into the notches of the Headers.
Connect the Rafter to the Header with two Screws (C)
through pre-drilled holes. (One Screw on each side of the Rafter).
---------
---------
C X2
C
---------

STEP6-2
Now install all remaining six Inside Rafters as shown in previous step.
<9>
---------
---------
---------
---------
---------
---------
---------
---------
---------
---------
---------
---------
C X12
x12
C

G
10 x16 Fx16
x8
STEP7
Locate the Brace(⑩).Make it flush with the outside of the Header and outside of the Post.
Fasten it with four Screws(Two Screw(G) and Two Screws(F))
through pre-drilled holes as shown. (Two into Header and Two into Post)
<10>
G x2
F x2
10

Dx8
02 x2
STEP8-1
<11>
Locate the Stringer ( ). Put it on the top of the Rafters.
Pay attention to the direction of the Stringer. Position the Stringer
firmly into the notches. Fasten each Rafter with eight Screws (D) through the pre-drilling holes.
---------
---------
---------
---------
---------
---------
---------
---------
02
D x8
02

Dx56
x14
STEP8-2
<12>
Install all remaining Stringers as shown in the previous step.
---------
---------
---------
---------
---------
---------
---------
---------
---------
---------
---------
---------
---------
---------
---------
---------
---------
---------
---------
---------
---------
---------
---------
---------
---------
---------
---------
---------
---------
---------
---------
---------
---------
---------
---------
---------
---------
---------
---------
---------
---------
---------
---------
---------
---------
---------
---------
---------
---------
---------
---------
---------
---------
---------
---------
---------
D x56
02

Hx16
I
I
H
x8
STEP9
Locate the Part(I).Place it on the top of the Stringers( ). Fasten it with two Screws(H)
through pre-drilled hole.Then install all remaining Parts as shown.( Totally sixteen Screws(H))
<13>
------
------
------
------
------
------
------
------
------
------
------
------
------
------
------
------
------
------
02
02

08 09
G
09 x8 Gx64
08 x8
STEP10
Locate the Post Skirt Pieces( & ).Place the four Post Skirt Pieces against the post on the side.
Fasten the Post Skirt Pieces together with sixteen Screws(G) through pre-drilled
holes at each Post.Repeat this step on the second Post.
<14>
-----------
-----------
-----------
-----------
-----------
-----------
-----------
-----------
08 09
Table of contents
Other VEIKOUS Tent manuals
Popular Tent manuals by other brands

Ohenry Productions
Ohenry Productions 10x20 quick start guide

ACADEMY
ACADEMY Easy Shade Canopy 10 ft x 10 ft user manual

Combi-Camp
Combi-Camp Country Instruction

Coleman
Coleman Vacationer 9271-139 instructions

Clarke
Clarke CIG81212 Assembly instructions

Big Agnes
Big Agnes Parkview Series Parkview 2 Setup instructions

Weka
Weka 617.3279.00.00 ASSEMBLY, USER AND MAINTENANCE INSTRUCTIONS

Ozark Trail
Ozark Trail W532 Assembly instructions

skandika outdoor
skandika outdoor Aarhus Travel Setup Instruction

ClearSpan
ClearSpan Solarguard PB01420R4 manual

Adventuridge
Adventuridge FLX-DT-17 user manual

Crivit
Crivit 313762 Operation and safety notes