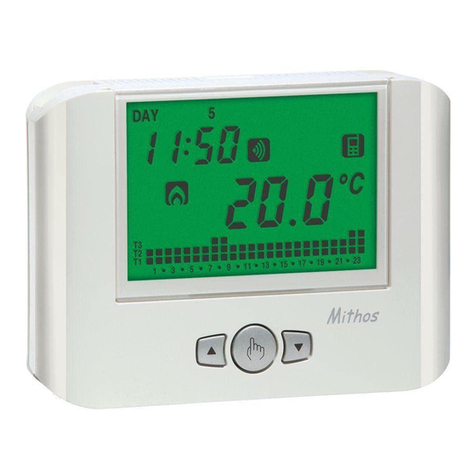
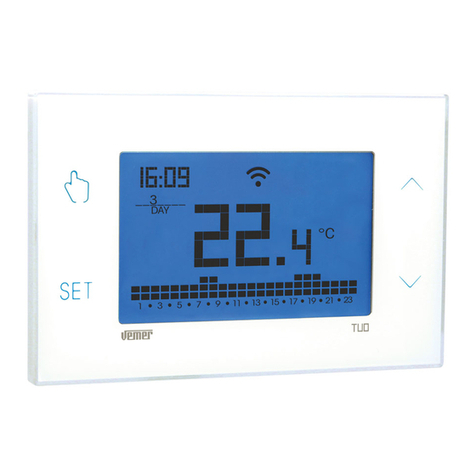
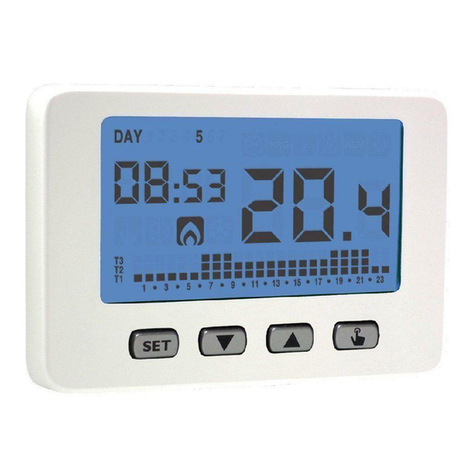
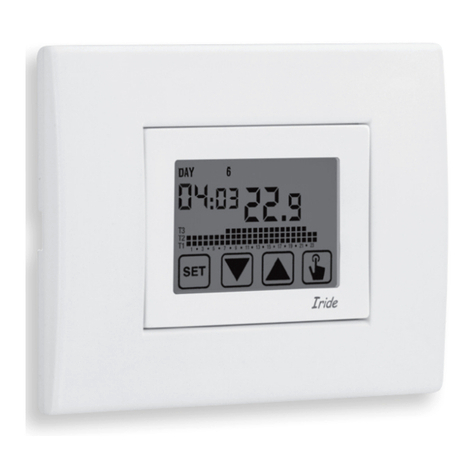
Vemer Tuo Wi-Fi RF User manual

Digital
Chronothermostat
TUO Wi-Fi RF
User Manual

- 39 -
Manuale d’Uso Cronotermostato TUO Wi-Fi RF
Italiano
Index
QSafety warnings Pagina 41
QDimensions Pagina 41
QDevice description Pagina 42
QConnection diagram Pagina 43
QInstallation and initial configuration Pagina 44
QApp description Pagina 46
QOperating mode Pagina 51
QConfiguration menu description Pagina 53
QCLOCK menu - Date and time setting Pagina 54
QPROG menu - Programs setting Pagina 56
QSET menu - Temperatures T1, T2, T3 setting Pagina 58
QTIMER menu - Timing setting Pagina 59
QADV menu - Advanced parameters setting Pagina 60
- operating mode Pagina 60
- regulation type Pagina 61
- parameters for the regulation type Pagina 61
- antifreeze temperature Pagina 62
- adjustment of the measured temperature Pagina 62
- Wi-Fi connection configuration Pagina 63
- minimum/maximum settable temperature Pagina 65
- password for key lock Pagina 65
- operating hour meter Pagina 66
- display backlighting Pagina 66
QOther functions of the device Pagina 69
- display of minimum/maximum daily temperature Pagina 69
- display of relative humidity Pagina 69
- keypad unlock Pagina 69
QDevice reset Pagina 70
QRegulation types Pagina 71
QHow to do in case of replacement of the Access Point Pagina 73
QHow to remove the device from your account Pagina 73
QTechnical characteristics Pagina 74
QReference standards Pagina 74
QWinter programs Pagina 75
QSummer programs Pagina 76

English
- 40 -
TUO Wi-Fi RF Chronothermostat User Manual
Wi-Fi wall-mounting electronic chronothermostat powered by mains (230 V~), suitable
for the control of heating and air-conditioning systems.
The device, through the bistable relay, acts on the control circuit of the burner or the
circulation pump (heating), or on the control circuit of the air conditioner (conditioning),
in order to guarantee the desired temperature.
The heating (or air conditioning) system is controlled by sending a radiofrequency
signal to a remote actuator of Vemer range or via the bistable relay with which the
device is equipped (wired solution).
The integrated Wi-Fi module allows the remote control of the device via your
smartphone or tablet. It's necessary to connect the device and then install the
appropriate app on your smartphone or tablet available free for iOS and Android
devices.
The device also displays the relative humidity value thanks to the built-in probe.
The colour of the display backlighting can be chosen by the user among the 48
selectable shades. You can even set the backlighting to be variable according to the
difference between the measured temperature and the set one.
The backlighting can be always switched off if the device is installed for example in
bedrooms.
Code Model Description
VE773600 Tuo Wi-Fi RF Bianco Weekly chronothermostat white colour
VE773700 Tuo Wi-Fi RF Nero Weekly chronothermostat black colour
The device connects to the Vemer cloud to check if there are changes to the
configuration and programming created using the app, and if so, regulates the
temperature according to the new configuration.
This operation takes place approximately once a minute.
Cloud VemerTuo Wi-Fi RF Access Point App1-channel remote actuator

English
- 41 -
TUO Wi-Fi RF Chronothermostat User Manual
QDuring installation and operation of the product, it is necessary to comply
with the following instructions:
1) The device must be installed by a skilled person, in strict compliance with the
connection diagrams.
2) Do not power on or connect the device if any part of it is damaged.
3) After installation, inaccessibility to the connection terminals without
appropriate tools must be guaranteed.
4) The device must be installed and activated in compliance with current electric
systems standards.
5) Before accessing the connection terminals, verify that the leads are not live.
6) In the electrical system of the building where the device must be installed, a
protection device from the overcurrents must be present.
7) The device performs actions of 1B type and is suitable for environments
with pollution degree 2 and overvoltage category III (EN 60730-1).
DIMENSIONS
SAFETY WARNINGS
130
85
28

English
- 42 -
TUO Wi-Fi RF Chronothermostat User Manual
Clock
Day of the week
Off operation
Active load (conditioning mode)
Active load (heating mode)
Measured temperature
Running daily program divided into 24 histograms, one for each hour of the day.
Each hour is associated with one of the 3 temperatures:
Temperature T1 Temperature T2 Temperature T3
Active timed operation
Synchronization with settings on the Vemer Cloud in progress
Connection to the active Wi-Fi network
Measured relative humidity
Configuration menu:
RF radiofrequency connection configuration with actuator
ADV advanced parameters of the device
TIMER timings
SET automatic operating temperatures T1, T2, T3
PROG automatic operating programs
CLOCK date and time
Local active operation. In this state the device is disconnected from the
Cloud Vemer and any change in operation must be made using the keys on the
chronothermostat. Local operation can be disabled by the app
Active keypad lock
DEVICE DESCRIPTION

English
- 43 -
TUO Wi-Fi RF Chronothermostat User Manual
CONNECTION DIAGRAM
L
N
NC
NO
C
L
N
NO
C
NC
U
L
N
NO
C
NC
U
Connection diagram for the control
of the boiler, heat pumps, etc.
Connection diagram for the supply
of circulation pumps, solenoid valves,
etc. at 230V ~

English
- 44 -
TUO Wi-Fi RF Chronothermostat User Manual
INSTALLATION AND INITIAL CONFIGURATION
1
3
1
1
2
click
5
2
4
The device can be installed on the wall or to cover the 3-module flush-mounting box
(type 503).
We recommend positioning at a height of 1.5 meters from the floor, in an area that
respects as much as possible the average temperature conditions of the entire
environment. Make sure that the distance between the Access Point and the device is
such as to guarantee stable communication.
Avoid installation near doors or windows, in niches, behind doors and curtains or
in positions with excess or total lack of ventilation, to avoid that the reading of the
temperature measured by the probe is in some way offset.
Device installation

English
- 45 -
TUO Wi-Fi RF Chronothermostat User Manual
1. Install and connect the device according to the connection diagrams shown in this
manual
2. Install and start the Vemer Tuo Wi-Fi RF app on your smartphone (or tablet)
3. Create a Vemer account with which to associate the device Tuo Wi-Fi RF.
Note: If you already have a Vemer account, go to step 4.
a. Choose "Register"
b. Fill in the "e-mail" and "password" fields and confirm by choosing "Register"
Note: for security reasons it is recommended to choose a password different
from the one used to access your e-mail box
c. Check your e-mail box: confirm the activation of the account by clicking on the
link contained in the e-mail sent by the system
4. Enter the e-mail address and password of your Vemer account
5. Add Tuo Wi-Fi RF to your Vemer account
On the app...
a. Choose "Add Thermostat". The procedure guides the user during the
configuration steps of Tuo Wi-Fi RF.
On Tuo Wi-Fi RF...
b. Hold down the keys and simultaneously until the display
shows &RQIQ(7
On the app...
c. Choose the wi-fi network highlighted in green with the name "iwm..."
d. On the next screen select the home wi-fi network to connect Tuo Wi-Fi RF.
Enter the password of the home Wi-Fi network.
e. Enter a name that identifies Tuo Wi-Fi RF, the pin (4 digits shown on the display
of Tuo Wi-Fi RF) and choose an icon that helps identify the device among those
proposed. Confirm with "Save".
The configuration procedure is finished. At this point:
the app displays the list of devices associated with your account among
which also the newly associated device must appear.
Tuo Wi-Fi RF displays the main screen. Check that the icon
is fixed and that the time shown at the top left is correct.
Device configuration

English
- 46 -
TUO Wi-Fi RF Chronothermostat User Manual
Thanks to the app you can control your Tuo Wi-Fi RF device remotely, easily and
intuitively.
Access using the access credentials
(email, password) chosen during registration
phase of your account
From this screen it’s possible to choose which device
to control. The devices Tuo Wi-Fi RF are identified by a
square frame, the devices Mithos Color Wi-Fi devices
by a circular frame.
allows you to record a new device
allows you to group several devices.
For example it’s possible to group all "Tuo Wi-Fi RF"
in a building of 3 floors according to the logic:
“Floor 1”, “Floor 2” and “Floor 3”.
Page “Devices list”
APP DESCRIPTION
Page “Login”

English
- 47 -
TUO Wi-Fi RF Chronothermostat User Manual
This screen shows the status of " Tuo Wi-Fi RF":
Measured temperature (25.5°C)
Operating mode (HEATING)
System status:
( ) red = on
( ) gray= off
Set temperature and running program name. Touch
this area to change the running program.
Operating mode
Touch this area to change the operating mode
(heating/cooling)
and mode (automatic/manual/off).
Main Page
From the screen “Programs list” it’s possible:
to create a new program
to select, to modify, to delete or to rename
an existing program
Note: the padlock on the left of the name
INVERNO DEFAULT indicates that the program
can not be changed or deleted.
"Programs List" page

English
- 48 -
TUO Wi-Fi RF Chronothermostat User Manual
To modify an existing program, select the profile program of the day to be modified.
On the screen that opens, assign at any time of day one of the three available tempe-
rature T1, T2 and T3 (marked by blue, green and red colours).
Created a program for a day, it's possible to copy it to any other day of the week
(“Copy” function).
Note: the image refers to the version of the app for smartphone.
On the tablet the whole weekly programming is visible on a single screen.
Modify a program

English
- 49 -
TUO Wi-Fi RF Chronothermostat User Manual
"Tuo Wi-Fi RF" settings
Configuration menu
Touch the symbol on the upper right to access the advanced configuration.
From this screen it’s possible:
The name of "Tuo Wi-Fi RF"
The icon that identifies it
The temperature values T1, T2 and T3
The advanced settings:
• temperature alarm configuration
• e-mail of the recipient of the alarm
• regulation type

English
- 50 -
TUO Wi-Fi RF Chronothermostat User Manual
Set vacation days in which the regulation is turned
off by selecting them on the calendar.
Set a holiday period
During the holiday period the
operation filed shows VAC
Advanced settings
From this screen you can:
• enter the email of the user who will receive
the alarm signals
• set the temperature thresholds and the time
(delay) necessary to trigger the alarm
• choose the type of temperature regulation
(on/off or proportional)
• block local operation. When local operation is
locked, any setting made with Tuo Wi-Fi RF
keypad will be ignored.
This function is useful if you want to have
control of the device only using the app
and prevent changes in settings from
the keypad of Tuo Wi-Fi RF.

English
- 51 -
TUO Wi-Fi RF Chronothermostat User Manual
The device can operate according to the following 3 modes:
Automatic mode
It allows you to use the device as a
chronothermostat and the temperature regulation
follows the "profile" of the set program.
The program profile assigns one of the 3
temperatures T1, T2 or T3 to each hour of the day.
It is possible to assign a different program to each day of the week.
In the example, the device adjusts the temperature based on the value of:
T2 from 00:00 to 6:00 and from 8:00 to 17:00
T3 from 6:00 to 8:00 and from 17:00 to 21:00
T1 from 21:00 to 24:00
The values of T1, T2 and T3 can be set by the user.
Manual mode
It allows you to use the device as
a thermostat and the regulation is according
to the temperature Tm.
Off mode
It is suitable when long periods of absence are expected.
In this mode the device does not perform any regulation
however, if it works in heating mode, it maintains a
minimum temperature (antifreeze temperature) to prevent
possible freezing of the system.
OPERATING MODE
program
profile

English
- 52 -
TUO Wi-Fi RF Chronothermostat User Manual
To switch from automatic to manual operation
Manual
operation
Tm operation
Automatic
operation
To switch from manual to automatic operation
To switch from automatic operation (or manual) to the one switched off and
vice versa
Note: when operating on the keypad, the device activates local operation.
In this way the device does not check if there are new settings on the cloud and
adjusts the temperature according to the local settings.
Local operation allows programming using the device keypad without modifying the
programming and configuration present in the cloud.
Local operation is reported both on the device by turning on the icon and on the
app.
Local operation can be interrupted at any time only by the app.
Manual
operation
3"
Automatic
operation
Tm operation
Automatic
operation
Off
operation
3"
3"

English
- 53 -
TUO Wi-Fi RF Chronothermostat User Manual
CONFIGURATION MENU DESCRIPTION
3s
SET
SET
SET
SET
SET
SET
SET
The SET menu allows you to modify of
the values of the 3 temperatures of the
automatic operation (T1, T2, T3).
The TIMER menu allows setting of
one of the 3 timed operations.
The PROG menu allows you to change the
programming of the automatic operating mode.
The ADV menu allows you to configure
the general operating parameters
of the device.
The CLOCK menu allows you to set date
and time. It also allows the configuration
of the daylight saving time change.
The RF menu allows configuration
and the radiofrequency connection test
between the device and the remote actuator.

English
- 54 -
TUO Wi-Fi RF Chronothermostat User Manual
CLOCK MENU - DATE AND TIME SETTING
Set the seconds* Set the minutes Set the time
Set the year Set the month Set the day
Initial screen Configuration menu
SET
3s
When connected to the Wi-Fi network, the device acquires the date and time settings
from the server and no settings are required.
However, if you need to manually set the date and time values, proceed as follows:
To exit the date and time setting:
• press the key once to return to the configuration menu
• press the key twice to exit the menu and return to the initial screen
• to change the settings of the summer/winter time change, press and hold for a long
time the key (see "Configuration of the summer/winter time change")

English
- 55 -
TUO Wi-Fi RF Chronothermostat User Manual
Changing the clock
Automatic on/off
time change
3s
If the function is enabled (AUTO ON), it is necessary to set:
• the day of the week (1= Monday...,7= Sunday)
• the week of the month (1st= first, 2nd= second,...LSt= last)
• the month of the year
• time
using the keys and to set the value and the key to confirm and move on to
the next parameter.
To exit the summer/winter time change configuration:
• press the key once to return to the configuration menu
• press the key twice to exit the menu
Note: the winter time change ¤summer time is identified by the symbol .
the summer time change ¤winter time is identified by the symbol .
For example, in Italy the summer time starts the last (LST) Sunday (7) of March (03)
at 2:00 o' clock and the last (LST) Sunday (7) of October (10) at 3:00 o' clock.
week
hour
day month
You can configure the device to independently manage the summer time update.
The factory setting includes:
• the passage winter time ¤summer time (+1h) the last Sunday of March
at 2:00 o'clock
• the passage summer time ¤winter time (+1h) the last Sunday of October
at 3:00 o' clock
To change the configuration of the summer/winter time change:
• when changing any of the clock parameters (seconds, minutes, hour, year, month
or day), keep the key pressed for a long time until the display shows $872
Configuration of the summer / winter time change

English
- 56 -
TUO Wi-Fi RF Chronothermostat User Manual
PROG MENU - PROGRAMS SETTINGS
x1 time
Initial screen Configuration menu PROG. Menu
Choose the day Y
Choose
the Px program
SET /
SET
3s
Access the PROG menu to change the programming of the automatic operation.
The factory setting includes:
• the P1 program from Monday to Friday
• the P2 program on Saturday and Sunday
If this program is not suitable for your needs, you can:
• assign a different program for one or more days of the week
• modify one or more existing programs by personalizing the profile, that is,
assigning different temperature levels for one or more hours of the day.
How to choose a different program for the day Y
If the program meets the needs:
• press the key once to confirm and choose another day to which to assign
a different program
• press the key twice to return to the configuration menu
• press the key three times to exit the menu and return to the initial screen
If no program meets the needs:
• choose the one that is closest to you and press the key to customize
the profile (see "How to customize the profile of a Px program")

English
- 57 -
TUO Wi-Fi RF Chronothermostat User Manual
How the switching delay works
Set a switching delay for a specific hour
to maintain, for the duration of the delay, the temperature value
assigned to the previous hour.
For example, if the program includes:
T2 from 12 to 13
T3 from 13 to 14 pm with 30 minutes delay
the chronothermostat adjusts the temperature based on the value of
T2 from 12 to 13.30 and
T3 from 13.30 to 14.00
It is possible to set delays of 15, 30, 45 minutes,
independent for every hour of the day.
How to customize the profile of a Px program
• starting from midnight 00:00, press the keys and to assign to each hour
of the day one of the 3 possible temperatures (T1, T2, T3) and the key
to confirm and go to the next hour.
• to enter a switching delay for the selected hour, hold down the key
for a long time.
For more information about switching delay, see "How the switching delay works"
When the profile program is suitable for your needs:
• press the key to exit the customization.
Choose the
PX program
Choose the temperature
for the selected time
Choose the temperature
for the next hour
Table of contents
Other Vemer Thermostat manuals

Vemer
Vemer Mithos Color Wi-Fi User manual

Vemer
Vemer CHRONOS 230 Bianco User manual

Vemer
Vemer Chronos RF Bianco User manual

Vemer
Vemer TUO Wi-Fi User manual

Vemer
Vemer TUO GSM VE771800 User manual

Vemer
Vemer THALOS RF User manual

Vemer
Vemer ECO User manual

Vemer
Vemer Tuo Wi-Fi Batteria Bianco User manual

Vemer
Vemer Mithos H User manual

Vemer
Vemer Dafne User manual
Vemer
Vemer Mithos GSM User manual

Vemer
Vemer Thalos Key Bianco User manual

Vemer
Vemer THALOS RF Series User manual

Vemer
Vemer EVO.DIN User manual

Vemer
Vemer Mithos RF User manual

Vemer
Vemer VE788600 User manual

Vemer
Vemer Athena Silver User manual

Vemer
Vemer Mithos Color Wi-Fi User manual
Vemer
Vemer Iride User manual

Vemer
Vemer Dafne User manual