VERIS INDUSTRIES, INC. Hawkeye 8400V Series User manual

Z204046-0F PAGE 1 ©2007 Veris Industries USA 800.354.8556 or 503.598.4564 / suppor[email protected] 03071
This chapter contains important safety precautions that must be followed before
attempting to install, service, or maintain electrical equipment. Carefully READ and
FOLLOW the safety precautions outlined below BEFORE working with the power meter.
PORTLAND, OREGON USA
(503) 598-4564 FAX (503) 598-4664
1-800-354-8556
VERIS INDUSTRIES
®
Installation Instructions
Hawkeye 8400V Series
POWER METER (For use with 1 Volt CTs)
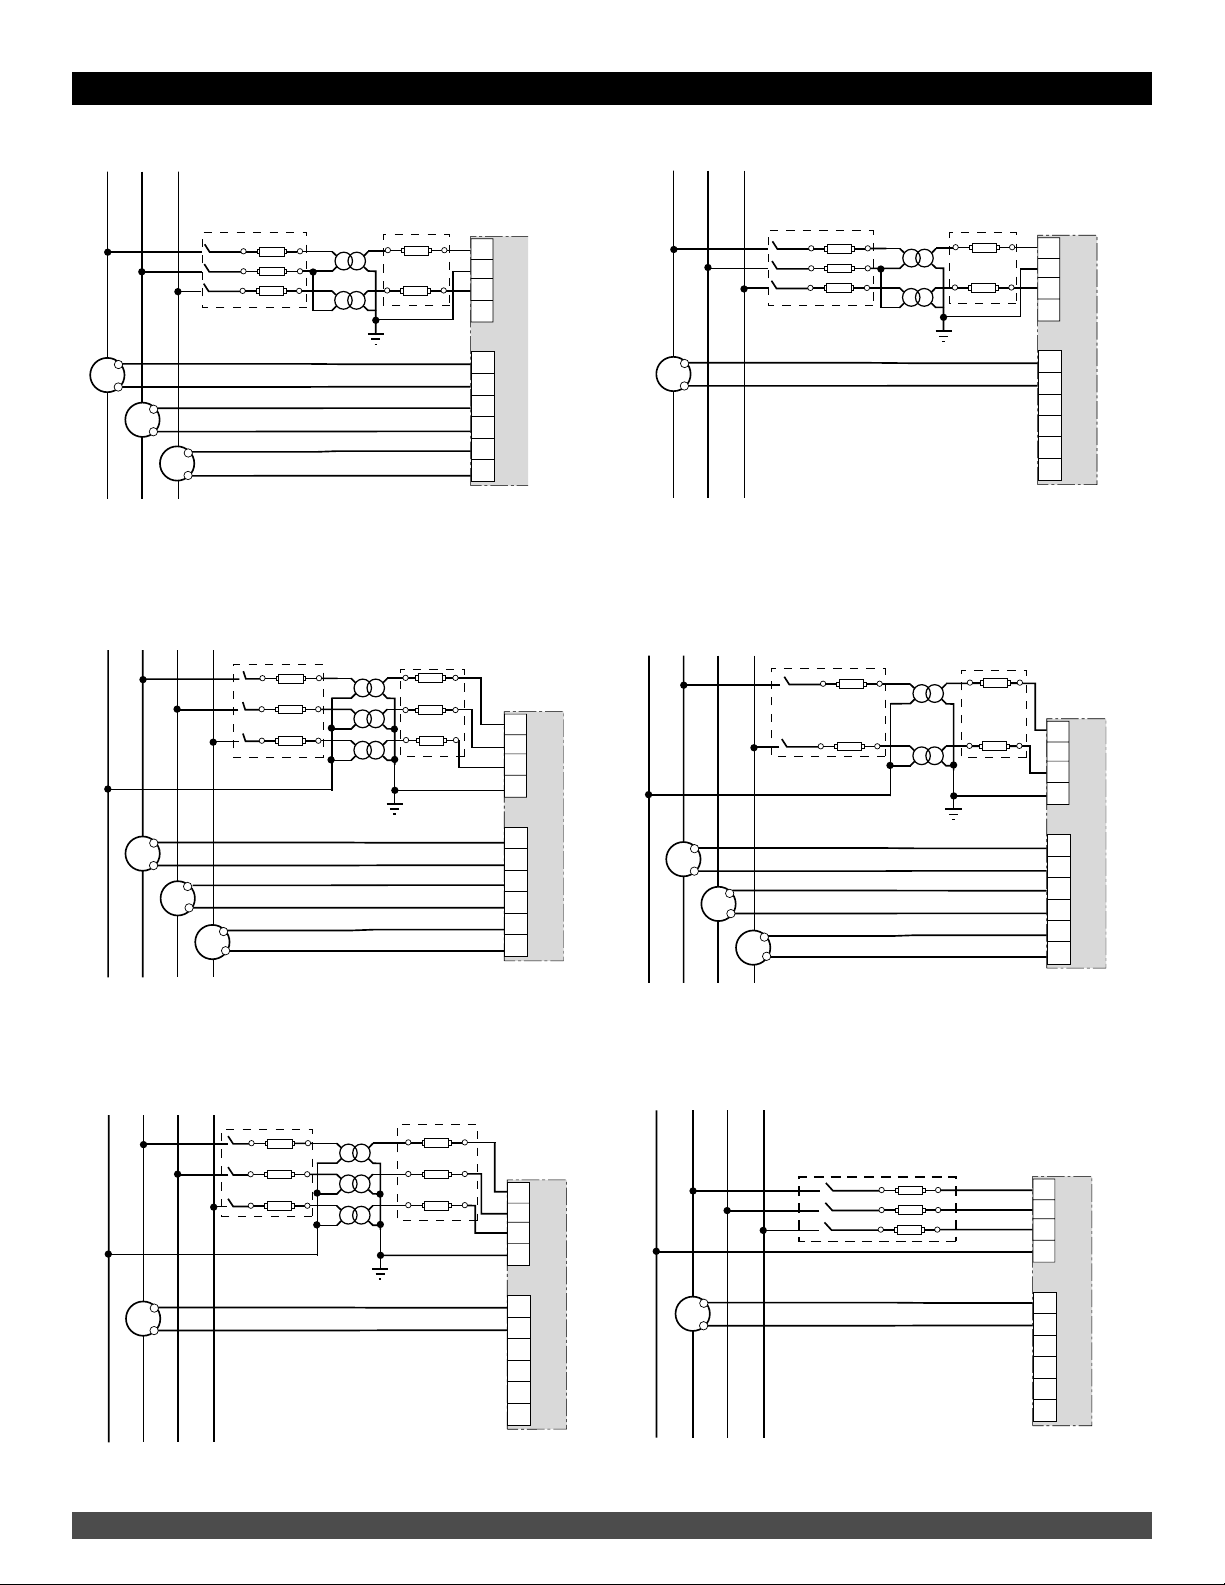
INTRODUCTION
A. One (1) power meter
B. Two (2) retainer clips
C. One (1) installation and user
manual
A
B
C
Box Contents (H8400VB/S)
Before you Begin
m DANGER
HAZARD OF ELECTRIC SHOCK, EXPLOSION, OR ARC FLASH
• Only qualified electrical workers should install this equipment. Such work
should be performed only after reading this entire set of instructions.
• NEVER work alone.
• Before performing visual inspections, tests, or maintenance on this equipment,
disconnect all sources of electric power. Assume that all circuits are live until
they have been completely de-energized, tested, and tagged. Pay particular
attention to the design of the power system. Consider all sources of power,
including the possibility of backfeeding.
• Turn off all power supplying the power meter and the equipment in which it is
installed before working on it.
• Always use a properly rated voltage sensing device to confirm that all power is off.
• Apply appropriate personal protective equipment (PPE) and follow safe electrical
work practices. In the USA, see NFPA 70E.
• Qualified persons performing diagnostics or troubleshooting that require electrical
conductors to be energized must comply with NFPA 70 E - Standard for Electrical
Safety Requirements for Employee Workplaces and OSHA Standards - 29 CFR
Part 1910 Subpart S - Electrical.
• Before closing all covers and doors, carefully inspect the work area for tools and
objects that may have been left inside the equipment.
• Use caution while removing or installing panels so that they do not extend into
the energized bus; avoid handling the panels, which could cause personal injury.
• The successful operation of this equipment depends upon proper handling,
installation, and operation. Neglecting fundamental installation requirements
may lead to personal injury as well as damage to electrical equipment or other
property.
• NEVER bypass external fusing.
• NEVER short the secondary of a potential transformer .
• Before performing Dielectric (Hi-Pot) or Megger testing on any equipment in
which the power meter is installed, disconnect all input and output wires to
the power meter. High voltage testing may damage electronic components
contained in the power meter.
• The power meter should be installed in a suitable electrical and fire enclosure.
Failure to follow this instruction may result in death or serious injury
Box Contents (H8400V)
A. One (1) power meter and it’s enclosure
B. One (1) installation and user manual
H8400 SERIES
A
B

Z204046-0F PAGE 2 ©2007 Veris Industries USA 800.354.8556 or 503.598.4564 / support@veris.com 03071
12
IDENTIFICATION
H8400V
uControl Power
vVoltage Inputs
w1 Volt ‘‘Current” Inputs
xPulse Outputs for H8453V, H8463V or RS-485 Output for
H8436V, H8437V
H8400VB/S
13
50/60 Hz / 125-250V 3W
110-415V 5VA
RISQUED'ÉLECTROCUTION,D'EXPLOSIONOUD'ARCELECTRIQUE
RIESGODEDESCARGAELÉCTRICA,EXPLOSIÓNODESTELLODEARCO
HAZARD OF ELECTRIC SHOCK, EXPLOSION OR ARC FLASH
ENTRÉES DE COURANT 1V NOM. / 1.2V MAX.
"CURRENT" INPUTS / ENTRADAS DE CORRIENTE
1-
I I
1+ 3+2-2+
III
3-
I
ENTRÉES DE TENSION
+
1
VV
2
V
3N
V
efectuar cualquier trabajo.
Si ces précautions ne sont pas respectés, cela entraÎnera la mort ou des blessures graves.
El incumplimiento de estas precauciones podrá causar la muerte o lesiones serias.
Failure to follow these instructions will result in death or serious injury.
Turn off all power supplying this device and the equipment in which it is installed before
Apague la alimentación del dispositivo y del equipo en el que está instalado antes de
Coupez l'alimentation de cet appareil et de l'équipement dans lequel il est installé avant travailler.
working on it.
VOLTAGE INPUTS / ENTRADAS DE TENSIÓN
12
KWH PHASE or
KVARH
240V
100mA max
480V L-L 50/60Hz
600V L-L 50/60Hz
R
Z104144-0C
678 9
10
12
11
5
J5
J6
J7
NB
A
L N
*
50/60 Hz / 125-250V 3W
110-415V 5VA
RISQUED'ÉLECTROCUTION,D'EXPLOSIONOUD'ARCELECTRIQUE
RIESGODEDESCARGAELÉCTRICA,EXPLOSIÓNODESTELLODEARCO
HAZARD OF ELECTRIC SHOCK, EXPLOSION OR ARC FLASH
ENTRÉES DE COURANT 1V NOM. / 1.2V MAX.
"CURRENT" INPUTS / ENTRADAS DE CORRIENTE
1-
I I
1+ 3+2-2+
III
3-
I
ENTRÉES DE TENSION
+
1
VV
2
V
3N
V
efectuar cualquier trabajo.
Si ces précautions ne sont pas respectés, cela entraÎnera la mort ou des blessures graves.
El incumplimiento de estas precauciones podrá causar la muerte o lesiones serias.
Failure to follow these instructions will result in death or serious injury.
Turn off all power supplying this device and the equipment in which it is installed before
Apague la alimentación del dispositivo y del equipo en el que está instalado antes de
Coupez l'alimentation de cet appareil et de l'équipement dans lequel il est installé avant travailler.
working on it.
VOLTAGE INPUTS / ENTRADAS DE TENSIÓN
KWH PHASE or
KVARH
240V
100mA max
480V L-L 50/60Hz
600V L-L 50/60Hz
R
;$
3FE
8IJUF 8IJUF 8IJUF
#MBDL :FMMPX
Note: Meter is pre-wired in door of H8400VB/S
*NOTE: If this unit is the last unit in a daisy chain,
then this switch should be in the“on”position.
Otherwise, this switch shold remain in the
“off”position.
Figure 1
Figure 2
11
yRS-485 Terminator Switch (H8436VB/S, H8437VB/S Only)*
zRS-485 Input (H8436VB/S, H8437VB/S) or Pulse Contacts (H8453VB/S, H8463VB/S)
{1 Volt “Current” Inputs
|Voltage Inputs
}Control Power Input
~Control Power Fuse — 1/2 Amp, 600VAC
Self-Power Connections (see Fig 9)
600VAC Connections for H84xxVBS, or jumper on H84xxVB (see Fig. 9)
Studs for 600V transformer — H84xxVBS only
13

Z204046-0F PAGE 3 ©2007 Veris Industries USA 800.354.8556 or 503.598.4564 / support@veris.com 03071
INSTALLATION
(3.62)
92+0.8
–0.0
92+0.8
–0.0
(3.62)
mm (in.) 19
50
(1.97)
(0.75)
96
(3.7
8
96
(3.78)
Mounting - H8400V
1. Insert the power meter through the 92 mm x 92 mm (3.62 in. x 3.62 in.) cut-out
(see Figure_on page 2).
2. Attach the two retainer clips to the power meter using the retainer slots at
position A or position B.
There are two sets of retainer slots on the left, right, top and bottom of the power
meter. The first set is for installation locations thinner than 3 mm (1/8 in.). The
second set is for installation locations 3 to 6 mm (1/8 in. to 1/4 in.).
NOTE: For use on a flat surface of a protective enclosure (for example, in the USA: NEMA
Type 1 rated enclosure or better).
B
A
A
B
Removing the Connectors
1. Insert the flat end of a screwdriver into the
groove between the power meter and
the connector, as shown in the image.
2. Pull down the screwdriver to remove the connector.
1
2
Dimensions - H8400V
H8400 SERIES
4.08"
(104mm)
9.45"
(240mm)
8.20"
(208mm)
1.77"
(45mm)
1.77"
(45mm)
CLEARANCE
Dimensions - H8400VB/S
NOTE: Recommended distance from left side of
box to another object is 1.77” (45 mm) to allow
meter door to open.
Figure 3
Figure 4
Figure 5
Figure 6

Z204046-0F PAGE 4 ©2007 Veris Industries USA 800.354.8556 or 503.598.4564 / support@veris.com 03071
INSTALLATION for H84XX VB & VBS
6.50"
165 mm
1.50"
38 mm
7.50"
190 mm
.50"
13 mm
Mounting - H8400VB/S
Mount the meter box at an appropriate height allowing for easy viewing of the
display. A mounting template is included in this installation guide.
Figure 7
Always observe all National and Local Codes during installation of this product.
The box needs to be mounted on a solid surface:
(1) For use in a pollution degree 2 or better environment only.
(2) Connect appropriate safety earth ground wiring to provided grounding
terminal.
(3) Disconnect devices:
In Europe A switch or circuit breaker rated for a maximum of 20 amps must be provided
to disconnect the H8400 from the supply source. The switch or circuit breaker shall be
in close proximity to the equipment and within easy reach of the operator and shall be
marked as the disconnecting device. The disconnecting device shall meet the relevant
requirements of IEC 60947-I and IEC 60947-3 and be suitable for the application.
(4) Overcurrent protection for supply conductors supply wiring needs to be pro-
vided with approved current limiting devices suitable for protecting the wiring but
not to exceed 20 Amps. In the US or Canada, disconnecting fuse holders may also be
used to do (3) above as well.
(5) Wiring can be up to #12 (2mm) and rated min. 600V.
(6) After installation the box needs to be closed and secured with provided plastic
cable tie or securing screw depending on which version you have. A lockout device
may also be used for this purpose.
WIRING H84XX VB
“CONTROL POWER” may be taken from the voltage inputs by selecting appropriate
jumper connections.* “CONTROL POWER” must be below 415V “L to L” and Maximum
300V from either Line to Safety Earth. Higher voltages require the use of the
“X050 DJU 600V to 300” Dropping Transformer provided in H84XX XBS products.
In this product the jumpers would normally connect to “J6” and “J8” to power from
480 or 600V Delta power systems.
*Jumpers normally set for “N” & “A” if to be used on a 480V or higher DELTA installation,
a separate control power source MUST be provided OR the optional “X050 DJU 600V to
300” Dropping Transformer MUST BE USED!
Power Connections
J5
J6
J7
NB
A
L
"CONTROL POWER INPUT"
N
Figure 9

Z204046-0F PAGE 5 ©2007 Veris Industries USA 800.354.8556 or 503.598.4564 / support@veris.com 03071
This chapter explains how to make the wiring connections for the power meter.
NOTE: Voltage inputs and control power for distribution systems up to 347 V L-N and 600
V L-L complies with metering category III. Also, terminal wiring should have a maximum
temperature rating of 80°C.
The following symbols are used in the diagrams:
Wiring Diagram Symbols
Symbol Description
Voltage disconnect switch
Fuse
Earth ground
Current transformer
Potential transformer
Protection containing a voltage disconnect
switch with a fuse or disconnect circuit
breaker (the protection device must be
rated for the available short-circuit current
at the connection point).
Introduction
S2
S1
WIRING H84XX VB
Figure 8

Z204046-0F PAGE 6 ©2007 Veris Industries USA 800.354.8556 or 503.598.4564 / support@veris.com 03071
Supported System Types
4JOHMF1IBTF8JSJOH
5ISFF1IBTF8JSJOH
/VNCFS
PG8JSFT
2UZ
2UZ
*%
77O
77
777O
777
777
7777O
7777O
7777O
5ZQF
-/
--
--XJUI/
%FMUB
%FMUB
#BMBODFE
XJSF
%FMUB
8ZF
8ZF
#BMBODFE
4ZTUFN
5ZQF
151SJNBSZ
4DBMF
/P15
/P15
/P15
/P15
/P15
/P15
/P15
/P15
'JHVSF
/VNCFS
*%
M
M
MM
MMM
M
MMM
MMM
M
$5T 7PMUBHF$POOFDUJPOT .FUFS$POmHVSBUJPO
Voltages Less Than or Equal to 347 VAC L-N/600 VAC L-L, Direct Connect No PTs
5ISFF1IBTF 8JSJOH
/VNCFS
PG 8JSFT
2UZ
2UZ
*%
77 7 UP
(SPVOE
77 7
7/ UP (SPVOE
77 7
7/ UP (SPVOE
77 7
7/ UP (SPVOE
77 7
7/ UP (SPVOE
5ZQF
%FMUB
%FMUB
#BMBODFE
(SPVOEFE
8ZF
8ZF
8ZF
(SPVOEFE
#BMBODFE
4ZTUFN
5ZQF
15 1SJNBSZ
4DBMF
#BTFE PO
7PMUBHF
#BTFE PO
7PMUBHF
#BTFE PO
7PMUBHF
#BTFE PO
7PMUBHF
#BTFE PO
7PMUBHF
'JHVSF
/VNCFS
*%
M M M
M
M M M
M M M
M
$5T 7PMUBHF $POOFDUJPOT .FUFS $POGJHVSBUJPO
Voltages Greater Than 347 VAC L-N/600 VAC L-L
WIRING
Figure 10
Figure 11

Z204046-0F PAGE 7 ©2007 Veris Industries USA 800.354.8556 or 503.598.4564 / support@veris.com 03071
N L1
S2
S1
V1
V2
V3
VN
I1+
I1–
I2+
I2–
I3+
I3–
3
4
5
6
14
15
16
17
18
19
H84xxV WIRING DIAGRAMS
1-Phase Line-to-Neutral 2- Wire System 1 CT. 1-Phase Line-to-Line 2-Wire System 1CT
USE SYSTEM TYPE 101
L1 L2
S2
S1
S2
S1
V1
V2
V3
VN
I1+
I1–
I2+
I2–
I3+
I3–
3
4
5
6
14
15
16
17
18
19
N
L1 L2
S2
S1
V1
V2
V3
VN
I1+
I1–
I2+
I2–
I3+
I3–
3
4
5
6
14
15
16
17
18
19
1-Phase Direct Voltage Connection 2 CT
L2 L3L1
S2
S1
S2
S1
S2
S1
V1
V2
V3
VN
I1+
I1–
I2+
I2–
I3+
I3–
3
4
5
6
14
15
16
17
18
19
L2 L3L1N
S2
S1
S2
S1
S2
S1
V1
V2
V3
VN
I1+
I1–
I2+
I2–
I3+
I3–
3
4
5
6
14
15
16
17
18
19
3-Phase 3-Wire 3CT no PT
3-Phase 4-Wire Wye Direct Voltage Input Connection 3 CT
Figure 13
Figure 12
USE SYSTEM TYPE 11
USE SYSTEM TYPE 12
Figure 14
USE SYSTEM TYPE 31
Figure 15
USE SYSTEM TYPE 40
Figure 16 Figure 17
L2 L3L1
S2
S1
V1
V2
V3
VN
I1+
I1–
I2+
I2–
I3+
I3–
3
4
5
6
14
15
16
17
18
19
Balanced 3-Phase 3-Wire Direct Voltage Input Connection 1 CT
USE SYSTEM TYPE 32

Z204046-0F PAGE 8 ©2007 Veris Industries USA 800.354.8556 or 503.598.4564 / support@veris.com 03071
L2 L3L1N
S2
S1
S2
S1
S2
S1
V1
V2
V3
VN
I1+
I1–
I2+
I2–
I3+
I3–
3
4
5
6
14
15
16
17
18
19
L2 L3L1N
S2
S1
S2
S1
S2
S1
V1
V2
V3
VN
I1+
I1–
I2+
I2–
I3+
I3–
3
4
5
6
14
15
16
17
18
19
L2 L3L1N
S2
S1
V1
V2
V3
VN
I1+
I1–
I2+
I2–
I3+
I3–
3
4
5
6
14
15
16
17
18
19
H84xxV WIRING DIAGRAMS
3-Phase 4-Wire Wye Connection 3CT 2 PT 3-Phase 4-Wire Wye 3CT 2PT (for balanced voltage)
Balanced 3-Phase 4-Wire 3PT 1 CT
L2 L3L1N
S2
S1
V1
V2
V3
VN
I1+
I1–
I2+
I2–
I3+
I3–
3
4
5
6
14
15
16
17
18
19
Balanced 3-Phase 4-Wire Direct Voltage Input Connection 1 CT
USE SYSTEM TYPE 40
Figure 18
USE SYSTEM TYPE 42
USE SYSTEM TYPE 44
Figure 20
Figure 19
Figure 21
USE SYSTEM TYPE 44
Figure 22 Figure 23
, ,,
3
3
3
3
3
3
6
6
6
6.
)
)n
)
)n
)
)n
USE SYSTEM TYPE 31
3-Phase 3-Wire Delta Connection 3CT 2 PT
L2 L3L1
S2
S1
V1
V2
V3
VN
I1+
I1–
I2+
I2–
I3+
I3–
3
4
5
6
14
15
16
17
18
19
Balanced 3-Phase 3-Wire 1 CT 2 PT
USE SYSTEM TYPE 32

Z204046-0F PAGE 9 ©2007 Veris Industries USA 800.354.8556 or 503.598.4564 / support@veris.com 03071
Direct Connect Control Power (DC Control Power)
• DC Control Power 100 VDC<V<300VDC
• See Table below.
L1 L2 L3N
1 2
L1 L2 L3N
1 2
L1 L2 L3
1 2
Direct Connect Control Power (Phase to Neutral)
• Phase to Neutral only when voltage <415+10% VAC max.
• See Table below.
H84xxV WIRING DIAGRAMS
1 2
Control Power Transformer (CPT) Connection
$POUSPM1PXFS4PVSDF
$15
$15
$15
-JOF7PMUBHF
-JOF7PMUBHF
%$
4PVSDF7PMUBHF7
7T7
7T7
7T7
7T7
7T7
7T7
'VTF
'/.PS.%-
'/2PS'/23
'/2PS'/23
'/23
'/23
-1$$
'VTF"NQFSBHF
N"
N"
N"
N"
N"
N"
Fuse Recommendation
NOTES:
• See Figure 24 to Figure 27 on page 9.
Over current protection should be located as close to the device as possible.
For selecting fuses and circuit breakers other than those listed above, use the following criteria:
Over current protection should be rated as listed above.
Current interrupt capacity should be selected based on the installation category and fault current capability.
Over current protection should be selected with a time delay.
The voltage rating should be based on the input voltage applied.
If a 0.25A fuse is not available with the required fault current capability, use a fuse rated at a maximum of 0.5A.
Direct Connect Control Power C (Phase to Phase)
• Phase to Phase only when voltage <415 +10%VAC max.
• See Table below.
• Control Power Transformer 120 or 240VAC. Secondary 50VA max.
• See Table below.
1. To avoid distortion, use parallel wires for control power and voltage inputs.
Keep the fuse close to the power source.
2. Use with 480Y/277V and 208Y/120V systems.
3. For an open delta PT connection with 120V L-L secondaries, use system type 31.
Figure 24
CONTROL POWER
Figure 25
Figure 26
Figure 27

Z204046-0F PAGE 10 ©2007 Veris Industries USA 800.354.8556 or 503.598.4564 / support@veris.com 03071
WIRING DIAGRAMS
Pulse Output Capabilities
Solid-state Pulse Output
The H8453 has two normally open solid-state KY outputs. The H8463 has one normally open and one normally closed solid-state KY outputs. One is dedicated to kWH and the
other is field selectable for Phase Detect or kVARh. See Figures 41 and 42 for configuration information.
≤100 mA
~
=
≤100 mA
~
=
3
4
5
6
KWH OPTION
KVARH
or
PHASE
7 8 9 10
*The power source should not be a safety extra low voltage (SELV) circuit. Pulse outputs are not SELV rated.
Digital Output/Pulse Output
KY is a solid state pulse output
rated for 240VAC/DC max.
Maximum load current is 100mA
at 25°C. Derate 0.56mA per °C
above 25°C.
Power Source
3-240VDC
6-240VAC
Power Source
3-240VDC
6-240VAC
Overcurrent Protective
Device (not supplied)
NOTE: The overcurrent protective device must
be rated for the short circuit current at the
connection point.
Figure 28 (H8453)

Z204046-0F PAGE 11 ©2007 Veris Industries USA 800.354.8556 or 503.598.4564 / support@veris.com 03071
COMMUNICATIONS
Communications Capabilities
Baud Rate
9600
19200
Maximum Communication Distances
1 to 32 Devices
Feet
8,000
6,000
Meters
2,438
1,829
NOTE: Distances listed should be used as a guide only and cannot be guaranteed.
Refer to the master device’s documentation for any additional distance limitations.
RS-485 Communications Distances
Daisy-chaining Devices to the Power Meter
–
+
The RS-485 slave port allows the power meter to be connected in a daisy chain with up to 31, 2-wire devices. In this bulletin, communications link refers to a chain of devices
that are connected by a communications cable. See Figure 30 .
Daisy-chaining 2-wire devices
• If the power meter is the first device on the daisy chain, connect it to the host device using a RS-232 to RS-485 converter.
• If the power meter is the last device on the daisy chain, terminate it with the terminator provided.
• The first device on the chain should also have a 120Ω terminator between + and -.
• See Figure 29 for the maximum daisy-chain communications distances for 2-wire devices.
• The terminal’s voltage and current ratings are compliant with the requirements of the EIA RS-485 communications standard
* A 120Ω resistor is included on the circuit board inside the H8436VB/S and H8437VB/S units.
Belden 1120A or equivalent 120Ω terminator on the
last device of the daisy chain*
Not used
Figure 29
Figure 30

Z204046-0F PAGE 12 ©2007 Veris Industries USA 800.354.8556 or 503.598.4564 / support@veris.com 03071
OPERATION
Operating the Display
The power meter is equipped with a large, back-lit LCD display. It can display up to
five lines of information plus a sixth row of menu options. Figure 31 shows the
different parts of the power meter.
PHASE
MAX DEMAND
1
1; DMD
265
275
268
2.4
{{{{{}}}}}}
A
A
A
!&
2
3
N
I
A
{{{{{}}}}}}
{{{{{}}}}}}
10 50 100
10 50 100
10 50 100
%
A B C
D
F
G
H
J
K
L
I
E
<-
Power Meter Display
A. Type of measurement
B. Screen Title
C. Maintenance icon
D. Bar Chart (%)
E. Units
F. Display more menu items
G. Menu item
H. Selected menu indicator
I. Button
J. Return to previous menu
K. Values
L. Phase
How the Buttons Work
NOTE: • Each time you read “press” in this manual, press and release the appropriate button beneath a menu item. For example,
if you are asked to “Press PHASE,” you would press and release the button below the PHASE menu item.
• Changes are automatically saved.
Navigation
Change Values
View more menu items on the current level
Return to the previous menu level
Indicates the menu item is selected and there are no menu
levels below the current level.
Change values or scroll through the available options.
When the end of a range is reached, pressing + again
returns to the first value or option.
Select the next number of a series.
Move to the next editable field or saves the changes and exits
the screen if the last editable field is selected.
Button Symbols
Figure 31
Figure 32

Z204046-0F PAGE 13 ©2007 Veris Industries USA 800.354.8556 or 503.598.4564 / support@veris.com 03071
Model H8436X/37x H8453x H8463x
CT Primary Ratio 100A 100A 100A
CT Secondary Ratio (A models only) 5A 5A 5A
PT Ratio 1:1 (none) 1:1 (none) 1:1 (none)
Frequency 60Hz 60Hz 60Hz
Setup Password 00000 00000 00000
Reset Password 00000 00000 00000
Display Mode IEEE IEEE IEEE
System Type 40 40 40
Modbus Address 001 N/A N/A
Modbus Baud Rate 19200 baud N/A N/A
Modbus Parity None N/A N/A
1st Pulse Contact N/A N.O. N.O.
KWh Pulse Width N/A 100ms 100ms
KWh Pulse Energy Index N/A 1 KWh/Pulse 1KWh/Pulse
2nd Pulse Contact N/A N.O. N.C.
2nd Pulse Contact Output N/A KVARh Phase Loss
KVARh Pulse Width N/A 100ms 100ms
KVARh Pulse Energy Index N/A 1 KVARh/Pulse 1 KVARh
H84XX DEFAULT SETTING SUMMARY TABLE:

Z204046-0F PAGE 14 ©2007 Veris Industries USA 800.354.8556 or 503.598.4564 / support@veris.com 03071
POWER METER SETUP
Set Up the Power Meter
To begin power meter setup, do the following:
1. Press until you see SETUP.
2. Press SETUP. Enter your password.
NOTE: The default password is 00000.
3. Press + to change a digit, to select the next digit.
4. Press OK.
Set Up CTs
1. Press CT.
2. Enter the PRIM CT (primary CT) number: 1 to 32767, using the + and
buttons.
3. Press OK.
1. Press PT. NOTE: The default is NO PT. Single Phase System types (10, 11, 12) do
not allow PTs.
2. Press +
3. Select the SCALE value: x1, x10, x100, NO PT (for direct connect).
4. Press OK.
5. Enter the PRIM (primary) value.
6. Press OK.
7. Enter the SEC. (secondary) value.
Set Up PTs
1. Press until HZ is visible.
2. Press HZ.
3. Press + to select the frequency: 50 Hz or 60 Hz. NOTE: The default is 60Hz.
4. Press OK.
Set Up the System Frequency
Figure 33
Figure 34
Figure 35

Z204046-0F PAGE 15 ©2007 Veris Industries USA 800.354.8556 or 503.598.4564 / support@veris.com 03071
POWER METER SETUP
Set Up the Meter System Type
1. Press until SYS is visible.
2. Press SYS.
3. Press + to select the SYS (system type): 10, 11, 12, 30, 31, 32, 40, 42, 44.
NOTE: See pages 6-8 for a description of the system types.
4. Press OK.
<-
3-PHASE SYSTEM
1; + OK
&
4
3
3
40
CT
PT
SYS
Wire
Set Up the Passwords
NOTE: The default passwords are 00000.
1. Press until PASSW (password) is visible.
2. Press PASSW.
3. Press + to change a digit in the SETUP password, to select the next digit.
NOTE: This sets the password to enter the Setup Menu or change SETUP via
Modbus.
4. Press OK.
5. Enter the RESET (password to reset the power meter) password.
NOTE: This sets the password required to reset stored values such as kWH via the
local RESET menu or remotely via Modbus (if so equipped.)
6. Press OK to return to the SETUP MODE screen.
<-
PASSWORD SETUP
1; + OK
00000
00000
00000
DIAG.
RESET
MIN.MX
&
00000 SETUP
Select the Display Operating Mode
1. Press until MODE is visible.
2. Press MODE.
3. Press IEEE or IEC. NOTE: IEEE mode uses W/VA/VAR terminology. IEC mode uses
P/Q/S.
4. Press to return to the SETUP MODE screen.
SELECT MODE
1; IEEE IEC
1;
Figure 36
Figure 37
Figure 38

Z204046-0F PAGE 16 ©2007 Veris Industries USA 800.354.8556 or 503.598.4564 / support@veris.com 03071
<-
PULSE SETUP
1; + OK
100
0.1
100
0.1
KWH/P
MSEC
KVARH
&
MSEC
POWER METER SETUP
Set Up Communications(H8436V/VB, H8437V/VB)
1. Press until COM is visible.
2. Press COM.
3. Enter the ADDR (meter address): 1 to 247. Press + to change a digit, to
select the next digit.
4. Press OK.
5. Press + to select the BAUD (baud rate): 2400, 4800, 9600 or 19200.
6. Press OK.
7. Press + to select the parity: EVEN, ODD, NONE.
8. Press OK to return to the SETUP MODE screen.
<-
COMMS SETUP
1; + OK
9600
nOnE
bauD
Par
mbus
ADDR
001
Set Up Demand
1. Press until DEMND (demand) is visible.
(H8437V/VB/S only)
2. Press DEMND.
3. Enter the MIN (interval in minutes): 0 to 60. Press + to change a digit, to
select the next digit.
4. Press OK. Enter the SUB-I (number of subintervals): 1 to 60. Press + to change a
digit, to select the next digit.
5. Press OK.
NOTE: The calculation method used for SUB-I is as follows:
0 = sliding block
1 = block
>1 = rolling block (The SUB-I value must divide evenly into the MIN value. For example,
if MIN is 15, SUB-I can be 3, 5, or 15. If you selected 3, you would have 3 subintervals at 5
minutes each.)
<-
DEMAND SETUP
1; + OK
100
15
1
0.1
MIN
SUB-i
KVARH
&
MSEC
I
Set Up Pulse Options (H8453V/VB, H8463V/VB )
1. Press until PULSE is visible.
2. Press PULSE.
3. Press + to select the MSEC (kWH pulse duration in milliseconds): 100, 300, 500,
or 1000.
4. Press OK.
<-
PULSE SETUP
1; + OK
100
0.1
_ _
KWH/P
PHASE
&
MSEC
7. (continued) The H8463V/VB will
open the contacts on the Phase
kVARH output when all three phase
voltages are within 25% of each
other and no phase is less than
82.5 volts line to neutral.
8. Press OK.
9. Select the kVARH (pulse weight):
0.1, 1, 10, 100, 1000, or 10000. This
is unavailable if PHASE is selected
above.
10. Press OK to return to the SETUP
MODE screen.
Figure 39
Figure 40
Figure 41
Figure 42
5. Press + to select the kWH/P (pulse
weight): 0.1, 1, 10, 100, 1000, or
10000.
6. Press OK.
7. Select the MSEC (kVARH pulse
duration in milliseconds): PHASE,
100, 300, 500, or 1000. Note: Selecting
PHASE changes the output operation
from kVARH to PHASE DETECT (see
Fig. 42). If phase is selected, the
H8453V/VB will close the contacts on
the PHASE KVARH output when all three
phase voltages are within 25% of each
other and no phase is less than 82.5
volts Line to Neutral.

Z204046-0F PAGE 17 ©2007 Veris Industries USA 800.354.8556 or 503.598.4564 / support@veris.com 03071
POWER METER SETUP
View the Meter Information
POWER METER DIAGNOSTICS
1. From the SUMMARY screen, DIAGN (diagnostics)
2. Press METER (meter info).
3. View the meter information (model number, firmware operating system
version, firmware reset system version, and power meter serial number).
H
METER
METER INFO
1; HELTH
8400U
10
4
25000193
0.5.
R.S.
S.N.
&
MODEL
^
Check the Health Status
1. Press HELTH
2. View the health status. If there
are no problems, OK is displayed on
the lower right. See Fig. 44.
METER
HEALTH STATUS
1; HELTH MAINT
OK
&
^
Reset Energy Accumulators: kWh, kVAh, & kVARh,
(Ph, Qh, Sh), (H8453V, H8463V, H8436V)
RESET THE POWER METER DATA
1. From the SUMMARY screen, RESET is visible.
2. Press RESET.
3. Enter the RESET password (00000 is the default).
4. Press OK.
5. Press YES to RESET, NO to cancel. NOTE: The RESET value displayed is a lifetime
count of the number of times the energy accumulators have been reset. This is
a security feature to detect tampering.
Reset Menu, (H8437V) (see below)
1. From the SUMMARY screen, RESET is visible.
2. Press RESET.
3. Enter the RESET password (00000 is the default).
4. Press OK.
5. Press until the parameter you want to reset is displayed.
6. Press the parameter to cancel.
1RESET
0.010 KWH
RESET ENERGY
No Yes
The wrench icon is displayed on all
screens when a health problem is
detected. See Fig. 45. Problems are
shown on the right of the screen with
the location in the center.
Problem:
PLOSS: Phase Loss. F indicates
unable to establish frequency lock
on Phase A. In 3 Phase systems,
A, B, and or C indicates that the
Phase voltage is 25% lower than the
other phases or if the voltage has
dropped below 82 volts Line to
Neutral.
VCLIP: Voltage Clipping. Indicates the
voltage input is too high for the meter to
measure.
ICLIP: Current Clipping. Indicates the
current input is too high for the meter to
measure.
Figure 43
Figure 44 Figure 45
Figure 46
7. Press YES to reset.
8. Menu Options:
METER - Performs all the resets below.
ENERG - Resets energy accumulations (the only reset on the H8436V, H8453V
and H8463)
DEMND - Resets Demand calculations and maximum values.
MINMX- All stored minimum and maximum values.
TIMER - Resets usage and elapsed timers.

Z204046-0F PAGE 18 ©2007 Veris Industries USA 800.354.8556 or 503.598.4564 / support@veris.com 03071
MENU TREES
Definitions:
BDS – Basic Data Stream. Only the Real Energy and Power data points are output.
FDS – Full Data Stream. 26 data points minimum as on the Enercept H8036.
EDS – Extended Data Stream. In addition to the FDS, includes: Frequency (phase A), Current THD, Voltage and THD on each phase.
System Types
Support system types 10, 11, 12, 31, 32, 40, 42, & 44.
Modbus Point Map
The Basic Data Stream (BDS) matches the H8035 Enercept. The Full Data Stream (FDS) matches the H8036 Enercept. The Extended Data Stream (EDS) is unique to the H8400
and adds parameters such as Frequency, Demand, and THD. The configuration of the H8400 is unique. Interger registers begin at 001 (0x001). Floats at 257 (0x101). Configura-
tion registers at 129 (0x081).
H8436/H8453/H8463 FDS Menu Tree (Full Data Stream)
3-PHASE SUMMARY
P
SUMM PHASE
PQS PHASE
PW INSTANT
P
I
AMPS PER PHASE
---
V VOLTS LINE-LINE
U ---
EACCUM Wh
----
/Power Factor
PF
P
POWER SUMMARY
PQS
V
V L-L V L-N
U V
V VOLTS LINE-NEUT
V ---
AMPS VOLTS POWER
I U-V PQS
3-PHASE SUMMARY
ENERG PF
E PF
--- ---
DISPLAY MODE
Blue = IEEE
Red = IEC
Black = Same for both IEEE & IEC
NOTE: Accumulated VAh and
VARh are displayed on Pulse
Models.
Figure 47

Z204046-0F PAGE 19 ©2007 Veris Industries USA 800.354.8556 or 503.598.4564 / support@veris.com 03071
MENU TREES
H8436/H8453/H8463 FDS Menu Tree (Full Data Stream)....continued
3-PHASE SUMMARY
RESET SETUP DIAGN
RESET SETUP DIAGN
H
HELTH METER
MAINT METER
S
SETUP - PASSWORD
SETUP-PASSWORD
R
RESET - PASSWORD
RESET-PASSWORD
SSETUP MODE
CT PT
CT PT
SSETUP MODE
HZ SYS
F SYS
SSETUP MODE
PASSW MODE
PASSW MODE
SSETUP MODE
COMMS or PULSE
COMMS or PULSE
RESET ENERGY?
NO YES
HEALTH STATUS
CT RATIO SYSTEM FREQUENCY PASSWORD SETUP
PT RATIO 1/3-PHASE SYSTEM DISPLAY MODE PULSE-SETUP
METER INFO
COMMS SETUP
Optional
Optional
21
or
DISPLAY MODE
Blue = IEEE
Red = IEC
Black = Same for both IEEE & IEC
Figure 48

Z204046-0F PAGE 20 ©2007 Veris Industries USA 800.354.8556 or 503.598.4564 / support@veris.com 03071
MENU TREES
H8437 EDS Menu Tree (Enhanced Data Stream)
3-PHASE SUMMARY
P
SUMM PHASE MINMX
PQS PHASE MINMX
I
AMPS PER PHASE
---
V VOLTS LINE-LINE
U ---
PPOWER SUMMARY
PQS
PW INSTANT
P
PVAR INSTANT
Q
PVA INSTANT
S
PPOWER MIN-MAX
MIN-MAX
V
V L-L V L-N
U V
V VOLTS LINE-NEUT
V ---
P
W VAR VA
P Q S
AMPS VOLTS POWER
I U-V PQS
---
DISPLAY MODE
Blue = IEEE
Red = IEC
Black = Same for both IEEE & IEC
Figure 49
This manual suits for next models
2
Table of contents
Other VERIS INDUSTRIES, INC. Measuring Instrument manuals