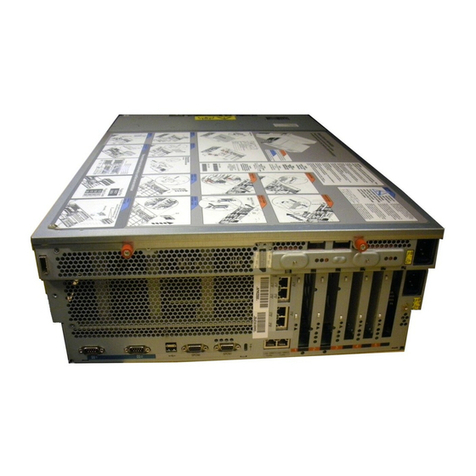
VERITAS Access 3340 User manual

Veritas Access Appliance
Initial Configuration Guide

Access Appliance Initial Configuration Guide
Last updated: 2022-05-25
Legal Notice
Copyright © 2022 Veritas Technologies LLC. All rights reserved.
Veritas, the Veritas Logo, and NetBackup are trademarks or registered trademarks of Veritas
Technologies LLC or its affiliates in the U.S. and other countries. Other names may be
trademarks of their respective owners.
This product may contain third-party software for which Veritas is required to provide attribution
to the third party (“Third-party Programs”). Some of the Third-party Programs are available
under open source or free software licenses. The License Agreement accompanying the
Software does not alter any rights or obligations you may have under those open source or
free software licenses. Refer to the Third-party Legal Notices document accompanying this
Veritas product or available at:
https://www.veritas.com/about/legal/license-agreements
The product described in this document is distributed under licenses restricting its use, copying,
distribution, and decompilation/reverse engineering. No part of this document may be
reproduced in any form by any means without prior written authorization of Veritas Technologies
LLC and its licensors, if any.
THE DOCUMENTATION IS PROVIDED "AS IS" AND ALL EXPRESS OR IMPLIED
CONDITIONS, REPRESENTATIONS AND WARRANTIES, INCLUDING ANY IMPLIED
WARRANTY OF MERCHANTABILITY, FITNESS FOR A PARTICULAR PURPOSE OR
NON-INFRINGEMENT, ARE DISCLAIMED, EXCEPT TO THE EXTENT THAT SUCH
DISCLAIMERS ARE HELD TO BE LEGALLY INVALID. VERITAS TECHNOLOGIES LLC
SHALL NOT BE LIABLE FOR INCIDENTAL OR CONSEQUENTIAL DAMAGES IN
CONNECTION WITH THE FURNISHING, PERFORMANCE, OR USE OF THIS
DOCUMENTATION. THE INFORMATION CONTAINED IN THIS DOCUMENTATION IS
SUBJECT TO CHANGE WITHOUT NOTICE.
The Licensed Software and Documentation are deemed to be commercial computer software
as defined in FAR 12.212 and subject to restricted rights as defined in FAR Section 52.227-19
"Commercial Computer Software - Restricted Rights" and DFARS 227.7202, et seq.
"Commercial Computer Software and Commercial Computer Software Documentation," as
applicable, and any successor regulations, whether delivered by Veritas as on premises or
hosted services. Any use, modification, reproduction release, performance, display or disclosure
of the Licensed Software and Documentation by the U.S. Government shall be solely in
accordance with the terms of this Agreement.
Veritas Technologies LLC
2625 Augustine Drive
Santa Clara, CA 95054
http://www.veritas.com

Technical Support
Technical Support maintains support centers globally. All support services will be delivered
in accordance with your support agreement and the then-current enterprise technical support
policies. For information about our support offerings and how to contact Technical Support,
visit our website:
https://www.veritas.com/support
You can manage your Veritas account information at the following URL:
https://my.veritas.com
If you have questions regarding an existing support agreement, please email the support
agreement administration team for your region as follows:
[email protected]Worldwide (except Japan)
[email protected]Japan
Documentation
Make sure that you have the current version of the documentation. Each document displays
the date of the last update on page 2. The latest documentation is available on the Veritas
website:
https://www.veritas.com/content/support/en_US/dpp.Appliances.html
Documentation feedback
Your feedback is important to us. Suggest improvements or report errors or omissions to the
documentation. Include the document title, document version, chapter title, and section title
of the text on which you are reporting. Send feedback to:
You can also see documentation information or ask a question on the Veritas community site:
http://www.veritas.com/community/
Veritas Services and Operations Readiness Tools (SORT)
Veritas Services and Operations Readiness Tools (SORT) is a website that provides information
and tools to automate and simplify certain time-consuming administrative tasks. Depending
on the product, SORT helps you prepare for installations and upgrades, identify risks in your
datacenters, and improve operational efficiency. To see what services and tools SORT provides
for your product, see the data sheet:
https://sort.veritas.com/data/support/SORT_Data_Sheet.pdf

Chapter 1 Getting to know the Access Appliance ......................... 6
About the Veritas Access Appliance ................................................... 6
About the Access Appliance administration interfaces ............................ 6
Using the Access Appliance shell menu ........................................ 8
About licensing the Access Appliance ................................................ 9
Where to find the documentation ..................................................... 10
Chapter 2 Preparing to configure the appliance ........................... 12
Initial configuration requirements ..................................................... 12
About obtaining IP addresses for Veritas Access ................................. 14
Network and firewall requirements ................................................... 17
Chapter 3 Configuring the appliance for the first time ................ 24
How to configure the Access Appliance for the first time ....................... 24
Configuring the Access cluster on the appliance ........................... 27
Chapter 4 Getting started with the Veritas Access GUI ............. 33
Accessing the Veritas Access web interface ....................................... 33
Chapter 5 Network connection management ................................ 35
Configuring network address settings on the appliance nodes ............... 35
Deleting network settings on appliance nodes .............................. 36
About NIC1 (eth0) port usage on the appliance nodes .................... 37
About IPv4-IPv6-based network support on the Access Appliance
..................................................................................... 37
Configuring VLAN settings on the appliance nodes .............................. 38
Viewing VLAN settings ............................................................ 38
Deleting a VLAN .................................................................... 39
About the Veritas Remote Management Console ................................ 39
Configuring the IPMI port on an appliance node ............................ 41
Managing IPMI users on an appliance node ................................. 41
Resetting the IPMI on an appliance node .................................... 42
Contents

Chapter 6 Monitoring the appliance ................................................. 44
About hardware monitoring in the Access GUI .................................... 44
About Veritas AutoSupport on the Access Appliance ............................ 44
Setting up AutoSupport on the appliance ..................................... 45
Using a proxy server with the appliance ...................................... 46
Setting up email notifications on the appliance .................................... 47
Setting up SNMP notifications on the appliance .................................. 48
Testing the appliance hardware ....................................................... 49
Chapter 7 Resetting the appliance to factory settings ................ 51
About appliance factory reset .......................................................... 51
Performing factory reset for cluster nodes .......................................... 52
Chapter 8 Appliance security ............................................................. 54
About Access Appliance security ..................................................... 54
About Access appliance user account privileges ................................. 55
Access appliance admin password specifications .......................... 55
About forced password changes ...................................................... 56
Changing the Maintenance user account password ............................. 56
About the Access Appliance intrusion detection system ........................ 57
Reviewing SDCS events on the Access Appliance ........................ 58
Auditing the SDCS logs on an Access Appliance .......................... 58
About SDCS event type codes and severity codes on an Access
appliance node ................................................................ 61
Changing the SDCS log retention settings on an Access Appliance
node .............................................................................. 63
About the Access Appliance intrusion prevention system ...................... 64
About Access appliance operating system security .............................. 64
Vulnerability scanning of the Access Appliance ............................. 65
Disabled service accounts on the Access appliance ...................... 66
About data security on the Access appliance ...................................... 66
About data integrity on the Access appliance ..................................... 67
Recommended IPMI settings on the Access appliance ......................... 67
Replacing the default IPMI SSL certificate on the Access appliance
..................................................................................... 69
5Contents

Getting to know the
Access Appliance
This chapter includes the following topics:
■About the Veritas Access Appliance
■About the Access Appliance administration interfaces
■About licensing the Access Appliance
■Where to find the documentation
About the Veritas Access Appliance
The appliances are rack-mounted servers that run the Veritas Optimized Operating
System, a Linux-based operating system. The OS, the appliance software, and the
Access application come preinstalled and optimized for the server hardware and
disk storage units.
See “About the Access Appliance administration interfaces” on page 6.
About the Access Appliance administration
interfaces
The Veritas Access Appliance is administered with multiple user interfaces.
1
Chapter

Table 1-1 Access Appliance administration interfaces
DescriptionInterface
The Access Appliance shell menu is accessed locally or remotely
on each node using any of the following methods:
■SSH
■Veritas Remote Management Console (virtual KVM)
■Physical keyboard and monitor
Note: The Access Appliance shell menu is available on eth1
(NIC2) once you configure the network settings during appliance
initial configuration, and is also available on eth0 (NIC1) on the
default IP 192.168.229.233.
Common tasks to do with the Access Appliance shell menu
include:
■Initial configuration
■Network configuration
■Appliance user management
■Hardware maintenance
■Appliance upgrade
■Appliance troubleshooting
Access Appliance shell
menu
The Veritas Remote Management Console provides
management and monitoring capabilities independent of the
appliance CPU, firmware, and operating system. This console
is accessible through the Intelligent Platform Management
Interface (IPMI) network port on the back of each appliance
node. For the best support and initial configuration experience,
Veritas recommends that you configure the IPMI port and make
it accessible on your network.
You can use the Veritas Remote Management Console for the
following:
■Access the Access Appliance shell menu remotely when the
appliance is not accessible using regular network interfaces.
■Manage an appliance that is turned off or unresponsive. Turn
on, turn off, or restart the appliance from a remote location.
■Monitor appliance hardware health from a remote location.
Veritas Remote
Management Console
7Getting to know the Access Appliance
About the Access Appliance administration interfaces

Table 1-1 Access Appliance administration interfaces (continued)
DescriptionInterface
The Veritas Access GUI is the primary interface for Access and
is used to administer the Access software on the appliance,
such as creating disk pools and file systems.
The Access GUI becomes available on the console IP address
once the appliance cluster is configured. After the cluster
configuration, the following URL is generated:
https://consoleIP:14161/
Veritas Access GUI
The Veritas Access command-line interface is used to administer
the Access software on the appliance.
The Access shell menu becomes available over SSH on the
console IP address after the appliance cluster is configured.
Veritas Access
command-line interface
For more information about the Access interfaces, refer to the Veritas Access
Administrator's Guide.
See “Using the Access Appliance shell menu” on page 8.
See “About the Veritas Remote Management Console” on page 39.
Using the Access Appliance shell menu
The Access Appliance shell menu provides a menu-based interactive shell interface
through which an administrator can manage the Veritas Access Appliance. The
interface is made up of hierarchical views that contain the administrative commands
and options.
When you log in to the Access Appliance shell menu, the following commands are
availbale:
■configure Perform initial Access appliance tasks
■delete Delete appliance settings
■export Export appliance settings
■import Import appliance settings
■set Modify appliance settings
■show Examine the running and historical state of the host
■start Run appliance commands
■support Perform supportability operations
■system Run a privileged operation or obtain monitoring data
8Getting to know the Access Appliance
About the Access Appliance administration interfaces

Helpful tips
The following list contains some helpful tips for using the Access Appliance shell
menu:
■For a list of available commands, type question mark (?).
■For a list of shell shortcuts, press Alt+s.
■To get more information about a command, type '?' while typing or after using
a tab to auto-complete the command.
See “About the Access Appliance administration interfaces” on page 6.
About licensing the Access Appliance
The Veritas Access software on the appliance includes a built-in evaluation license
that activates once you complete the appliance initial configuration. This license is
a trialware which can be used for 60 days. You have to obtain a perpetual license
to use the Access software on the appliance after you complete the initial
configuration.
To comply with the terms of the End User License Agreement, you have 60 days
to obtain a valid perpetual license key. The administrator and company
representatives must ensure that the appliance is entitled to the license level for
the products installed. Veritas reserves the right to ensure entitlement and
compliance through auditing.
For more information about the Veritas Access product licensing, refer to the Veritas
Access GUI Online Help.
If you encounter problems while licensing this product, visit the Veritas licensing
Support website.
www.veritas.com/licensing/process
The Veritas Access licensing has a few functional enforcements.
Table 1-2 Functional enforcements of Veritas Access licensing
ActionEnforcement
NoneDuring Validity
Nagging message (in the GUI only)During Grace period
9Getting to know the Access Appliance
About licensing the Access Appliance

Table 1-2 Functional enforcements of Veritas Access licensing (continued)
ActionEnforcement
Before you restart the node, you can stop the
NFS, CIFS, and S3 services, but you cannot
start the services again (even if you have not
restarted the node).
After you restart the node, the NFS, CIFS,
and S3 services do not come ONLINE on the
restarted node.
Post Grace Period
If you add the Veritas Access license using the Access GUI:
■When a node is restarted after the license has expired, the NFS, CIFS, and S3
services are stopped on that node. The status of the service appears ONLINE
if the service is running anywhere in the cluster, even if it is OFFLINE on this
node. Check the alerts on each node individually to see if the service is ONLINE
or OFFLINE locally.
■You can start, stop, and check the status of NFS, CIFS, and S3 services.
■You can only provide the license file from the local system, the scp path is not
supported through the GUI.
If you add the Veritas Access license using the Veritas Access shell menu:
■When a node is restarted after the license has expired, the NFS, CIFS, and S3
services are stopped on that node. You can use the support services show
command to display the node-wise status of the service.
■You can start, stop, and check the status of NFS, CIFS, and S3 services.
■You can add the license using the license add command. The license add
command provides support for scp path as well.
■The license list and license list details commands provide details of
the license installed on each node of the cluster.
Where to find the documentation
The latest version of the Veritas Access Appliance documentation is available on
the Veritas Support website and the Veritas Services and Operations Readiness
Tools (SORT) website.
https://www.veritas.com/content/support/en_US/Appliances.html
https://sort.veritas.com/documents
10Getting to know the Access Appliance
Where to find the documentation

You need to specify the product and the platform and apply other filters for finding
the appropriate document.
The following guides are available for the Access Appliance:
■Veritas Access Appliance Initial Configuration Guide
■Veritas Access Appliance Command Reference Guide
■Veritas Access 3350 Appliance Product Description
■Veritas Access 3350 Appliance Hardware Installation Guide
■Veritas Access Appliance Cloud Storage Tiering Solutions Guide
■Veritas Access Appliance Solutions Guide for Enterprise Vault
■Veritas Access Appliance Solutions Guide for NetBackup
■Veritas Access Appliance Troubleshooting Guide
■Veritas Access Appliance Administrator’s Guide
■Veritas Access Appliance Release Notes
■Veritas Appliance AutoSupport 2.0 Reference Guide
■Veritas Access Appliance Safety and Maintenance Guide
■Veritas Access Appliance Third-Party Legal Notices Guide
■Veritas Access Appliance Upgrade Guide
11Getting to know the Access Appliance
Where to find the documentation

Preparing to configure the
appliance
This chapter includes the following topics:
■Initial configuration requirements
■About obtaining IP addresses for Veritas Access
■Network and firewall requirements
Initial configuration requirements
Review the information in this topic before you perform the initial configuration on
the Veritas Access Appliance.
Network information
For the appliance itself, you need to acquire the following network information:
■Two IP addresses for appliance node management over IPMI
■Two IP addresses for appliance node management over eth1
■DNS (used for AutoSupport services)
■Static route and other advanced routing information
■IP address or the FQDN of the Network Time Protocol (NTP) server. If you use
an FQDN for the NTP server, you must configure the DNS server.
■(Optional) VLAN information
■(Optional) Proxy server addresses and credentials (used for AutoSupport
services)
2
Chapter

■(Optional) SMTP or SNMP information for receiving appliance notifications and
alerts
Required DNS settings
Veritas strongly recommends that you configure DNS on the appliance node. The
IP address assigned to the eth1 network interface must be resolved to a valid host
name via the DNS server lookup or the local hosts file. A unique DNS entry is
required for eth1 on each node.
The DNS server must be configured if you use the CallHome feature. Without the
DNS entries, the AutoSupport client cannot send out alert emails and the system
health collector cannot work properly.
You must also configure the DNS server if you use an FQDN for the NTP server.
Required credentials
Two user accounts are used during initial configuration: admin and maintenance.
The admin account is the user that logs into the appliance nodes and performs all
necessary configuration steps. The maintenance user account is required when
you perform operations that require access to the operating system.
You are required to change the factory default admin and maintenance passwords
during the initial configuration.
Both the admin and maintenance user accounts use the same default password
on new appliances:
■User name: admin or maintenance
■Password: P@ssw0rd
Access to the Access Appliance shell menu
Ensure that you can access the Access Appliance shell menu. All initial configuration
tasks are done using this interface.
13Preparing to configure the appliance
Initial configuration requirements

Table 2-1 Methods to access the Access Appliance shell menu
DescriptionMethod
You can use the Veritas Remote Management Console to launch a virtual
KVM of the Access Appliance shell menu as if you were using a keyboard
and mouse that are connected directly to the appliance.
Note: You can only access the Veritas Remote Management Console
if you have provisioned network access to the IPMI port on the appliance
nodes (which is normally done as part of the hardware installation
process).
See “Configuring the IPMI port on an appliance node” on page 41.
Veritas Remote
Management
Console
(recommended)
You can use SSH for initial configuration if you have provisioned network
access to the eth0 port on the appliance nodes.
See “About NIC1 (eth0) port usage on the appliance nodes” on page 37.
SSH
You can physically connect a standard VGA monitor and USB keyboard
to the appliance node. If the appliance is powered on, the monitor displays
the logon prompt for the Access Appliance shell menu.
Physical
keyboard and
monitor
connected to the
appliance
Connectivity during initial configuration
If you configure the appliance from a remote computer, you must take precautions
to avoid loss of connectivity. Any loss of connectivity during initial configuration
results in failure.
Before you log onto the Access Appliance shell menu, ensure that your computer
is set up to avoid the following:
■Conditions that cause the computer to go to sleep
■Conditions that cause the computer to turn off or to lose power
■Conditions that cause the computer to lose its network connection
See “Network and firewall requirements” on page 17.
About obtaining IP addresses for Veritas Access
The Veritas Access initial configuration process requires that you configure several
IP addresses for the two appliance nodes.
You can configure a pure IPv4 or an IPv6 network, or a mixed mode network with
both IPv4 and IPv6 addresses.
14Preparing to configure the appliance
About obtaining IP addresses for Veritas Access

Note: The IP type (IPv4 or IPv6) can be different on different networks. In a single
network, the IP type must be consistent (either IPv4 or IPv6).
Table 2-2
Console IPeth4 and eth5 (for
Access 3340
Appliance model)
eth4 and eth6 (for
Access 3350
Appliance model)
eth2 and eth3eth1
IPv4IPv4IPv4IPv4
IPv4IPv6IPv4IPv4
IPv6IPv6IPv4IPv6
IPv6IPv4IPv4IPv6
You need to obtain a range of physical IP addresses, a range of virtual IP addresses,
and a netmask for the chosen public network from the network administrator in
charge of the facility where the appliance is located. The range of IP addresses
need not be contiguous as long as the IP addresses are in the same data network.
All IP addresses (both physical and virtual) must be part of the same subnet and
use the same netmask as the node's access IP.
By design, the appliance does not support the use of the localhost (127.0.0.1) IP
address during configuration.
Note: Netmask is used for IPv4 addresses. Prefix is used for IPv6 addresses.
Accepted ranges for prefixes are 0-128 (integers) for IPv6 addresses.
The information you obtain from the network administrator is used to configure the
following:
■Physical IP addresses
■Virtual IP addresses
■Console IP address
■IP address for the default gateway
■Netmask for the data network
■Details for the private network, such as starting IP address and the netmask for
the private IP address
15Preparing to configure the appliance
About obtaining IP addresses for Veritas Access

■(Optional) IP address for the Domain Name System (DNS) server
■DNS domain name
■NTP server
Note: If the FQDN of the NTP server is specified, you are required to configure
the DNS server.
IP address requirements
Table 2-3 Required IP addresses
ItemNumber of IPs
Physical IP addresses for public network access over eth4 and
eth5 for the Access 3340 Appliance model or over eth4 and eth6
for the Access 3350 Appliance model.
You can configure up to four public IP addresses. The IP
addresses are assigned to the public interfaces of both the nodes
using the round-robin algorithm, selecting the first public interface
of both the nodes followed by the second public interface of both
the nodes.
0 to 4
Virtual IP addresses for public network access over eth4 and
eth5 for the Access 3340 Appliance model or over eth4 and eth6
for the Access 3350 Appliance model.
Starting with version 8.0, you can assign a virtual IP address to
a public data network interface that does not have a physical IP
address assigned to it. Earlier, a physical IP address was
required to be assigned to a public data network interface if you
wanted to assign a virtual IP address to it.
0 to 8 (Optional)
IP address for the management console.1
IP addresses for or appliance node management over IPMI.
See “Initial configuration requirements” on page 12.
2
IP addresses for appliance node management over eth1.
See “Initial configuration requirements” on page 12.
2
For more details about Veritas Access network requirements, refer to the Veritas
Access Installation Guide.
See “Where to find the documentation” on page 10.
16Preparing to configure the appliance
About obtaining IP addresses for Veritas Access

See “Network and firewall requirements” on page 17.
IP address requirements for network bonding
You can configure network bonding to group multiple network interfaces into a
single logical interface. The bonded network interface increases data throughput
and provides redundancy.
For the Access 3340 Appliance model, when you configure network bonding for
public network access, bond0 is created, which groups eth4 (pubeth0) and eth5
(pubeth1) into a single logical network interface. For the Access 3350 Appliance
model, when you configure network bonding for public network access, bond0 is
created, which groups eth4 (pubeth0) and eth6 (pubeth2) into a single logical
network interface.
Use the following guidelines when you assign an IP address for the bonded network
interface:
■Allocate either IPV4 public and virtual IP addresses or IPV6 public and virtual
IP addresses, but not both.
■Reserve a maximum of two public IP addresses for public network access. The
IP addresses need not be contiguous.
■Reserve one virtual IP address for the Remote Management Console.
Network and firewall requirements
Appliance ports
In addition to the ports that are used by the Veritas Access software, the appliance
also provides for both in-band and out-of-band management. The out-of-band
management is through a separate network connection, the Remote Management
Module (RMM), and the Intelligent Platform Management Interface (IPMI). Open
these ports through the firewall as appropriate to allow access to the management
services from a remote laptop or KVM (keyboard, video monitor, mouse).
Table 2-4 lists the ports open for inbound communication to the appliance.
Table 2-4 Inbound ports
DescriptionServicePort
In-band management CLIssh22
In-band management GUIHTTPS443
17Preparing to configure the appliance
Network and firewall requirements

Table 2-4 Inbound ports (continued)
DescriptionServicePort
CLI access, ISO & CDROM
redirection
KVM5900
(optional, used if open)KVM623
NFS++HTTPS2049
CIFS (for the Log/Install
shares)
CIFS
SAMBA
445
Veritas Data Deduplication
engine
spoold10082
Veritas Data Deduplication
manager
spad10102
* Veritas Remote Management – Remote Console
++ Once the NFS service is shut down, the vulnerability scanners do not pick up
these ports as threats.
Table 2-5 lists the ports outbound from the appliance to allow alerts and notifications
to the indicated servers.
Table 2-5 Outbound ports
DescriptionServicePort
Call Home notifications to
Veritas
Download SDCS certificate
HTTPS443
Traps sent by SNMP agentsSNMP162**
Log uploads to VeritasSFTP22
Email alertsSMTP25
LDAP389
LDAPS636
Log forwardingrsyslog514
Veritas Data Deduplication
engine
spoold10082
18Preparing to configure the appliance
Network and firewall requirements

Table 2-5 Outbound ports (continued)
DescriptionServicePort
Veritas Data Deduplication
manager
spad10102
** This port number can be changed within the appliance configuration to match
the remote server.
Table 2-6 lists the out of band management ports on the appliance.
Table 2-6 Out of band management ports
Out-of-band management
(ISM+ or RM*)
HTTP80
Out-of-band management
(ISM+ or RM*)
HTTP443
CLI access, ISO & CDROM
redirection
KVM5900
(optional, used if open)KVM623
CLI accessRMM7578
ISO & CD-ROM redirectionRMM5120
Floppy redirectionRMM5123
KVMRMM7582
CDROMHTTPS5124
USB or floppy5127
NFS ++HTTPS2049
CIFS (for the Log/Install
shares)
445
+ NetBackup Integrated storage manager
* Veritas Remote Management – Remote Console
++ Once the NFS service is shut down, the vulnerability scanners do not pick up
these ports as threats.
19Preparing to configure the appliance
Network and firewall requirements

Note: Ports 7578, 5120, and 5123 are for the unencrypted mode. Ports 7582, 5124,
and 5127 are for the encrypted mode.
Veritas Access ports
Table 2-7 displays the default ports that Access uses to transfer information.
Table 2-7 Default Veritas Access ports
Impact if blockedPurposeProtocol or
Service
Port
FTP features are
blocked.
Port where the FTP
server listens for
connections.
Note: Users can
configure another port
if desired.
FTP21
Access is not
accessible.
Secure access to the
Access server
SSH22
The SMTP messages
that are sent from
Access are blocked.
Sending SMTP
messages.
SMTP25
Domain name
mapping fails.
Communication with
the DNS server
DNS queries53
RPC services fail.RPC portmapper
services
rpcbind111
Server clocks are not
synchronized across
the cluster.
NTP-reliant features
(such as DAR) are
not available.
Communication with
the NTP server
NTP123
CIFS clients cannot
access the Access
cluster
CIFS client to server
communication
CIFS139
SNMP alerts cannot
be broadcast.
Sending SNMP alertsSNMP161
20Preparing to configure the appliance
Network and firewall requirements
Other manuals for Access 3340
8
Table of contents
Other VERITAS Server manuals

VERITAS
VERITAS Sun Enterprise 10000 User manual

VERITAS
VERITAS Access 3340 Operating manual

VERITAS
VERITAS Access 3340 Manual

VERITAS
VERITAS NetBackup Series User manual

VERITAS
VERITAS 5150 Manual

VERITAS
VERITAS NetBackup 5340 User manual

VERITAS
VERITAS NetBackup 5330 Manual

VERITAS
VERITAS NetBackup 5330 Manual
Popular Server manuals by other brands

HPE
HPE ProLiant DL380 Gen9 Product End-of-Life Disassembly Instructions

Axis
Axis 291 1U installation guide

Acer
Acer ALTOS R910 Series user guide

Sun Microsystems
Sun Microsystems Sun Enterprise 10000 manual

Intel
Intel R1000SP Quick installation user's guide

Lenovo
Lenovo ThinkServer RD230 Guide d'utilisation