Verity Audio Reveal REC02U User manual

2023 Verity / All rights reserved / Subject to Change
Installation Instructions for
REC02U & REC03U w/ GPS
HD 4-CH Dual SD Card Hybrid HD
MDVR Distributed by Verity.
Please read this manual completely before operating the SYSTEM
A division of
Component Solution Services, LLC.
56600 Twin Branch Dr., Mishawaka, IN 46545
www.veritysafe.com

2
2023 Verity / All rights reserved / Subject to Change
Contents
ABOUT US..................................................................................3
THINK SAFETY FIRST................................................................4
Components................................................................................6
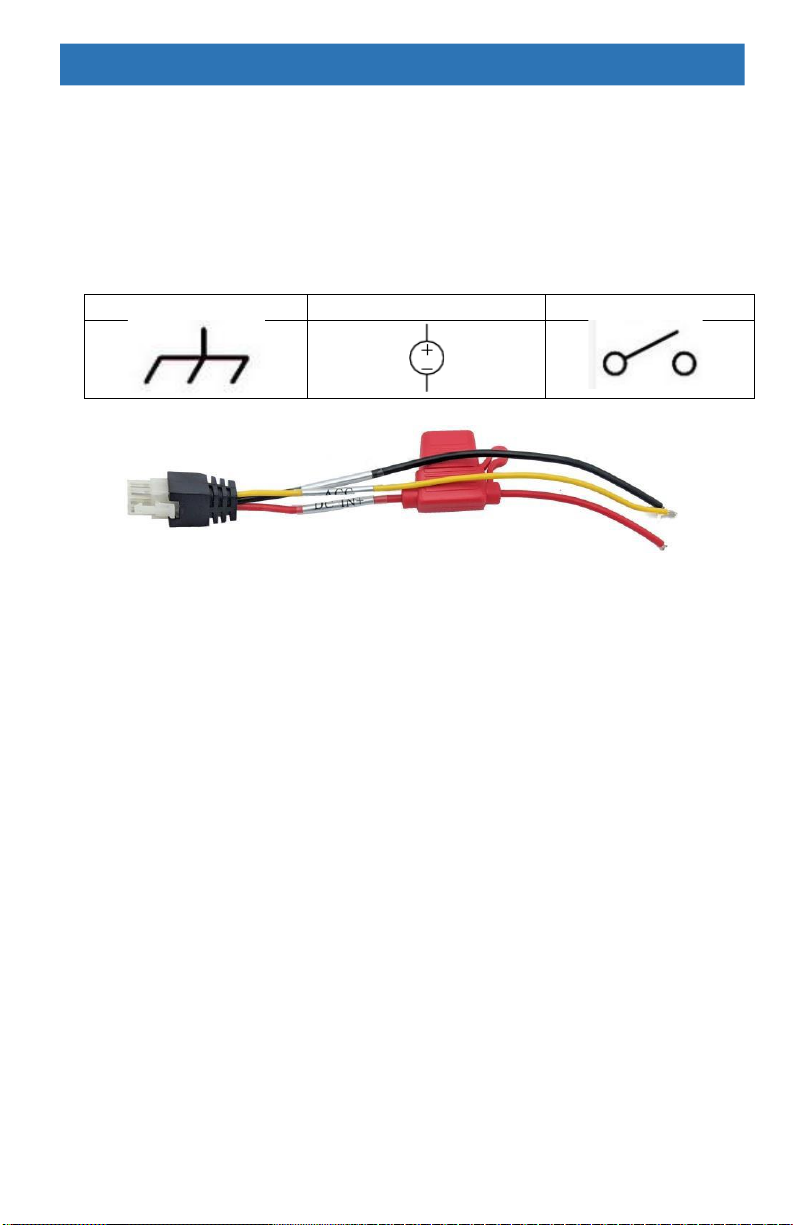
Power Cable................................................................................6
Placement...................................................................................7
VIDEO | TIGGERS ......................................................................8
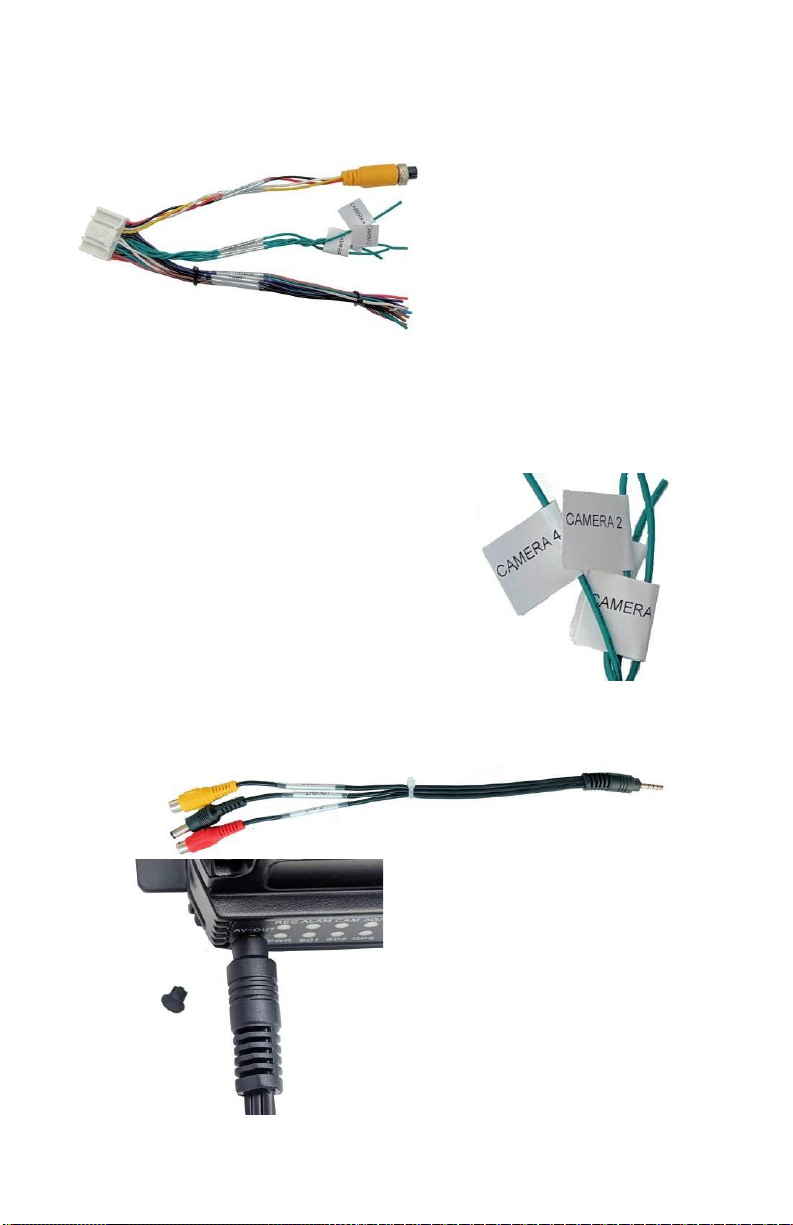
Front Video | Audio Out................................................................8
OPTIONAL:ADD02CP................................................................9
ConnectingHarnesses...............................................................10
MetalConnector Tamper-resistant Cover...................................11
WARRANTY..............................................................................15
IMPORTANT NOTICE:
There have been many recent
changes to electrical harnesses in
commercial vehicles. CAN bus signal
transmission can cause faint ghosting on
DVR recording, monitors, and even in some
cases, audio devices. We have designed
technologies to prevent this issue in the
DVR. It is recommended to follow the
chassis manufacturer’s wiring suggestions.
These can be found by searching the
chassis manufacturer’s up-fitter guidelines.
Use the designated grounding post. For a
professional installation, a simple black and
red wire search under the dashboard may
not work.

Optional
IR extender
Control
Panel
ABOUT US
Verity does not just buy systems off the shelf overseas,
put our logo on them, and ship them out. We work with
engineers, some at our location in Mishawaka, Indiana
to design camera systems to meet the safety needs of
several industries.
Where some companies just fall for the latest trend and
bring untested safety equipment to the market, we
perform the needed testing and often help factories
make a better product for which we employ the ODM
(original design manufacturing) method. We employ
global engineers who help us offer the latest
technologies.
One aspect of every project we do is: “How will we
defend it in court?” By doing extensive testing, we
know our products are the best. We make our products
“Verity Safe™”.
3

4
THINK SAFETY FIRST
Verity products are intended to be installed as a
supplement, and our observation systems and/or
products are not intended to be a substitute for
mirrors or other standard motor vehicle equipment
which may be required by law. Verity products
promote improving vehicle/driver operations. Our
products are no substitute for proper driving
techniques, observance of traffic laws, and motor
vehicle safety regulations.
Installation Location
Before installing the MDVR, be sure you are not
drilling into any objects, such as wires, vents,
airbags, etc., when drilling the mounting holes. If
not using the optional ADD02CP IR extender, the
MDVR face plate must be installed in straight line
sight of the remote.
DO NOT OPEN ANY COMPONENT. There are no
serviceable parts inside any Verity product.
Opening the product will break the tamper
indicators and void the warranty. If a problem
should arise, please contact our technical support
at 574-807-6004. For faster resolution, fill out a
service ticket found on our website.
www.veritysafe.com

5
WARNING
Do not pull cables tightly and add tension
to them. A drip loop is required where
applicable.
Do not place cables where they
can be crushed in any manner.
CAUTION
To avoid damage to the electronic circuit,
stop using thisproduct while doing welding
work to the vehicle and/or trailers.
When cleaning monitors, cameras, and
DVRs, use a damp, lint-free cloth only.
Connect this unit only to other
compatible Verity components.
Although our products have built-in surge
and cross-polarity protection, ensure all
cables are connected properly. Improper
cable connections may damage the DVR.
Cables should not be allowed to touch hot
or rotating parts, such as the engine or
exhaust.
Do not locate the DVR near heat-
generating vents or devices.
Turn off power to the DVR when
connecting the camera(s).

6
COMPONENTS
DVR Back Plate
Dimensions
170 x 142 x 50mm
Including security cover 170 x187 x 50mm
Power Cable
GND | Ground
DC IN+ | Power Wire
ACC | Ignition Hot
GND | Ground wire needs to go to a chassis ground post
or proper grounding location suggested by the truck OEM.
DC IN+ | 12v. Power Wire. This wire needs to be
connected to constant power. The DVR can be set to
run past the ignition being turned off. (See the
operation manual to find directions on how to set this
option.)
ACC wire is an ignition hot wire. This is used to
activate recording.

7
Placement
The remote is an IR remote and the DVR
needs to be in straight line sight of the DVR.
If you install the DVR behind a wall or in a cabinet, the IR
remote will not work.
For these applications,
our IR extender will allow
you to place the DVR
hidden behind a wall and
use our ADD02CP. This
IR/LED panel has a 16-
foot extended cable. This
panel provides feedback
on the operation of the
DVR. Never miss another
recording due to issues
that may occur over the
years.

8
VIDEO | TIGGERS
Video | Audio Out
Camera Trigger
Wires Option
Trigger Wires
Yellow 4-Pin: Connect to monitor
Camera trigger:
Needed triggers are tagged
Option Trigger Wires:
These will be tagged to
match added options.
Front Video | Audio Out
Do you need to change
from an RCA connect to
4-pin or BNC? Call us we
have your needed
adaptors.

9
OPTIONAL: ADD02CP
If our LED Control Panel & IR Extender is
added, there is a connector on the trigger
wires.
Once the ADD02CP has been installed, program
the DVR to accept it.
Click on
PERIPHERALS
Click on
SERIAL
PWR: Power light indicates when MDVR has power.
REC: Recording light indicates recording is functional.
HDD: Hard Disk Light indicates Hard Disk is functional
(This does not apply to DVRs that use SD cards.)
ALM: The alarm light indicates the following alarms: IO
Linkage Alarm, Speed Alarm, G-sensor Alarm,
Temperature Alarm, and HDD Error Alarm.
V-LOSS: Video lost light.
ERP: Error light indicates functioning errors.
IR: Sensor for the MDVR Remote Control.

10
To access, use the following:
The Baud rate needs to point to “Panel.”
Connecting Harnesses

11
Connecting Cameras
Connect camera to the corresponding camera IN.
Metal Connector Tamper-resistant Cover
Security cover helps prevent tampering or damage to the
cable connection on the back of the MDVR.

12
REC03U DVR with Optional GPS
The installation of the REC03U has one added step.
The GPS antenna needs to be installed.
REC03U with GPS

13
Antenna Location
The location of antenna
is key to successful
operations.
Although, many say the “magnetic style” GPS
antennas, which are the industry standard are
waterproof, they are not truly waterproof in
many ways. Most are only IP65 rated.
FYI: IP65 (waterproof rating) is tested at 4 psi
of water pressure. Hard rain may fall at
pressures of 5-7 PSI. Drive-through vehicle
wash facilities use approx. 1500 psi. It is
recommended to use an antenna rated for
external use.
We do include the magnetic-style antenna as
standard with our systems. Most often, the
antenna can simply be mounted on the truck’s
dashboard, near the base of the windshield. This
location allows the antenna clear and
unobstructed access to the sky. Most windshield
glass should not significantly hinder reception
from GPS satellites.
However, a small percent of chassis the OEMs are
using have glass with coatings which may inhibit
the signal.

14
Acceptable GPS Signal
When Do I Need an External GPS Antenna?
When the windshield angle prevents an upward
or outward path to the satellite in the sky, some
bullet proof/protective glass may also impede
signals.

15
WARRANTY
Verity®
A division of COMPONENT SOLUTION SERVICES (CSS)
LIMITED ONE (1) YEAR WARRANTY
CSS products’ warranties are not transferable. The warranties apply to the retail
consumer for one (1) year and covers against defects in material and workmanship on
Verity systems. We do not warranty our cables, which are QC tested at three different
stations before shipping. All components must be installed in compliance with all Federal,
State, and Local government requirements. Warranty is limited to the United States of
America and Canada.
Defective components will be replaced or repaired, based on a CSS evaluation of the
component. In-bound shipping charges, based on the CSS rate allocated in the RMA
(returned merchandise agreement), will be covered once the component has been deemed
defective at the CSS warranty facility. The pre-assigned in-bound freight will be supplied
upon return of product. All repaired/replaced warranty parts shall be for the remaining
duration of the original warranty time period.
CSS takes pride in our products and will aid in the processing of your components:
a) All warranty claimants must have consulted our technical support
department for trouble shooting and the acquiring of an RMA. Contact can
be made via email at tech@verityrvs.com or call 574-807-6002.
b) When the warranty claim is made, the consumer must establish the
warranty start dates by presenting documentation regarding the date of
retail purchase (e.g., bill of sale).
c) Service performed by non-authorized service personnel may void all
warranty claims.
d) CSS will make no payments for system removal / system re-installing,
mileage allowance, or transportation expenses.
The limited warranty does not cover damage resulting from misuse, accident,
modification or alteration to hardware or software, tampering, unsuitable physical or
operating environment beyond product specifications, improper maintenance, or failure
caused by a product for which CSS is not responsible. There is no warranty for any
product with removed or altered identification labels. CSS DOES NOT PROVIDE ANY
OTHER WARRANTIES OF ANY KIND, INCLUDING, BUT NOT LIMITED TO, THE
IMPLIED WARRANTIES OR CONDITIONS OF MERCHANTABILITY AND FITNESS
FOR A PARTICULAR PURPOSE. SOME JURISDICTIONS DO NOT ALLOW THE
LIMITATION OF IMPLIED
WARRANTIES, SO THIS LIMITATION MAY NOT APPLY TO YOU.
This warranty gives you specific legal rights, and you may also have other rights that vary
from state to state.

Technical Support
A service ticket can be filled out online to supply the
quickest service. The service ticket can be easily found
on our website www.verityrvs.com or use the code to the
right. Please have the serial number, which is found on
the top of the DVR, when contacting the service
department. We take great pride in delivering the most
dependable product in the industry. Each item was
100% QC
Tested, and then we randomly
recheck another up to 10% before it
leaves our hands to you. We have a
.034% issue rate with this product.
Email Tech Support:
Tech@verityrvs.com
Phone Tech Support: 574-807-6004
Note: if you are an OEM, Fleet fire/rescue customer
needing tech support after hours or on weekends, leave
a message, and a technician will return your call as
soon as one becomes available.
a division of
Component Solution Services
56600 Twin Branch Drive Mishawaka, IN 46545
574-807-6002
Toll-Free 844-875-4799
2023 Verity / All rights reserved / Subject to Change
We at Verity would like to personally thank you for
purchasing our product. Our company strives to
supply the best products at a fair price. We care
that you enjoy a safe driving experience.
Other manuals for Reveal REC02U
1
This manual suits for next models
1
Table of contents
Other Verity Audio DVR manuals
Popular DVR manuals by other brands

Sentry Surveillance
Sentry Surveillance RealEyes 17 Series Quick start manual

MGDVRs
MGDVRs MGSA-16-DVD Installation and user guide

EverFocus
EverFocus ECOR264X1 Series Features & specifications

LTS
LTS LTD8304K-ET quick start guide

Novus
Novus NVR-6332-H8 user manual

Dedicated Micros
Dedicated Micros NetVu Uniplex UP/MAN/002/M Advanced Installation Manual