Vertex™Omega 180 i/ Instruction Manual © Vertex Aquaristik ™GmbH, Deutschland 2014
Install and operate:
1- Remove your skimmer and its components from the box and inspect for any possible defects. If there are
any concerns please contact your dealer within 48 hours of receiving your skimmer, refrain from installing
the unit, keep all original packaging as well as proof of purchase.
Any damages to the unit during transport are not covered under warranty and must be claimed with
the forwarder at the time of receiving the product.
2- After proper inspection, clean the unit with a damp cloth using RO water to ensure removal of any oils
and/ or chemicals used during the manufacturing process.
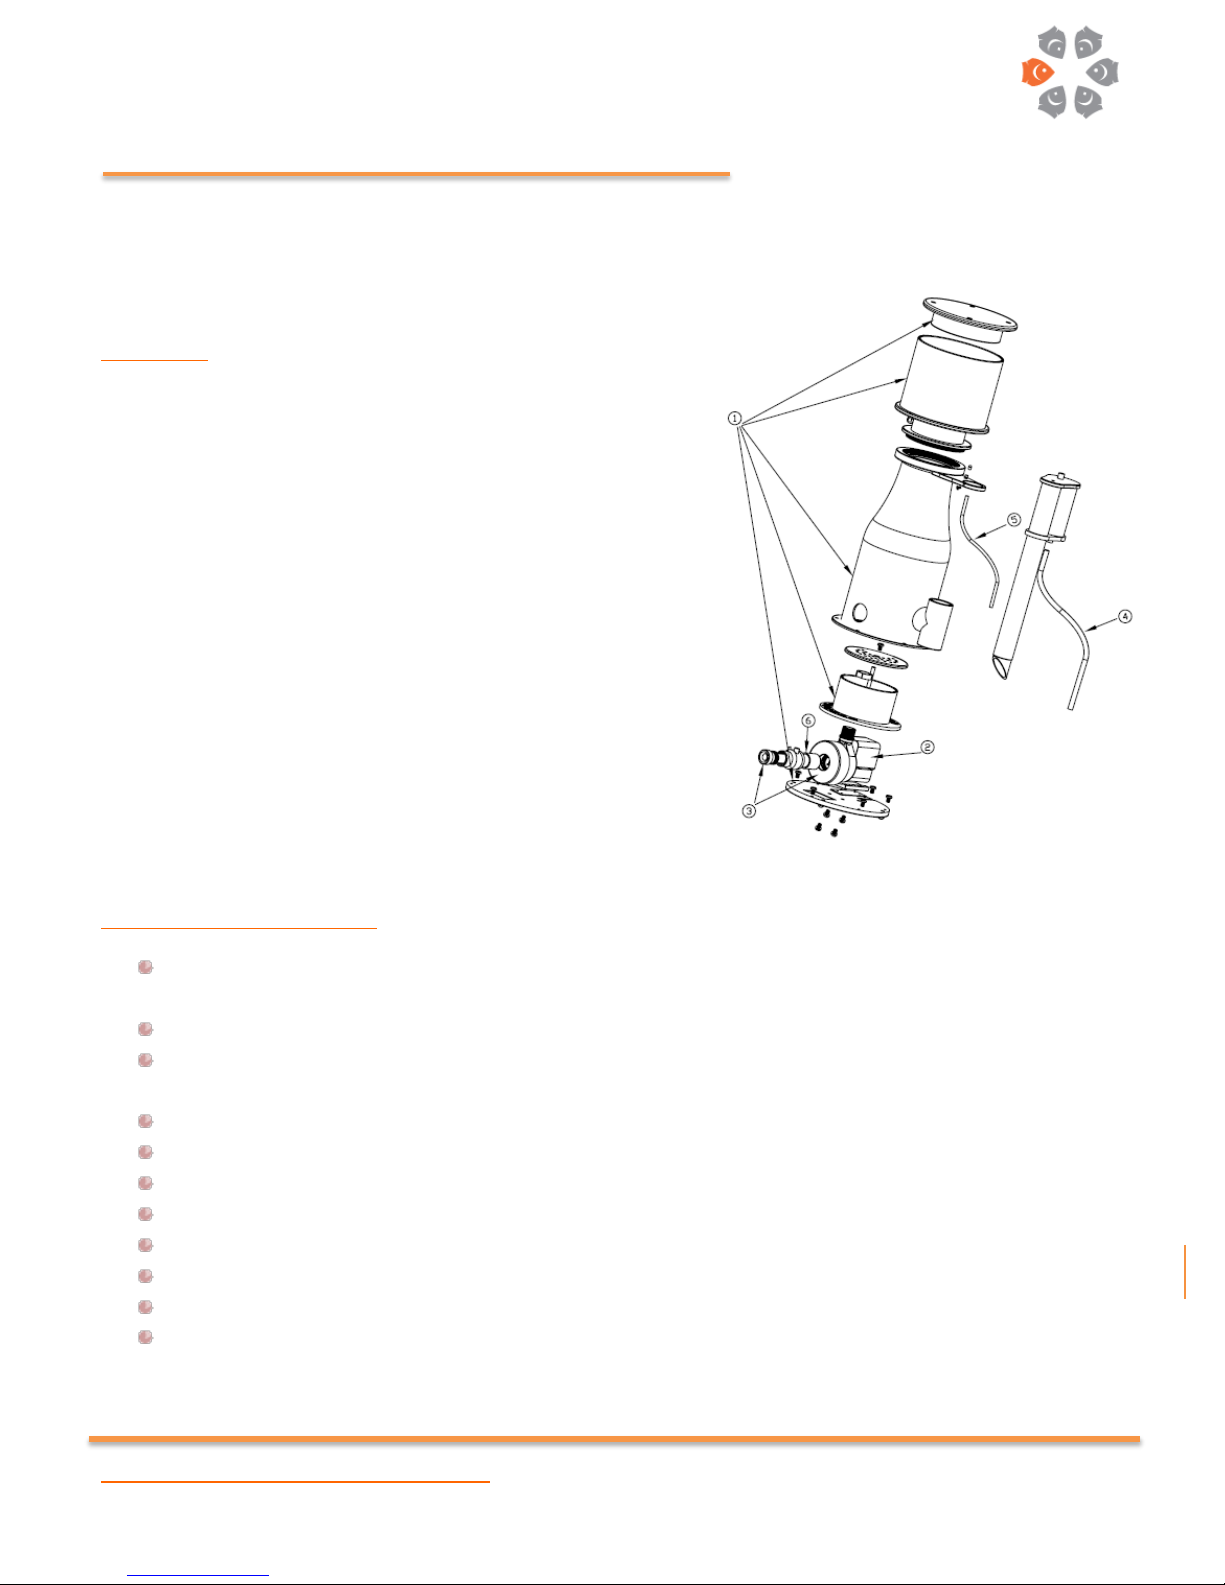
3- Remove the Collection Cup from the skimmer. Do not lose the O-Ring housed in the bayonet.
4- Connect the Clear Silicone Air-Tubing to its dedicated 10mm Air-Intake nipple on the Venturi.
5- Connect the other end of the Clear Silicone Air-Tubing to its dedicated 10mm nipple on the silencer.
6- Connect the red PE Ozone-Tubing to its dedicated Ozone- Intake nipple on the Riser-Tube holder. If no
Ozone is injected; leave the Ozone-port cap on.
7- Connect the other end of the red PE Ozone-Tubing to its dedicated Ozone- Intake nipple on the Venturi.
8- Plan placing your skimmer in the sump. For stable performance; the skimmer must be placed in a sump
compartment that does not fluctuate in water-level. Leave the nozzle fully closed for the break-in period.
Be sure to place your skimmer in a sump compartment that is free of debris, gravel, sand, shells and/or
other small objects. These Objects can possibly enter the pump, clog the needle-wheel and impede
functionality or damage your skimmer pump. Do not place the pump near a calcium or carbonate effluent
discharge. This does include but not limits to any calcium reactor, kalkwasser reactor and/ or dosing
pumps dosing such chemicals.
9- Place both pump intake and Skimmer output at a minimum distance of 6cm / ~2” away from any surfaces
to prevent any disruption in operation.
10-Do not place the skimmer where it will be exposed to a lot of air turbulence such as drain from display
tank. A large influx of air bubbles can cause the pump to cavitate and seize.
11-Place the skimmer in the sump carefully, do not lift the skimmer by the Riser-Tube holder.
12-Ensure there is enough length of wire to have a drip-loop.
13-When electrical devices are operated in close proximity of water, drip-loops become more so important
due to the possibility of splashing, moisture creep…DO NOT IGNORE THIS WARNING! As always your
safety is our number one concern.
14-Turn the unit on and close the riser-pipe. Allow the foam to cascade over the neck into the sump.
15-We recommend a period of 24 hours of running the skimmer in this fashion. This will reduce the overall
break-in period.
16-After 24 hours turn the skimmer off.
17-Open the riser-tube 100% and screw the collection cup back on.
18-Turn the skimmer on. Do not touch electrical outlets with wet hands. Dry your hands completely before
handling electrical cords and/ or devices.