Page 4 of 28 802006UK BCS Residential User Guide - Aug 2015- V2.01
3. Tap operation
To dispense boiling water (with the safety lock off)
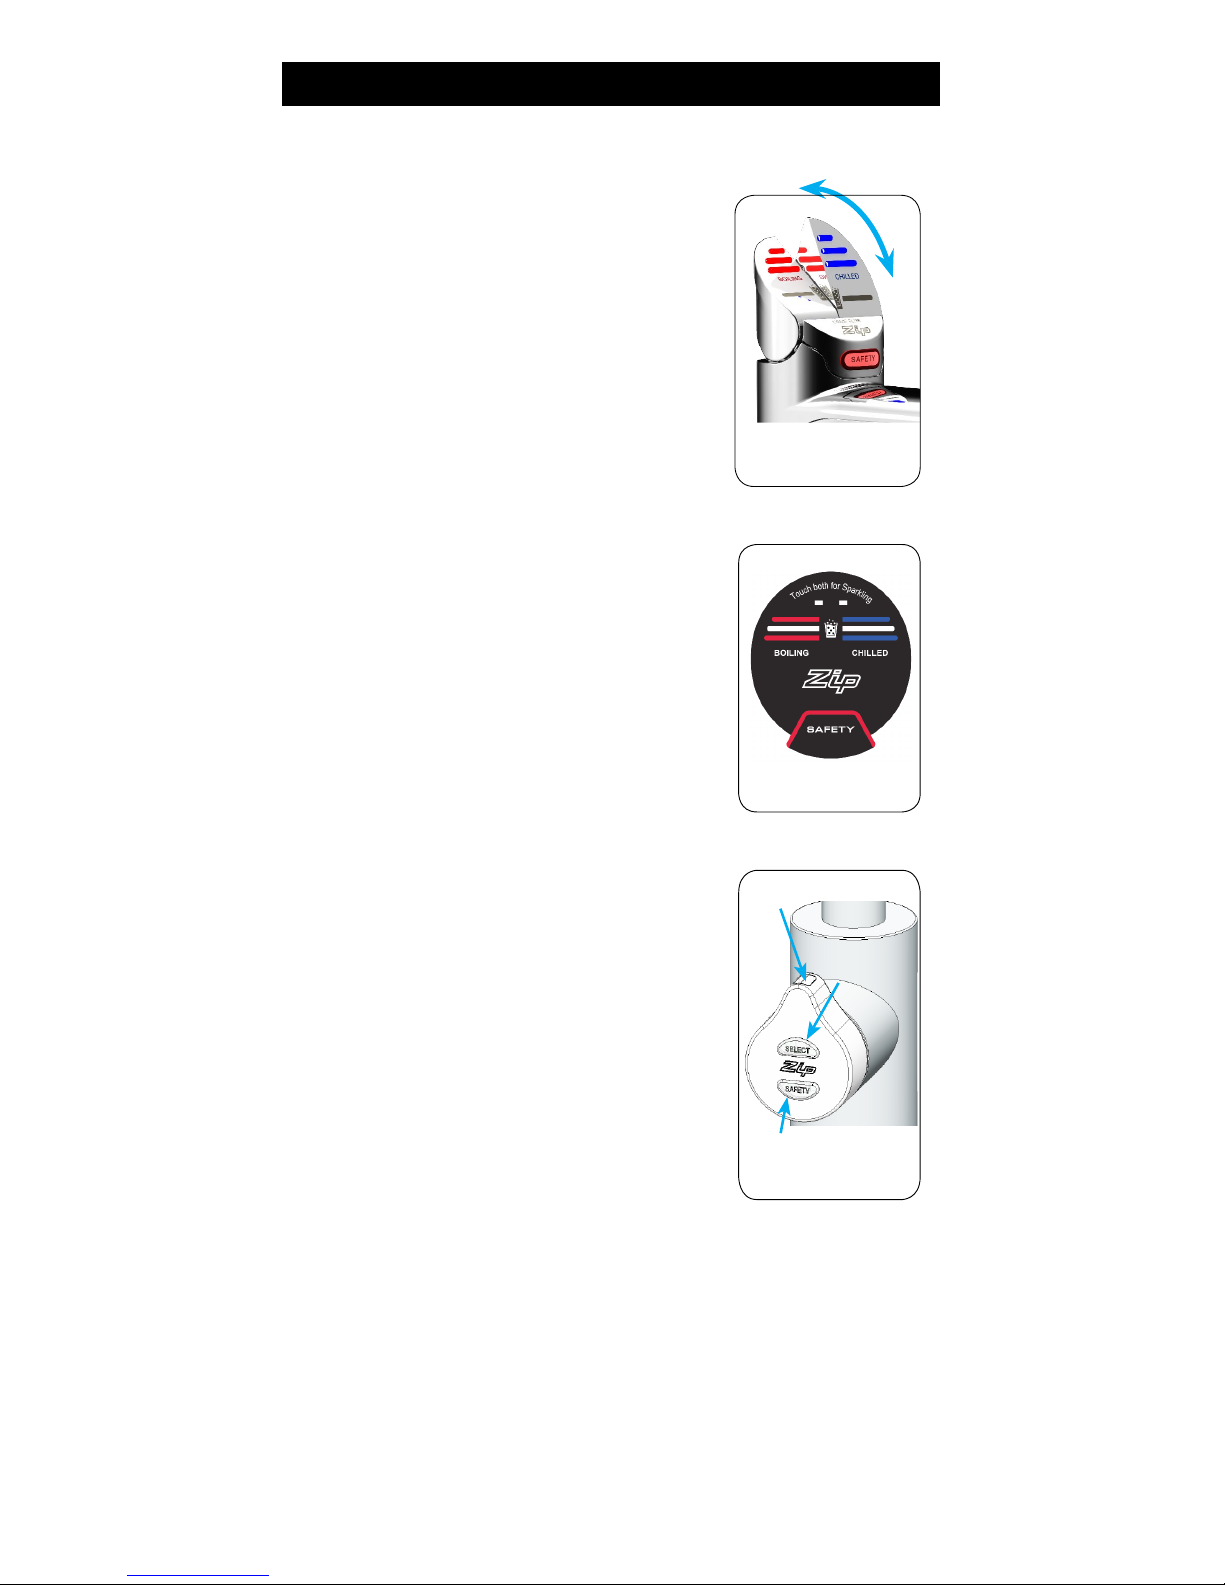
Classic
Depressing the red BOILING lever allows the
dispensing of boiling water.
Pulling forward the red BOILING lever allows the
tap to operate in a “no-touch” mode.
Water will flow from between 5 and 15 seconds
(this is user adjustable, see page 25).
To reset, return the lever to the “off” position and
repeat the step. (The lever has to be manually
returned to the “off” position).
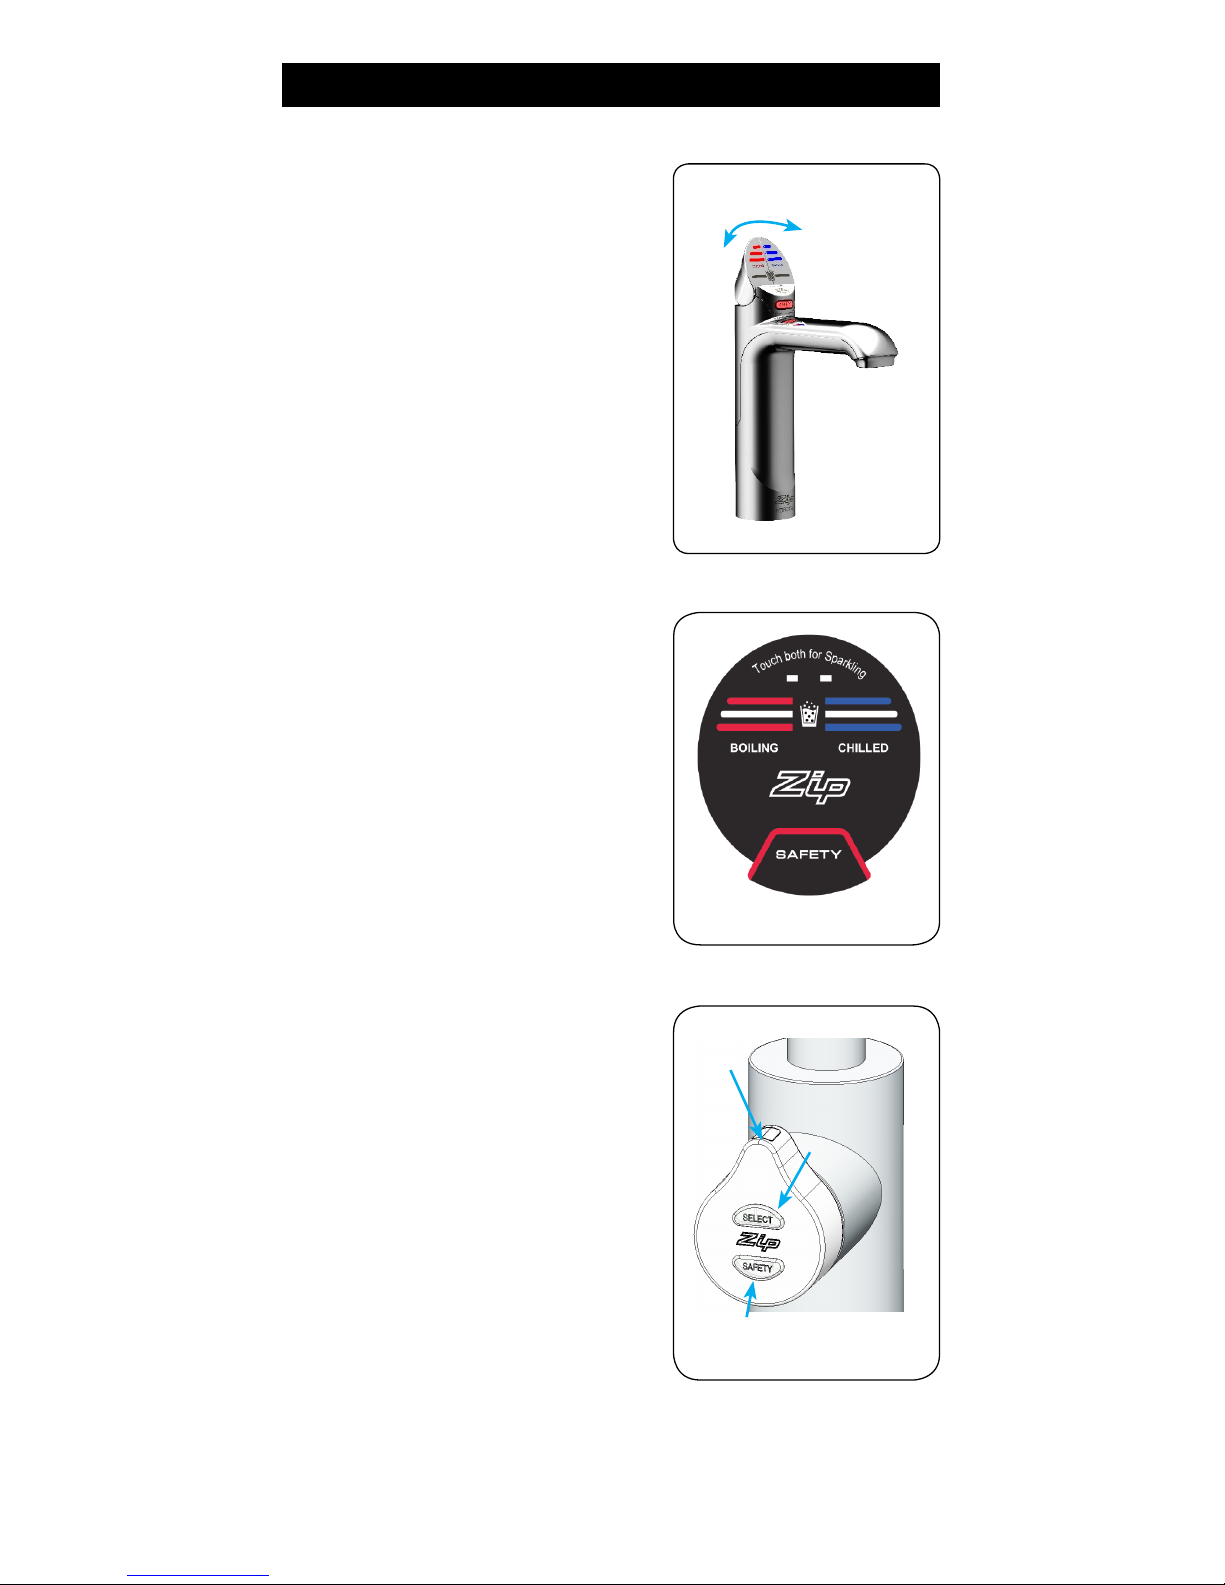
Elite
Touching the red BOILING button allows the
dispensing of boiling water.
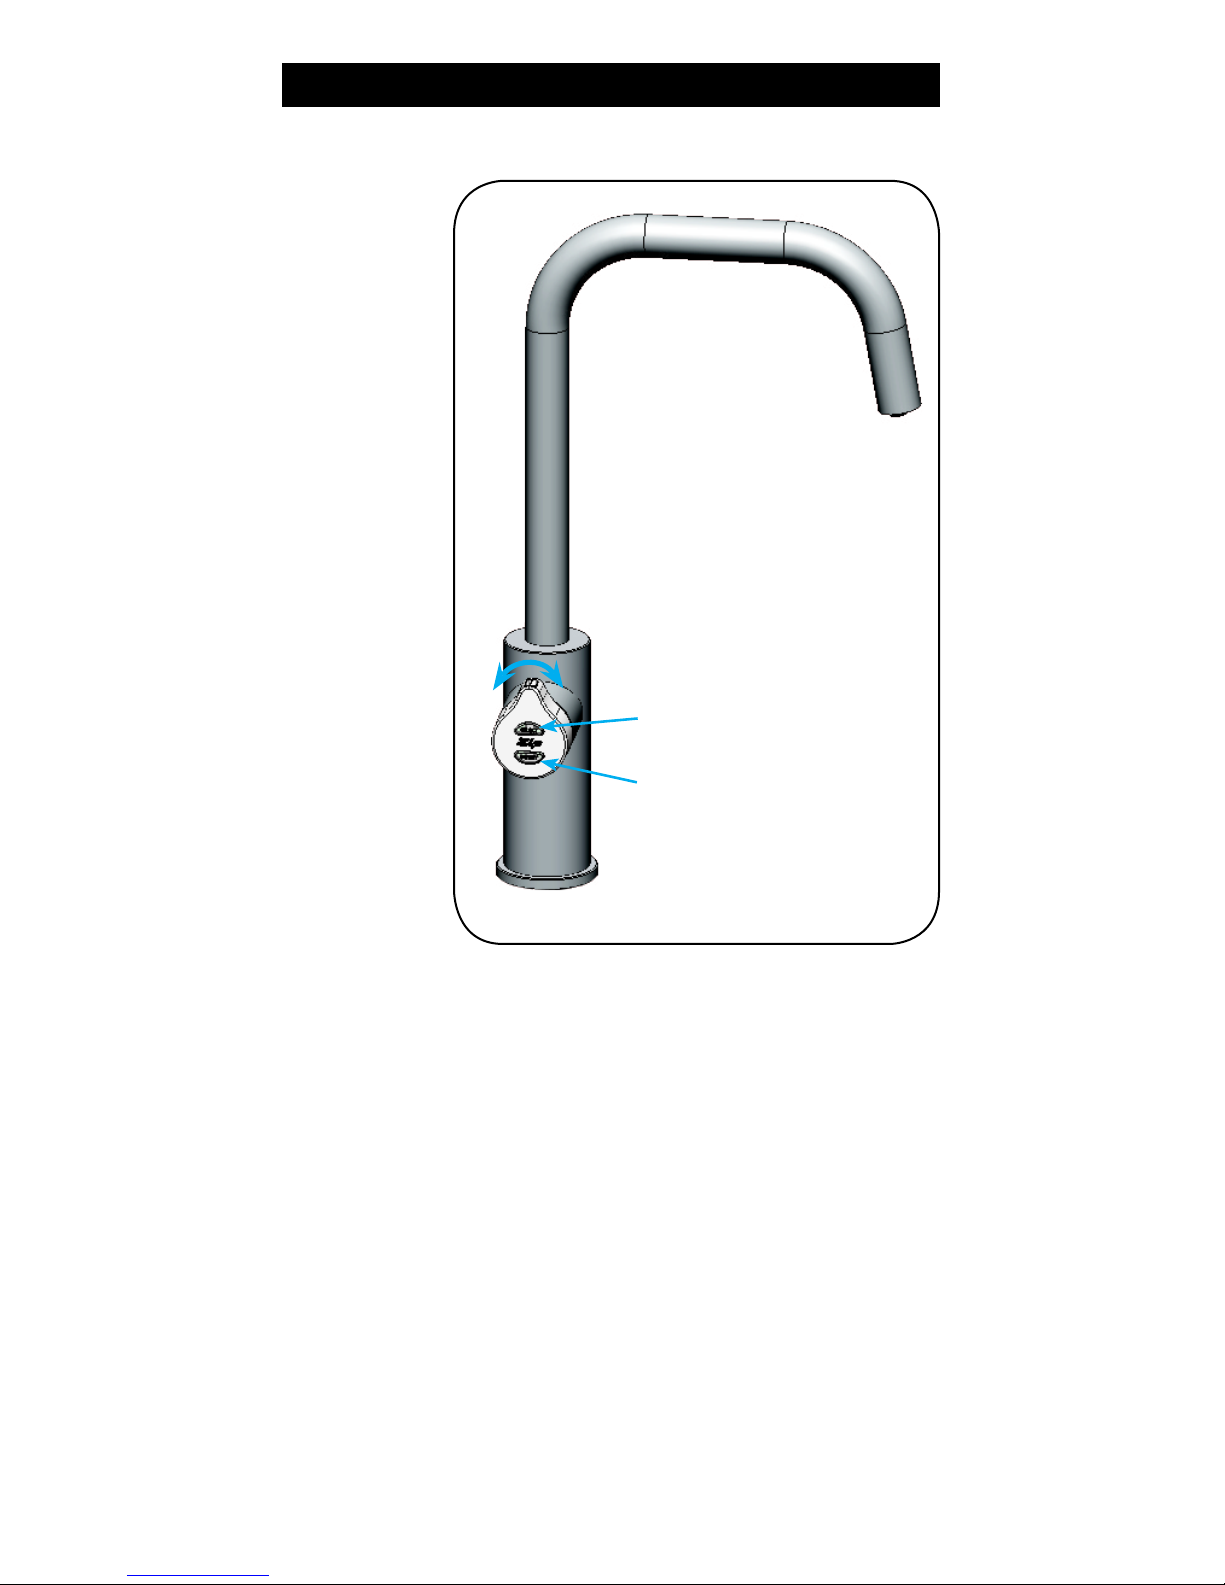
Arc / Cube
Touch the SELECT button until the indicator and
select lights illuminate red. Rotating the control
when the indicator lights are illuminated red allows
the dispensing of boiling water.
To dispense boiling water (with the
safety lock on)
Classic
Depress the red BOILING lever, while
simultaneously covering the safety lock button with
a second finger. These two actions need to occur
within 2 seconds for the successful dispensing of
boiling water.
Elite
Place a finger on the safety lock, then touch the
boiling button, while keeping both fingers in position.
Arc / Cube
Touch the select button until the indicator, select
and safety buttons illuminate red, then touch the
safety button twice until the three red lights flash
(the lights will flash for approx. 2 seconds if the tap control is not rotated, then
the select, safety and indicator lights will return to continually illuminated red
(and after a short period the select and indicator lights will return to continually
illuminated blue as a safety precaution).
Boiling water may be dispensed by rotating the control while the three red
illuminated lights are flashing.
While dispensing boiling water, all three red illuminated lights will continue to
flash.
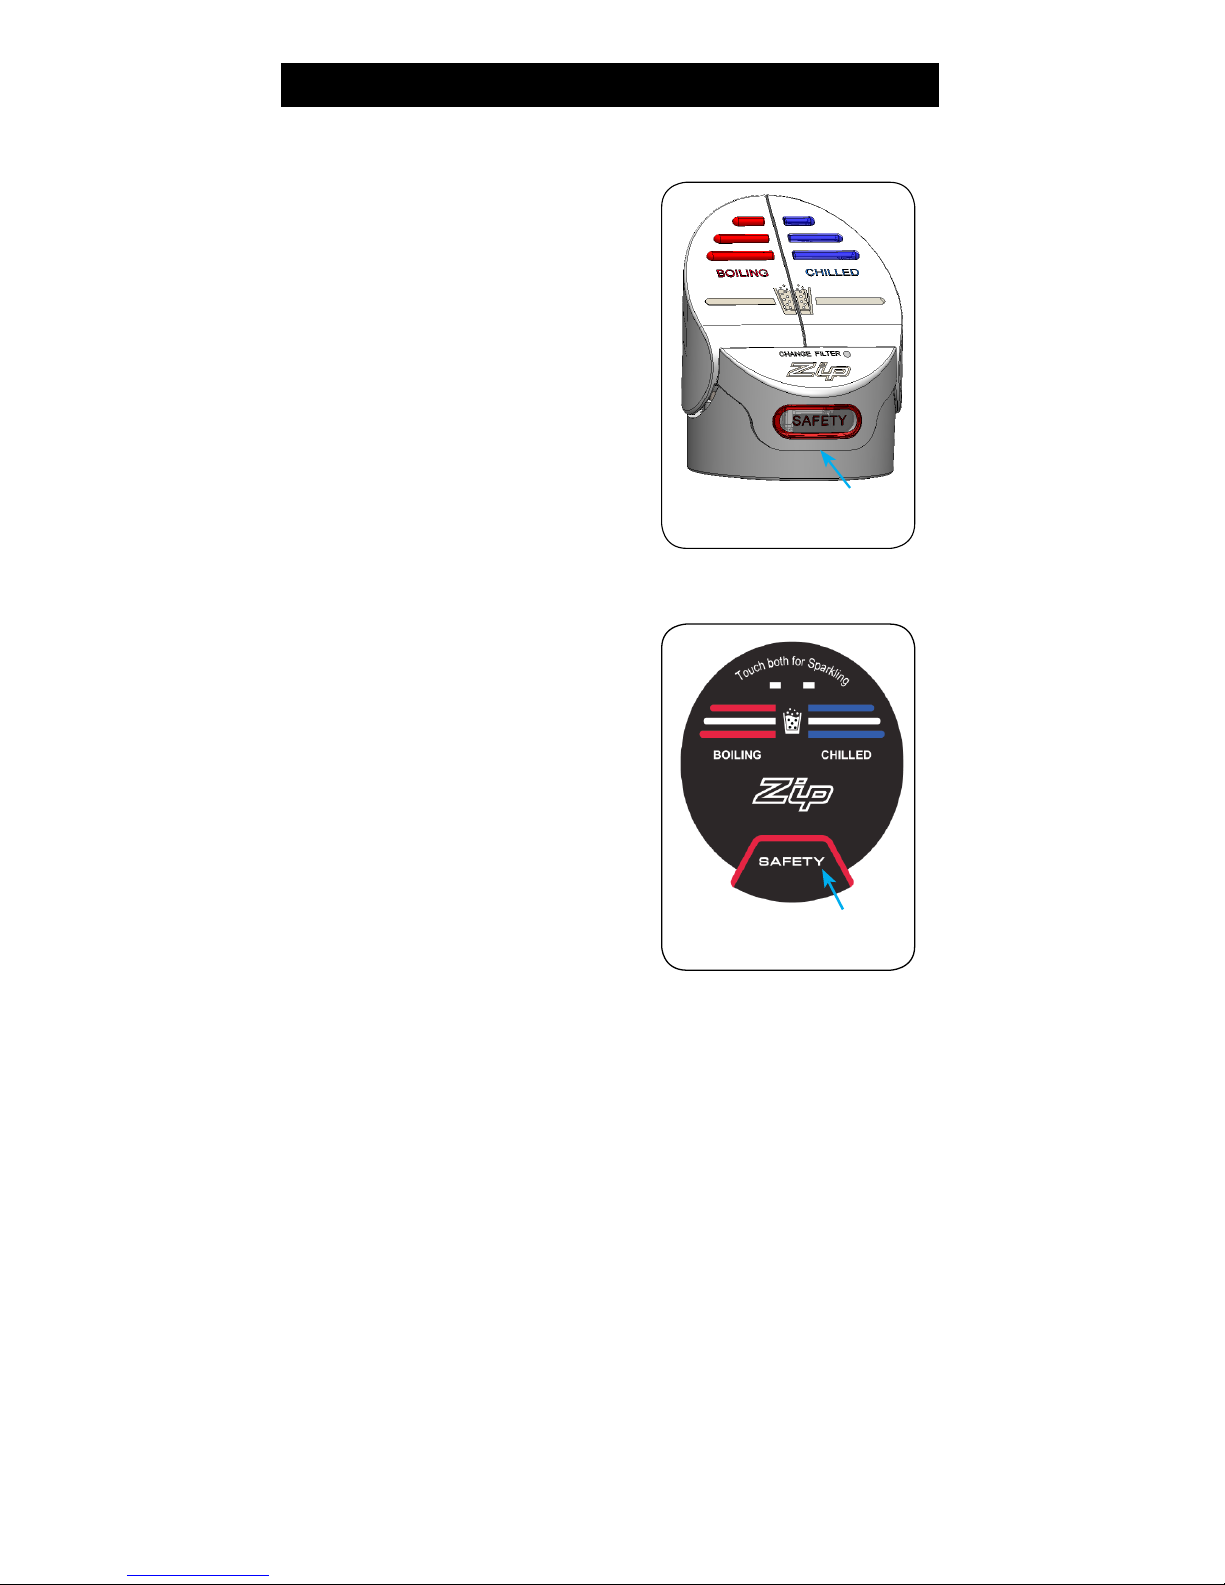
Indicator light
Safety Lock
Classic
Elite
Arc / Cube
Select
button