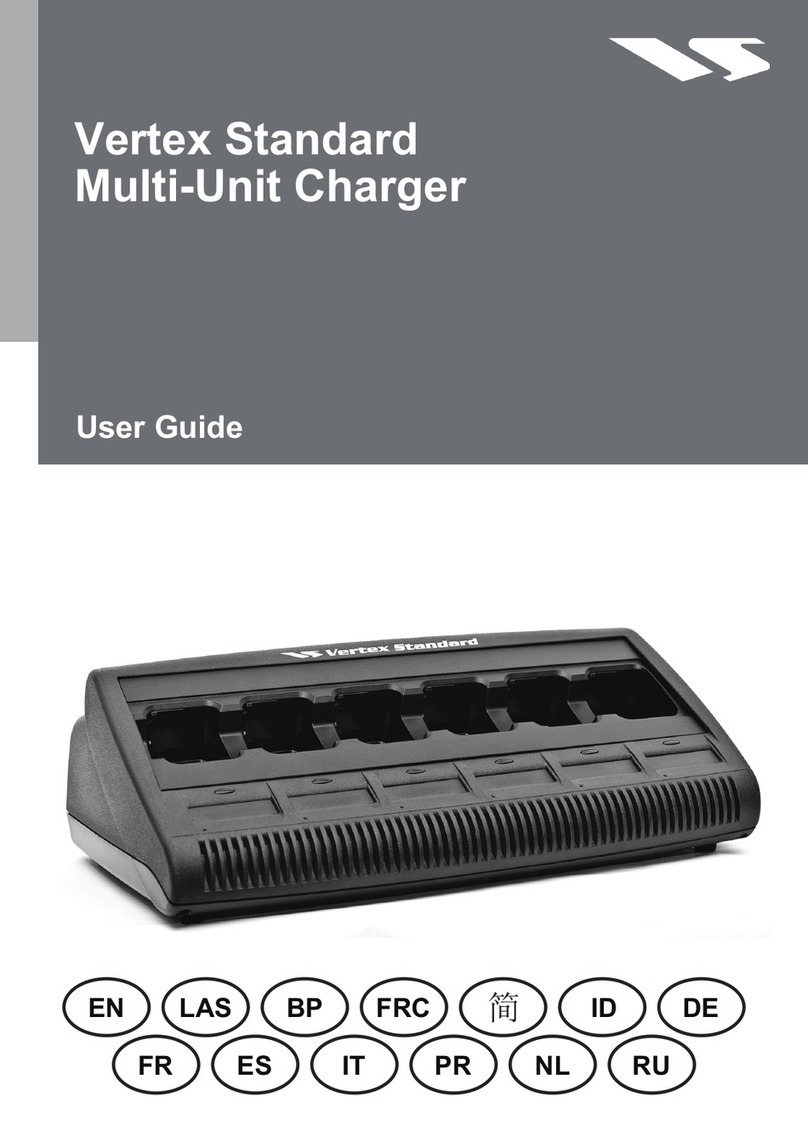
Vertex Standard VAC-6030B/AAH27X001 User manual

Vertex Standard
Multi-Unit Charger
en-USfr-CAes-LA pt-BR zh-CNid-ID de-DE
es-ES fr-FR it-IT nl-NL pt-PT ru-RUru-RU uk-UA
*68012001067*
68012001067-DA
User Guide

Contents
List of Tables............................................................................................................... 3
Copyrights................................................................................................................... 4
Chapter 1: Types of Multi-Unit Chargers.................................................................. 5
Chapter 2: Important Safety Instructions..................................................................6
Chapter 3: Operational Safety Guidelines................................................................ 7
Chapter 4: Operating the Charger............................................................................. 8
4.1 Charging the Battery................................................................................................................8
Chapter 5: Troubleshooting the Charging Operation............................................10
Chapter 6: Service Information................................................................................11
Chapter 7: Vertex Standard Authorized Power Cords...........................................12
Chapter 8: Vertex Standard Authorized Batteries..................................................13
68012001067-DA
Contents
2

List of Tables
Table 1: Battery Charging Indicators........................................................................................................8
Table 2: Troubleshooting Issues with the Charging Operation...............................................................10
Table 3: Depot Contacts for Service.......................................................................................................11
Table 4: Vertex Standard Power Cords..................................................................................................12
Table 5: Batteries for Vertex Standard Digital Radios............................................................................13
68012001067-DA
List of Tables
3

Copyrights
© 2020 Vertex Standard LMR, INC. The Vertex Logo and Vertex are registered trademarks of Vertex
Standard. All Rights Reserved. No portion of this manual may be reproduced without the permission of
Vertex Standard LMR, INC.
68012001067-DA
Copyrights
4

Chapter 1
Types of Multi-Unit Chargers
This accessory manual is applicable to the following Multi-Unit chargers that are available for Vertex
Professional Digital Radios:
• VAC-6030B/AAH27X001
• VAC-6030C/AAH27X002
• VAC-6030H/AAH27X003
68012001067-DA
Types of Multi-Unit Chargers
5

Chapter 2
Important Safety Instructions
Save these instructions. This document contains important safety and operating instructions. Read
these instructions carefully and save them for future reference.
Before using the battery charger, read all the instructions and cautionary markings on (1) the charger,
(2) the battery, and (3) the radio using the battery.
WARNING:
• To reduce the risk of injury, charge only the rechargeable Vertex Standard-authorized
batteries listed in Table 5: Batteries for Vertex Standard Digital Radios on page 13. Other
batteries may explode, causing personal injury and damage.
• Use of accessories not recommended by Vertex Standard may result in risk of fire, electric
shock, or injury.
• To reduce the risk of damage to the electric plug and cord, pull by the plug rather than the
cord when disconnecting the charger.
• An extension cord must not be used unless necessary. Use of an improper extension cord
can result in risk of fire and electric shock. If an extension cord must be used, make sure
that the cord size is 18 AWG for lengths of up to 100 feet (30.48 m), and 16 AWG for lengths
up to 150 feet (45.72 m).
• To reduce the risk of fire, electric shock, or injury, do not operate the charger if it has been
broken or damaged in any way. Take it to a qualified Vertex Standard service
representative.
• The Multi-Unit Charger can only be repaired by a qualified service technician authorized by
Vertex Standard. Any violation of this policy can void unit warranty.
• To reduce the risk of electric shock, unplug the charger from the AC outlet before attempting
any maintenance or cleaning.
• For fuse replacement, use only fuses of the same type and rating listed on the charger label.
Replace fuses with Cooper-Bussman GDC-3.15 or approved equivalents only. The following
parts can be ordered from Vertex Standard Radio Products and Services Division (General
line: +49 30 6686 1555):
- Fuse – 6571489S01
- Cover – 0987739G01
• This is a class A product. In a domestic environment, this product may cause radio
interference in which case the user may be required to take adequate measures.
68012001067-DA
Chapter 2: Important Safety Instructions
6

Chapter 3
Operational Safety Guidelines
• Turn off the radio when charging the battery.
• This equipment is not suitable for outdoor use. Use only in dry locations or conditions.
• Connect the equipment only to an appropriately fused and wired supply of the correct voltage, as
specified on the product.
• Disconnect from line voltage by removing the main plug from the outlet.
• The socket outlet to which this equipment is connected must be close by and easily accessible.
• For equipment using fuses, replacements must comply with the type and rating specified in the
equipment instructions.
• Maximum ambient temperature around the charger must not exceed 40 °C (104 °F).
• Ensure that the cord is located in an area that is safe from being stepped on, tripped over, or
subjected to water, damage, or stress.
68012001067-DA
Operational Safety Guidelines
7

Chapter 4
Operating the Charger
The Charger System is a fully automated battery care system. The charger pockets accommodate
either a radio with a battery attached, or a battery alone. Batteries charge best at room temperature.
Prerequisites:
Before charging a radio with a battery attached, turn off the radio.
Procedure:
1Place the radio or battery into the charger.
2Remove the radio or battery when it is fully charged.
When the radio or battery is fully charged, the LED illuminates solid green.
4.1
Charging the Battery
Prerequisites:
Before charging a radio with a battery attached, turn off the radio.
Procedure:
1Plug the charger end of the power supply cord into the power receptacle at the back of the
charger.
2Plug the wall receptacle end of the power supply cord into the appropriate AC outlet.
If the power-up sequence is successful, the indicator on the charger blinks once in green.
3Insert a battery or the radio with a battery into the pocket of the charger by performing the
following actions:
aAlign the grooves on each side of the battery with the corresponding raised rails on each side
of the pocket.
bPress the battery towards the rear of the pocket.
cSlide the battery into the pocket, ensuring complete contact between the charger and battery
contacts.
When the charger detects contact with the battery, the indicator on the charger illuminates.
Table 1: Battery Charging Indicators
Charge Indicator Description
Single Green Blink The charger successfully powers up.
Solid Red The battery is in rapid charge mode.
Blinking Green The battery completed rapid charge (>90 % available capaci-
ty).
The battery is in Top-Off charge (Trickle charge).
Solid Green The battery completed charging and is fully charged.
Blinking Orange The battery is detected by the charger but is waiting to
charge. Either the battery voltage is too low or, the battery
68012001067-DA
Chapter 4: Operating the Charger
8

Charge Indicator Description
temperature is too low or too high to allow charging. When
this condition is corrected, the battery automatically begins
charging.
Blinking Red The battery is not chargeable or is not making proper con-
tact.
4Remove the battery or radio from the pocket with one hand while supporting the charger with the
other hand.
68012001067-DA
Chapter 4: Operating the Charger
9

Chapter 5
Troubleshooting the Charging
Operation
You must observe the color of the LED indicator on the charger when troubleshooting the charging
operation.
Table 2: Troubleshooting Issues with the Charging Operation
LED Indication Issue Solution
No indication No contact between the charger
and the battery or radio.
Check that the radio with battery, or
the battery alone, is correctly insert-
ed.
No power to the charger. • Ensure that the power cord is se-
curely plugged into the charger
and an appropriate AC outlet, and
that there is power to the outlet.
• Replace fuses.
Blinking Red No contact between the charger
and the battery or radio. • Remove the battery from the
charger and replace it back into
the charger.
• Verify that the battery is a Vertex
Standard-authorized battery as
listed in Table 5: Batteries for Ver-
tex Standard Digital Radios on
page 13. Other batteries may not
charge.
• Remove power from the battery
charger and, using a clean dry
cloth, clean the gold metal charg-
ing contacts of both the battery
and the charger.
The battery is not chargeable. Replace the battery.
Blinking Orange The battery is waiting to charge.
The temperature of the battery may
be below 5 °C (41 °F) or above 40
°C (104 °F), or the battery voltage
may be lower than the predeter-
mined threshold level for rapid
charging.
When this condition is corrected, the
battery automatically begins charging.
68012001067-DA
Chapter 5: Troubleshooting the Charging Operation
10

Chapter 6
Service Information
Only qualified service technicians authorized by Vertex Standard can repair the Multi-Unit Charger.
Any violation of this policy voids the unit warranty.
Contact the following depot for service. Call and confirm your return before sending the unit to the
depot for service.
Table 3: Depot Contacts for Service
Location Contact
United States (US) Vertex Service Center
US Headquarters
10900 Walker Street,
Cypress, CA 90630, U.S.A
Europe, the Middle East, and Africa
(EMEA) Motorola Solutions Systems Polska Sp.z o.o
ul. Czerwone Maki 82,
30-392 Krakow, Poland
68012001067-DA
Service Information
11

Chapter 7
Vertex Standard Authorized Power
Cords
This charger is designed for use in 100 VAC to 240 VAC, 50/60 Hz applications and uses power cords
in Table 4: Vertex Standard Power Cords on page 12.
Table 4: Vertex Standard Power Cords
Plug Type Charger Kit Power Cord
U.S. VAC-6030B/AAH27X001 3087791G01
EMEA Hybrid VAC-6030C/AAH27X002 3087791G04
Australia/NZ VAC-6030H/AAH27X003 3087791G10
68012001067-DA
Chapter 7: Vertex Standard Authorized Power Cords
12

Chapter 8
Vertex Standard Authorized Batteries
Authorized batteries that can be used with Vertex Standard Digital Radios are listed in Table 5:
Batteries for Vertex Standard Digital Radios on page 13.
Table 5: Batteries for Vertex Standard Digital Radios
Kit (PN) Chemistry Capacity
FNB-V116/AAH23X001 NiMH High
FNB-V117LI/AAH86X001 LiIon Ultra High
68012001067-DA
Vertex Standard Authorized Batteries
13

Table des matières
Liste des tableaux....................................................................................................... 3
Droits d'auteur.............................................................................................................4
Chapitre 1: Types de multichargeurs.......................................................................5
Chapitre 2: Notice de sécurité importante...............................................................6
Chapitre 3: Directives d’utilisation sécuritaire........................................................7
Chapitre 4: Utilisation du chargeur.......................................................................... 8
4.1 Charge de la batterie............................................................................................................... 8
Chapitre 5: Dépannage de l'opération de charge..................................................10
Chapitre 6: Informations sur le service..................................................................11
Chapitre 7: Cordons d'alimentation agréés Vertex Standard.............................. 12
Chapitre 8: Batteries agréées par Vertex Standard.............................................. 13
68012001067-DA
Table des matières
2

Liste des tableaux
Tableau 1: Voyants de charge de la batterie ...........................................................................................8
Tableau 2: Dépannage des problèmes avec l'opération de charge ...................................................... 10
Tableau 3: Contacts du centre de réparation ........................................................................................ 11
Tableau 4: Cordons d'alimentation Vertex Standard .............................................................................12
Tableau 5: Batteries pour radios numériques Vertex Standard .............................................................13
68012001067-DA
Liste des tableaux
3

Droits d'auteur
© 2020 Vertex Standard LMR, INC. Le logo Vertex et Vertex sont des marques déposées de Vertex
Standard. Tous droits réservés. Aucune partie de ce manuel ne peut être reproduite sans la
permission de Vertex Standard LMR, INC.
68012001067-DA
Droits d'auteur
4

Chapitre 1
Types de multichargeurs
Le manuel de cet accessoire s'applique aux multichargeurs suivants, qui sont disponibles pour les
radios numériques professionnelles Vertex :
• VAC-6030B/AAH27X001
• VAC-6030C/AAH27X002
• VAC-6030H/AAH27X003
68012001067-DA
Types de multichargeurs
5

Chapitre 2
Notice de sécurité importante
Conservez ces instructions. Ce document contient d’importantes directives relatives à la sécurité et
au fonctionnement de l’appareil. Veuillez lire attentivement cette notice et la conserver pour vous y
référer ultérieurement.
Avant d’utiliser le chargeur de batterie, lisez toutes les directives et les marquages d’avertissement sur
(1) le chargeur, (2) la batterie et (3) la radio associée à la batterie.
AVERTISSEMENT:
• Pour réduire les risques de blessure, ne chargez que les batteries rechargeables agréées
Vertex Standard apparaissant dans le Tableau 5: Batteries pour radios numériques Vertex
Standard à la page 13. Les batteries non approuvées pourraient exploser et causer des
blessures corporelles et d’autres dommages.
• L'utilisation d'accessoires non recommandés par Vertex Standard pourrait occasionner des
risques d'incendie, de choc électrique ou de blessure.
• Afin de réduire la possibilité d'endommager la fiche et le cordon d'alimentation, débranchez
le chargeur en tirant sur la fiche au lieu du cordon.
• Il n'est pas recommandé d'utiliser une rallonge, sauf en cas de nécessité absolue.
L’utilisation d’une rallonge inappropriée pourrait causer un risque d’incendie et de décharge
électrique. Si une rallonge doit être utilisée, assurez-vous que le format du cordon est de
calibre 18 lorsque sa longueur est de 30,48 m (100 pi) ou moins et de calibre 16 lorsque sa
longueur atteint jusqu'à 45,72 m (150 pi).
• Pour réduire le risque d'incendie, de choc électrique ou de blessure, n'utilisez pas le
chargeur s'il est brisé ou endommagé de quelque manière que ce soit. Apportez-le à un
technicien Vertex Standard qualifié.
• Le multichargeur ne peut être réparé que par un technicien professionnel autorisé par
Vertex Standard. Toute violation de la présente politique peut annuler la garantie du produit.
• Pour réduire les risques de choc électrique, débranchez le chargeur de la prise c.a. avant de
procéder à une maintenance ou à un nettoyage.
• Pour remplacer les fusibles, utilisez uniquement des fusibles de même type et valeur
nominale indiqués sur l'étiquette du chargeur. Remplacez les fusibles avec des fusibles
Cooper-Bussman GDC-3.15 ou des équivalents approuvés uniquement. Les pièces
suivantes peuvent être commandées auprès de la division des produits et services de
Vertex Standard (ligne générale : +49 30 6686 1555) :
- Fusible – 6571489S01
- Couvercle – 0987739G01
• Ce produit est de classe A. Ce produit peut entraîner des interférences radio dans un
environnement résidentiel, auquel cas, l’utilisateur peut être tenu de prendre des mesures
adéquates.
68012001067-DA
Chapitre 2: Notice de sécurité importante
6

Chapitre 3
Directives d’utilisation sécuritaire
• Éteignez la radio lorsque vous chargez la batterie.
• Cet équipement n’est pas conçu pour une utilisation à l’extérieur. Ne l'utilisez que dans des
emplacements secs et sous des conditions de nature semblable.
• Ne branchez l'équipement qu'à un bloc d'alimentation à fusible câblé approprié de tension prescrite
(telle que spécifiée sur le produit).
• Débranchez le chargeur de la tension de secteur en retirant la fiche d'alimentation de la prise de
courant.
• La prise de courant à laquelle cet équipement est branché doit se trouver à proximité et être
facilement accessible.
• Pour les appareils utilisant des fusibles, les pièces de rechange devront être conformes aux
instructions fournies dans la documentation.
• La température ambiante maximale autour du chargeur ne doit pas dépasser 40 °C (104 °F).
• Assurez-vous que le cordon est placé à un endroit où il ne sera pas écrasé ou endommagé, ne
gênera pas le passage, ne sera pas tendu de façon anormale et ne sera pas exposé à une source
d'humidité.
68012001067-DA
Directives d’utilisation sécuritaire
7

Chapitre 4
Utilisation du chargeur
Le système de chargeur est un système d'entretien de batterie entièrement automatisé. Les logements
du chargeur peuvent accueillir chacun soit une radio avec une batterie, soit une batterie seule. Pour
des résultats optimaux, chargez la batterie à la température ambiante.
Préalables :
Avant de charger une radio avec une batterie, éteignez la radio.
Procédure :
1Placez la radio ou la batterie dans le chargeur.
2Retirez la radio ou la batterie lorsqu'elle est entièrement chargée.
Lorsque la radio ou la batterie est entièrement chargée, le voyant s'allume en vert fixe.
4.1
Charge de la batterie
Préalables :
Avant de charger une radio avec une batterie, éteignez la radio.
Procédure :
1Branchez l'extrémité pour chargeur du cordon d'alimentation dans la prise d'alimentation située
derrière le chargeur.
2Branchez la fiche d'alimentation du cordon d'alimentation dans une prise c.a. appropriée.
Si la séquence de mise en marche réussit, le voyant du chargeur clignote une fois en vert.
3Insérez une batterie ou une radio avec une batterie dans le logement du chargeur en exécutant
les actions suivantes :
aAlignez les rainures sur chaque côté de la batterie avec les rainures en relief
correspondantes sur chaque côté du logement.
bAppuyez la batterie contre l’arrière du logement.
cGlissez la batterie dans le logement en vous assurant qu'un contact parfait est établi entre le
chargeur et les contacts de la batterie.
Lorsque le chargeur détecte un contact avec la batterie, le voyant du chargeur s'allume.
Tableau 1: Voyants de charge de la batterie
Indicateur de charge Description
Clignotement vert unique Le chargeur s'allume avec succès.
Rouge fixe La batterie est en mode de charge rapide.
Vert clignotant La recharge rapide de la batterie est terminée (capacité
disponible > 90 %).
La batterie est en charge à bloc (charge lente).
Vert continu La recharge de la batterie est terminée et la batterie est
chargée à bloc.
68012001067-DA
Chapitre 4: Utilisation du chargeur
8
Other manuals for VAC-6030B/AAH27X001
1
This manual suits for next models
2
Table of contents
Languages:
Other Vertex Standard Batteries Charger manuals

