manuals.online logo
Brands
  1. Home
  2. •
  3. Brands
  4. •
  5. Vertex Standard
  6. •
  7. Radio
  8. •
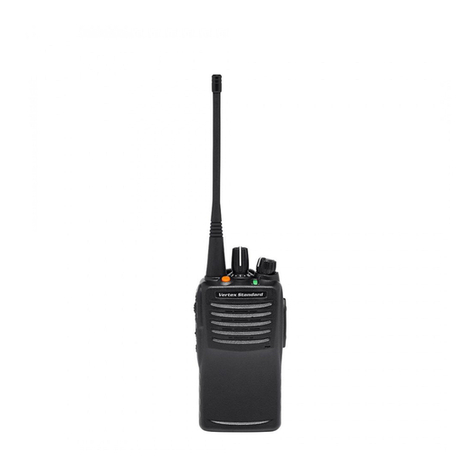
  9. Vertex Standard VX-230 Series User manual

Vertex Standard VX-230 Series User manual

OperatiOn
Preliminary StePS
 Installacharged batterypackontothetransceiver,asde-
scribedpreviously.
 ScrewthesuppliedantennaontotheAntennajack.Never
attempt to operate this transceiver without an antenna con-
nected.
 IfyouhaveaSpeaker/Microphone,werecommendthatitnot
beconnecteduntil you arefamiliar with thebasic operation
oftheVX-230.
OPeratiOn Quick Start
 Turnthetoppanel’sVOL/PWRknob
clockwisetoturnontheradioon.
 Turnthetoppanel’sCHselectorknob
to choose the desired operating chan-
nel.
 RotatetheVOL/PWRknobtosetthe
volume level. If no signal is present,
pressandholdintheProgrammable
keyassignedto“SQL OFF”formore
thanonesecond;backgroundnoise
will now be heard, and you may use
thistosettheVOL/PWRknobforthe
desiredaudiolevel.
BefOre YOu Begin
Battery Pack inStallatiOn and remOval
 To install the battery, hold the transceiver with your left hand,
soyourpalmisoverthespeakerandyour
thumbisonthetopofthebeltclip.Insert
thebatterypackintothebattery
compartmentonthebackofthe
radio while tilting the Belt
Clipoutward, thenpush
thebottomsideofthe
batterypackuntil
thebatterypack
lockswiththeBat-
teryPackLatch.
 Toremovethebattery,turntheradiooffandremoveanyprotec-
tivecases.Slide the BatteryPackLatch onthebottom ofthe
radio, then slide the battery downward and out from the radio
whileholdingtheBeltClip.
Caution
Do not attempt to open any of the rechargeable Lithium-
Ion packs, as they could explode if accidentally short-
circuited.
lOw Battery indicatiOn
Asthebatterydischargesduringuse,thevoltagegraduallybecomes
lower.Whenthebatteryvoltagebecomestolow,substituteafreshly
charged battery and recharge the depleted pack.When the battery
voltageislow,theLEDindicatoronthetopoftheradiowillblink
red.Furthermore,ifyourDealersetsthe“LowBatteryAlert”feature
intothetransceiver,analertbeeperwillsoundwhenthebatteryvolt-
ageislow.
 PressandholdintheProgrammable
keyassignedto“SQL OFF”formore
thanonesecond(orpressthekey
twice)toquietthe noiseandresume
normal(quiet)monitoring.
 Totransmit,monitorthechannelandmakesureitisclear.
THIS IS AN FCC REQUIREMENT!
 Totransmit,pressandholdinthePTT
switch.Speakintothemicrophone
area of the front panel grille (lower
right-hand corner) in a normal voice
level. To return to the Receive mode,
releasethePTTswitch.
Do not transmit the radio without
an antenna connected.
 IfaSpeaker/Microphoneisavailable,removetheplasticcapand
its two mounting screws from the right side of the transceiver,
theninserttheplugfromtheSpeaker/MicrophoneintotheMIC/
SPjack;securetheplugusingthescrewssuppliedwiththe
Speaker/Microphone.Holdthespeakergrilleupnexttoyourear
whilereceiving.Totransmit,pressthePTTswitchontheSpeak-
er/Microphone,justasyouwouldonthemaintransceiver’sbody.
Note: Save the original plastic cap and its mounting
screws.Theyshouldbere-installedwhennotusingthe
Speaker/Microphone.
Microphone
Speaker
MIC/SP Jack
(ExternalMic/Earphone)
VOL/PWR Knob
CH (Channel) Selector
Side 1 Switch
Push To Talk
(PTT) Switch
Antenna
LED Indicator
Battery Pack Latch
Side 2 Switch
Copyright 2013
Vertex Standard LMR, Inc.
All rights reserved.
SafetY training infOrmatiOn
ThisRadiohasbeentestedandcomplieswiththeFederalCommu-
nications Commission (FCC) RF exposure limits for Occupational
Use/Controlledexposureenvironment.Inaddition,itcomplieswith
thefollowingStandardsandGuidelines:
 FCC 96-326, Guidelines for Evaluating the Environmental Ef-
fectsofRadio-FrequencyRadiation.
 FCCOETBulletin65Edition97-01(1997)SupplementC,Eval-
uatingCompliancewithFCCGuidelinesforHumanExposureto
RadioFrequencyElectromagneticFields.
 ANSI/IEEEC95.1-1992, IEEEStandardfor SafetyLevelswith
Respectto Human ExposuretoRadio FrequencyElectromag-
neticFields,3kHzto300GHz.
 ANSI/IEEE C95.3-1992, IEEE Recommended Practice for the
Measurement of Potentially Hazardous Electromagnetic Fields-
RFandMicrowave.
WARNING:ThisradiogeneratesRFelectromagneticenergy
duringtransmit mode.Thisradio isdesigned forand classi-
edasOccupational Use Only,meaningitmustbeusedonlyduring
thecourseofemploymentbyindividualsawareofthehazards,and
thewaystominimizesuchhazards.Thisradioisnotintendedforuse
bytheGeneral Populationinanuncontrolledenvironment.
CAUTION:ToensurethatyourexposetoRFelectromagnet-
icenergyiswithintheFCCallowablelimitsforoccupational
use,alwaysadheretothefollowingguidelines:
Please read this manual carefully to become familiar with the
features of this transceiver.
 Do not transmit the radio without an antenna connected.
This radio is NOT approved for use by the general popula-
tion in an uncontrolled environment. This radio is restricted
to occupational use, work related operations only where the
radio operator must have the knowledge to control its RF ex-
posure conditions.
When transmitting, hold the radio in a vertical position with
its microphone 1 to 2 inches (2.5 to 5 cm) away from your
mouth and keep the antenna at least 1 inch (2.5cm) away
from your head and body.
The radio must be used with a maximum operating duty
cycle not exceeding 50 %, in typical Push-to-Talk (PTT) con-
gurations. DO NOT transmit for more than 50 % of total
radio use time (50 % duty cycle). Transmitting more than 50
% of the time can cause FCC RF exposure compliance re-
quirements to be exceeded.
To keep the Body Worn conguration with the Vertex Stan-
dard CLIP-18 belt-clip, reduce the maximum operating duty
cycle still more.
The radio is transmitting when the red LED on the top of
the radio is illuminated. You can cause the radio to transmit
by pressing the PTT button or by using the Vertex Standard
VC-25 VOX headset.
When operate the radio with the Vertex Standard CLIP-18
belt-clip, make the transmission time as short as possible, to
keep the Body Worn conguration.
Always use the FNB-V103LIA or FNB-V104LIA Lithium-Ion
Battery.
 Risk of explosion if battery is replaced by an incorrect type.
Dispose of used batteries according to the instructions.
 Perform the battery charging where the ambient tempera-
ture range +50 °F to +104 °F (10 °C to +40 °C). Charge out
of this range could cause damage to the battery pack.
 Battery Pack shall not be exposed to excessive heat such as
sunshine, re or the like.
Vertex Standard LMR, Inc.
 Always use Vertex Standard authorized accessories.
Vertex Standard shall not be liable for any damage or ac-
cidents such as fire, leakage or explosion of batteries, etc.,
caused by the malfunction of non-Vertex Standard accesso-
ries.
 This radio generates RF electromagnetic energy during
transmit mode. This radio is designed for and classified as
occupational use only, meaning it must be used only during
the course of employment by individuals aware of hazard-
ous, and the ways to minimize such hazardous. This radio is
not intended for use by the General Population in an uncon-
trolled environment.
Theinformationlistedaboveprovidestheuserwiththeinformation
neededtomakehimorherawareofRFexposure,andwhattodoto
assurethat thisradio operateswith theFCC RFexposurelimitsof
thisradio.
Electromagnetic Interference/Compatibility
During transmissions, this radio generates RF energy that can
possibly cause interference with other devices or systems. To
avoid such interference, turn off the radio in areas where signs
are posted to do so.
Do not operate the transmitter in areas that are sensitive to elec-
tromagnetic radiation such as hospitals, health care facilities,
aircraft, and blasting sites.
FCC LICENSE INFORMATION
This radio operates on communications frequencies which are
subject to FCC (Federal Communications Commission) Rules
and Regulations. FCC Rules require that all operators using Pri-
vate Land Mobile radio frequencies obtain a radio license before
operating their equipment.
acceSSOrieS & OptiOnS
FNB-V103LIA 7.4V1380mAhLithium-IonBattery
FNB-V104LIA 7.4V2300mAhLithium-IonBattery
VAC-300 DesktopRapidCharger(CD-34+PA-42)
VAC-6300 6-unitMultiCharger
PA-42 ACAdapter(forCD-34)
MH-37A4B Earpiece/Microphone
MH-45B4B Speaker/Microphone(NoiseCancelling)
MH-360S Speaker/Microphone(SmallType)
MH-450S Speaker/Microphone(MiniatureType)
VH-115S Lightweightheadsetw/Boommic
VH-215S Lightweightpaddedheadset,SingleSpeaker
VH-225S Lightweightpaddedheadset,DualSpeaker
VC-25 VOXHeadset
VCM-2 VehicleChargerMountAdapter
DCM-1 DesktopChargerBracket
ATV-8A RubberAntenna134-151MHz
ATV-8B RubberAntenna150-163MHz
ATV-8C RubberAntenna161-174MHz
ATV-6XL RubberAntenna134-174MHz(Untuned)
ATU-6A RubberAntenna400-430MHz
ATU-6B RubberAntenna420-450MHz
ATU-6C RubberAntenna440-470MHz
ATU-6D RubberAntenna450-485MHz
ATU-6F RubberAntenna485-520MHz
CLIP-18 BeltClip
LCC-230 LeatherCase
CE99 ProgrammingSoftware
FIF-12 USBProgrammingInterface
CT-27 RadiotoRadioProgrammingCable
CT-42A PCProgrammingCable(CT-29+CT-28)
CT-106 PCProgrammingCable(forFIF-12)
Tilt the Belt Clip
Insert the Battery Pack
Push the bottom side
of the Battery Pack
vX-230 SerieS
OPerating manual
cOntrOlS & cOnnectOrS
Green Monitoron(orSide1orSide2switchisactivated)
Blinking Green BusyChannel(orSQLoff)
Glows Red Transmitting
Blinking Red BatteryVoltageisLow
Yellow ReceivingaSelectiveCall
Operating temperature range
(FOr eurOpean user)
Operation:–20°Cto+55°C
Battery Charging:+10°Cto+40°C
(Turntheradiooffwhilechargingthebattery)
mOn (mOnitOr)
Press(orPressandhold)theassignedProgrammablekeymomen-
tarilytodisabletheTonesquelch.WhendisablestheTonesquelch,
theLEDindicatoronthetopoftheradiowillglowgreen.
SQl Off
Press(orPressandhold)theassignedProgrammablekeytodis-
abletheNoiseandTonesquelch.Againpress(orPressandhold)the
assignedProgrammablekeytoresumenormal (quiet)Noiseand
Tonesquelchaction.
SQl Set
Youcanmanuallyadjustthesquelchlevelusingthisfunction.Press
the assigned Programmable key to toggle the squelch threshold
level“High”and“Low”.
lOw POwer
Press(orPressandhold)theassignedProgrammable key
tosettheradio’stransmittertothe“LowPower”mode,thus
extendingbatterylife.Press(orPressandhold)theassigned
Programmablekeyagaintoreturnto“HighPower”operation
when in difcult terrain. When the radio’s transmitter is set to
“Low Power” mode, the LED indicator on the top of the radio
willglowgreen.
Scan
The Scanning feature is used to monitor multiple channels pro-
grammedintothetransceiver.Whilescanning, theradiowillcheck
eachchannelforthepresenceofasignal,andwillstoponachannel
ifasignalispresent.
 Toactivatescanning:
 Press(orPressandhold)theassignedProgrammablekey.
 The scanner will search the channels, looking for active ones;
it will pause each time it nds a channel on which someone is
speaking. When the scanner is activated, the LED indicator on
thetopoftheradiowillglowgreen.
 Tostopscanning:
 Press(orPressandhold)theassignedProgrammablekey.
 OperationwillreverttothechanneltowhichtheCHknobisset.
KeY functiOnS
fOllOw-me Scan
“Follow-Me”ScanfeaturechecksaUser-assignedPriorityChannel
regularlyasyouscantheotherchannels.Thus,ifonlyChannels1,
3,and5(ofthe8availablechannels)aredesignatedfor“Scanning,”
theusermaynonethelessanychannelasthe“User-assigned”Prior-
ityChannelviathe“Follow-Me”feature.
Press the assigned Programmable key to activate “Follow-Me”
scanning,thenturntheCHselectorknobtothechannelwhichyou
want to designate as the “User-Assigned Priority Channel”. When
thescannerstopsonan“active”channel,theUser-assignedPriority
Channelwillautomaticallybecheckedevery fewseconds(interval
programmedbyyourDealer).
Scan Set
Press(or pressand hold)the assignedProgrammablekeytode-
letetheCurrentMemoryChannelfromtheScanningList.Whenyou
deleteachannelfromtheScanningList,alowtonebeepwillsound.
TorestoreaparticularchanneltoyourScanningList,press(orpress
andhold)theassignedProgrammablekeyagain;ahightonebeep
willsound.
dw (dual watch)
The Dual Watch feature is similar to the Scan feature, except that
onlytwochannelsaremonitored:thecurrentoperatingchannel,and
the“Priority”channel.
 ToactivateDualWatch:
 Press(orPressandhold)theassignedProgrammablekey.
 Thescannerwillsearchthetwochannels;itwillpauseeachtime
itndsachannelonwhichsomeoneisspeaking.WhentheDual
Watch feature is activated, the LED indicator on the top of the
radiowillglowgreen.
 TostopDualWatch:
 Press(orPressandhold)theassignedProgrammablekey.
 OperationwillreverttothechanneltowhichtheCHknobisset.
ta Scan
PresstheassignedprogrammablekeytotoggletheTA(TalkAround)
scanfeature“On”and“Off.”
WhileTAscanisproceeding,theVX-230willsearchboththetrans-
mitandreceivefrequencies(andtheLEDindicatoronthetopofthe
radiowillglowgreen).Whenasignalisencounteredonthereceive
frequency,theVX-230willpauseuntilthesignaldisappears.
Whenasignalisencounteredonthetransmitfrequency,theVX-230
willcheck foractivity onthe receivefrequencyeveryfewseconds
(intervalprogrammedbyyourDealer).
ta (talk arOund)
Press(or Pressand hold)the assignedProgrammablekeytoac-
tivatetheTalkAround featurewhenyouareoperatingonduplex
channelsystems(separatereceiveandtransmitfrequencies,utilizing
a“repeater”station).TheTalkAroundfeatureallowsyoutobypass
therepeaterstationandtalkdirectlytoastationthatisnearby.This
featurehasnoeffectwhenyouareoperatingon“Simplex”channels,
wherethereceiveandtransmitfrequenciesarealreadythesame.
Whenthe“TA”function isactivated,theLEDindicator onthetop
oftheradiowillglowgreen.
tX Save diSaBle
Press(orPressandhold)theassignedProgrammablekeytodis-
able the Transmit Battery Saver, if you are operating in a location
wherehighpowerisalmostalwaysneeded.
TheTransmit Battery Saver helps extend battery life by reducing
transmitpowerwhenaverystrongsignalfromanapparentlynearby
station is being received. Under some circumstances, though, your
hand-heldradiomaynotbeheardwellattheotherendofthecom-
municationpath,andhighpowermaybenecessaryatalltimes.
reSet
Press (or Press and hold) the assigned Programmable key to si-
lencethereceiverandresetforanothercall,whenacommunication
isnished.
artS (
autO range tranSpOnd SYStem
)
ThissystemisdesignedtoinformyouwhenyouandanotherARTS-
equippedstationarewithincommunicationrange.
During ARTSoperation, yourradioautomaticallytransmitsfor
about1secondevery55secondsinanattempttoshakehandswith
theotherstation.
Ifyouareoutofrangeformorethantwominutes,yourradiosenses
thatnosignalhasbeenreceived,aringingbeeperwillsound.Ifyou
subsequently move back into range, as soon as the other station
transmits,yourbeeperwillsound.
call
Press(orPressandhold)theassignedProgrammablekeytosend
aprogrammed2-or5-Tonesequentialtone.
call 2, call 3
Press(orPressandhold)theassignedProgrammablekeytosend
a5-Tonesequentialtonegroupwhichispre-dened.
SPeed dial
YourDealermayhaveapre-programmedAuto-Dialtelephonenum-
bermemoryintoyourradio.Press(orPressandhold)theassigned
Programmable key to send the pre-programmedAuto-Dial tele-
phone number. The DTMF tones sent during the dialing sequence
willbeheardinthespeaker.
lOck
Press(orPressandhold)theassignedProgrammablekeytolock
theCHknob,Programmablekeys,andPTTswitch.Theprecise
lockoutconfigurationisprogrammedbyyourVERTEX STAN-
DARDdealer.
emergency
The VX-230 series includes an “Emergency” feature, which may
be useful, if you have someone monitoring on the same frequency
asyourtransceiver’schannel.ForfurtherdetailscontactyourVER-
TEX STANDARDdealer.
lOne wOrker
PressandholdtheassignedProgrammablekeytotoggletheLone
Workerfeature“ON”and“OFF.”
TheLoneWorkerfeaturewillemitanaudiblealarmfor30seconds
at one second intervals when the LoneWorker Timer has expired.
IftheuserdoesnotresetthetimerbypressingthePTTswitch,the
radioswitchestotheEmergencymode.
Declaration of Conformity
We, YAESU UK Ltd. declare under our sole responsibility that the
following equipment complies with the essential requirements of
the Directive 1999/5/EC.
Type of Equipment: FM Transceiver
Brand Name: VERTEX STANDARD
Model Number: VX-231-D0-5 / VX-231-G6-5
Manufacturer: Vertex Standard Co., Ltd.
Address of Manufacturer: 4-8-8 Nakameguro Meguro-Ku, Tokyo
153-8644, Japan
Applicable Standards:
This equipment is tested and conforms to the essential require-
ments of directive, as included in following standards.
EN 300 086-2 V1.3.1
Radio Standard:
EN 301 489-01 V1.8.1
EMC Standard: EN 301 489-05 V1.3.1
EN 60950-1: 2006 +A11: 2009 +A1: 2010
Safety Standard:
The technical documentation as required by the Conformity As-
sessment procedures is kept at the following address:
Company: YAESU UK Ltd.
Address: Unit 12, Sun Valley Business Park, Winnall Close
Winchester, Hampshire, SO23 0LB, U.K.
attentiOn in Case OF use
This transceiver works on frequencies which are not gener-
allypermitted.
Forfrequencyallocation,
applyforalicenceatyour
localspectrummanagement
authority.
For actual usage contact
yourdealerorsalesshopinordertogetyourtransceiverad-
justedtotheallocatedfrequencyrange.
nOtiCe !
There are no owner-serviceable parts inside the transceiver.
AllservicejobsmustbereferredtoanauthorizedVERTEX
STANDARD Service Representative. Consult yourAutho-
rized VERTEX STANDARD Dealer for installation of op-
tionalaccessories.
DispOsal OF yOur eleCtrOniC anD
eleCtriC equipment
Productswiththesymbol (crossed-outwheeled
bin)cannotbedisposedashouseholdwaste.
Electronic and Electric Equipment should bere-
cycledatafacilitycapableofhandlingtheseitems
andtheirwastebyproducts.
In EU countries, please contact your local equipment sup-
plier representative or service center for information about
thewastecollectionsysteminyourcountry.
impOrtant nOtiCe FOr nOrth ameriCan users
regarDing 406 mhz guarD BanD
The U.S. Coast Guard and National Oceanographic andAt-
mosphericAdministration have requested the cooperation of
theU.S.FederalCommunicationsCommissioninpreserving
theintegrityoftheprotectedfrequencyrange406.0to406.1
MHz,whichisreservedforusebydistressbeacons.Donot
attempt to program this apparatus, under any circumstances,
foroperationinthefrequencyrange406.0-406.1MHzifthe
apparatusistobeusedinornearNorthAmerica.
Warning - Frequency band 406 - 406.1 MHz is reserved
for use ONLY as a distress beacon by the US Coast
Guard and NOAA. Under no circumstance should this
frequency band be part of the pre-programmed oper-
ating frequencies of this radio.
Part15.21:Changesormodicationstothisdevicenotex-
pressly approved byVertex Standard could void the user’s
authorizationtooperatethisdevice.
List of the practicable area
AUT BEL BGR CYP CZE DEU
DNK ESP EST FIN FRA GBR
GRC HUN IRL ITA LTU LUX
LVA MLT NLD POL PRT ROU
SVK SVN SWE CHE ISL LIE
NOR –––––
ThisdevicecomplieswithPart15oftheFCCrules.Opera-
tionissubjecttotheconditionthatthisdevicedoesnotcause
harmfulinterference.
TheVX-230provide[Side 1]and[Side 2]keys.These“Pro-
grammable” keys functions can be customized (set to other
functions),viaprogrammingbyyourVERTEX STANDARD
dealer, to meet your communications/network requirements.
Some features may require the purchase and installation of op-
tional internal accessories.The possible Programmable key
features are illustrated below, and their functions are explained
in the next chapter. For further details, contact your VERTEX
STANDARDdealer.
Forfuturereference,checktheboxbelowtoeachfunctionthat
hasbeenassignedtotheProgrammablekeyonyourparticular
radio,andkeepithandy.
functiOn
Programmable Key
[Press / Press & Hold]functiOn
Programmable Key
[Press / Press & Hold]
[Side 1] [Side 2] [Side 1] [Side 2]
None / / TA (Talk Around)/ /
Mon (Monitor)/ / TX Save Disable / /
SQL Off / / Reset / /
SQL Set / / Call / /
Low Power / / Call 2 / /
Scan / / Call 3 / /
Follow-Me Scan / / Speed Dial / /
Scan Set / / Lock / /
DW (Dual Watch)/ / Emergency –/–/
TA Scan / / Lone Worker –/–/
mOdel reference
mOdel freQuency tX POwer
VX-231-D0-5 134 - 174 MHz 5W
VX-231-G6-5 400 - 470 MHz 5W
VX-231-G7-5 450 - 520 MHz 5W

Other manuals for VX-230 Series

7

Other Vertex Standard Radio manuals

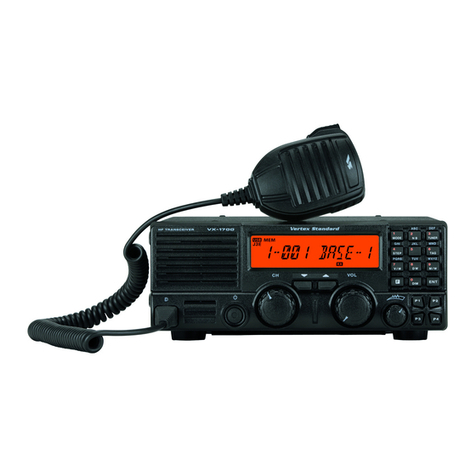
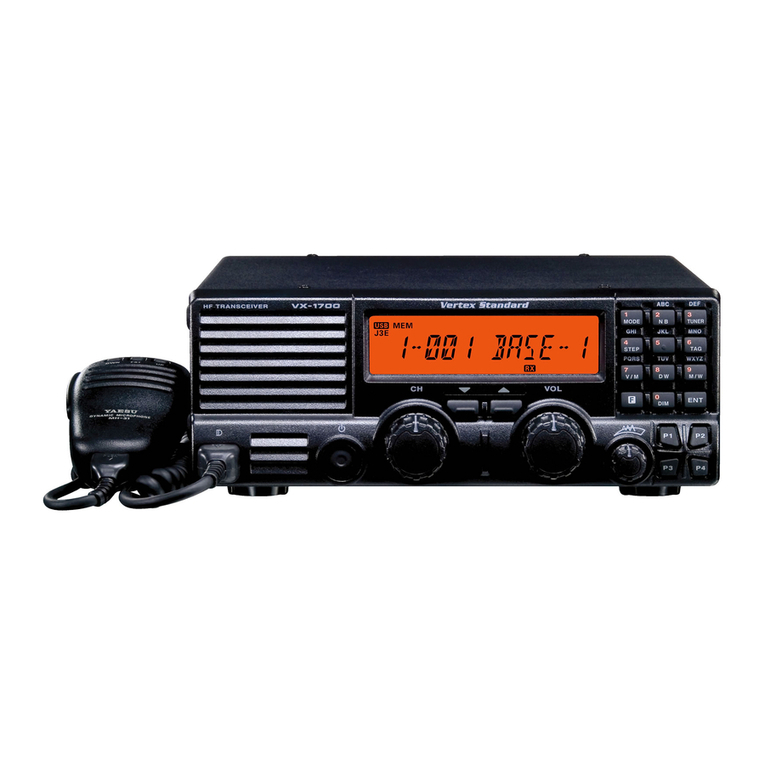
Vertex Standard VX-1700 Series User manual

Vertex Standard

Vertex Standard VX-1700 Series User manual

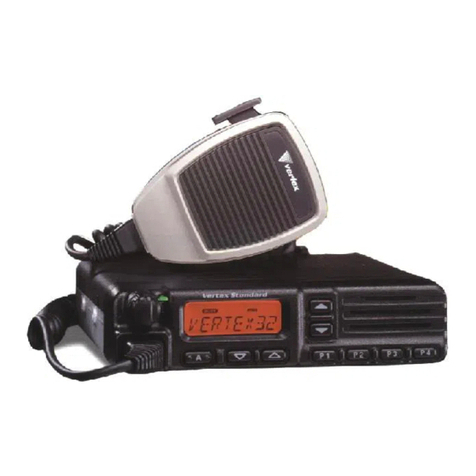
Vertex Standard VX-3200 Series User manual

Vertex Standard

Vertex Standard VX-3200 Series User manual

Vertex Standard VX-4500 Series User manual

Vertex Standard

Vertex Standard VX-4500 Series User manual

Vertex Standard VX-920 series User manual

Vertex Standard

Vertex Standard VX-920 series User manual

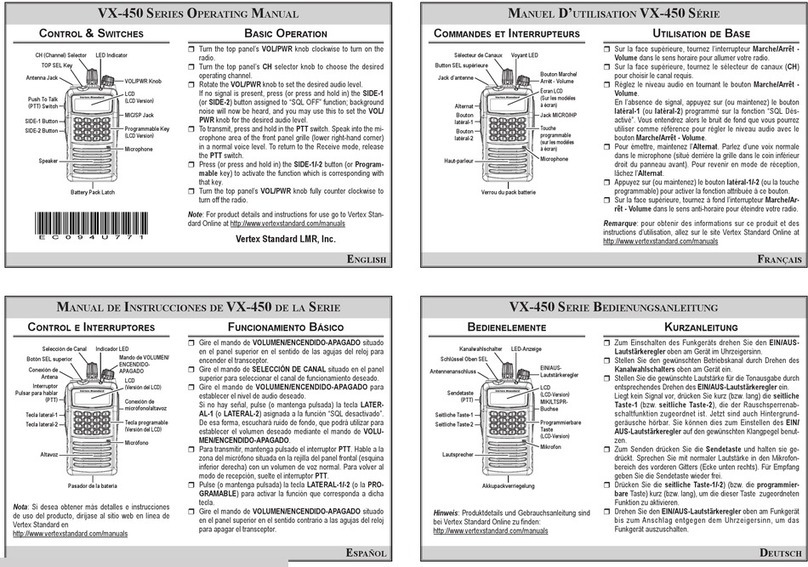
Vertex Standard VX-450 series User manual

Vertex Standard

Vertex Standard VX-450 series User manual

Vertex Standard VX-160 User manual

Vertex Standard

Vertex Standard VX-160 User manual

Vertex Standard VX-4500 Series User manual

Vertex Standard

Vertex Standard VX-4500 Series User manual

Vertex Standard VX-4000 Series User manual

Vertex Standard

Vertex Standard VX-4000 Series User manual

Vertex Standard VX-1700 Series User manual

Vertex Standard

Vertex Standard VX-1700 Series User manual

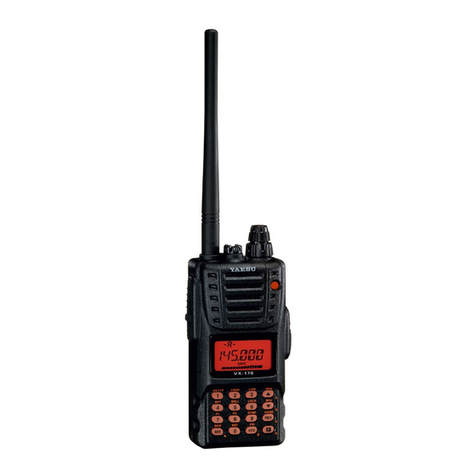
Vertex Standard VX-170 User manual

Vertex Standard

Vertex Standard VX-170 User manual

Vertex Standard VX-450 series User manual

Vertex Standard

Vertex Standard VX-450 series User manual

Vertex Standard EVX-5300 User manual

Vertex Standard

Vertex Standard EVX-5300 User manual

Vertex Standard EVX-261 User manual

Vertex Standard

Vertex Standard EVX-261 User manual

Vertex Standard VXD-720 digital User manual

Vertex Standard

Vertex Standard VXD-720 digital User manual

Vertex Standard VX-2100 Series User manual

Vertex Standard

Vertex Standard VX-2100 Series User manual

Vertex Standard VX-1700 Series User manual

Vertex Standard

Vertex Standard VX-1700 Series User manual

Vertex Standard VX-2500 User manual

Vertex Standard

Vertex Standard VX-2500 User manual

Vertex Standard VX-1400 User manual

Vertex Standard

Vertex Standard VX-1400 User manual

Vertex Standard VX-2200 Series User manual

Vertex Standard

Vertex Standard VX-2200 Series User manual

Vertex Standard VX-6000 User manual

Vertex Standard

Vertex Standard VX-6000 User manual

Vertex Standard VX-537 User manual

Vertex Standard

Vertex Standard VX-537 User manual

Vertex Standard VX-2500 User manual

Vertex Standard

Vertex Standard VX-2500 User manual

Vertex Standard VX-4100 Series User manual

Vertex Standard

Vertex Standard VX-4100 Series User manual

Vertex Standard VX-4500 Series User manual

Vertex Standard

Vertex Standard VX-4500 Series User manual

Popular Radio manuals by other brands

Hyundai H-1615 instruction manual

Hyundai

Hyundai H-1615 instruction manual

NTI DiRaBox DRB 30 instructions

NTI

NTI DiRaBox DRB 30 instructions

Muji MJBTS-1 user manual

Muji

Muji MJBTS-1 user manual

Telestar M 12i instruction manual

Telestar

Telestar M 12i instruction manual

Hyundai RA 601 instruction manual

Hyundai

Hyundai RA 601 instruction manual

OTE TETRA FC 2001 Short user guide

OTE

OTE TETRA FC 2001 Short user guide

Sirius Satellite Radio SCH2P Installation and user guide

Sirius Satellite Radio

Sirius Satellite Radio SCH2P Installation and user guide

Sharp FV-1710 Service manual

Sharp

Sharp FV-1710 Service manual

Freecom MusicPal user manual

Freecom

Freecom MusicPal user manual

Ubiquiti airFiber AF-11 quick start guide

Ubiquiti

Ubiquiti airFiber AF-11 quick start guide

Peaq PDR210 quick start guide

Peaq

Peaq PDR210 quick start guide

MAJORITY Orwell user manual

MAJORITY

MAJORITY Orwell user manual

Sangean HDR-1 Features

Sangean

Sangean HDR-1 Features

HYT TM-600 Service manual

HYT

HYT TM-600 Service manual

Roadstar TRA-2350 Service manual

Roadstar

Roadstar TRA-2350 Service manual

Motorola GM1280 user guide

Motorola

Motorola GM1280 user guide

auna IR 160 manual

auna

auna IR 160 manual

Pioneer XMp3 user guide

Pioneer

Pioneer XMp3 user guide

manuals.online logo
manuals.online logoBrands
  • About & Mission
  • Contact us
  • Privacy Policy
  • Terms and Conditions

Copyright 2025 Manuals.Online. All Rights Reserved.