Forced Power Down
MAP-2100 Quick Start Guide
April 2023 22127245, R004 Page 6
Forced Power Down
In order to force the unit to power off, hold the power button on the front panel down for
at least 4 seconds. When performing a forced power off, you will not retain your last
active test or general settings of the instrument since the last normal power down.
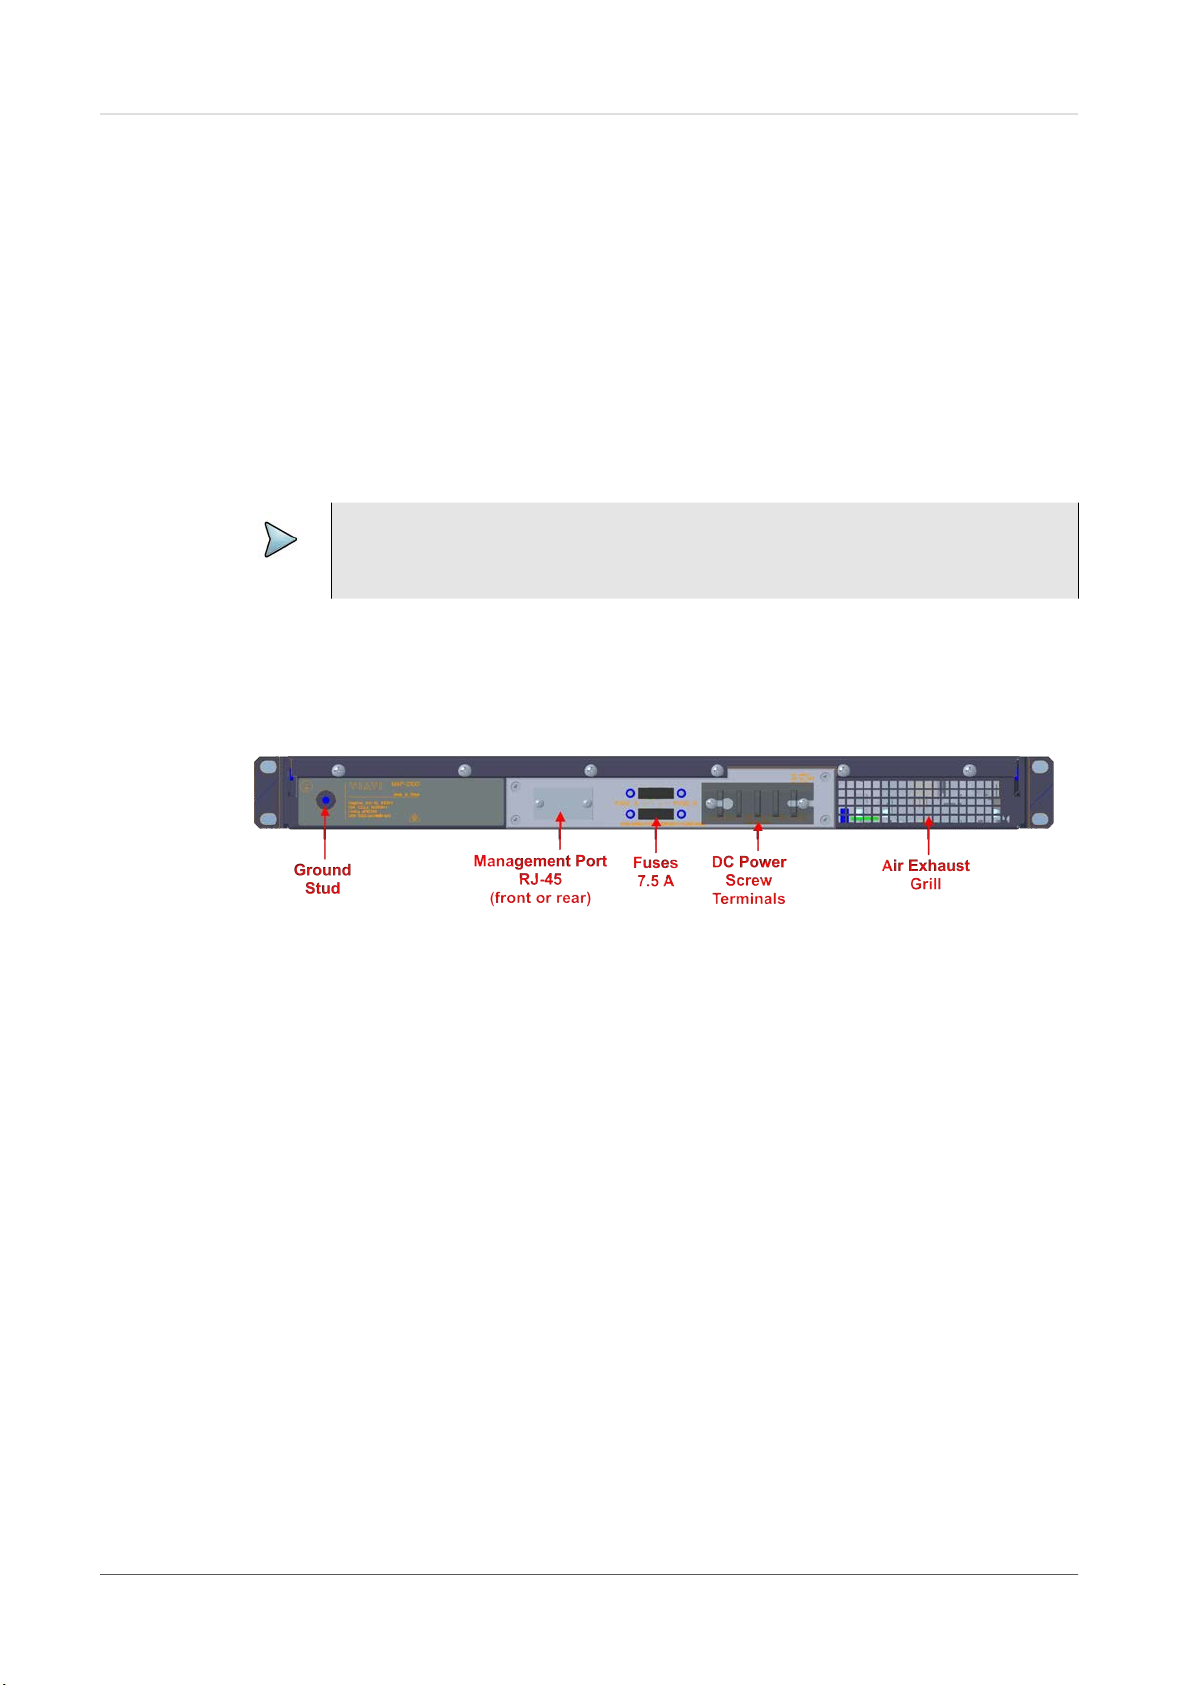
Resetting MAP-2100
The instrument provides a reset function via front panel RESET button. This button is
recessed and requires a small instrument like a paper clip in order to be activated. The
primary function of this button is to enable a known configuration that will allow the user
to remotely connect to the unit via network interface.
To reset the unit, you must first power it down, using either the normal front power
switch or the rear switch for the full power off. Once the unit is powered off, depress the
RESET button and turn on the unit. The RESET button must remain depressed until the
unit displays Resetting to Default Setups on the front panel.
Following that message, the display will show Select Net Type: and alternate between
DHCP and Static IP. Releasing the RESET button will select the displayed network
type. At this point, quickly depressing and releasing the RESET button will toggle
between the Dynamic IP (DHCP) and Static IP settings.
Resetting the defaults will perform the following functions:
1Disable firewall feature (port 22 only) if enabled
2Disables VNC password if enabled
3Set DHCP mode or set static IP addresses to the following defaults:
- IP Address: 192.168.200.2
- Subnet Mask: 255.255.255.0
- Gateway: 192.168.200.1
- DNS Address: 192.168.200.1
Setting a Static IP on MAP-2100
Perform the following steps to set a Static IP address on a MAP-2100.
1Power down the MAP-2100, using either the normal front power switch or the rear
switch for full power off.
2Once the unit is powered off, depress the RESET button and turn on the unit. The
RESET button must remain depressed until the unit displays Resetting to
Default Setups on the front panel. Following that message, the display shows
Select Net Type, alternating between DHCP and Static IP.
3Release the RESET button to select the displayed network type. Quickly pressing
and releasing the RESET button toggles between the Dynamic IP (DHCP) and
Static IP settings.