Victa V82VGT User manual

CORDLESS
82V LITHIUM ION
GRASS TRIMMER
RAPID TRIMMER
OPERATOR'S MANUAL
WARNING! Read this manual before operating your product.
V82VGT (1696788)
Not for Reproduction

IMPORTANT NOTES
Thank you for purchasing your Victa product. Victa prides itself in the quality and performance
of all its products.
This instruction manual will aid in the assembly, safe operation and maintenance of your
product.
Please read the following warnings to ensure safety and the long life of your product.
Do not attempt to operate this product until you have read thoroughly and understood
completely all instructions, safety rules, etc, contained in this manual. Failure to comply may
result in accidents involving electric shock, fire, and/or serious personal injury.
Harness should always be worn to ensure correct ergonomics when operating the grass
trimmer.
INTENDED USE
This product is intended for domestic grass trimming only. This product is not intended for
brushcutting or commerical use.
Do not use the product for any task, except for that which it is intended.
Details
Warning! Beware of electric shock
hazard when charging.
Read the directions
for use before
operating the machine.
Read the directions before
carrying out any maintenance
work.
Wear safety goggles and
ear protection that meet
safety standards.
Wait for all components
of the machine to completely
stop & remove the battery.
Wear sturdy, non-slip
footwear.
Do not use rigid cutting disk.
Wear safety gloves.
Do not use machine in
wet conditions, protect
the machine from rain
and damp.
Be careful of objects
being thrown out!
Ensure bystanders
are kept at least 50'
(15m) away & stop the
machine if approached.
General safety
Should NOT be disposed of
with house hold items.
Class 9 'LI-ION' dangerous
good. Contact local authorities
for shipping requirements.
WARNING
1
Not for Reproduction

Table of Contents
Features & Definitions
3smetIdeilppuS&serutaeF
Safety & Handling
4ytefaSlareneG
5lasopsiDtcudorP
Assembly Procedures
5gnikcapnU
5ssenraHehtgnittiF
6tfahSremmirTehtgnittiF
6drauGremmirTehtgnittiF
7eldnaHtnorFehtgnittiF
Operating Instructions
7Line Trimmer Cut-off Blade
7General Operation
8gnippotS&gnitratS
9spiTgnittuC
Maintenance & Care
9gninaelC
9gnirotS
01tnemecalpeReniLremmirT
21trahCecnanetniaM
21ecivreS
Troubleshooting
31gnitoohselbuorT
Technical Specification
41noitacificepStcudorP
2
NOTE: WARRANTY DETAILS ARE NOT WRITTEN WITHIN THIS OPERATOR’S MANUAL.
REFER TO OTHER DOCUMENTS SUPPLIED WITH THIS MACHINE FOR WARRANTY
DETAILS.
THE WARRANTY DOCUMENTS MAY INCLUDE TECHNICAL SPECIFICATIONS THAT
ARE SPECIFIC TO EACH MODEL THAT ARE NOT WRITTEN WITHIN THIS OPERATOR’S
MANUAL.
Not for Reproduction

Features & Supplied Items
3
FEATURES DEFINITIONS
WARNING
Do not operate the product if any component is missing or damaged. Have any missing or
damaged components repaired or replaced.
14
NOTE: Refer to Fig. 1.
Fig 1
1 Battery Port with Battery Release Button
2 Rear Handle
3 ON/OFF Button
4 Trigger Lock
5 Trigger
6 High/Low Speed Button
7 Harness Connection Point
8 Front Handle
9 Upper Shaft
10 Coupling
11 Lower Shaft
12 Guard
13 Bump Head
14 Harness
15 Briggs & Stratton 82V Rapid Charger (not included all models - refer to packaging)
- Grass Trimmer Operator's Manual (not shown)
16 Briggs & Stratton 82V 2Ah Battery (not included all models - refer to packaging)
17 Briggs & Stratton 82V 4Ah Battery (not included all models - refer to packaging)
- Briggs & Stratton 82V Rapid Charger Operator's Manual (if appropriate, not shown)
- Briggs & Stratton 82V Battery Operator's Manual (if appropriate, not shown)
1
4
5
6
3
7
8
9
10
11
12
13
2
15
17
16
Not for Reproduction

4
4
•Carefully read all instructions on the machine and in the manual before attempting to assemble
and operate the machine. Keep this manual in a safe place for future reference, and consult it
regularly. Ensure other users read this manual and are aware of the product safety risks
•The machine should be operated only with a genuine Briggs & Stratton 82V Max Lithium-Ion
battery. When using battery operated machine basic safety precaution should always be
followed to reduce the risk of leaking batteries and personal injury.
•Become familiar with all controls and their proper operation before using the machine. Know
how to stop the machine and how to disengage the power in an emergency.
•Thoroughly inspect the area where the machine is to be used. Remove all stones, sticks, wire,
bones, toys, and other objects that could be tripped over or thrown by the cutting mechanism.
Thrown objects can cause serious personal injury.
•Always wear a face mask or a dust mask when operating the machine in a dusty environment.
•Always wear appropriate clothing & do not wear loose clothing (or jewellery etc) that can get
caught in moving parts.
•Do not operate this machine in bare feet, or while wearing sandals or lightweight (e.g. canvas
shoes) Wear long trousers & heavy shoes.
•Do not operate the machine while under the influence of alcohol or drugs.
•Stay alert & do not operate the machine when you are tired. Pay attention to what you are
doing and ensure others are aware of your task intentions before commencing.
•Avoid using the machine dangerous environments. Only use the machine in daylight or in good
artificial light.
•Do not use the machine in a rush. Always walk & never run with the machine.
•Before inspecting, adjusting, servicing or cleaning the machine, always stop & remove the
battery.
•If the machine starts to vibrate excessively, discontinue use until the machine has been
inspected and assessed. Having a machine assessed for vibration problems generally reduces
the risk for injury or product failure.
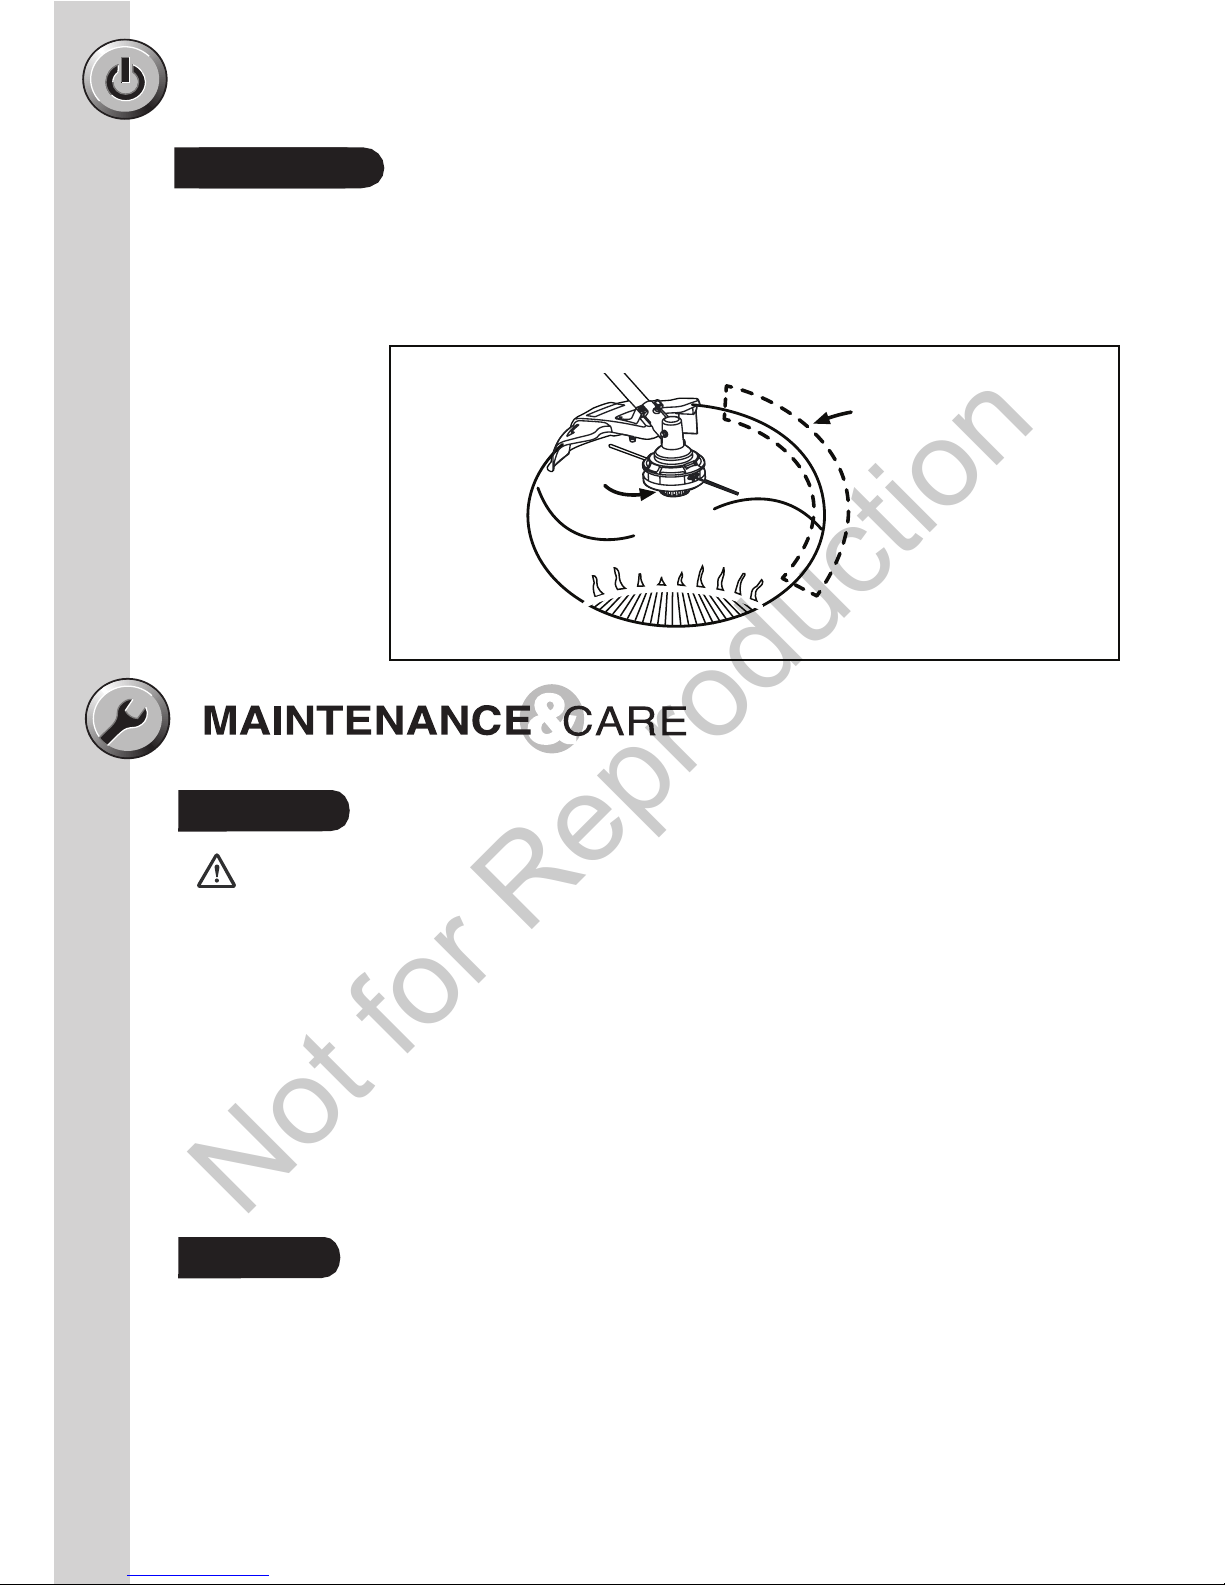
•Don’t force the machine beyond its cutting capacity. The machine will perform better and safer
if allowed to cut at the pace for which it is rated for.
•Do not use the machine indoors. Only store the machine indoors in a dry & secure location.
Keep the machine out of reach of children.
•Always maintain the machine according to the maintenance section of this manual
•If machine strikes a foreign objects, always inspect for damage.
•Do not allow children or impaired persons to operate the machine.
•Use extreme care when approaching blind corners, doorways, shrubs, trees, or other objects
that may obscure your view & the path of the machine.
•Do not use the machine near hot ash, combustible materials or immerse in liquids. This may
cause fire hazard, serious injury or product damage.
•Do not put any object into ventilation grills. Do not use with any openings blocked, keep
openings free from anything that may reduce air flow to the motor.
•Do not point the machine in the direction of people or pets.
•Avoid trees and shrubs. Tree bark, wood moldings, siding, and fence posts can easily be
damaged by the line.
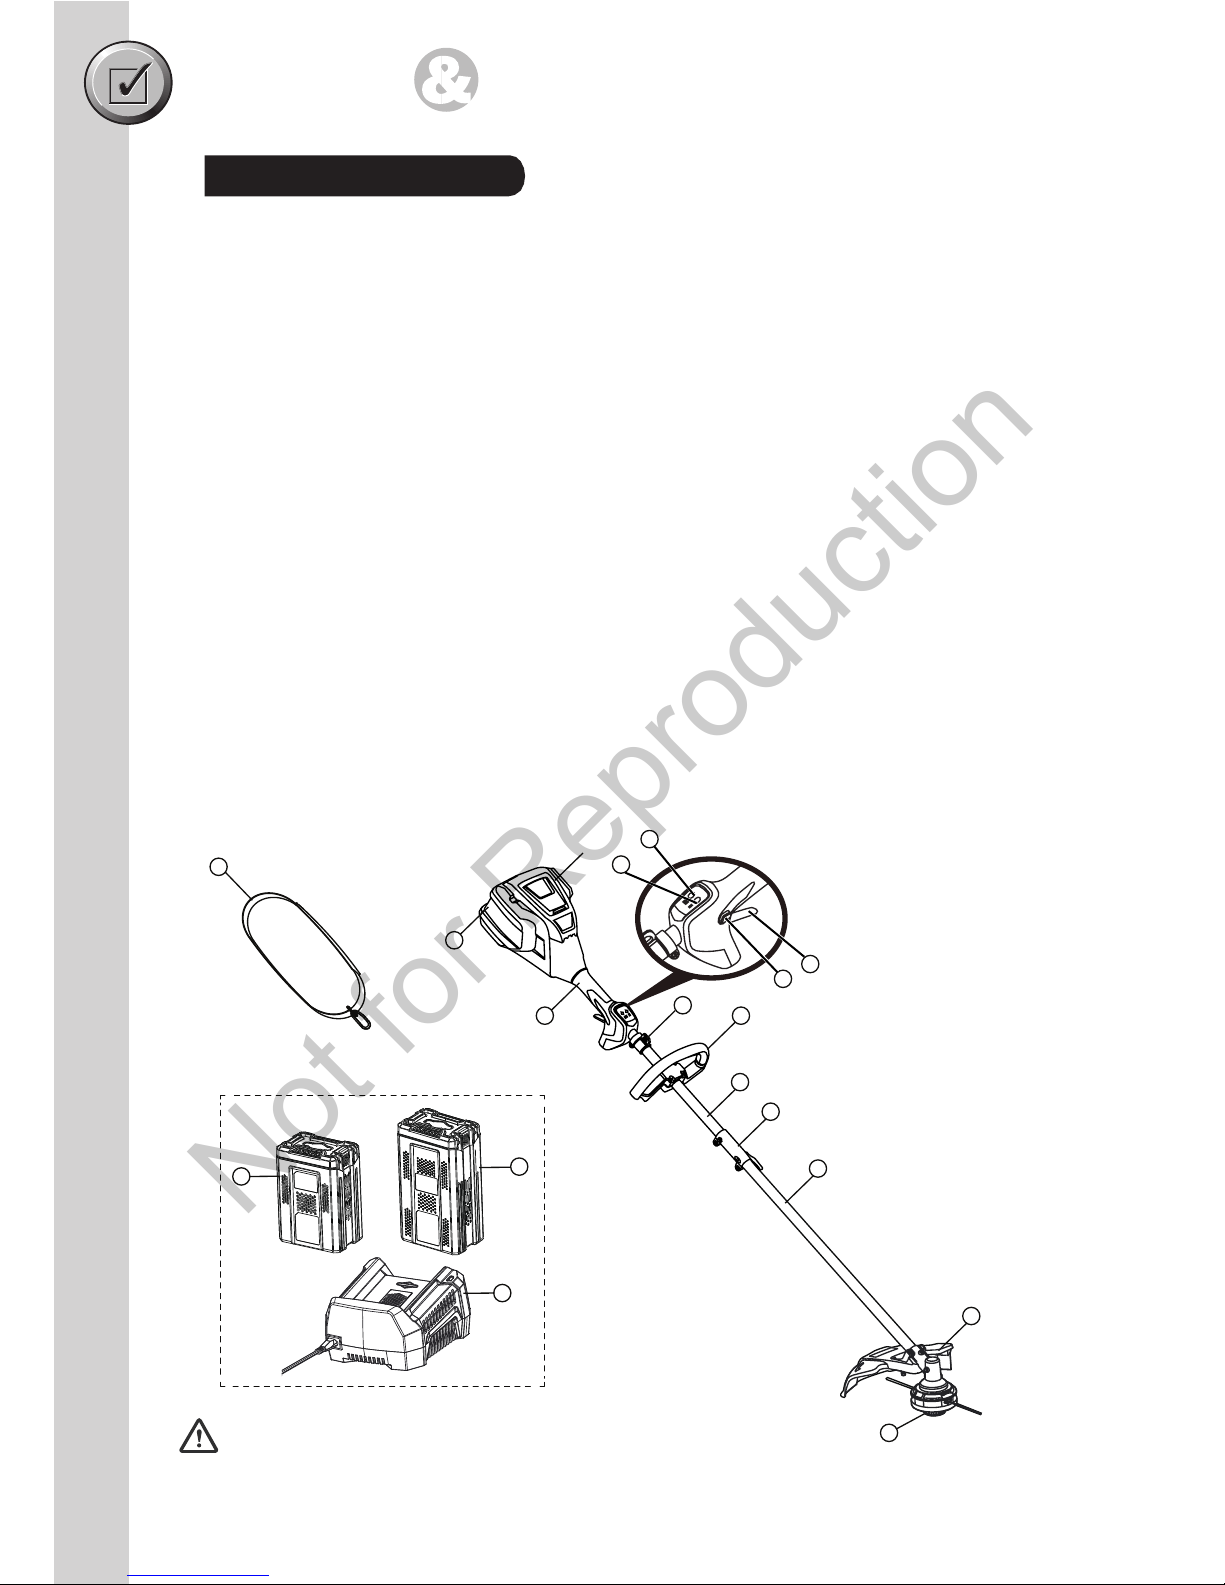
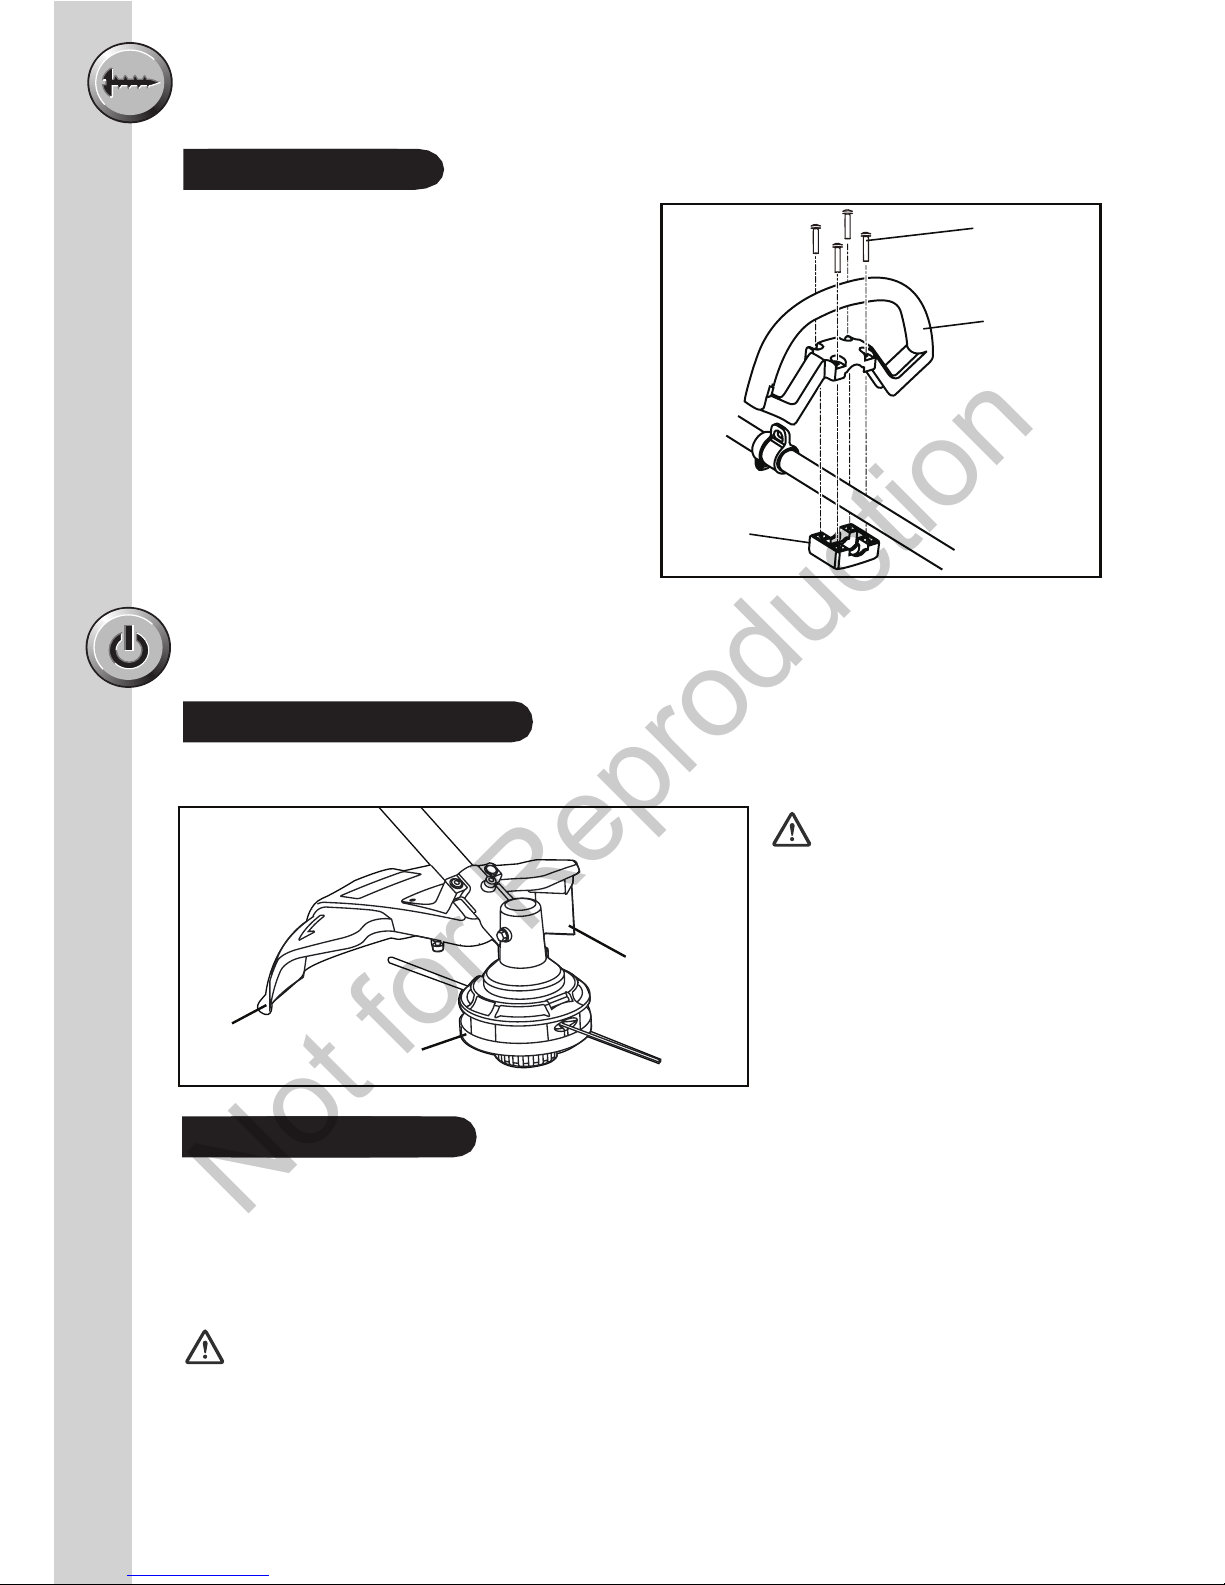
•Product must be completely assembled before attempting to start the machine.
General Safety
Not for Reproduction

5
Fitting the Harness
3.
Product Disposal
CORRECT DISPOSAL OF THE PRODUCT
Waste electrical products should not be disposed of with household waste.
Please recycle where facilities exist. Check with your local authority or retailer
for recycling advice.
The battery contains material which is hazardous to you and the environment. It
must be removed and disposed of separately at a facility that accepts lithium-ion batteries.
Refer to Briggs & Stratton 82V Lithium Ion Battery and Charger Operator's Manuals
for further information relating to battery and charger disposal.
In the rare case a battery is damaged & any of the contents leaks or comes into contact with
a persons skin, eyes, or is ingested, follow the first aid instructions inside the battery & charger
manual. Seek further medical attention immediately.
Emergency Contact
ASSEMBLY PROCEDURES
This product requires assembly.
•Carefully remove the product and any accessories from the box. Make sure that all items
listed in the packing list are included. Refer to page 3.
•Do not discard the packing material until you have carefully inspected and ensured product
is in correct operating condition.
WARNING
Do not attempt to modify this product or create accessories not recommended for use with
this product. Any such alteration or modification is misuse and could result in a hazardous
condition leading to possible serious personal injury.
Do not operate the machine unless assembly is complete including guards, handles &
harness.
Unpacking
The harness is intended to help you work safely while maintaining correct ergonomic position
when using the grass trimmer.
•Hook the strap into into the harness connection
point (1).
•Slip the strap over the shoulder.
•Set the length of the shoulder strap in such a way that
the trimmer head runs parallel to the ground. In order to
establish the optimum length of the strap, you should
then make a few swinging movements without starting
the product.
1
NOTE: Refer to Fig. 2.
Fig. 2
Not for Reproduction

8
ASSEMBLY PROCEDURES
6
NOTE: Refer to Fig. 4.
Fitting the Trimmer Guard
•Remove the battery.
•Invert the line trimmer to access the trimmer head.
•Using a Phillips head screwdriver, remove the pre-installed screws (1) from the trimmer head.
•Place the guard (2) on to the trimmer head and slide the guard onto the head by following the
track on the head.
•Align the screw holes on the guard with the screw holes on the trimmer head.
Fitting the Trimmer Shaft
Loosen the coupling knob (2) on the coupling (3).
• Push in the release button (1) located on the lower
tube. Align the button with the positioning hole on
the coupling.
• Slide the lower tube into the upper shaft coupling
until the release button engages in the positioning
hole.
• Tighten the coupling knob firmly.
WARNING
Do not use the grass trimmer with any attachments
unless certified by Victa to operate with this machine.
Do not operate or fit battery before the shaft is completely
assembled. Take care when fitting and tightening. Beware of
pinch points.
Fig.1
Fig 3
Fig 4
NOTE: Refer to Fig. 3.
3
2
1
•Insert the screws into the trimmer head, fastening the guard in place.
•
Before commencing this assembly, remove battery from
product - if inserted.
Before commencing this assembly, remove battery from product - if inserted.
2
1
Not for Reproduction

ASSEMBLY PROCEDURES
7
NOTE: Refer to Fig. 5.
•Loosen the four screws (1) in the handle (2)
with a Phillips screwdriver (not included)
•Attach the front handle and lower clamp (3)
on the shaft.
•Adjust handle up or down, if necessary, to
desired operating position.
•Tighten the four screws so that the handle
cannot be rotated on the shaft.
Fitting the Front Handle
The trimmer is equipped with a line
trimming cut-off blade on the trimmer
guard.
Replace the cutting blade when
cut-off efficiency diminishes.
This will maintain best performance.
Line Trimmer Cut-off Blade
1
General Operation
Hold the trimmer with your right hand on the rear handle and your left hand on the
front handle. Keep a firm grip with both hands while in operation. The trimmer should
be held at a comfortable position with the rear handle about hip height. Always
operate the trimmer at full throttle. If debris becomes wrapped around the cutting
head, release the trigger, remove battery and then remove the debris.
•Motor housing may become hot during operation. Do not rest or place your arm,
hand, or any body part against the motor housing during operation.
WARNING
OPERATING INSTRUCTIONS
WARNING
Cut off blade is sharp.
NOTE: Refer to Fig. 6.
Fig 5
Fig 6
2
3
and remove the screws from the handle.
CUT-OFF BLADE
TRIMMER LINE
GUARD
BUMP HEAD
Not for Reproduction

8
OPERATING INSTRUCTIONS
TRIGGER LOCK BUTTON
NOTE: Refer to Fig. 8.
The trigger lock button reduces the possibility of accidental starting. The trigger lock button
must be depressed before you pull the trigger. The lock resets each time the trigger
is released.
STARTING the trimmer:
•Press the ON/Off button to power on the trimmer. (Refer to Fig. 7).
•Depress the trigger lock button (1).
•Squeeze the trigger (2). The trigger lock can now be released.
•Press high speed button to increase speed depending upon grass condition. Two LED's will
illuminate above the high speed button indicating that the trimmer is in the high speed setting.
STOPPING the trimmer:
•Release the switch trigger.
•Allow cutting head to come to a complete stop.
Power off the trimmer by pressing the ON/OFF
button.
•Remove battery from product.
Starting & Stopping
Fig 8
Fig 7
Hight / Low
Speed Button
ON / OFF
Button
2
1
•
Not for Reproduction

9
OPERATING INSTRUCTIONS
•Keep the trimmer tilted toward the area being cut; this is the best cutting area. Fig.9
•The trimmer cuts best when passing from right to left. This will avoid throwing debris at
the operator. Avoid cutting in the danger area shown in figure 9.
Fig.10
Cutting Tips
Cleaning
WARNING
To prevent serious personal injury remove the battery from the machine before removing
debris, cleaning, servicing or storing.
•Clean the unit using a damp cloth with a mild detergent.
•Do not immerse the machine or any part of it in water.
•Moisture can cause a shock hazard. Wipe off any moisture with a soft dry cloth
& ensure the machine is dry before replacing the battery.
•Use a small brush or vacuum cleaner to clean the air vents on the product
•Keep the air vents free of obstructions.
The following steps should be taken in order to prepare the machine for storage.
•Remove the battery prior to storage.
•Clean the machine as described in the previous section.
•Store the machine and battery indoors, in a cool, dry, clean location.
•Store the machine out of reach of children.
Storing
NOTE: Refer to Fig. 9.
Fig 9
DANGEROUS CUTTING AREA!
BEST CUTTING AREA
•Do not use solvents, strong detergents, certain aromatic oils such as pine and lemon when
cleaning plastic parts. Chemicals can damage, weaken or destroy plastic component which
may result in serious personal injury.
•Do not store the machine next to corrosive materials such as fertilizer or fuel.
Not for Reproduction

10
WARNING
•Nylon line will deteriorate over time and may require replacement if line breakages and cut
performance is not satisfactory
•Do not operate the bump head with parts missing such as the spring or eyelets
•Do not operate the bump head if the cover is not secured by the Cover Clips.
•Do not operate the bump head if components are damaged or excessively worn.
•Do not use rigid cutting disk, brush cutter blade or any other attachment on this product.
Trimmer Line Replacement
NOTE: Refer to Fig. 10. Fig 10
4.
3.
2.
1.
Bump Head Assembly
1. Cover
2. Spool retainer
3. Spool
4. Housing
Cover Clips
Eyelet Slot
Not for Reproduction

11
Trimmer Line Replacement
1. Line up the slots on the spool cap with the slots on the string head.
2. Insert line through the string head hole. Push line until it exits the opposite string
3. Pull the line through until there is an equal amount of line on each side.
4. Turn the spool cap clock-wise to begin winding the string into the string head.
Leave approximately 5 inches of string protruding out of each side of the head.
Slots
Slots
Spool cap
String head
head hole.
Fig 11.1
Fig 11.2 Fig 11.3
Not for Reproduction

Maintenance Chart
Features Requirements
Before
After finish
Recharging
Monthly
Yearly
If damaged
As required
Trimmer Visual inspection • •
Trigger •
Trigger lock •
Battery release button Check •
Cutting head assy Check & clean • •
Gear box Grease (straight shaft) • •
Ventilation grills Clean •
Nylon line Stock replacement • •
Bump head Clean
Replacement
•
• •
All accessible fasteners Retighten • •
Refer to the following table for routine maintenance.
Service
Servicing requires extreme care and knowledge and should be performed only by a qualified
service technician. For service we suggest you return the product to your nearest Authorized
Service Dealer for repair. When servicing, use only genuine replacement parts.
•Keep the machine dry, clean, and free of oil and grease.
•In order to reduce the risk of fire, keep the motor free of grass, leaves, and debris build-
up.
•Keep all nuts, bolts, and screws tight in order to be sure that the equipment is in safe
working condition.
•Never tamper with safety devices. Check them regularly for proper operation.
12
Check operation
Check
NOTE: Refer to warranty card supplied with this product for service contact details.
Not for Reproduction

13
TROUBLESHOOTING
PROBLEM POSSIBLE CAUSE SOLUTION
Trimmer fails to start when
trigger depressed
Not cutting grass No trimmer line in bump head Replace line in
bump head
Flat battery Recharge battery
Battery disengaged Refit battery
Faulty battery Replace battery
Excessive vibration Cut off blade worn Replace cut off blade
Bumphead not fitted correctly Refit bump head
Broken drive shaft Replace drive shaft
Troubleshooting
Not for Reproduction

14
Product Specification
TECHNICAL SPECIFICATIONS
Model V82VGT
Function Grass trimmer
Motor type 82V 800W DC brushless motor
Max motor speed Low speed setting: 5,000 rpm,
High speed setting: 5,500 rpm
Shaft type Split, straight shaft
Cutting head Dual Bump-feed head
Cutting width 16" (406mm)
Line type, diameter & profile Nylon, 2.0 mm, twisted
Product weight (no battery) 5.2 Kg
Product weight
(with battery)
6.6 kg (2 Ah Battery),
7.8 kg (4Ah Battery)
Noise
1
65 dBA
Vibration
2
4.3 m/s2
1
Measured at 7.5m from unit.
2
Value for use for assessment of user exposure. Actual vibration during use of the product
may differ depending on actual
CORDLESS
82V LITHIUM-ION GRASS TRIMMER
'RAPID CUT'
Not for Reproduction

15
IMPORTANT NOTES
_________________________________________________________
_________________________________________________________
_________________________________________________________
_________________________________________________________
_________________________________________________________
_________________________________________________________
_________________________________________________________
_________________________________________________________
_________________________________________________________
_________________________________________________________
_________________________________________________________
_________________________________________________________
_________________________________________________________
_________________________________________________________
_________________________________________________________
_________________________________________________________
_________________________________________________________
_________________________________________________________
_________________________________________________________
_________________________________________________________
_________________________________________________________
_________________________________________________________
_________________________________________________________
_________________________________________________________
_________________________________________________________
_________________________________________________________
_________________________________________________________
_________________________________________________________
_________________________________________________________
_________________________________________________________
_________________________________________________________
_________________________________________________________
_________________________________________________________
_________________________________________________________
Not for Reproduction

CHOKE
388011447AU
©2016 Briggs & Stratton Power Products Group, LLC
Victa is a trademark of Briggs & Stratton Australia Pty. Ltd.
ABN 13 006 576 856
All rights reserved. No part of this booklet may be reproduced by any means
without prior written permission. All information herein is subject to change without notice.
Rev: 00 (07-25-16)
Not for Reproduction
This manual suits for next models
1
Table of contents
Other Victa Trimmer manuals