9
Need Help? Watch the video at www.victortech.com/High-Rise
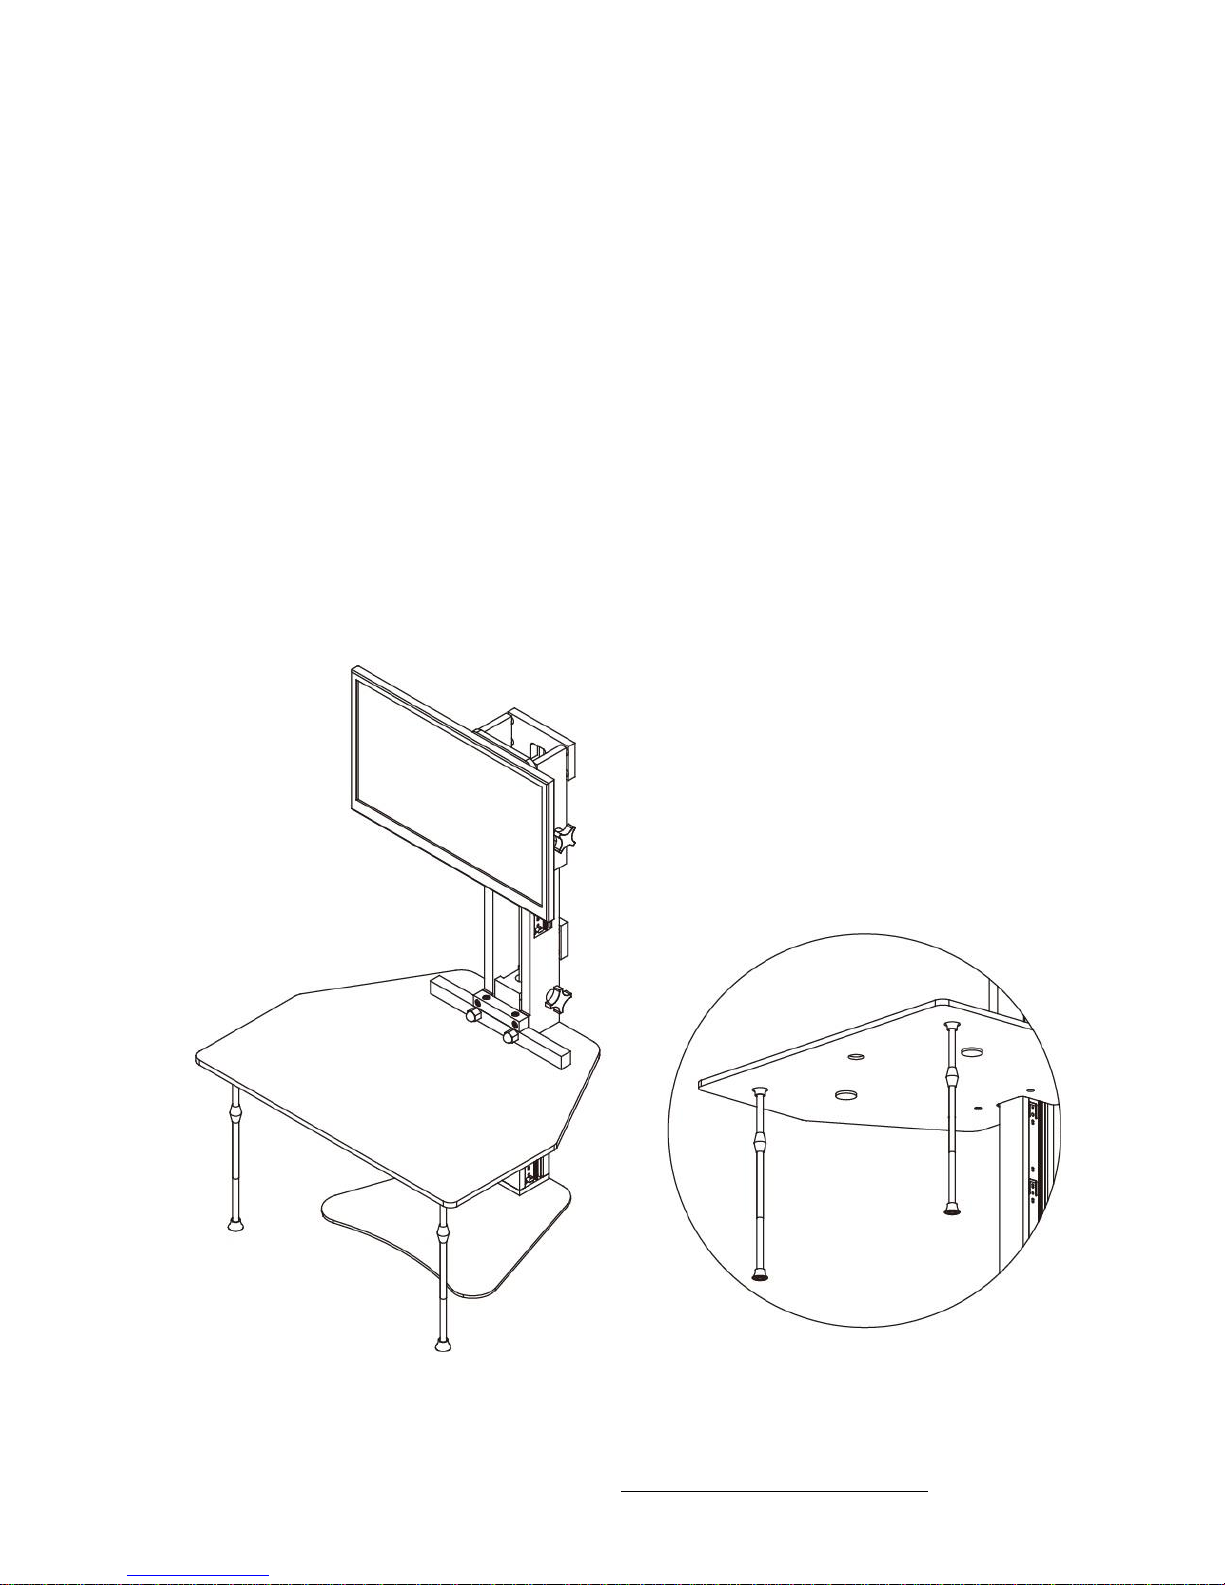
Step 7: Adjust the Monitor Tilt or Height
1. The bracket allows the monitor to tilt up or down. Tighten the
mechanism by turning the wrench clockwise on the bolt head.
For more firm rotation, tighten the hex bolt.
2. When looking at the monitor from the front, push the monitor to
the left to expose the Tower behind the monitor.
3. Turn the black knob located behind the monitor counter-
clockwise two or three rotations to loosen. This will free the
monitor to be raised or lowered.
Gently pull up or down on the monitor if it does not move. If the
monitor does not move easily, loosen the knob another ½ rotation
and try again.
TIP: More effort is required to lower the Monitor compared to the Desk Surface. This is
normal.
4. To set the monitor at your desired height, turn the knob clockwise until snug and the monitor
no longer moves up or down. Do not over tighten! Too much force can break the hardware.
Tighten only as much as required to maintain a stable monitor height. Experiment to
determine the minimal amount of tightening required to hold the monitor in place. This will
extend the life of your product.
TIP: For optimal downward movement, place your hand at the top of the Tower and slowly
push down. Do not push down on the monitor.
TIP: The monitor mount will move down with less effort when the weight of a monitor has
been added.
TIP: If the monitor rotates too loosely, spin the monitor clockwise one full rotation. This is a
quick way to tighten the mechanism.
5. OPTIONAL: Additional height adjustment can be obtained by moving the location of the
monitor holder on the monitor board. Remove the four bolts holding the monitor board to the
tower. Next, remove the four bolts holding the monitor holder and move the holder to a
different location on the board using the pre-drilled holes. Tighten the bolts and reattach the
monitor board. Make sure to reinstall the spacers between the board and the tower.