manuals.online logo
Brands
  1. Home
  2. •
  3. Brands
  4. •
  5. Sauder
  6. •
  7. Indoor Furnishing
  8. •
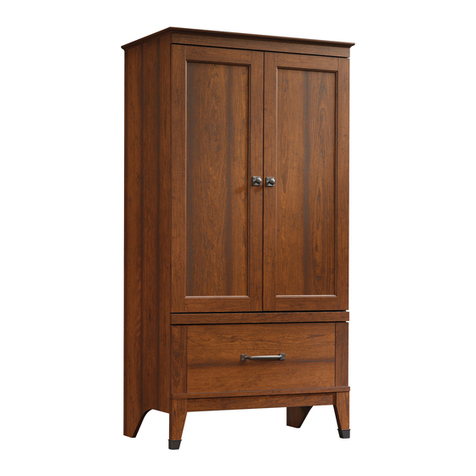
  9. Sauder Cannery Bridge 429515 User manual

Sauder Cannery Bridge 429515 User manual

sauder.com
NOTE: THIS INSTRUCTION
BOOKLET CONTAINS IMPORTANT
SAFETY INFORMATION.
PLEASE READ AND KEEP FOR
FUTURE REFERENCE.
sauder.com
CONTACT US FIRST
BEFORE MAKING ANY RETURNS TO THE STORE.
sauder.com
CONTACT US FIRST
BEFORE MAKING ANY RETURNS TO THE RETAILER.
Visit sauder.com/service to order replacement parts, view video assembly tips, or chat with a live rep.
Prefer the phone? Give us a ring at 1-800-445-1527.
Customer Service is available Monday-Friday - 9 a.m. to 5:30 p.m. EST (except holidays)
Sauder.com
Share your journey!
Enlish p 1-22
Français p 23-25
Español p 26-28
Lot # 570166 07/06/21
Purchased: __________________
Library Base
Cannery Bride Collection | Model 429515
You'll love what we
have in storage.
Part Identification
Hardware Identification
Hardware Usage Guide
Assembly Steps
Français
Español
Safety
Warranty
Hammer
Not actual size
No. 2 Phillips Screwdriver
Tip Shown Actual Size
Table of Contents Assembly Tools Required
3
4
5
6-22
23-25
26-28
29-30
31
Pae 2 www.sauder.com/service 429515
Part Identification
åWhile not all parts are labeled, some of the parts will have a label or an inked letter on the edge
to help distinguish similar parts from each other. Use this part identification to help identify similar parts.
Now you know
our ABCs.
A LEFT END (1)
B RIGHT END (1)
C TOP (1)
D BOTTOM (1)
E SKIRT (1)
F LEFT BACK (1)
G RIGHT BACK (1)
H LEFT DOOR (1)
J RIGHT DOOR (1)
K SHELF (1)
A
B
C
D
E
F
G
H
J
K
Pae 3www.sauder.com/service429515
Hardware Identification
åScrews are shown actual size. You may receive extra hardware with your unit.
WOOD DOWEL - 24
13CAM SCREW - 34
HIDDEN CAM - 34
24HINGE - 4
SHELF PIN - 4
5PULL - 2
6METAL BRACKET - 2
8
TIE PLATE - 2
9APPLIQUE CARD - 1
10 11 BUMPER CARD - 1
1/2" FLAT HEAD SCREW - 8
12 1/2" PAN HEAD SCREW - 10
13
14 78" MACHINE SCREW  2
Pae 4 www.sauder.com/service 429515
DOOR STOP PLATE - 1
7
Hardware Usage Guide
HOW TO USE A HIDDEN CAM & CAM SCREW OR CAM DOWEL
NOTE: Various CAM SCREWS or a CAM DOWEL may be used.
Cam Screws Cam Dowel
Turn the CAM SCREW or
gently tap the CAM DOWEL
until the shoulder is against
the surface of the part.
1.
Hidden Cam
Arrow
Push a HIDDEN CAM into
the part. The arrow in the
HIDDEN CAM must point
toward the hole in the
edge of the board.
Hole
2.
3.
1
2
Insert the CAM SCREW or CAM DOWEL into the
HIDDEN CAM. Tighten the HIDDEN CAM.
Pae 5www.sauder.com/service429515
Step 1
å Assemble your unit on a carpeted floor or on the empty
carton to avoid scratchin your unit or the floor.
å Push thirteen HIDDEN CAMS (2) into the BACKS (F and G).
å Turn seven CAM SCREWS (3) into the BACKS (F and G).
Look for this icon. It means a video assembly tip is
available at www.sauder.com/service/tips
Find the numbered video or scan the QR code. 1
F
G
2
Arrow
2
Arrow
2
Arrow
Arrow
2
(13 used)
(7 used)
3
3
Pae 6 www.sauder.com/service 429515
å Insert two WOOD DOWELS (1) into the RIGHT BACK (G).
å Fasten the LEFT BACK (F) to the RIGHT BACK (G).
Tihten three HIDDEN CAMS.
å NOTE: Be sure the WOOD DOWELS in the RIGHT BACK
insert into the LEFT BACK.
Step 2 1
F
G
Surface with
HIDDEN CAMS
Surface with
HIDDEN CAMS
1
These CAM SCREWS
must be here.
Pae 7www.sauder.com/service429515
Just think. The sooner
you do this, the sooner
you do somethin else.
Step 3
å Push thirteen HIDDEN CAMS (2) into the BOTTOM (D).
D
2
Arrow
2
Arrow
Arrow
2
1
Arrow
2
Pae 8 www.sauder.com/service 429515
å Insert four WOOD DOWELS (1) into the BOTTOM (D).
å Fasten the BOTTOM (D) to the BACKS (F and G). Tihten
four HIDDEN CAMS.
å NOTE: Be sure the WOOD DOWELS in the BOTTOM
insert into the BACKS.
Step 4
D
1
F
G
Surface with
HIDDEN CAMS
1
Do not stand the unit upriht without the
BACK fastened. The unit may collapse.
Caution
Pae 9www.sauder.com/service429515
Step 5
å Push two HIDDEN CAMS (2) into the SKIRT (E).
å Turn three CAM SCREWS (3) into the SKIRT (E).
å Insert two WOOD DOWELS (1) into the BOTTOM (D).
å Fasten the SKIRT (E) to the BOTTOM (D). Tihten three
HIDDEN CAMS.
å NOTE: Be sure the WOOD DOWELS in the BOTTOM
insert into the SKIRT.
D
E
E
Arrow
2
2
Arrow
3
1
This surface and this
ede must be even.
1
Surface with
HIDDEN CAMS
Pae 10 www.sauder.com/service 429515
å Push six HIDDEN CAMS (2) into the ENDS (A and B).
å Turn fourteen CAM SCREWS (3) into the ENDS (A and B).
Step 6
B
A
2
Arrow
3
1
(6 used)
(14 used)
Pae 11www.sauder.com/service429515
Step 7
å Insert four WOOD DOWELS (1) into the LEFT END (A).
å Fasten the LEFT END (A) to the BOTTOM (D), SKIRT (E),
and LEFT BACK (F). Tihten seven HIDDEN CAMS.
å NOTE: Be sure the WOOD DOWELS in the LEFT END
insert into the BOTTOM and LEFT BACK.
1
D
E
F
A
1
Pae 12 www.sauder.com/service 429515
å Insert four WOOD DOWELS (1) into the RIGHT END (B).
å Fasten the RIGHT END (B) to the BOTTOM (D), SKIRT (E),
and RIGHT BACK (G). Tihten seven HIDDEN CAMS.
å NOTE: Be sure the WOOD DOWELS in the RIGHT END
insert into the BOTTOM and RIGHT BACK.
Step 8
D
G
B
1
E
1
Pae 13www.sauder.com/service429515
Step 9
å Fasten the METAL BRACKETS (8) to the ENDS (A and B) and
SKIRT (E) as shown. Use four 1/2" PAN HEAD SCREWS (13).
å Fasten the TIE PLATES (9) to the ENDS (A and B) as shown.
Use four 1/2" PAN HEAD SCREWS (13).
B
AE
8
1/2" PAN HEAD SCREW
(8 used in this step)
13
13
9
Pae 14 www.sauder.com/service 429515
Now miht be a
ood time to refresh
your drink.
å Turn ten CAM SCREWS (3) into the TOP (C).
å Fasten the DOOR STOP PLATE (7) to the TOP (C).
Use two 1/2" PAN HEAD SCREWS (13).
Step 10
C
3
(10 used)
1
7
1/2" PAN HEAD SCREW
(2 used in this step)
13
Pae 15www.sauder.com/service429515
Step 11
å Carefully stand your unit upriht.
å Insert eiht WOOD DOWELS (1) into the ENDS (A and B)
and BACKS (F and G).
å Fasten the TOP (C) to the ENDS (A and B) and
BACKS (F and G). Tihten ten HIDDEN CAMS.
å NOTE: Be sure the WOOD DOWELS in the ENDS and
BACKS insert into the TOP.
C
A
B
G
F
1
(8 used)
1
Pae 16 www.sauder.com/service 429515
å Peel APPLIQUES from the APPLIQUE CARD (10) and
stick them onto each visible HIDDEN CAM.
å Insert the SHELF PINS (5) into the hole locations of your
choice in the ENDS (A and B). Set the SHELF (K) onto the
SHELF PINS.
Step 12
A
B
K
(4 used)
10
5
Finished ede
Pae 17www.sauder.com/service429515
Step 13
å Fasten one of the PULLS (6) to the LEFT DOOR (H). Use
one 7/8" MACHINE SCREW (14).
H
7/8" MACHINE SCREW
(1 used in this step)
14
6
Pae 18 www.sauder.com/service 429515
å Fasten two of the HINGES (4) to the LEFT DOOR (H). Use
four 1/2" FLAT HEAD SCREWS (12).
å Repeat steps 13-14 for the RIGHT DOOR.
Step 14
H
17
1/2" FLAT HEAD SCREW
(4 used in this step)
12
4
Pae 19www.sauder.com/service429515
Almost time to
celebrate! With a nap.
Step 15 17
å Before fastenin the DOOR to your unit, be sure the
mountin screw is aainst the stops as shown in the
riht diaram. If it isn't, loosen the adjustin screw and
mountin screw to slide it aainst the stops. Then tihten
the mountin screw.
å Fasten the RIGHT DOOR (J) to the RIGHT END (B)
as shown in the lower diaram. Use the screws in the
HINGES. You should start each SCREW a few turns before
completely tihtenin any of them.
å Repeat this step for the other DOOR (H).
å Peel BUMPERS from the BUMPER CARD (11) and stick
them onto the DOORS (J and H) as shown.
å See the next step for DOOR adjustments.
Mountin
screw
Stop
Hine
Adjustin
screw
11
Pae 20 www.sauder.com/service 429515
J
H
A
B

Other Sauder Indoor Furnishing manuals

Sauder Cannery Bridge 420374 User manual

Sauder

Sauder Cannery Bridge 420374 User manual

Sauder HomePlus Collection 411967 User manual

Sauder

Sauder HomePlus Collection 411967 User manual

Sauder 415546 User manual

Sauder

Sauder 415546 User manual

Sauder 409942 User manual

Sauder

Sauder 409942 User manual

Sauder Orchard Hills 401346 User manual

Sauder

Sauder Orchard Hills 401346 User manual

Sauder County Line 427719 User manual

Sauder

Sauder County Line 427719 User manual

Sauder 413322 User manual

Sauder

Sauder 413322 User manual

Sauder 425024 User manual

Sauder

Sauder 425024 User manual

Sauder Office Works Affirm 427450 User manual

Sauder

Sauder Office Works Affirm 427450 User manual

Sauder Carson Forge 412920 User manual

Sauder

Sauder Carson Forge 412920 User manual

Sauder New Grange User manual

Sauder

Sauder New Grange User manual

Sauder 412314 User manual

Sauder

Sauder 412314 User manual

Sauder Edge Water 408696 User manual

Sauder

Sauder Edge Water 408696 User manual

Sauder Palladia 422002 User manual

Sauder

Sauder Palladia 422002 User manual

Sauder Harvey Park Lateral File 426510 User manual

Sauder

Sauder Harvey Park Lateral File 426510 User manual

Sauder 423033 User manual

Sauder

Sauder 423033 User manual

Sauder 415421 User manual

Sauder

Sauder 415421 User manual

Sauder Summit Station 427287 User manual

Sauder

Sauder Summit Station 427287 User manual

Sauder Hammond 430786 User manual

Sauder

Sauder Hammond 430786 User manual

Sauder Cannery Bridge 429512 User manual

Sauder

Sauder Cannery Bridge 429512 User manual

Sauder Lateral File User manual

Sauder

Sauder Lateral File User manual

Sauder Shoal Creek 409733 User manual

Sauder

Sauder Shoal Creek 409733 User manual

Sauder Boulevard Cafe 422356 User manual

Sauder

Sauder Boulevard Cafe 422356 User manual

Sauder Whitaker Point 429369 User manual

Sauder

Sauder Whitaker Point 429369 User manual

Popular Indoor Furnishing manuals by other brands

Habitat Lulu 819254 manual

Habitat

Habitat Lulu 819254 manual

Whalen MainStays Parsons manual

Whalen

Whalen MainStays Parsons manual

INSPIREDHOME Kamille King Assembly instructions

INSPIREDHOME

INSPIREDHOME Kamille King Assembly instructions

Coaster 301405Q Assembly instructions

Coaster

Coaster 301405Q Assembly instructions

Teknik Elstree L-Shaped Desk 5426914 manual

Teknik

Teknik Elstree L-Shaped Desk 5426914 manual

Powell 14J2001BL Assembly instructions

Powell

Powell 14J2001BL Assembly instructions

Seconique BERGEN TALL SIDEBOARD Assembly instructions

Seconique

Seconique BERGEN TALL SIDEBOARD Assembly instructions

imovr OMEGA DENALI installation manual

imovr

imovr OMEGA DENALI installation manual

Noble House Home Furnishings PLANTER Assembly instructions

Noble House Home Furnishings

Noble House Home Furnishings PLANTER Assembly instructions

ExBrite DHJSMC2026V3DKLDX Installation and operating manual

ExBrite

ExBrite DHJSMC2026V3DKLDX Installation and operating manual

Kettler Charlbury 0195532-6009 Assembly instructions

Kettler

Kettler Charlbury 0195532-6009 Assembly instructions

Forte INGS821 Assembling Instruction

Forte

Forte INGS821 Assembling Instruction

pottery barn kids GEMMA CRIB quick start guide

pottery barn kids

pottery barn kids GEMMA CRIB quick start guide

Dorel Living DA8274 manual

Dorel Living

Dorel Living DA8274 manual

bbf 3 Drawer Mobile Pedestal Assembly guide

bbf

bbf 3 Drawer Mobile Pedestal Assembly guide

Henley 614/3222 Assembly instructions

Henley

Henley 614/3222 Assembly instructions

Forte NIKS81 Assembling Instruction

Forte

Forte NIKS81 Assembling Instruction

Fursys Sidiz T50 Series Assembly instructions

Fursys

Fursys Sidiz T50 Series Assembly instructions

manuals.online logo
manuals.online logoBrands
  • About & Mission
  • Contact us
  • Privacy Policy
  • Terms and Conditions

Copyright 2025 Manuals.Online. All Rights Reserved.