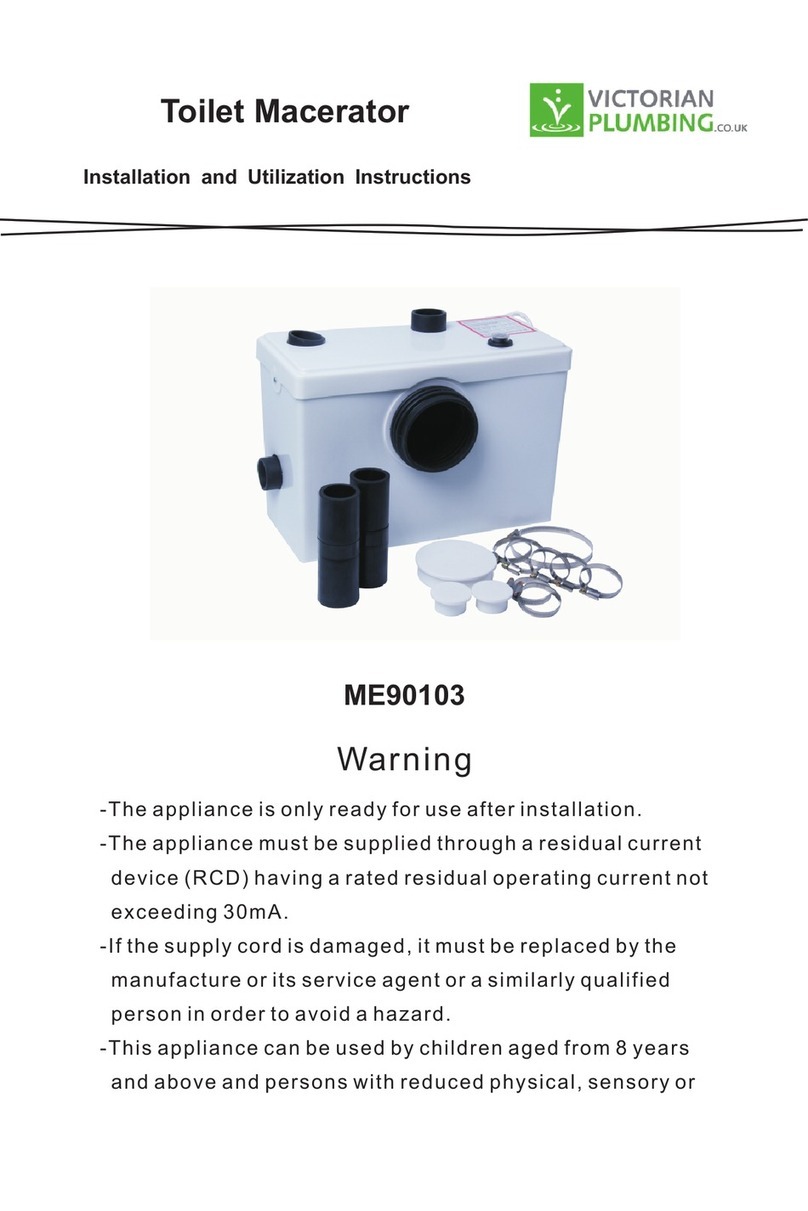
Victorian Plumbing Cruze WH-8801 User manual

WH-8801 User manual

Contents
Product specifications
Other functionaI description
Operation
Warm air drying
Lamp control
Drying temperature adjustment
Night light
Remote control operation protection
Troubleshooting
Important safety warning
Dimensions
Maintenance and cleaning
Remote button function
Seat temperature adjustment
Water temperature adjustment
Key Flush
Cleaning
Overall sketch
Preparation before first use

Important safety warning
Save these instructions.
Warning: Risk of electric shock, fire, or injury to life. This product
must be grounded safely. Connect to a dedicated
220-230V AC.50Hz.10A. In a circuit with a ground fault circuit
breaker or an earth leakage protector.
Warning: Risk of electric shock or product damage. Do not spray
water directly onto the product.
A fully qualified and competent person should install this product.
Note! The risk of product damage. Do not install it in a place where water
may splash.
Note! The risk of product damage.Do not install the product in an
excessively humid place where moisture may condense on the surface
of the product. Please maintain adequate ventilation in the environment
to prevent damage to electronic components.
Note! Risk of product damage or property loss. Hard push and hard water
pipe joints may cause water to leak.
Note! Risk of product damage. Do not apply excessive force to the nozzle or
the product may be damaged.
Note! Risk of product damage. Water may freeze in a water pipe, make
arrangements for water pipe insulation. Any water left in the product may
freeze during winter storage. Please ensure that the product is at room
temperature before reinstalling or using it.
Note! Risk of product damage. Do not turn on the power until the
installation is complete, otherwise the product may malfunction.
Note:In warm climates, thermal protectors may fail during storage or
transportation,
causing the product to not work. Please ensure that the product is
at room temperature before reinstalling or using it.

When using electrical products, especially when there are children, basic safety
protection should be observed included the following:
Danger - Reduce the risk of electric shock:
□
Do not touch the toilet that has been sprayed with water.
Warning - Reduce the risk of low burns, electric shock, fire or
personal injury:
□
Monitoring is required when children, the elderly, and disabled people
use or are close to the device. Children should not be allowed to use
this product. Do not allow children to stay alone in
a room with this product installed.
□
For children and the elderly who cannot perform their own
temperature adjustment operations, it is necessary to help adjust the
temperature, flushing temperature and air temperature of the toilet
seat cover to the appropriate grade position.
□
Use this product only in the manner described in the manual, and do
not use accessories that are not recommended.
□
D o not lean against the seat cover when using it to avoid damage to
the product.
□
Do not use this product if: Power cord and product are damaged; The
product is not working properly; The product is drenched with water.
□
Install the product correctly according to the installation instructions.
□
T his appliance is designed for fixed connection to the power supply.
Connecting this appliance to the power supply must be performed by a
qualified and authorised electrician.
□
Keep the power cord away from the heated surface.
□
Do not drop or insert any items into the pipes and openings.
□
D o not use this product outdoors or where the particle spray
equipment is being used. Also do not use this product in places where
oxygen is supplied.
□
□
□
This is a Class 1 electrical appliance and must be correctly earthed. Make
sure the earth cable is connected first during the electrical connection.
Prevent water from dripping onto the power cord.
Incorrect repairs are dangerous. Trained and qualified engineers must
only conduct repairs. Do not attempt to repair this product
yourself, otherwise the warranty will be void.

Product
specifications
Water supply pressure (dynamic
pressure)
0.7kgf/cm2~ 7. Skgf/cm2 (0.07Mpa. ~
0.74Mpa.)
Specification
220~230V 50Hz
1600W (coldwater temperature < 8 °C)
Power cord length
About lm
Use
environment
0~40°C
Cleaning
Water
output
Hip rinse/ female rinse
0.42~1.2L/min (three grades adjustable))
Laxative flushing
0.42~1.2L/min (three grades adjustable))
Maximum instantaneous heating power
When the water temperature is <8 °C, the maximum
power is 1600W.
Cleaning water temperature adjustment
Off, low, medium, and high four (room
temperature ~ 40 ° C)
Number of nozzles
1
Nozzle position adjustment
5 Grade place
Pulse massage
Open/Close
Mobile flush
Open/Close
Safety
equipmen
t
Water shortage
protection
Water flow detection sensor
Water temperature
overheat protection
Temperature fuse, overheat circuit breaker, water
temperature sensor
Comfortable
Seat
insulation
Maximum heating power
30W
Temperature
adjustment
Off, low, medium, and high four Grade place
(Room temperature ~ 39 ° CJ
Safety equipment
Thermal fuse, thermal circuit breaker
Warm air
Mobile
drying
Open/Close
Maximum air volume
of
the fan
0.22m3/min
Maximum heating
power
300W
Temperature
adjustment
Off, low, medium, and high
Safety equipment
Thermal fuse, thermal circuit breaker
Deodorizati
on
function
Intelligent deodorization
Activated carbon deodorization
Note: The product styles in this manual are subject to the actual product!

e
Product Specifications (continued)
Health
Other
Functions
Remote control
Nozzle self-cleaning
Antibacterial material
Auxiliary Button nob
Sitting sensor.
Night light
Set various functions
Have.
Seat,
nozzle
On the side of the body
Located inside the seat
One blue LED light
Preparation before first use
□
Connect the water inlet hose, open the water stop valve, and plug in the power supply.
□
Confirm that the battery is correctly inserted in the "remote control".
□
Confirm that there are no obstacles in front of the product.
□
Waiting for the host to complete the self-test. It is normal to hear the motor and the sound of running
water during this period.
□
The self-test process takes about 30 seconds.
Other functional description
1. Smart toilet flushing method.
•If it is a wall mounted smart toilet, you can press the water tank flush button onthe wall to flush.
2. Intelligent toilet self-cleaning function
•Press the laxativebutton, the nozzle will self-clean for three seconds, then extend to start the
cleaning function.
•After cleaning, the nozzle will self-cleaning for three seconds.
3. Intelligent toilet automatic deodorization function
•After use, the toilet will automatically deodorize for 30 seconds, or it can be turned off with the
remote control.
4. Button function
•
The user is seated and presses the button without performing the cleaning and drying
functions; toilet
bowl for drying; If the toilet is performing the cleaning or drying function,
pressing it will stop the current function.
•
Rotate the button continuously ten times backwards to turn off the buttonindicator and then.
turn it back ten times to re-open the button indicator. The button has other functions.
Refer to the button function section of this manual.

Button
Button control: The front spine is cleaned, the female is cleaned after
the rotation, and the cleaning is stopped by pressing.
(Note: The above smart toilet is one of the toilet models, which is
subject to the actual product. )
Overall sketch

Female cleaning
Operational function of the toilet.
-start up
After the spin button,you hear a
"beep''
and startthe female cleaning.
-
stop
Press the button and
hear a "beep''
tostopthe femalecleaning.
The cleaning will automatically stop after approximately three minutes of continuous cleaning.
Cleaning
Operational function of the toilet.
-start up
Turn the button forward and hear a
"beep’
sound to start the hip
cleaning.
-
stop
Press the button and hear a
"beep’
and stop the hip
cleaning.
The cleaning will automatically stop after approximately three minutes of continuous cleaning.

Warm air-drying
Operation function operation of the toilet.
-start up -stop
Pressthebuttonand hear a “beep" Press the button again and hear a "beep.”
to start thewarm air arch. After 6-7s, stop the warm air drying.
Drying will automatically stop after approximately three minutes of continuous drying.
Lamp control
-close, open
Rotate the button ten times in the back and
forth, and hear the "drip" sound, the button
indicator lights off. The operation button
indicator lights up again.

Water temperature adjustment
When cleaning:
-
Warming
-
Desuperheat
The button is continuously rotated forward 2
The button is continuously
rotated backwards two
times, and when the "beep" is heard, the
times, and when the sound is heard, the water
water temperature rises by one step. temperatureis loweredby onestep.
Wind temperature adjustment
When the warm air is
dry:
-
Warming
-
Desuperheat
The button is rotated forward two times in a row, Thebuttoniscontinuously rotated backwards
two and when the sound is heard, the wind times,and whenthe "beep" is heard, thewind
temperature rises by one step temperatureis lowered by onestep.

Seat temperature adjustment
Operational function of the toilet:
-Warming -Desuperheat
The button rotates forward two times in a row, The button iscontinuously rotated backwards
two and when the "beep" is heard, the seat times, and whenthe "beep" isheard, the seat
temperature rises by one step' temperature is lowered by one step.
Summer seat isnot heated:
The seat temperature setting has four speeds, off-low-medium-high, and the maximum temperature is
reduced three times, and the seat will stop heating.
Night light
Operational function of the toilet:
- Turn on -Shutdown
Quickly click the button three times
Quickly click the buttonthree times
(within one second) and hear a "beep’ to turn on
second) and hear a "beep" and turn night
light.
l
ight off.

*
*
*
Remote button function
Note: For the first time, if the remote control does not respond to use,
you need to re code. (Refer to the coding method on the following page)
Power
Pulsate
Stop
Flush Rear Front Dryer
Water
Seat
Wind
Press thisbutton toperform
the flush function. The Toilet
pan with automatic flushing
function can be flushed by
pressing this button.
This toilet has no function.
Press this button to perform
laxative flushing, press the
selection button to adjust the
water temperature, flush the
hydraulic power, and rinse the
position. Press again to
perform a mobile rinse.
Press this button to perform
laxative flushing, press the
selection button to adjust the
water temperature, wash the
hydraulic power, and rinse the
position. Press again to
perform a mobile rinse.
Press this button to perform the drying
function, press the selection button to
adjust the water temperature,
The drying temperature is four steps:
1. Does not light for normal temperature,
2. Blue is low,3. Pink is mid-range,
4. Red is high grade.
top
Stop
In the laxative modes, press
these two keys to adjust the
sprinkler position. There are
five position gears, and there
are indicators.
to indicate the current gear position.
In the laxative modes, press
these two keys to adjust the
flushing hydraulics. There is an
indicator light indicating the
current.
Press to stop all functions that are in
use. It can stop the buttocks, female,
laxative and dry functions.
When the massage button is turned
on, the female flushing, and the lax-
ative flushing function are turned on,
press this button to perform the rub-
None The water temperature gear is
divided into four gears:
1.
Not lit to normal temperature,
2. Blue is low,
3. Pink is mid-range,
4. Red is high grade.
Press this button to turn on/offthe power.
This button is the seat temperature
adjustment button, and the seat
temperature is four:
1. Does not light for normal temperature,
2. Blue is low,
3. Pink is mid-range,
4. Red is high grade.
bing, and then press to stop the rub-
bing.
This toilet has no function.
This button is the wind temperature
adjustment button, and the seat temperature
is four:
1. Does not light for normal temperature,
2. Blue is low,
3. Pink is mid-range,
4. Red is high grade.
There are four modes of indicator display:
1. Running LED mode Press any key,
If it is not in any other mode, it will display the effect of running lights, and the five indicators will light up once
respectively.
2. Temperature regulation mode
Press the water temperature key, the seat temperature key, and the air temperature.
key, and their gear positions will be displayed. There are colors to indicate the temperature gear positions.
3. Nozzle length adjustment mode
Press the arrow key, the length of the nozzle will be displayed with five indicators.
4. Water pressure regulation mode Press the plus and minus keys to display the water pressure intensity,
with three indicators.
This button is the key for automatic
deodorization. Press the automatic
deodorization on, the indicator light
is on, press again, the indicator light
is off. Whenthe indicator is on, the
Toilet pan automatically performs a
30-second deodorization function
when the user is away from the seat.
This toilet has no function.
Back button
Press this button to light the Toilet pan
night light, then press this button to turn
offthe night light. Press and hold this
button to enter the power save mode,
and automatically resume after 8 hours,
or press this button again to turn offthe
power save function.
This key is the nozzle cleaning key,
press once to clean the nozzle
Washing function. Automatic stop
after 1 minute End. You can also
press the Stop button to stop.
This toilet has no function.
This key is afunction key, different
toilets have different functions.
This toilet has no function.
Long press User 1 to allow automatic flip;
Press and hold User 2 to disable automatic flip.
Special attention: for the water tank or sensing panel without automatic flushing
function, pressing the flush key will not execute the flushing function.
*
*

Remote control operation protection
AThe remotecontrolcommunicates withthebody.
Theremotecontrolcontrols thebodyby sending wireless signal.Thecloser signal is,thestronger the signal is.
Pleasechoosetheinstallation location.
B
Remote control
signal
pair
code
If theremote control is lost or damaged, youneedto pair the signal withthe appliancewithanewremotecontrol.
Otherwise, theremote control cannot beused.
The
pairing
method
is as
follows:
l. Pressandholdtheremotecontrolstop button. Press and holdthe Toilet
buttonagain:
2.
Afterhearing the longsound of "beep'' Releasethebuttonand
stop button.
3.
Press the remote control stop button again.A "beep" will
indicate
that pairing was successful. If
there is no sound.
Please replace the
remote-controlbatteryandtryagain.
CTheuseandreplacement oftheremote-control battery
Theremotecontroluses two 7-cell alkaline batteries (not supplied).
D. Other
□
Do not place the remotecontrol
wherethe liquid may
be sprayed
directly, or
by
immersing
it ina liquid.
□
Do not place it
around small appliances such ashand dryers and hair dryers, soas not
to
interfere with
the
normaluseofthe remotecontrol.
□
Do not apply external force tothe button area of theremote-control frequently orviolently.
□
After using theremote control, putit back on theremote-controlbracket on thewall.
Note:
1.
The positive
and
negative
poles
of the
battery
must
match
the markings
on the remote
control.
2.
Old andnew batteries cannot be mixed.
3.
Please
use alkaline
batteries.
4.
Please
remove
the battery
when
not in use for
a
long
time.
Maintenance and cleaning
Routine cleaning
For the best results, keep the following in mind when maintaining your product: Note! Do
not flush the toilet cover directly with water (included the remote control)
•
Apply a small amount of cleaning
solution to test the cleaning
solution
will not
damage
the surface
of the
Toilet, once confirmed the cleaning solution
ca n
be applied
to the entire
surface.
•Donotletthe detergent soak: Do notlet thedetergent soak theproduct.

Maintenance and cleaning
Avoid
rough
surface
materials:
use
soft,
wet
sponges
or
cotton
cloth, do
not
use rough
surface,
materials toclean the surface, such as brushes, scour pads, etc.
*
Scrub: Immediately
after
adding
the
cleaner,
wipe
the surface
with
a
damp
cloth
and
wipe
off
the
detergent and dirtsprayed onto thesurface.
*
Neutralcleaning liquid anddetergent should be used.
Cleaning
seat
*
Avoid abrasive cleaners
and disinfectants
in aerosol cans
.
Maintenance
tips
Clean the seat with a mixture of detergent and
water. using a soft, moist sponge or cloth. Dry
withasofttoweland let theseat dry naturally.
Note: The success of thecleaning process depends on factors suchas thehardness and temperature of the water, the
exactamount of ingredients used, thechange in cleaning rules, and thestate of the product being cleaned. Because
thesefactors willchange, thecompany cannot guarantee thevalidity ofthe mentioned rules.
□Clean thelidandseat smart seattoclean Smart
toilet cleaning:
□Isolate thepower andclosethewater stopvalve
□Wring withasoft cloth dampened with water
□Dry witha dry soft cloth

13 13
Maintenance and cleaning
Seat cover and seat cleaning:
It is not recommended that the user disassemble the seat cover and the seat to clean the dirt in the corners, so as not to
damage the internal connecting wires and electrical components. Please contact a qualified electrician to disassemble
and replace the cover and seat.
□
Nozzlecleaning
How to clean the nozzle with asoft brush:
□
When not seated, the front or rear button, the nozzle willstick out, but will not spray water.
□
Users can clean the nozzle with a soft brush and water.
□
Press the buttonto retract the nozzle.
□
After cleaning, wipethe water on the product with a dry soft cloth.
□
Filter cleaning or replacement
The user finds that the amount of flushing water is small or there is no water. Please clean or replace the filter
in time. If it is a wall mounted toilet (because the filter is installed in the water tank), please refer to the
tank cleaning instructions.
Filter screen
Bottom of seat

Maintenance and cleaning
•
Maintenance when not in use for extended periods of time
If you are not going to use the smart toilet cover for a long time, besure to close the water stop valve.
•
Turn off the power.
•
Close the water valve.
Note:
1.
If the product is not used for a long time without draining the water, the residual water is easy to
freeze in winter and deteriorates in summer.
2.
In the winter, the water supply pipeline in the home has been frozen. Do not use the smart toilet
immediately. You can raise the temperature in the room and wait for it to naturally thaw before
use.
3.
When using it again after long-term use, be sure to rinse it several times to ensure that the internal
piping is clean.
4.
Take out the battery of the remote control.
Troubleshooting
General function
Symptoms
Possible
reason
Recommended measures
The machine is not
working
A.
Power
outage
B.
No power cord or socket is connected.
C.
The power line leakage protection
switch is not reset.
D.
The human body does not touch the seat,
sensing area.
A.
Wait until the power is restored.
B.
Check the power cord or check the
power
outlet.
C.
Press the reset button onthe plug.
D.
Contact the seat sensing area.
No nozzle can
effluent
A.
The seat failed to sense the user.
B.
The water supply valve is closed, or the
inlet pipe is bent.
C.
The filter is blocked.
A.
Adjust the sitting position, there can be no
object isolation between the skin and the
seat, such as pants.
B.
Turn off the power, remove the water
supply, andre-energize.
C.
Clean the filter.

115
Troubleshooting (continued)
Cleaning function
Symptoms
Possible reason
Recommended measures
No water flow
A.Thewater supply valve has been closed.
B.The drop sensor does not detect the user.
A.Open the water supply value.
B.Check theactive seat information inthe "Usage
Method" section.
Low flushing water
pressure
A.Thefilter is blocked.
B.The water supply pressure isinsufficient.
C. The plastic seat cover is not connected to the
ceramic base.
A. View the "cleaning filter" section of the hidden
water tank.
B. Increase the water pressure to the water
pressure range required by the product.
C. Reinstall the plastic seat cover so that there is
no large gap between the plastic seat cover
andthe ceramic base.
The water is blockedin the
nozzle before the
cleaning is completed.
A.The sitting sensor does not detect the user.
A. View in the "User Manual"
Water flows out of
the hole beside the
Nozzle when flushing
Protection against excessive water pressure
inside
the product.
No
Sitting sensor
Symptoms
Possible reason
Recommended measures
Press the wash button
when not inuse, the
cleaning function is
enabled
The sitting sensor is covered
by an object
or the
seat iswet
Wipe
water
or
foreign
objects
that
fall into
the
sensor
area
Even ifyousit,the
cleaning function does
not work.
In the current sitting position, the sitting sensor
cannot monitor the user, or the pad ison the seat.
Change
sitting posture

Troubleshooting (continued
Remote control
Symptoms
Possible
reason
Recommended measures
Remote control does not
work
A.
The battery is exhausted, or the battery
polarity is reversed.
B.
The remote control is in the water.
C.
The remote control is broken.
D.
The distance is too far.
E.
Changed the new remote control does notmatch the toilet
.
A.
Please replace the battery, please insert
the battery correctly.
B.
Take out the battery in time andthen dry it.
C.
Contact the dealer for replacement.
D.
Close to the Toilet, try again.
E.
Reference remote control operation
protection page 11
Warm air function
Symptoms
Possible
reason
Recommended measures
Theheater stops working
during use
Inthe current seat position, the sitting sensor
cannot detect the user.
Tochange the sitting position,press thestop button
first, then press the drying button.
Seat heating
Symptoms
Possible
reason
Recommended measures
The seat is not hot
A.
The heated seat has not been opened.
B.
The heating has started, because the
power is small, and the heating time is
longer.
C.
The heated seat is broken
.
A.
Refer to the seat heating function o n the
b u t t o n or refer to the seat heating
function of the remote control.
B.
Wait for a while, then test.
C.
Contact dealer for replacement or repair.
Night light
Symptoms
Possible
reason
Recommended measures
Nightlight not
lighting up.
A. Night light function is not turned on.
B. Night light is broken
A.
Please refer to the night light function on
the button or the night light function of
the reference remote control.
B.
Contact the dealer for replacement or repair
Water temperature
Symptoms
Possible
reason
Recommended measures
The nozzle sprays cold
water
A.
Flush water temperature grade is not
adjusted.
B.
Heater is broken
A.
Please refer to the water temperature
adjustment of the remote control
B.
Contact supplier for replacement or repair

Size
Dimension drawing of floor
mounted toilet installation
This manual suits for next models
1
Table of contents
Other Victorian Plumbing Toilet manuals
Popular Toilet manuals by other brands

PolyJohn
PolyJohn Comfort XLT PH04 Instructions and parts

Swiss Madison
Swiss Madison Back-to-Wall installation instructions

ProFlo
ProFlo PF9800 Series installation instructions

Villeroy & Boch
Villeroy & Boch 9M78U101 installation manual

Englefield
Englefield EVORA 78597A-SST installation instructions

Cinderella
Cinderella Comfort Australia user manual