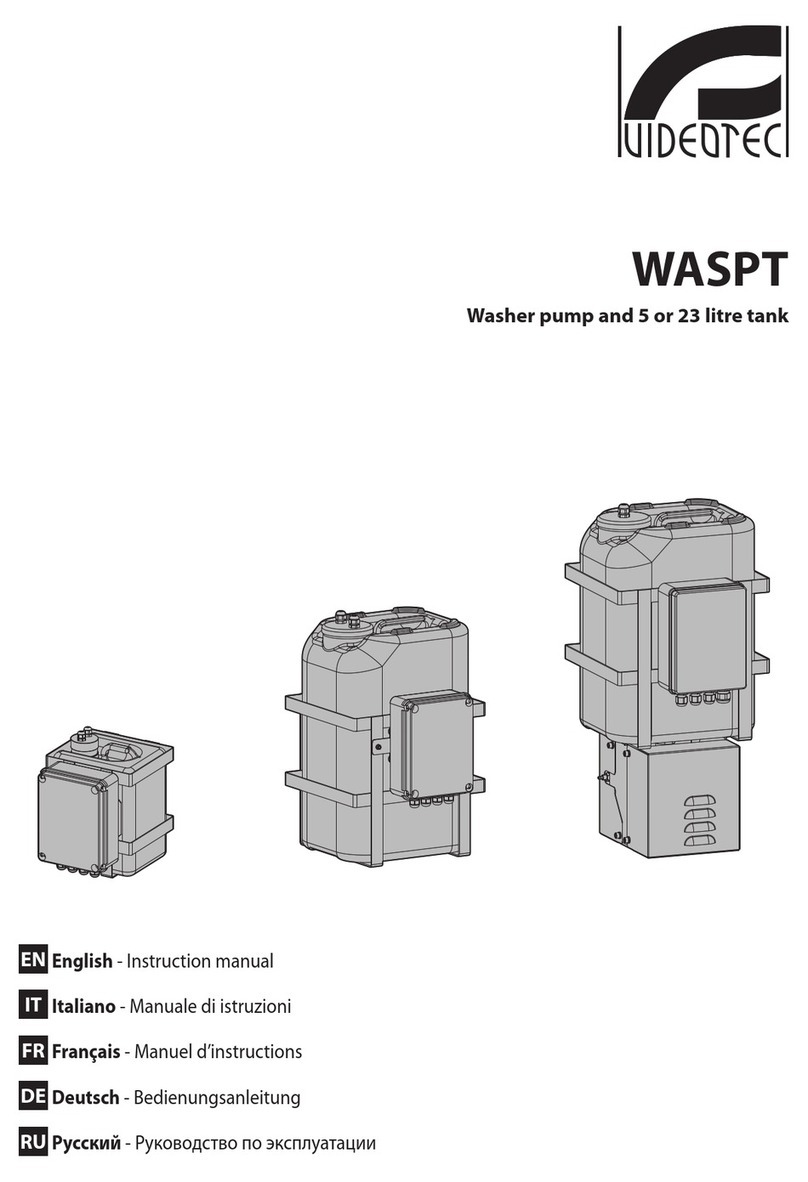
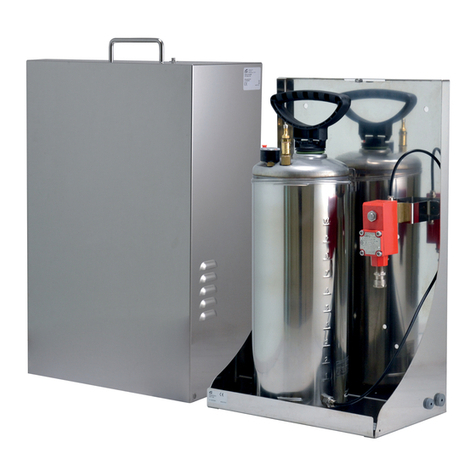
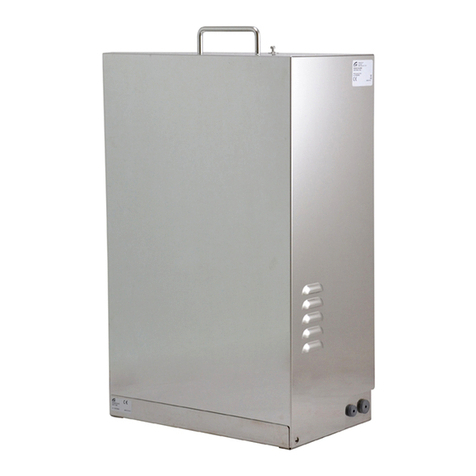
Videotec WASNX User manual

EN
English - Instruction manual
IT
Italiano - Manuale di istruzioni
FR
Français - Manuel d’instructions
DE
Deutsch - Bedienungsanleitung
RU
Русский - Руководство по эксплуатации
ITALIANO
WASNX
Washer pump with solenoid valve for stainless steel products


EN
English - Instruction manual
ENGLISH
WASNX
Washer pump with solenoid valve for stainless steel products

EN - English - Instruction manual
2 MNVCWASNX_1915_EN
Contents
ENGLISH 1
1 About this manual ....................................................................................................................3
1.1 Typographical conventions ................................................................................................................................................ 3
2 Notes on copyright and information on trademarks.............................................................3
3 Safety rules................................................................................................................................3
4 Identication.............................................................................................................................5
4.1 Product description and type designation................................................................................................................... 5
4.2 Product marking..................................................................................................................................................................... 5
5 Preparing the product for use .................................................................................................6
5.1 Unpacking................................................................................................................................................................................. 6
5.2 Safely disposing of packaging material ......................................................................................................................... 6
5.3 Contents .................................................................................................................................................................................... 6
5.4 Preparatory work before installation............................................................................................................................... 6
5.4.1 Product opening...................................................................................................................................................................................... 6
5.4.2 Drilling the box (optional) .................................................................................................................................................................... 6
5.4.3 Assembly of the seal rings (optional) ............................................................................................................................................... 7
5.4.4 Assembly on supports ........................................................................................................................................................................... 7
6 Installation ................................................................................................................................8
6.1 Installation and loading of the pump............................................................................................................................. 8
6.2 Connection of the power supply line.............................................................................................................................. 9
6.2.1 24Vac power line connection.............................................................................................................................................................. 9
6.2.2 120Vac and 230Vac power line connection................................................................................................................................... 9
6.2.3 Connection of the solenoid valve....................................................................................................................................................10
6.3 Product closure.....................................................................................................................................................................10
6.4 Washer installation (NXPTZ range).................................................................................................................................10
6.4.1 Installation examples ...........................................................................................................................................................................11
6.5 Washer installation (NVX range)......................................................................................................................................12
7 Instructions for normal operation.........................................................................................12
7.1 Pump manual activation....................................................................................................................................................12
8 Maintenance ...........................................................................................................................12
8.1 Replacing the solenoid valve...........................................................................................................................................12
9 Cleaning ..................................................................................................................................13
10 Information on disposal and recycling...............................................................................13
11 Technical data .......................................................................................................................13
11.1 General ..................................................................................................................................................................................13
11.2 Mechanical ...........................................................................................................................................................................13
11.3 Electrical................................................................................................................................................................................13
11.4 Environment........................................................................................................................................................................13
11.5 Certications........................................................................................................................................................................13
12 Technical drawings ...............................................................................................................14

Instruction manual - English - EN
3MNVCWASNX_1915_EN
1 About this manual
Read all the documentation supplied carefully before
installing and using this unit. Keep the manual in a
convenient place for future reference.
1.1 Typographical conventions
DANGER!
High level hazard.
Risk of electric shock. Disconnect the
power supply before proceeding with any
operation, unless indicated otherwise.
CAUTION!
Medium level hazard.
This operation is very important for the
system to function properly. Please read
the procedure described very carefully and
carry it out as instructed.
INFO
Description of system specications.
We recommend reading this part carefully
in order to understand the subsequent
stages.
2 Notes on copyright and
information on trademarks
The mentioned names of products or companies are
trademarks or registered trademarks.
3 Safety rules
CAUTION!The electrical system to which the
unit is connected must be equipped with a
15A max automatic bipolar circuit breaker.
The minimum distance between the circuit
breaker contacts must be 3mm (0.1in).
The circuit breaker must be provided
with protection against the fault current
towards the ground (dierential) and the
overcurrent (magnetothermal).
CAUTION! Device installation and
maintaining must be performed by
specialist technical sta only.
This device must be earthed using the
solenoid valve connector.
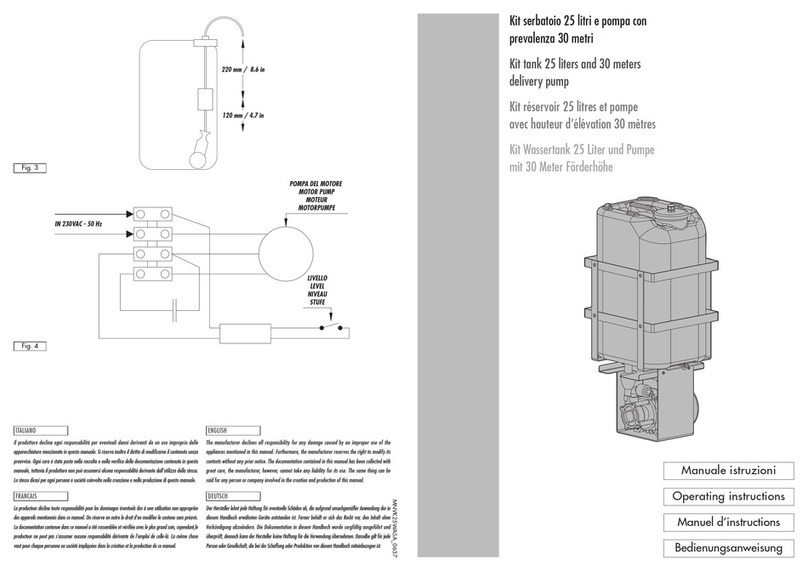
Fig. 1
• Read these instructions.
• Keep these instructions.
• Heed all warnings.
• Follow all instructions.
• Make sure that all the devices are suitable for the
application and for the environment in which they
will be installed.

EN - English - Instruction manual
4 MNVCWASNX_1915_EN
• When installing the devices make sure the system
and installer personnel are absolutely safe.
• Choose an installation site that is strong enough
to sustain the weight of the device, also bearing
in mind particular environmental aspects, such as
exposure to strong winds.
• We strongly recommend using only approved
brackets and accessories during installation.
• Installation category (also called Overvoltage
Category) species the level of mains voltage
surges that the equipment will be subjected to.
The category depends upon the location of the
equipment, and on any surge voltage protection
provided. Equipment in an industrial environment,
directly connected to major feeders/short branch
circuits, is subjected to Installation Category
III. If this is the case, a reduction to Installation
Category II is required. This can be achieved by
use of an insulating transformer with an earthed
screen between primary and secondary windings,
or by tting UL listed Surge Protective Devices
(SPDs) from live to neutral and from neutral to
earth. Listed SPDs shall be designed for repeated
limiting of transient voltage surges and the
following rated operation conditions: Type 2 (SPDs
permanently connected to the power network and
intended for installation on the load side of the
service equipment); Nominal Discharge Current
(In) 20kA min. For example: FERRAZ SHAWMUT,
STT2240SPG-CN, STT2BL240SPG-CN rated
120Vac/240Vac, (In=20kA). Maximum distance
between installation and reduction is 5m.
• The manufacturer declines all responsibility
for any damage caused by an improper use
of the appliances mentioned in this manual.
Furthermore, the manufacturer reserves the right
to modify its contents without any prior notice.
The documentation contained in this manual has
been collected and veried with great care. The
manufacturer, however, cannot take any liability
for its use. The same thing can be said for any
person or company involved in the creation and
production of this manual.
• This device was designed to be permanently
secured and connected on a building or on a
suitable structure. The device must be permanently
secured and connected before any operation.
• Since the user is responsible for choosing the
surface to which the device is to be anchored,
we do not supply screws for attaching the device
rmly to the particular surface. The installer is
responsible for choosing screws suitable for the
specic purpose on hand.
• Before starting any operation, make sure the
power supply is disconnected.
• A power disconnect device must be included
in the electrical installation, and it must be very
quickly recognizable and operated if needed.
• Equipment intended for installation in Restricted
Access Location performed by specialist technical
sta.
• Make sure that the connected devices are
completely compatible and suitable for use.
• Make sure the operating temperatures are
compatible with the devices.
• Any change that is not expressly approved by the
manufacturer will invalidate the guarantee.

Instruction manual - English - EN
5MNVCWASNX_1915_EN
• The device must only be opened by specialist
technical sta. Tampering with the device will
invalidate the guarantee.
• Be careful not to use cables that seem worn or old.
• The device must be properly connected to the
earth circuit.
• The device can only be considered to be switched
o when the power supply has been disconnected
and the connection cables to other devices have
been removed.
• Before powering the device install an overload
protection device in the building electrical system.
• For technical services, consult only and exclusively
authorized technicians.
• Keep this handbook carefully; it must be available
for consultation on the installation site.
• Never, under any circumstances, make any
changes or connections that are not shown in
this handbook. Improper use of the appliance
can cause serious hazards, risking the safety of
personnel and of the installation.
• Use only VIDEOTEC original spare parts.
4 Identication
4.1 Product description and type
designation
The WASNX washer pump is an important element
for eective video surveillance because it guarantees
sharp images in all environmental conditions and
reduces the need for maintenance.
The WASNX system is designed for operate in special
environments such as marine, industrial, chemical
and where the external conditions are highly
corrosive.
The wash system is also compatible with third-party
products.
The kit includes a stainless steel 10-litre tank with
solenoid valve.
4.2 Product marking
See the label attached to the product.
Product marking is also seen inside the product, on
the label positioned as illustrated in the gure.
Fig. 2

EN - English - Instruction manual
6 MNVCWASNX_1915_EN
5 Preparing the product for
use
5.1 Unpacking
When the product is delivered, make sure that the
package is intact and that there are no signs that it
has been dropped or scratched.
If there are obvious signs of damage, contact the
supplier immediately.
When returning a faulty product we recommend
using the original packaging for shipping.
Keep the packaging in case you need to send the
product for repairs.
5.2 Safely disposing of packaging
material
The packaging material can all be recycled. The
installer technician will be responsible for separating
the material for disposal, and in any case for
compliance with the legislation in force where the
device is to be used.
5.3 Contents
Check the contents to make sure they correspond
with the list of materials as below:
• Glass wash system
• Bolts and screws
• Washer semi-rigid pipe (with nozzle)
• Hydraulic joints
• Delivery pipe
• Instruction manual
5.4 Preparatory work before
installation
5.4.1 Product opening
Unscrew the 2 side screws to open the cover.
Fig. 3
Unscrew the safety screw (01) and lift the casing (02).
02
01
Fig. 4
5.4.2 Drilling the box (optional)
There are 2 holes on the side of the product,
protected by sealing rings. The 2 holes enable
passage of the power supply cable of the solenoid
valve and the delivery pipe. Additional holes can
be made at the base or on the other side. The holes
should be protected by sealing rings.
Fig. 5

Instruction manual - English - EN
7MNVCWASNX_1915_EN
5.4.3 Assembly of the seal rings
(optional)
During assembly, be careful not to damage
the rubber and thereby reduce its air-
tightness.
Insert the conical part of the sealing ring in the hole.
Tighten the conical part of the sealing ring with a
pliers or a similar tool.
Fig. 6
Pull the sealing ring allowing it to pass through the
hole until the conical part is completely out. In the
nal position, the sealing ring should completely
close the passage hole.
Fig. 7
RATIO BETWEEN THE DIMENSIONS OF THE SEALING RINGS AND THE
DIAMETER OF THE USABLE CABLES
Sealing ring Ø passage hole
(mm)
Ø cable (mm)
M16 16.5 From 5 to 9
M20 20.5 From 8 to 12
Tab. 1
5.4.4 Assembly on supports
The product can be fastened directly to the wall or
the oor using the holes present.
Fig. 8
The box can also be assembled on a pole collar or
corner adaptor module.
Fig. 9Pole mounting.
Fig. 10 Fastening with corner adaptor module.

EN - English - Instruction manual
8 MNVCWASNX_1915_EN
6 Installation
Before starting any operation, make sure
the power supply is disconnected.
6.1 Installation and loading of
the pump
We recommend lling the tank with water
at ambient temperature. If using the pump
at temperatures below 3°C (37.4°F) add
some glass cleaner antifreeze liquid to the
water.
During installation or maintenance operations of the
pump, you can leave the tank in place or remove it. To
remove the tank (01) loosen the metal clips (02) and
release the connection pipe (03) by exerting pressure
on the fast connection joint (04).
01
03
02
02
04
Fig. 11
Reduce any residual pressure in the tank using the
safety valve.
Fig. 12
Undo the top body of the pump (01) by turning it
anti-clockwise and removing it. Fill the tank (02).
02
01
Fig. 13
Screw in the upper casing of the pump.
Pressurise the tank pumping with the handle (01)
until the indicated pressure is reached (3.5bar). Turn
the handle to the safety position (02).
02
01
Fig. 14
Pass the delivery pipe (01) through the sealing ring
(02). Connect the delivery pipe to the solenoid valve
(fast connector joint).
02
01
Fig. 15

Instruction manual - English - EN
9MNVCWASNX_1915_EN
6.2 Connection of the power
supply line
The device can be provided with dierent power
supply voltages. The power supply voltage is
indicated on the product identication label. (4.2
Product marking, page5).
6.2.1 24Vac power line connection
For further information, refer to the PTZ
unit/Camera manual.
The solenoid valve can be directly activated using the
PTZ unit/Camera RL2 relay.
~ ~a
RL2
Fig. 16 24Vac power supply.
6.2.2 120Vac and 230Vac power line
connection
Use an auxiliary relay with adequate
electrical specications for the power
supply voltage and absorption of the wash
system.
The relay (RL2 on the PTZ unit board) has
the characteristics outlined below.
• Working voltage: 30Vac max or 60Vdc
max.
• Nominal current: 1A max.
For further information, refer to the PTZ
unit manual.
The solenoid valve cannot be directly activated using
the PTZ unit RL2 relay.
You also need to use an auxiliary relay with NO
(Normally Open) contact.
~/- ~/+ N La
RL2
Fig. 17 Power supply 120Vac or 230Vac.

EN - English - Instruction manual
10 MNVCWASNX_1915_EN
6.2.3 Connection of the solenoid valve
Pass the power supply cable through the sealing ring.
Fig. 18
Connect the power supply cable to the connector as
described below.
Unscrew the screw and remove the connector.
Fig. 19
Remove the terminal block from the connector hood.
Fig. 20
Unscrew and remove the cable gland. Insert the
power supply cable and connect it to the terminal
block.
Re-insert the terminal block in the connector and
tighten the cable gland. Connect the connector to
the solenoid valve and screw in the screw.
Use cables with the characteristics outlined
below.
• Diameter: from 6mm (0.24in) to 8mm
(0.3in).
• Section (single conductor): 1.5mm²
(15AWG) max.
6.3 Product closure
After installation and wiring, close the product again.
6.4 Washer installation (NXPTZ
range)
Fasten the support (01) onto the PTZ unit body with
the metal clip (02) provided.
02
01
Fig. 21
Shorten the semi-rigid washer pipe (01) as needed.
Unscrew the nut (02) from the joint and slide it along
the pipe. Insert the end of the pipe into the ogive
(03).
03
01 02
Fig. 22
Lock the nut to the coupling.
Fig. 23
Tighten the delivery joint.
Fig. 24

Instruction manual - English - EN
11MNVCWASNX_1915_EN
Unscrew the knurled nut (01) from the delivery joint
(02). Insert the knurled nut on the delivery pipe (03).
Insert the end of the delivery pipe into the spinner
(04). Lock the nut to the coupling.
02
01
04
03
Fig. 25
Fasten the semi-rigid pipe (01) to the washer support
using the plate (02), the screws (03) and the washers
(04) supplied.
04
03
01
02
Fig. 26
To calibrate the jet, orientate the nozzle towards the
window of the housing.
Fig. 27
6.4.1 Installation examples
Fig. 28 PTZ unit fastening.
Fig. 29 Pole mounting.
Fig. 30 Wall mounting.

EN - English - Instruction manual
12 MNVCWASNX_1915_EN
6.5 Washer installation (NVX
range)
The camera, if equipped with a wiper, can be
equipped with an external pump that provides water
to clean the glass.
Fig. 31
To complete installation of the washing system, use
the kit supplied with the camera.
Insert the head of the nozzle (01) on the support (02)
by tightening the nut (03).
03
01
02
Fig. 32
Fasten the nozzle and the support assembled by
using one of the accessory holes (01) on the front of
the housing. Tighten the screw and the washer (02).
Insert the delivery pipe of the nozzle (03). Secure the
delivery pipe to the support with a clip (04).
0402 03
01
Fig. 33
7 Instructions for normal
operation
7.1 Pump manual activation
Close the contact (button, switch, etc.) to activate
the wash system. Open the contact to shut-o water
supply.
N La
Fig. 34
8 Maintenance
8.1 Replacing the solenoid valve
Maintenance must be performed with the
power supply disconnected and the circuit-
breaker open.
Dismantle the support plate (01). Dismantle the
solenoid valve (02) from the support plate and
replace it.
01
02
Fig. 35

Instruction manual - English - EN
13MNVCWASNX_1915_EN
9 Cleaning
Frequency will depend on the type of
environment in which the product is used.
The device should be cleaned using a damp cloth;
compressed air must not be used.
10 Information on disposal
and recycling
The European Directive 2012/19/EU on Waste
Electrical and Electronic Equipment (WEEE) mandates
that these devices should not be disposed of in the
normal ow of municipal solid waste, but they should
be collected separately in order to optimize the
recovery stream and recycling of the materials that
they contain and to reduce the impact on human
health and the environment due to the presence of
potentially hazardous substances.
The symbol of the crossed out bin is marked
on all products to remember this.
The waste may be delivered to appropriate collection
centers, or may be delivered free of charge to the
distributor where you purchased the equipment at
the time of purchase of a new equivalent or without
obligation to a new purchase for equipment with size
smaller than 25cm (9.8in).
For more information on proper disposal of these
devices, you can contact the responsible public
service.
11 Technical data
11.1 General
Enclosure made of stainless steel AISI 316L
Delivery pipe supplied
• Length: 20m (66ft)
11.2 Mechanical
Pressure: 4bar max
Delivery head: 20m (66ft)
Material (delivery pipe): Antistatic plastic
Dimensions (WxHxL): 429x697x255mm
(16.9x27.4x10in)
Unit weight: 18kg (40lb)
Water tank capacity: 10l (2.6gal)
11.3 Electrical
Supply voltage/Current consumption
• 230Vac, 0.07A, 50/60Hz
• 120Vac, 0.13A, 50/60Hz
• 24Vac, 0.7A, 50/60Hz
11.4 Environment
For installation indoors and outdoors
Operating temperature of solenoid valve: from -20°C
(-4°F) to +60°C (140°F)
Operating temperature of device: depending on the
solidication temperature of the liquid
11.5 Certications
Electrical safety (CE): EN60950-1
Electromagnetic compatibility (CE): EN61000-6-2,
EN61000-6-3
Outdoor installation (CE): EN60950-22
IP protection degree (EN60529):
• IP65 (solenoid valve only, enclosure not rated)
EAC certication

MNVCWASNX_1915_EN
12 Technical drawings
The indicated measurements are expressed in millimetres.
Fig. 36 WASNX.
Headquarters Italy Videotec S.p.A.
Via Friuli, 6 - I-36015 Schio (VI) - Italy
Tel. +39 0445 697411 - Fax +39 0445 697414
Email: [email protected]
France Videotec France SARL
Immeuble Le Montreal, 19bis Avenue du Québec, ZA de Courtaboeuf
91140 Villebon sur Yvette - France
Tel. +33 1 60491816 - Fax +33 1 69284736
Email: info.fr@videotec.com
Asia Pacic Videotec (HK) Ltd
Flat 8, 19/F. On Dak Industrial Building, No. 2-6 Wah Sing Street
Kwai Chung, New Territories - Hong Kong
Tel. +852 2333 0601 - Fax +852 2311 0026
Email: info.hk@videotec.com
Americas Videotec Security, Inc.
Gateway Industrial Park, 35 Gateway Drive, Suite 100
Plattsburgh, NY 12901 - U.S.A.
Tel. +1 518 825 0020 - Fax +1 518 825 0022
Email: info.usa@videotec.com
www.videotec.com

IT
Italiano - Manuale di istruzioni
ITALIANO
WASNX
Pompa lavavetro con elettrovalvola per prodotti in acciaio inox

IT - Italiano - Manuale di istruzioni
2 MNVCWASNX_1915_IT
Sommario
ITALIANO 1
1 Informazioni sul presente manuale ........................................................................................3
1.1 Convenzioni tipograche.................................................................................................................................................... 3
2 Note sul copyright e informazioni sui marchi commerciali...................................................3
3 Norme di sicurezza ...................................................................................................................3
4 Identicazione ..........................................................................................................................5
4.1 Descrizione e designazione del prodotto ..................................................................................................................... 5
4.2 Marcatura del prodotto........................................................................................................................................................ 5
5 Preparazione del prodotto per l'utilizzo.................................................................................6
5.1 Disimballaggio ........................................................................................................................................................................ 6
5.2 Smaltimento in sicurezza dei materiali di imballaggio............................................................................................. 6
5.3 Contenuto................................................................................................................................................................................. 6
5.4 Lavoro preparatorio prima dell’installazione ............................................................................................................... 6
5.4.1 Apertura del prodotto............................................................................................................................................................................ 6
5.4.2 Foratura della scatola (opzionale)...................................................................................................................................................... 6
5.4.3 Montaggio degli anelli di tenuta (opzionale)................................................................................................................................ 7
5.4.4 Montaggio sui supporti......................................................................................................................................................................... 7
6 Installazione..............................................................................................................................8
6.1 Installazione e caricamento della pompa...................................................................................................................... 8
6.2 Collegamento della linea di alimentazione.................................................................................................................. 9
6.2.1 Collegamento della linea di alimentazione in 24Vac.................................................................................................................. 9
6.2.2 Collegamento della linea di alimentazione in 120Vac e 230Vac ............................................................................................ 9
6.2.3 Collegamento dell'elettrovalvola.....................................................................................................................................................10
6.3 Chiusura del prodotto ........................................................................................................................................................10
6.4 Installazione del lavavetro (famiglia NXPTZ)..............................................................................................................10
6.4.1 Esempi di installazione ........................................................................................................................................................................11
6.5 Installazione del lavavetro (famiglia NVX)...................................................................................................................12
7 Istruzioni di funzionamento ordinario .................................................................................12
7.1 Attivazione manuale della pompa.................................................................................................................................12
8 Manutenzione.........................................................................................................................12
8.1 Sostituzione dell'elettrovalvola.......................................................................................................................................12
9 Pulizia ......................................................................................................................................13
10 Informazioni sullo smaltimento e il riciclo .........................................................................13
11 Dati tecnici ............................................................................................................................13
11.1 Generale................................................................................................................................................................................13
11.2 Meccanica.............................................................................................................................................................................13
11.3 Elettrico..................................................................................................................................................................................13
11.4 Ambiente ..............................................................................................................................................................................13
11.5 Certicazioni........................................................................................................................................................................13
12 Disegni tecnici ......................................................................................................................14

Manuale di istruzioni - Italiano - IT
3MNVCWASNX_1915_IT
1 Informazioni sul presente
manuale
Prima di installare e utilizzare questa unità, leggere
attentamente tutta la documentazione fornita. Tenere
il manuale a portata di mano per consultazioni
successive.
1.1 Convenzioni tipograche
PERICOLO!
Pericolosità elevata.
Rischio di scosse elettriche. Prima di
eseguire qualsiasi operazione assicurarsi di
togliere tensione al prodotto, salvo diversa
indicazione.
ATTENZIONE!
Pericolosità media.
L'operazione è molto importante per il
corretto funzionamento del sistema. Si
prega di leggere attentamente la procedura
indicata e di eseguirla secondo le modalità
previste.
INFO
Descrizione delle caratteristiche del
sistema.
Si consiglia di leggere attentamente per
comprendere le fasi successive.
2 Note sul copyright e
informazioni sui marchi
commerciali
I nomi di prodotto o di aziende citati sono marchi
commerciali o marchi commerciali registrati
appartenenti alle rispettive società.
3 Norme di sicurezza
ATTENZIONE! L’impianto elettrico al quale
è collegata l’unità deve essere dotato di
un interruttore di protezione bipolare
automatico da 15A max. La distanza
minima tra i contatti dell'interruttore
di protezione deve essere di 3mm.
L’interruttore deve essere provvisto di
protezione contro la corrente di guasto
verso terra (dierenziale) e la sovracorrente
(magnetotermico).
ATTENZIONE! L'installazione e la
manutenzione del dispositivo devono
essere eseguite solo da personale tecnico
specializzato.
Questo dispositivo deve essere
collegato a terra tramite il connettore
dell'elettrovalvola.
Fig. 1
• Leggere le istruzioni.
• Conservare le istruzioni.
• Osservare tutte le avvertenze.
• Attenersi a tutte le istruzioni.
• Assicurarsi che tutti i dispositivi siano adatti per
l’applicazione e l’ambiente per cui sono stati
progettati.

IT - Italiano - Manuale di istruzioni
4 MNVCWASNX_1915_IT
• Accertarsi di installare i dispositivi in maniera
tale da garantire la sicurezza dell’impianto e del
personale addetto all’installazione.
• Scegliere la postazione di installazione in modo
che sia sucientemente solida da sostenere il
peso del dispositivo, considerando anche aspetti
ambientali particolari come esposizione a vento
forte.
• Si raccomanda di utilizzare solo stae o accessori
consigliate per l’installazione.
• La categoria di installazione (detta anche categoria
di sovratensione) specica i livelli della tensione
transitoria di rete alla quale l’apparato è soggetto.
La categoria dipende dal luogo di installazione
e dalla presenza di dispositivi di protezione
contro le sovratensioni. Un dispositivo per
ambienti industriali, connesso ai rami principali
dell’impianto di alimentazione è soggetto alla
categoria di installazione III. Se questo è il caso, è
richiesta una riduzione alla categoria II. Ciò può
essere ottenuto utilizzando un trasformatore
di isolamento con schermatura connessa a
terra tra il primario ed il secondario, o tramite
l’impiego di dispositivi di protezione contro le
sovratensioni (SPD), UL listed, connessi tra la fase
ed il neutro e tra il neutro e terra. I dispositivi SPD
UL listed, dovranno essere predisposti per limitare
sovratensioni transitorie in modo ripetitivo e per
le seguenti condizioni nominali di funzionamento:
Tipo 2 (Dispositivi SPD connessi permanentemente
alla rete di alimentazione, per installazioni dal lato
del carico del dispositivo di servizio); Corrente
nominale di scarica (In) 20kA minimi. Si possono
utilizzare ad esempio: FERRAZ SHAWMUT,
ST23401PG-CN, ST240SPG-CN specicati per
120Vac/240Vac, (In=20kA). La distanza massima tra
l'installazione e la riduzione è di 5m.
• Il produttore declina ogni responsabilità per
eventuali danni derivanti da un uso improprio
delle apparecchiature menzionate in questo
manuale. Si riserva inoltre il diritto di modicarne il
contenuto senza preavviso. Ogni cura è stata posta
nella raccolta e nella verica della documentazione
contenuta in questo manuale. Il produttore,
tuttavia, non può assumersi alcuna responsabilità
derivante dall'utilizzo della stessa. Lo stesso
dicasi per ogni persona o società coinvolta nella
creazione e nella produzione di questo manuale.
• Questo dispositivo è stato progettato per essere
ssato e collegato in maniera permanente
su un edicio o su una struttura adeguata. Il
dispositivo deve essere ssato e collegato in
maniera permanente prima di eettuare qualsiasi
operazione.
• Dato che la scelta della supercie di montaggio
è a cura dell’utente non si forniscono viti per il
ssaggio sicuro del dispositivo alla supercie. È
responsabilità dell’installatore utilizzare viti adatte
allo scopo specico richiesto.
• Prima di eseguire qualsiasi operazione assicurarsi
di togliere tensione al prodotto.
• L’impianto elettrico deve essere dotato di un
sezionatore di rete prontamente riconoscibile e
utilizzabile in caso di necessità.
• L'apparecchio è destinato all'installazione in un'
Area ad Accesso Limitato eettuata da personale
tecnico specializzato.
• Assicurarsi che i dispositivi collegati siano
completamente compatibili e adatti all’uso.
• Controllare che le temperature di esercizio siano
compatibili con i dispositivi.
• Qualsiasi intervento non espressamente approvato
dal costruttore fa decadere la garanzia.
Table of contents
Languages:
Other Videotec Water Pump manuals
Popular Water Pump manuals by other brands

GORMAN-RUPP PUMPS
GORMAN-RUPP PUMPS 4D-X3 3P Installation, operation, and maintenance manual with parts list

Taconova
Taconova TACOFLOW2 PURE 15 Installation and operating instructions

Speck
Speck P71/250-100RDK operating instructions

IWAKI
IWAKI APN-S041-D3 instruction manual

Enerpac
Enerpac ZU4204BB-Q instruction sheet

superior pump
superior pump 94505 owner's manual

Tunze
Tunze Osmolator 3155 Instructions for use

Grundfos
Grundfos DW Series Installation and operating instructions

BRÖTJE
BRÖTJE HEP 25-180-10 Assembly instructions

pumpa
pumpa BLUE LINE PMC1004P.1 manual

March Pumps
March Pumps 893-06 Safety Instructions & Preventive Maintenance

Pentair
Pentair NOCCHI VSD manual