3 of 18
Product
Instructions
PI-PR 566441 1017 (Multifunctional Thermostat) (EN ES FR)
Viega LLC, 12303 Airport Way, Ste. 395 • Broomfield, CO 80021 • Ph: 800-976-9819 • Fax: 800-976-9817
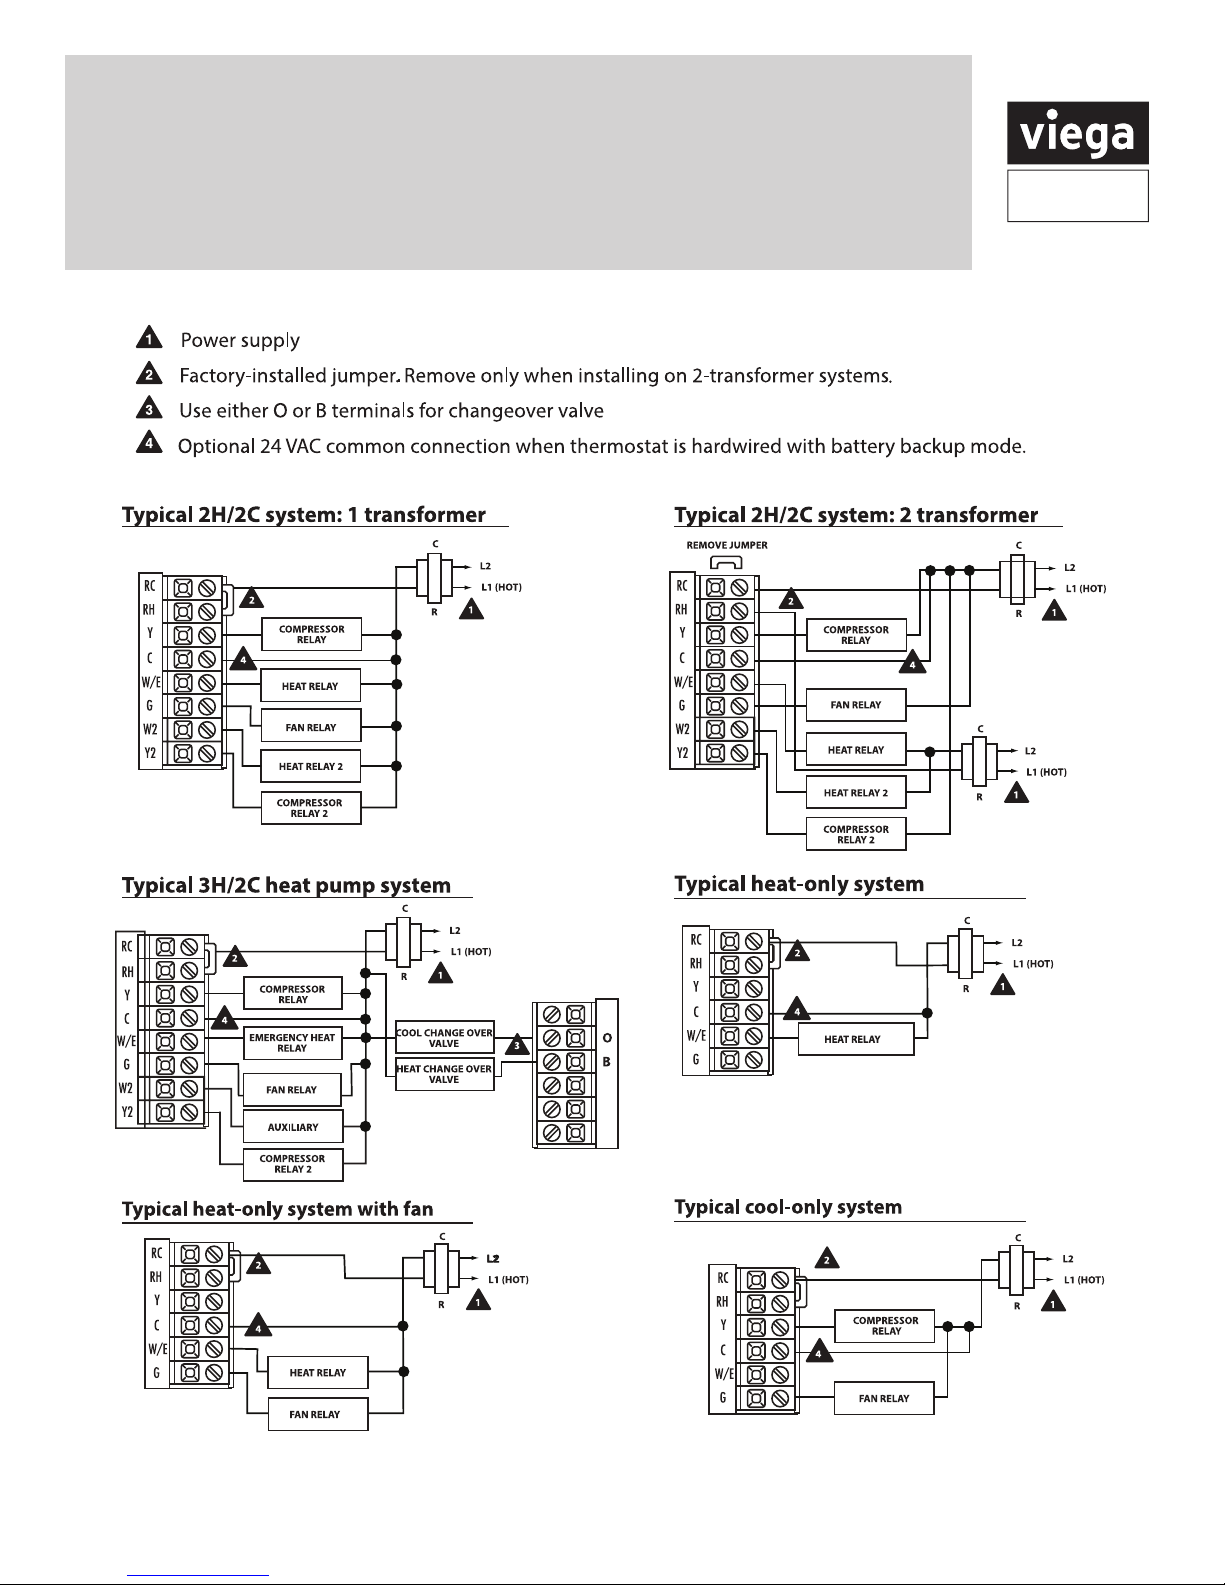
Thermostat wiring
1. If you are replacing a thermostat, make note of the
terminal connections on the thermostat that is being
replaced. In some cases the wiring connections will
not be color coded. For example, the green wire
may not be connected to the G terminal.
2. Loosen the terminal block screws. Insert wires then
retighten terminal block screws.
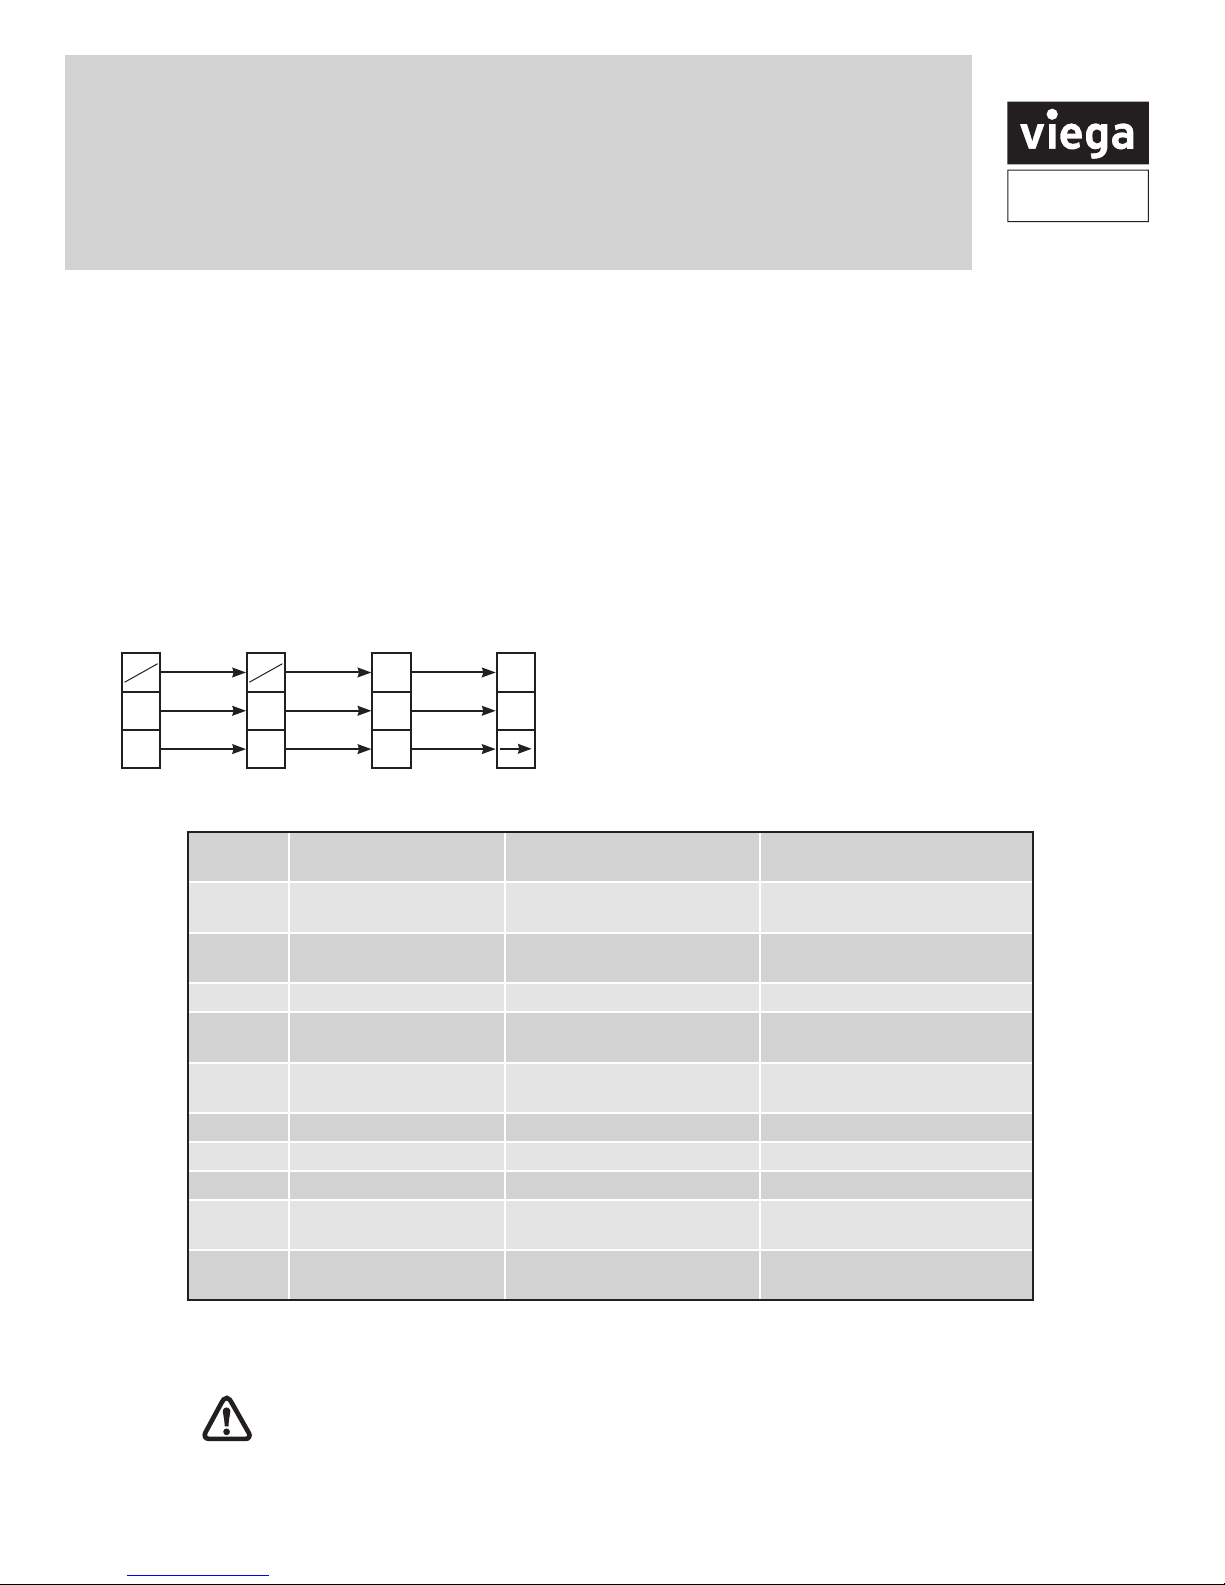
Viega thermostat terminal conversion
Power type
• 3 wire
• 3 wire with battery backup
• 2 wire with battery
Wire specifications
Use shielded or non-shielded 18-22 gauge thermostat wire.
Wiring Tips
C terminal
The C (common wire) terminal does not have to be
connected when the thermostat is powered by batteries.
NOTE: In systems with no emergency heat relay a jumper
can be installed between E and W2 to turn thermostat into
a single stage control.
Warning:
All components of the control system and the thermostat installation
must conform to Class II circuits per the NEC Code.
Terminal
2 Heat 2 Cool
Conventional System
2 Heat 2 Cool
Heat Pump System
3 Heat 2 Cool
Heat Pump System
RC Transformer power
(cooling)
Transformer power
(cooling)
Transformer power
(cooling)
RH Transformer power
(heating)
Transformer power
(heating)
Transformer power
(heating)
C Transformer common Transformer common Transformer common
B Energized in heating Heat pump changeover valve
energized in cooling
Heat pump changeover valve
energized in heating
O Energized in cooling Heat pump changeover valve
energized in cooling
Heat pump changeover valve
energized in cooling
G Fan relay Fan relay Fan relay
W/E First stage of heat First stage of emergency heat First stage of emergency heat
Y First stage of cool First stage of heat & cool First stage of heat & cool
Y2 Second stage of cool Second stage of cool Second stage of cool & second
stage of heat
W2 Second stage of heat Auxiliary heat relay,
second stage of heat
Auxiliary heat relay,
third stage of heat
Terminal designations
C
W
C
W/E
L
N
R
C
W
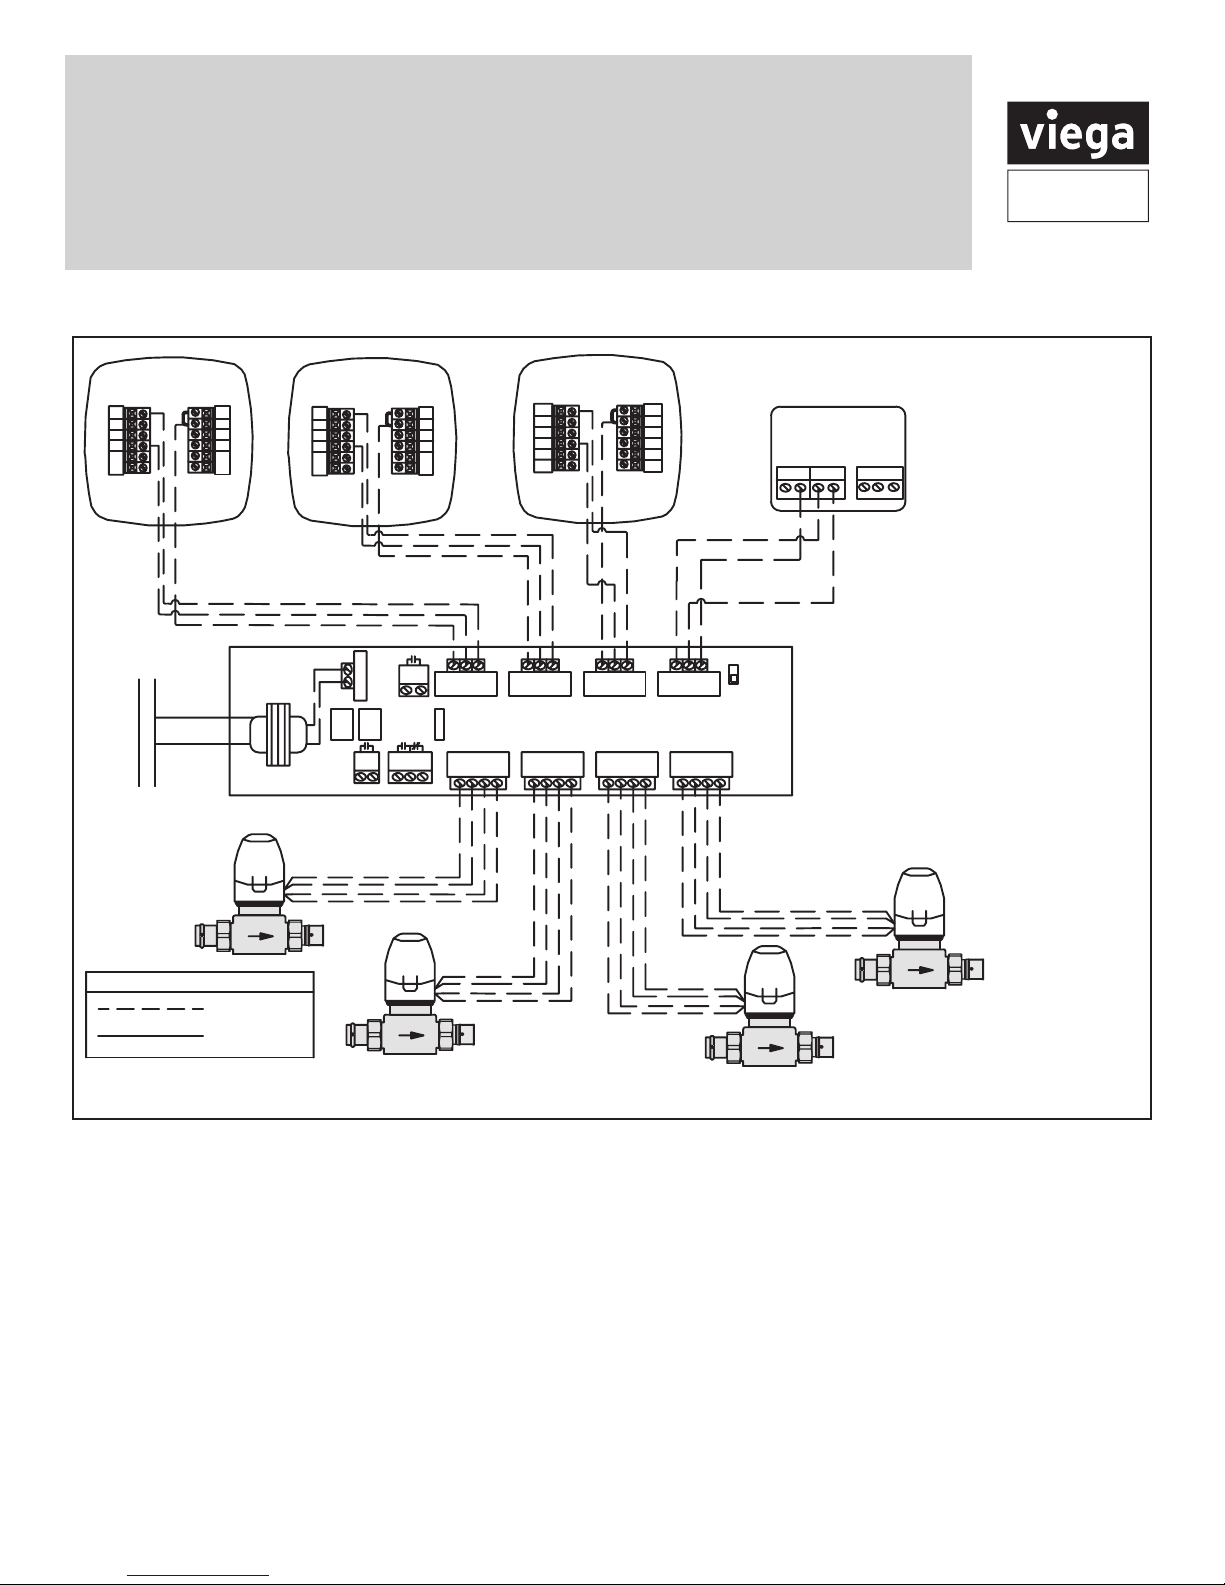
Thermostats
15116
15117
Thermostat
15118
Zone Control
18060
18062
18050
Zone Control
18032
Thermostat
18029
This thermostat is shipped from the factory to operate a conventional heating and cooling
system. See the "heat pump" conguration step on page 11 of this product instruction to
congure the thermostat for heat pump applications.
RH
RC
RH
RC