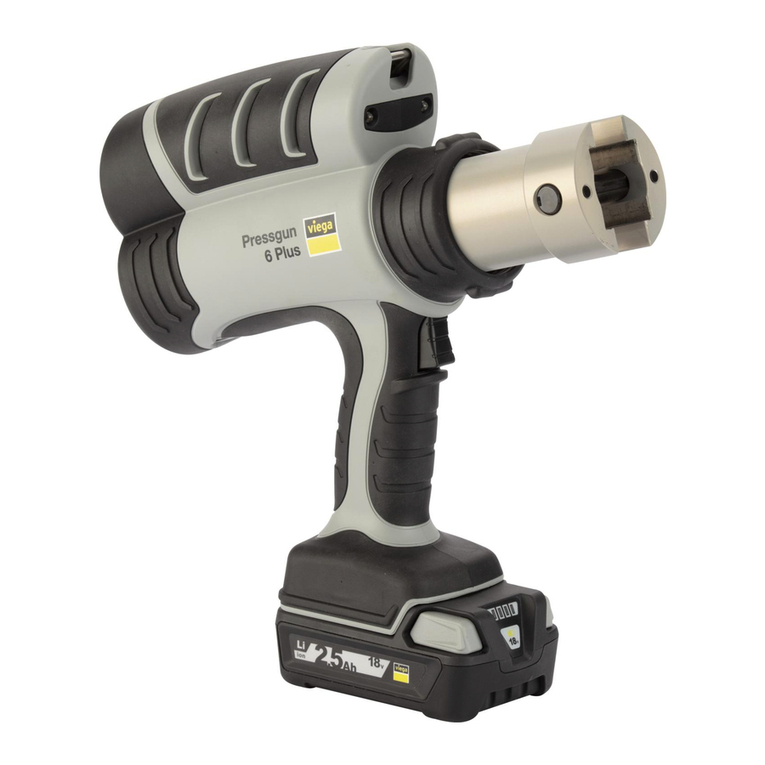
Viega Pressgun 5 User manual

Instructions for Use
Press machinePressgun 5
Model
0798.5
AU

Table of contents
1About these instructions for use 3
1.1 Target groups 3
1.2 Labelling of notes 3
1.3 About this translated version 4
1.4 Note on use of abbreviated terms 4
2Product information 5
2.1 Standards and regulations 5
2.2 General safety advice for electrical tools 5
2.3 Intended use 9
2.3.1 Areas of application 9
2.4 Product description 9
2.4.1 Overview 9
2.4.2 Technical data 10
2.4.3 Operating mode 12
2.4.4 Control elements and indicators at the press
machine 12
3Handling 14
3.1 Transport and storage 14
3.2 Commissioning 15
3.3 Carrying out the pressing process 16
3.4 Aborting the pressing process 17
3.5 Troubleshooting 17
3.6 Care and maintenance 18
3.6.1 Cleaning the press tools 18
3.6.2 Performing checks 19
3.6.3 Inspection and maintenance 19
3.7 Disposal 20
4Appendix 21
4.1 Warranty 21
4.2 Service partners 21
Table of contents
Press machinePressgun 5 2

1 About these instructions for use
Trade mark rights exist for this document; for further information, go to
viega.com/legal.
These instructions are a translation of the original operating instructions.
1.1 Target groups
The information in these operating instructions is directed at the fol‐
lowing groups of people:
nHeating and plumbing experts and trained personnel
This product must not be used by persons who do not have the afore‐
mentioned training or qualifications.
1.2 Labelling of notes
Warning and advisory texts are set aside from the remainder of the text
and are labelled with the relevant pictographs.
DANGER!
This symbol warns of possible life-threatening injury.
WARNING!
This symbol warns of possible serious injury.
CAUTION!
This symbol warns of possible injury.
NOTICE!
This symbol warns of possible damage to property.
This symbol gives additional information and hints.
About these instructions for use
Press machinePressgun 5 3

1.3 About this translated version
This instruction for use contains important information about the choice
of product or system, assembly and commissioning as well as intended
use and, if required, maintenance measures. The information about the
products, their properties and application technology are based on the
current standards in Europe (e.g. EN) and/or in Germany
(e.g. DIN/DVGW).
Some passages in the text may refer to technical codes in Europe/
Germany. These should serve as recommendations in the absence of
corresponding national regulations. The relevant national laws, stand‐
ards, regulations, directives and other technical provisions take priority
over the German/European directives specified in this manual: The
information herein is not binding for other countries and regions; as said
above, they should be understood as a recommendation.
1.4 Note on use of abbreviated terms
For reading comfort, the following abbreviated terms are used in these
instructions for use:
Term Abbreviated form
Viega system press jaws Press jaws
Viega system press rings Press rings
Viega system press tool Press tool
Combinations of for example:
nPress machine and press jaws
nPress machine and
Press Booster
nPress machine with hinged
adapter jaws and press ring or
press chain
nPress machine and press-in
attachment tool
About these instructions for use
Press machinePressgun 5 4

2 Product information
2.1 Standards and regulations
The following standards and regulations apply to Germany / Europe.
National regulations can be found on the relevant web site of your
country at viega.com.au/standards
Regulations from section: Technical data
Scope / Notice Regulations applicable in Ger‐
many
Oscillation emission value
Protection classes
EN 60745-1
2.2 General safety advice for electrical tools
This section contains general safety instructions for numerous different
products and electrical tools. Consequently, not every safety instruction
will apply to this tool.
WARNING!
Read all safety warnings, instructions, illus‐
trations and specifications provided with this
power tool.
Failure to follow all instructions listed below may result in
electric shock, fire and/or serious injury.
Save all warnings and instructions for future reference.
The term “power tool” in the warnings refers to your mains-operated
(corded) power tool or battery-operated (cordless) power tool.
a) Keep work area clean and well lit.
Cluttered or dark areas invite accidents.
b) Do not operate power tools in explosive atmospheres, such as in the
presence of flammable liquids, gases or dust.
Power tools create sparks which may ignite the dust or fumes.
c) Keep children and bystanders away while operating a power tool.
Distractions can cause you to lose control.
Work area safety
Product information
Press machinePressgun 5 5

a) Power tool plugs must match the outlet. Never modify the plug in any
way. Do not use any adapter plugs with earthed (grounded) power tools.
Unmodified plugs and matching outlets will reduce risk of electric shock.
b) Avoid body contact with earthed or grounded surfaces, such as
pipes, radiators, ranges and refrigerators.
There is an increased risk of electric shock if your body is earthed or
grounded.
c) Do not expose power tools to rain or wet conditions.
Water entering a power tool will increase the risk of electric shock.
d) Do not abuse the cord. Never use the cord for carrying, pulling or
unplugging the power tool. Keep cord away from heat, oil, sharp edges
or moving parts.
Damaged or entangled cords increase the risk of electric shock.
e) When operating a power tool outdoors, use an extension cord suit‐
able for outdoor use.
Use of a cord suitable for outdoor use reduces the risk of electric shock.
f) lf operating a power tool in a damp location is unavoidable, use a
residual current device (RCD) protected supply.
Use of an RCD reduces the risk of electric shock.
a) Stay alert, watch what you are doing and use common sense when
operating a power tool. Do not use a power tool while you are tired or
under the influence of drugs, alcohol or medication.
A moment of inattention while operating power tools may result in
serious personal injury.
b) Use personal protective equipment. Always wear eye protection.
Protective equipment such as a dust mask, non-skid safety shoes, hard
hat or hearing protection used for appropriate conditions will reduce
personal injuries.
c) Prevent unintentional starting. Ensure the switch is in the off-position
before connecting to power source and/or battery pack, picking up or
carrying the tool.
Carrying power tools with your finger on the switch or energising power
tools that have the switch on invites accidents.
d) Remove any adjusting key or wrench before turning the power tool
on.
A wrench or a key left attached to a rotating part of the power tool may
result in personal injury.
e) Do not overreach. Keep proper footing and balance at all times.
This enables better control of the power tool in unexpected situations.
f) Dress properly. Do not wear loose clothing or jewellery. Keep your hair
and clothing away from moving parts.
Loose clothes, jewellery or long hair can be caught in moving parts.
g) lf devices are provided for the connection of dust extraction and col‐
lection facilities, ensure these are connected and properly used.
Use of dust collection can reduce dust-related hazards.
Electrical safety
Personal safety
Product information
Press machinePressgun 5 6

h) Do not let familiarity gained from frequent use of tools allow you to
become complacent and ignore tool safety principles.
A careless action can cause severe injury within a fraction of a second.
a) Do not force the power tool. Use the correct power tool for your
application.
The correct power tool will do the job better and safer at the rate for
which it was designed.
b) Do not use the power tool if the switch does not turn it on and off.
Any power tool that cannot be controlled with the switch is dangerous
and must be repaired.
c) Disconnect the plug from the power source and/or remove the bat‐
tery pack, if detachable, from the power tool before making any adjust‐
ments, changing accessories, or storing power tools.
Such preventive safety measures reduce the risk of starting the power
tool accidentally.
d) Store idle power tools out of the reach of children and do not allow
persons unfamiliar with the power tool or these instructions to operate
the power tool.
Power tools are dangerous in the hands of untrained users.
e) Maintain power tools and accessories. Check for misalignment or
binding of moving parts, breakage of parts and any other condition that
may affect the power tool's operation. lf damaged, have the power tool
repaired before use.
Many accidents are caused by poorly maintained power tools.
f) Keep cutting tools sharp and clean.
Properly maintained cutting tools with sharp cutting edges are less likely
to bind and are easier to control.
g) Use the power tool, accessories and tool bits etc. in accordance with
these instructions, taking into account the working conditions and the
work to be performed.
Use of the power tool for operations different from those intended could
result in a hazardous situation.
h) Keep handles and grasping surfaces dry, clean and free from oil and
grease.
Slippery handles and grasping surfaces do not allow for safe handling
and control of the tool in unexpected situations.
a) Recharge only with the charger specified by the manufacturer.
A charger that is suitable for one type battery pack may create a risk of
fire when used with another battery pack.
b) Use power tools only with specifically designated battery packs.
Use of any other battery packs may create a risk of injury and fire.
c) When battery pack is not in use, keep it away from other metal
objects, like paper clips, coins, keys, nails, screws or other small metal
objects, that can make a connection from one terminal to another.
Shorting the battery terminals together may cause burns or a fire.
Power tool use and care
Battery tool use and care
Product information
Press machinePressgun 5 7
d) Under abusive conditions, liquid may be ejected from the battery;
avoid contact. lf contact accidentally occurs, flush with water. lf liquid
contacts eyes, additionally seek medical help.
Liquid ejected from the battery may cause irritation or burns.
e) Do not use a battery pack or tool that is damaged or modified.
Damaged or modified batteries may exhibit unpredictable behaviour
resulting in fire, explosion or risk of injury.
f) Do not expose a battery pack or tool to fire or excessive temperature.
Exposure to fire or temperature above 130 °C may cause explosion.
g) Follow all charging instructions and do not charge the battery pack or
tool outside the temperature range specified in the instructions.
Charging improperly or at temperatures outside the specified range may
damage the battery and increase the risk of fire.
a) Have your power tool serviced by a qualified repair person using only
identical replacement parts.
This will ensure that the safety of the power tool is maintained.
b) Never service damaged battery packs.
Service of battery packs should only be performed by the manufacturer
or authorized service providers.
a) Use the correct tools.
Only use the tools and accessories listed in the operating instructions.
Do not use electric tools for purposes or work they are not intended for.
b) Secure the workpiece.
Use clamping devices or a vice to hold the workpiece. lt is held more
securely than it would be by hand and both your hands are free to
operate the tool.
c) Leave protective equipment in place.
d) Hand-held devices must not to be used as stationary equipment.
e) Do not hold the device in the compression area.
f) Do not hold any body parts or foreign objects between the press jaws
when activating the pressing cycle. Do not hold the jaw lever during the
pressing cycle. Danger of crushing!
There is a danger of crushing the Fingers and hands.
g) Observe the safety instructions for the cleaning and corrosion protec‐
tion agents used by you.
h) Ensure that the workpiece is not under tension.
Service
Basic safety rules
Product information
Press machinePressgun 5 8

2.3 Intended use
2.3.1 Areas of application
The Viega system press machine Pressgun 5 is intended for pressing
press connectors into the respective piping systems. In combination
with Viega system press jaws, the press tool is suitable for use with all
Viega plumbing and heating installation systems up to and including
dimension 108 as well as dimension ⅜ up to 2 inches.
2.4 Product description
2.4.1 Overview
Fig. 1: Overview of the machine elements
1 - LED light
2 - Cylinder head with press jaw fixture (180° rotatable)
3 - Retaining bolt
4 - Start button
5 - Bracket for battery or mains adapter
6 - Battery (depends on scope of delivery)
7 - Mains adapter (depends on scope of delivery)
8 - Button for manual release
Product information
Press machinePressgun 5 9

Refer to the model number to see the scope of delivery of your press
machine in the table below:
Model number 2293.2 2293.1 5393.2 5393.1 2295.2 2295.1 0798.5
Pressgun 5 X X X X X X X
Press jaw set PT2 (dimensions
15 / 22 / 28)
X X - - - - -
Press jaw set Raxofix (dimen‐
sions 16 / 20 / 25)
- - X X - - -
Lithium ion rechargeable bat‐
tery (18 V / 2.0 Ah)
X - X - X - X
Battery charger (230 V / 18 V) X - X - X - X
Mains adapter 230 V / 50 Hz - X - X - X -
Case X X X X X X X
Instructions for use X X X X X X X
2.4.2 Technical data
Nominal output 490 W
Voltage 18 V DC
Machine monitoring electronic
Sound pressure level 80 dB(A)
Uncertainty 3 dB(A)
Oscillation level < 2.5 m/s2
Uncertainty (K) 1.5 m/s2
Power transmission hydraulic
Thrust on piston 32 kN
Switch-on duration Maximum three pressings per
minute (≤ DN54)
Weight with rechargeable battery 3.8 kg
Protection class IP 44 *
* pursuant to the applicable directives, see
Ä
‘Regulations from sec‐
tion: Technical data’ on page 5
Scope of delivery
Press machine
Product information
Press machinePressgun 5 10

The specified oscillation emission value was measured pursuant to the
applicable directives and is suitable for comparing the machine with
other electrical tools, see
Ä
‘Regulations from section: Technical data’
on page 5.
Data on the oscillation emission value (reference period 8 h):
nDefines a daily trigger value: > 2.5 m/s2
nDaily exposure limit value: max. 5 m/s2
The mains adapter is a voltage transformer which transforms the mains
voltage from 230 V AC current to 18 V DC current. Use the connection
cable comprised in the delivery to plug the mains adapter in the socket
provided on site.
Input 220–240 VAC
Tolerance range ±5 %
Frequency 50–60 Hz
Output 18 V DC / max. 33 A
Dimensions (L x W x H) 124 x 78.5 x 73 mm
Weight 1 kg
Cable length 4.95 m
Overheat protection 100 °C / mains adapter switched
off
Short-circuit-proof 45 A
Overload protection provided
Double isolation provided
Operating temperature -10–60 °C
Storage Dry up to 65°C
Rechargeable battery technology Lithium ions
Capacity 18 V / 2.0 Ah
18 V / 4.0 Ah
Charger Original charger (Viega)
Charging time 45 min (18 V / 2.0 Ah)
60 min. (18 V / 4.0 Ah)
Mains adapter – depending on scope of delivery
Lithium ion rechargeable battery – depending on scope of delivery
Product information
Press machinePressgun 5 11

Input 120 VAC or 230 VAC
Tolerance range ±10 V
Frequency 50–60 Hz
Input current max. 1.0 A
Output 18 V DC
Rechargeable battery technology Lithium ions
Weight 0.73 kg
Dimensions (L x W x H) 153 x 142 x 94 mm
2.4.3 Operating mode
The Pressgun 5 is an electro-hydraulically operated press machine.
Pressing is enabled by switching the machine on and pressing the Start
button. The hydraulically operated roller head moves forwards into the
press jaw and closes it with a power of 32 kN. This presses the press
connector into the pipeline.
The Pressgun 5 operates with a voltage of 18 V DC. The power is sup‐
plied via battery or mains adapter.
2.4.4 Control elements and indicators at the press machine
1
2
Fig. 2: Control elements on the front of the press machine
1 - On/Off button
2 - LED indicator
In order to avoid incorrect operation and for flawless pressing, the press
machine is electronically monitored. LEDs indicate the operating status
and any machine malfunction.
Battery charger – depending on scope of delivery
LED indicators
Product information
Press machinePressgun 5 12

The following are monitored:
nRetaining bolt
nPressing time
nVoltage / battery capacity
nService intervals
nOperating temperatures
Significance of the LEDs
LED Status Description
Green flashing Low battery charge level – Recharge bat‐
tery.
lit up Machine is ready for operation.
Red flashing Machine is blocked – push retaining bolt
in.
lit up Outside the recommended temperature
range (-5°C – 50°C)
Yellow flashing 40000 strokes reached/exceeded – the
safety shutdown will occur after a further
2000 pressings
lit up Machine is blocked – Machine is faulty,
or 42000 strokes reached
Use the On/Off button to switch the press machine on and off.
Keep the On/Off button pressed down to carry out a function test of the
LED indicator.
The press machine switches off automatically after ten
minutes if it is not used after switch-on.
If the power supply is interrupted during the pressing, the release button
can be used to manually return the roller head to its start position.
The press jaw fixture in the front part of the cylinder head is 180° rotat‐
able to allow for flexible alignment of the press jaws to the pressing
point.
On/Off button
Button for manual release
Rotatable cylinder head
Product information
Press machinePressgun 5 13

3 Handling
3.1 Transport and storage
NOTICE!
Transporting and storing the rechargeable
battery
Observe the manufacturer's instructions for transport and
storage.
DANGER!
Risk of crushing!
Risk of getting your fingers and hands crushed.
nStore the press machine out of reach of children and
unauthorised persons.
Observe the following instructions for transport and storage of the press
machine:
nDisconnect the press machine from the power supply.
nStore the press machine in a dry, frost-free place in the case pro‐
vided.
The lithium ion rechargeable battery will need approx. five
complete charging and discharging cycles to reach its full
capacity.
Protect the press machine and accessories from the following external
influences:
nImpacts
nMoisture and humidity
nDust and dirt
nFrost and extreme heat
nChemical solutions and vapours
The press machine has a high level of EMC protection. However, if elec‐
tromagnetic waves do switch on the press machine, the press machine
can be briefly disconnected from its power supply. This usually rem‐
edies the fault. If not, remove the source of the interference.
Handling
Press machinePressgun 5 14

3.2 Commissioning
DANGER!
Risk of electric shock!
An electric shock can lead to burns and serious injury and
even death.
nCheck that the mains cable status is correct before
commissioning the mains adapter.
nUnplug the mains plug before removing the mains
adapter from the press machine.
nDo not place the press machine on wet surfaces while
the mains adapter is connected to the mains.
CAUTION!
Risk of crushing by operating the press
machine without press jaws!
If no press jaw is inserted, your fingers may get caught in
the danger zone and get crushed when the press machine
starts up.
nDo not use the press machine without a press jaw
inserted.
nDo not put your fingers in the danger zone.
▶Check the scope of delivery.
▶Insert the mains adapter or the fully charged lithium ion recharge‐
able battery into the mounting bracket at the handle.
▶Pull out the retaining bolt at the press jaw fixture.
Handling
Press machinePressgun 5 15

INFO! The figures show the typical use of a press jaw. Use the
hinged adapter jaws in the same way.
▶Slide the retaining bolt in as far as it will go.
▶Press the On/Off button.
▷The green LED is lit. The press machine is ready for operation.
3.3 Carrying out the pressing process
CAUTION!
Risk of crushing due to improper use!
nDo not start the press machine without a press jaw
inserted.
nDo not reach into the area of the moving roller head or
press jaws during pressing.
nIn order to operate it safely, firmly hold the press
machine on both the handle and on the press machine
head.
NOTICE!
Risk of property damage due to damaged
press jaws!
Using a damaged, incorrectly dimensioned, or worn press
jaw may result in an incorrect pressing.
nCheck the press jaw before use for any visible defect,
and if applicable replace the press jaw.
nOnly use press jaws that are the right dimension and
are compatible with the press connector system.
Handling
Press machinePressgun 5 16

The press jaw must be able to lock properly during
pressing.
nEnsure that there is enough space on the press point.
nKeep the press jaw contour and the area around the
press point free from dirt and any objects that could
hinder complete pressing.
Requirements:
nThe press machine is ready for operation, the green LED is illumi‐
nated.
nA press jaw has been correctly inserted.
▶Check whether the nominal width of the press connector matches
the nominal width of the press jaw.
▶Fit the press machine with the press jaw inserted accurately and at
a right angle to the pipe axis on the press connector.
▶Keep the Start button pressed until the automatic process starts.
▷Once the press machine creates the press force, it automatically
completes pressing from this point until the entire press stroke
has been carried out.
▶After full retraction of the roller head, open the press jaw and loosen
it from the press connector.
In case of interruption of the power supply during
pressing, press the manual release button to return the
roller head to its initial position.
Then remove the incompletely pressed press connector
from the installation and use a new press connector.
3.4 Aborting the pressing process
If the roller head has not yet touched the press jaw and the press
machine has not yet built up any pressing force, the pressing process
can simply be aborted by releasing the Start button.
Next, press the button to manually release and bring roller head back to
its starting position.
If the press machine is in automatic mode, the pressing can only be
aborted by pressing the button to manually release.
3.5 Troubleshooting
In case of malfunction, check the following potential causes:
90°
Handling
Press machinePressgun 5 17

Fault Cause Solution
Actuating the Start
button does not
trigger pressing.
The press machine is
not switched on.
Press the On/Off
button. The green
LED is lit.
The battery is too
weak.
Fully charge the bat‐
tery.
The battery or mains
adapter is not prop‐
erly inserted.
Check it is correctly
located in the
mounting bracket.
The mains cable of
the mains adapter is
not connected to the
mains.
Connect it to the
power supply.
The power supply is
not correct.
Establish the power
supply as specified by
the manufacturer.
Contact an authorised service partner if the press machine does not
start after carrying out the measures above.
3.6 Care and maintenance
The tools are subject to normal wear and tear; for this reason, they must
be maintained in regular intervals. Only service partners authorised by
Viega may service and maintain the tools. See
Ä
Chapter 3.6.3 ‘Inspec‐
tion and maintenance’ on page 19.
3.6.1 Cleaning the press tools
NOTICE!
Damage due to fluids!
Make sure that no fluids get inside the press machine.
Never dip the press machine into fluids.
Requirements:
nThe press machine is not energised (disconnected from the mains or
rechargeable battery has been removed).
nNo press jaw is inserted.
▶Wipe the press machine down with a slightly damp cloth.
▶Clean the press rolls of the roller head dry and then treat with main‐
tenance oil (art. no. 667 924).
Press machine
Handling
Press machinePressgun 5 18

▶Remove dirt and metallic residues from the press jaw or the press
ring.
▶Remove residues from the press jaw contour (e.g. using Viega
cleaning fleece, art. no. 104 412).
▶Apply maintenance oil to the hinges and all moving parts (art.
no. 667 924).
▶Then thinly spray the press jaw or press ring with maintenance oil
(art. no. 667 924) and let it work for a short time before wiping off
with a lint-free cloth.
3.6.2 Performing checks
To ensure trouble-free operation, perform checks at regular intervals:
▶At the end of each use, check the press contour of the press jaws
and press rings for damage or visible wear.
▶Check the press jaws and press rings for smooth operation.
▶Check all press jaws and press rings for proper function by carrying
out a test pressing with press connector inserted.
In case of malfunctions, contact an authorised service partner.
3.6.3 Inspection and maintenance
The functional safety and permanent leak tightness of the Viega press
connector systems depend primarily on the functional and operational
safety of the Viega system press tools, which comprise the Viega press
machine plus Viega system press jaw, ring, chain, and hinged adapter
jaw. The Viega press tools were developed and adapted specifically for
use with the Viega press connector systems. Viega does not check
whether these system press tools can be used for pressing other manu‐
facturers' systems. In particular, no statement can be made on whether
it is possible to create permanently leakproof connections in this way.
NOTICE!
Do not attempt to carry out repairs yourself. Have repairs
carried out only by authorised service partners.
Press jaws and press rings
Handling
Press machinePressgun 5 19

Service information at the machine
Yellow LED Cause Consequences
flashing 40000 pressings
made
The safety shutdown will occur
after a further 2000 pressings.
lit up 42000 pressings
made
The press machine has activated
the safety shutdown function.
Send the press machine to your
nearest service partner for inspec‐
tion and maintenance.
Hydraulic oil is subject to a natural ageing process. Viega recommends
to have the machine inspected and maintained at least every four years.
In case of malfunction, the electronic monitoring function will automati‐
cally lock the press machine. Please contact an authorized service
partner.
nTop: Version 1
nBottom: Version 2, from 2019, with annually changing colour shade
The Viega system press jaws and system press rings have a label
showing the date when the next maintenance is due. Respect the main‐
tenance dates in order to guarantee safety and proper function. After
completed maintenance, the Viega service partner will apply a new
sticker.
3.7 Disposal
Do not dispose of the press machine in household waste and do not
scrap it. For environmentally compatible disposal, send the press
machine to your local service partner or pass it to a recycling company.
Maintenance interval
Press jaws and press rings
2 0 X X
299
Fig. 3: Variants of the maintenance label
(example representation)
Handling
Press machinePressgun 5 20
This manual suits for next models
1
Table of contents
Other Viega Tools manuals

Viega
Viega MegaPress Z3 Actuator User manual

Viega
Viega Megapress User manual

Viega
Viega 50000 Instruction sheet

Viega
Viega Pressgun Picco User manual

Viega
Viega 2489.1 User manual

Viega
Viega Smartpress User manual

Viega
Viega PureFlow Instruction sheet

Viega
Viega Pressgun Picco 6 Plus User manual

Viega
Viega PureFlow 50030 Instruction sheet

Viega
Viega 6 PlusPress User manual