Viessmann Vitovent 300-W Quick guide

Installation and service instructions
for contractors
VIESMANN
Vitovent 300-W
Type H32S C325
Type H32S C400
Mechanical ventilation system with heat recovery
for a maximum air flow rate of 325 m3/h and 400 m3/h
VITOVENT 300-W
6152162 GB 4/2020 Please keep safe.

2
Please follow these safety instruc-
tions closely to prevent accidents
and material losses.
Safety instructions explained
Danger
This symbol warns against the risk
of injury.
!Please note
This symbol warns against the risk
of material losses and environmen-
tal pollution.
Note
Details identified by the word "Note"
contain additional information.
Target group
These instructions are exclusively inten-
ded for qualified contractors.
■Work on electrical equipment may only
be carried out by a qualified electrician.
■Ventilation units and systems may only
be installed and commissioned by
trained ventilation specialists.
Regulations to be observed
■National installation regulations
■Statutory regulations for the prevention
of accidents
■Statutory regulations for environmental
protection
■Codes of practice of the relevant trade
associations
■All relevant safety regulations as
defined by DIN, EN, DGW, VDE and
locally applicable standards
AT: ÖNORM, EN and ÖVE
CH: SEV, SUVA, SVTI, SWKI and
SVGW
Safety instructions
Safety instructions
6152162

3
Working on the system
■Isolate the system from the power sup-
ply (e.g. at a separate MCB/fuse or a
mains isolator) and check that it is no
longer 'live'.
Note
In addition to the control circuit there
may be several power circuits.
Danger
Contact with live components can
result in severe injuries. Some
components on PCBs remain live
even after the power supply has
been switched off.
Prior to removing covers from the
appliances, wait at least 4 minutes
until the voltage has completely
dropped out.
■Safeguard the system against recon-
nection.
!Please note
Electronic assemblies can be dam-
aged by electrostatic discharge.
Prior to commencing any work,
touch earthed objects such as heat-
ing or water pipes to discharge
static loads.
Repair work
!Please note
Repairing components that fulfil a
safety function can compromise the
safe operation of the system.
Replace faulty components only
with genuine Viessmann spare
parts.
Auxiliary components, spare and wearing parts
!Please note
Spare and wearing parts that have
not been tested together with the
system can compromise its func-
tion. Installing non-authorised com-
ponents and making non-approved
modifications or conversions can
compromise safety and may invalid-
ate our warranty.
For replacement, use only spare
parts supplied or approved by
Viessmann.
Safety instructions
Safety instructions (cont.)
6152162

4
1. Information Disposal of packaging ............................................................................ 5
Symbols ................................................................................................. 5
Intended use .......................................................................................... 6
Passive house use ................................................................................. 6
Product information ................................................................................ 6
■Spare parts lists .................................................................................. 7
■Information about parameter settings, diagnosis and troubleshooting 7
2. Preparing for installation Siting ...................................................................................................... 8
■Installation requirements .................................................................... 8
■Dimensions ......................................................................................... 9
■Minimum clearances ........................................................................... 11
Protecting the mechanical ventilation system ........................................ 11
3. Installation sequence Installing the Vitovent ............................................................................. 12
■Wall mounting ..................................................................................... 12
■Floorstanding installation .................................................................... 12
Connecting the outdoor air and exhaust air pipes ................................. 13
Connecting the condensate drain .......................................................... 13
■Maintenance-free waterless trap (standard delivery) ......................... 14
Electrical connections ............................................................................ 14
■Overview of electrical connections ..................................................... 15
■Fitting and connecting the ventilation programming unit .................... 15
■Connecting the heat pump ................................................................. 15
■Installing the wireless operating switch (accessories) ........................ 16
■Air pressure switch (on site) ............................................................... 18
■Additional external electric preheating coil ......................................... 18
■Central humidity sensor (accessories) ............................................... 18
■CO2 sensor (accessories) ................................................................... 18
■Power supply ...................................................................................... 19
4. Commissioning, inspec-
tion, maintenance
Steps - commissioning, inspection and maintenance ............................ 20
5. Maintenance Removing the PCB cover ...................................................................... 29
Temperature sensor resistance curve .................................................... 29
6. Connection and wiring dia-
gram
Controller PCB ....................................................................................... 30
7. Commissioning/service
reports
Commissioning report ............................................................................ 31
Example of commissioning report .......................................................... 32
8. Specification ................................................................................................................ 33
9. Decommissioning and dis-
posal
Final decommissioning and disposal ..................................................... 35
10. Certificates Declaration of conformity ....................................................................... 36
11. Keyword index ................................................................................................................ 37
Index
Index
6152162

5
Please dispose of packaging waste in line with statu-
tory regulations.
Symbols
Symbol Meaning
Reference to other document containing
further information
1.
Step in a diagram:
The numbers correspond to the order in
which the steps are carried out.
Warning of material losses and environ-
mental pollution
Live electrical area
Pay particular attention.
■Component must audibly click into place.
or
■Acoustic signal
■Fit new component.
or
■In conjunction with a tool: Clean the sur-
face.
Dispose of component correctly.
Dispose of component at a suitable collec-
tion point. Do not dispose of component in
domestic waste.
The steps in connection with commissioning, inspec-
tion and maintenance are found in the "Commission-
ing, inspection and maintenance" section and identified
as follows:
Symbol Meaning
Steps required during commissioning
Not required during commissioning
Steps required during inspection
Not required during inspection
Steps required during maintenance
Not required during maintenance
Control modes for mechanical ventilation systems
to ErP
Symbol Meaning
Manual control (ON/OFF)
Time control (via time switch, time pro-
grams)
Central demand control (central capturing
of sensor data in addition to time control or
manual control)
Control according to local demand (captur-
ing of multiple sensor data in addition to
time control or manual control)
Symbols on the ventilation unit
Symbol Meaning
Supply air
Exhaust air
Extract air
Outdoor air
Information
Disposal of packaging
6152162
Information

6
The appliance is only intended to be installed and
operated in ventilation systems that comply with
EN 1946-6, with due attention paid to the associated
installation, service and operating instructions. It is
only designed for the controlled mechanical ventilation
of living spaces.
Intended use presupposes that a fixed installation in
conjunction with permissible, system-specific compo-
nents has been carried out.
Commercial or industrial usage for a purpose other
than mechanical ventilation of living spaces shall be
deemed inappropriate.
Any usage beyond this must be approved by the man-
ufacturer for the individual case.
Incorrect usage or operation of the appliance (e.g. the
appliance being opened by the system user) is prohibi-
ted and results in an exclusion of liability. Incorrect
usage also occurs if the components in the ventilation
system are modified from their intended function.
Note
The appliance is intended exclusively for domestic
use, i.e. even users who have not had any instruction
are able to operate the appliance safely.
Passive house use
Vitovent 300-W meets the requirements for passive
house use.
Product information
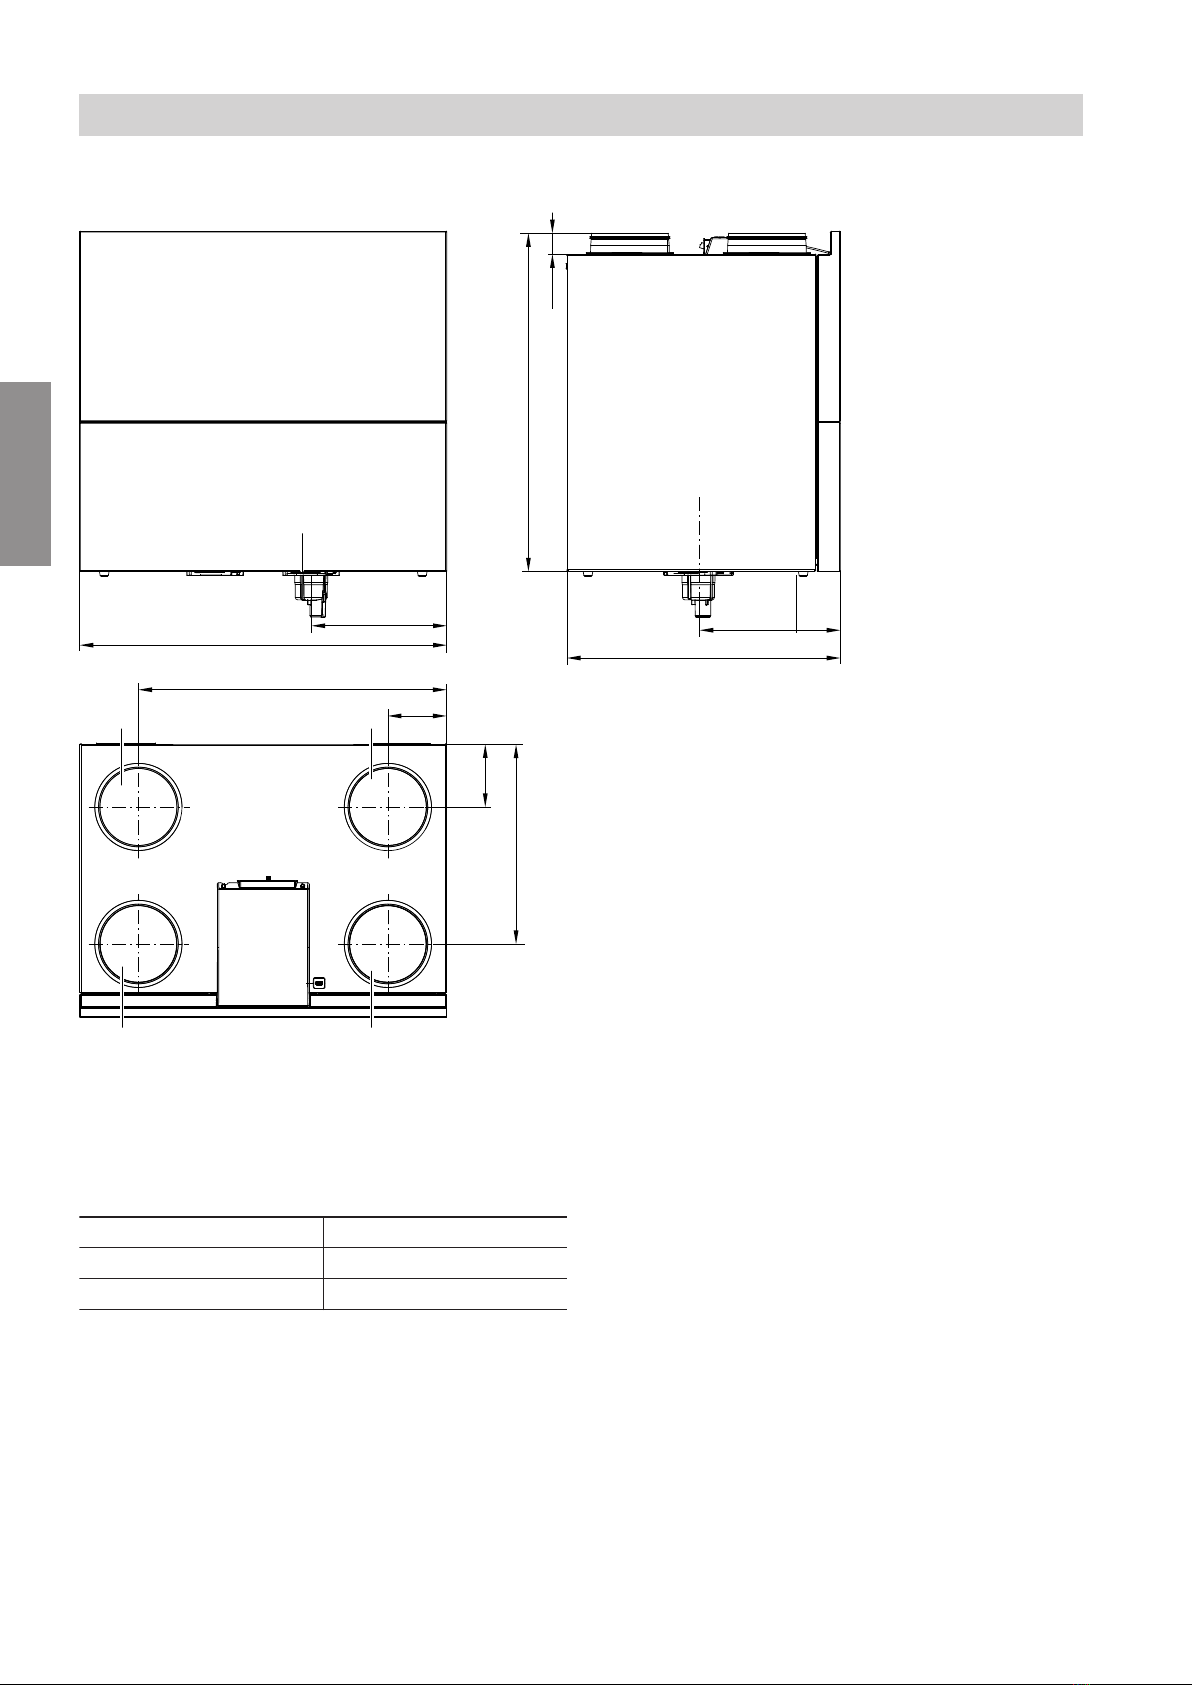
The Vitovent 300-W is a mechanical ventilation unit for
detached houses or apartments with up to 440 m2 of
living space. The Vitovent 300-W is available in left or
right-hand versions. In the left-hand version, the supply
air and extract air connections are on the left side of
the unit. In the right-hand version, these connections
are on the right side of the unit.
The ventilation unit is operated using the ventilation
programming unit, type LB1, or the "Vitotronic 200 con-
trol unit, type WO1C", of a Viessmann heat pump.
When fresh outdoor air is drawn into the ventilation
unit, it is first passed through a filter. The outdoor air is
then preheated in the countercurrent heat exchanger
by the energy from the extract air, without the two air
flows mixing. The cleaned and preheated outdoor air is
then routed through the ductwork as supply air to the
rooms.
The extract air is drawn out of rooms where moisture
and odours are created (kitchen, bathroom, WC) and
then transported to the ventilation unit via the duct-
work. There, the extract air is purified by means of a fil-
ter to protect the countercurrent heat exchanger. At the
heat exchanger, the extract air preheats the cooler out-
door air according to the countercurrent principle and
is then routed out of the building via the exhaust air
duct.
Heat recovery is switched off automatically in line with
the temperatures inside and outside the building. This
is achieved by closing the bypass damper. This ena-
bles the inside of the building to be cooled by the out-
door air, e.g. on cooler summer nights.
The constant flow rate control ensures a defined, con-
stant air flow rate on the supply and extract air side,
irrespective of the static pressure of the ductwork. The
built-in preheating coil ensures balanced operation
even at outside temperatures down to about –10 °C
and so ensures a consistently high heat recovery level.
For operation below this temperature, an additional
electric preheating coil (accessories) can be built into
the outdoor air duct.
Time programs can be set on the programming unit of
the heat generator or ventilation unit to match the
mechanical ventilation system to demands.
The ventilation unit must always remain switched on to
expel any moisture.
Shutting down the system creates a risk of condensa-
tion forming inside the ventilation unit and on the build-
ing structure (moisture damage).
The ventilation unit has active monitoring of the instal-
led supply air and extract air filters. Required filter
changes are indicated on the respective programming
unit and can therefore be carried out as necessary.
Information
Intended use
6152162
Information

7
Spare parts lists
Information about spare parts can be found at
www.viessmann.com/etapp or in the Viessmann
spare part app.
Information about parameter settings, diagnosis and troubleshooting
Installation and service instructions for "Ventila-
tion programming unit, type LB1" or heat pump
control unit "Vitotronic 200, type WO1C"
Information
Product information (cont.)
6152162
Information

8
Installation requirements
■Preferably site the ventilation unit inside the airtight
and thermally insulated building envelope.
!Please note
The installation room must be dry and free
from the risk of frost.
Ensure ambient temperatures between
2 and 35 °C.
■The ventilation unit can be mounted on the wall or on
a mounting base.
■Keep ductwork to the extract air and, where appro-
priate, supply air areas short.
■Thermally insulated supply air and extract air pipes
that are routed through unheated areas of the build-
ing in accordance with DIN 1946-6 (not applicable to
EPP pipes or bends).
■A standard socket is required for the power supply.
■Connect the condensate drain to a waste water pipe.
■The ventilation unit must be accessible for mainte-
nance purposes.
Possible installation sites:
■Separate plant room, storage area or utility room on
the ground floor
■Cellar
■Thermally insulated long pane attic room
Open flue combustion equipment and Vitovent
Danger
The simultaneous operation of open flue com-
bustion equipment (e.g. an open fireplace) and
the Vitovent in a space with combustion air inter-
connection results in dangerous negative pres-
sure in the interior. Negative pressure can result
in flue gas re-entering the room.
In order to prevent health risks, observe the fol-
lowing:
■Never operate the Vitovent simultaneously with
open flue combustion equipment (e.g. open fire-
place).
■Only operate combustion equipment in room sealed
mode with a separate combustion air supply. We rec-
ommend combustion equipment that has general
building approval as room sealed combustion equip-
ment of the Deutsches Institut für Bautechnik (DIBt)
[Germany].
■Keep doors to boiler rooms that are not part of the
combustion air interconnection with the living space
airtight and shut.
Information regarding the operation of the Vitovent
in conjunction with open flue combustion equip-
ment
■On-site safety equipment must be installed that will
switch off the ventilation unit when there is negative
pressure inside the room.
■The relevant flue gas inspector must give his/her
approval [check local regulations].
■Frost protection for the countercurrent heat
exchanger is ensured by means of the integral pre-
heater coil. For operation with even lower outside
temperatures, provide an additional external electric
preheater coil (accessories) or a geothermal heat
exchanger (on site) in the outdoor air duct.
Extractor hoods, extracting tumble dryers and the
Vitovent
!Please note
The simultaneous operation of extractor hoods
or extracting tumble dryers and the ventilation
unit in interconnected rooms results in negative
pressure inside the room.
Never link extractor hoods or extracting tumble
dryers into the ventilation unit ductwork.
Set up kitchen extractor hoods as recirculating
extractors, which is more energy efficient.
Never connect existing extractor hoods to the extract
air duct of the mechanical ventilation system for the
following reasons:
■Hygiene, contamination:
grease deposits in the extract air system
■Noise from the supply air valves:
Extractor hoods operate with a substantially greater
air flow rate (> 300 m3/h) than the ventilation unit.
The generated negative pressure creates a "short
circuit" inside the system, as the amount of differen-
tial air must be made up by the ventilation ductwork.
Connect extractor hoods via a coaxial exhaust air sys-
tem to enable the differential air volume to be replen-
ished.
Provide an interlock for the extractor when using an
extractor hood in conjunction with open flue combus-
tion equipment: See chapter "Open flue combustion
equipment and Vitovent"
Preparing for installation
Siting
6152162
Installation

9
Dimensions
Type H32S C325/C400 (R), right-hand version
750
45
695
270
560
630
120
410
130
E
AB
DC
F
270
Fig. 1
AExtract air
BExhaust air
COutdoor air
DSupply air
EElectrical terminal area
FWaterless trap (standard delivery) with continuing
connection DN 32
Type Connections
H32S C325 (R) DN 160
H32S C400 (R) DN 180
Preparing for installation
Siting (cont.)
6152162
Installation

10
Type H32S C325/C400 (L), left-hand version
750
270
45
695
270
560
630
120
410
130
E
CD
BA
F
Fig. 2
AExtract air
BExhaust air
COutdoor air
DSupply air
EElectrical terminal area
FWaterless trap (standard delivery) with continuing
connection DN 32
Type Connections
H32S C325 (L) DN 160
H32S C400 (L) DN 180
Preparing for installation
Siting (cont.)
6152162
Installation

11
Minimum clearances
A
600
30 30
Fig. 3
AVitovent 300-W
Protecting the mechanical ventilation system
!Please note
Dust entering the ventilation unit and the duct-
work can result in faulty operation of the
mechanical ventilation system.
Prevent the ingress of dust whilst building work
is in progress by the following measures:
■Following the installation, close all supply air and
extract air vents, for example with self-adhesive film.
■Only start the ventilation unit after all other construc-
tion work inside the building has been completed.
Preparing for installation
Siting (cont.)
6152162
Installation

12
Wall mounting
590
80
3.
80
4.
1.
A
B
2.
Fig. 4
ARubber washers as anti-vibration measure
BSpacer
3. Secure the wall mounting bracket with countersunk
screws.
Note
After hooking the unit into the wall mounting bracket,
check that it is mounted securely.
Floorstanding installation
1. In order to safeguard that the condensate can
drain off freely, site the Vitovent 300-W on a
mounting base (accessories). Vibrations are isola-
ted by means of adjustable anti-vibration feet.
2. Level the Vitovent 300-W horizontally.
Installation sequence
Installing the Vitovent
6152162
Installation

13
Push ducts onto the respective ventilation unit connec-
tors (install check valve on site if necessary). The con-
nectors must be completely covered by the duct, other-
wise condensate may appear on the colder connec-
tors. Ensure seamless insulation.
1.
2.
Fig. 5
2. Fit the connection duct so as to be airtight.
Depending on the type of duct used and how it is
seated, secure with a clamp or cold-shrink tape.
Routing the outdoor air and exhaust air
pipes:
"Air distribution system" installation and service
instructions
!Please note
If water penetrates the outer wall of the building,
structural damage can occur.
For the wall duct, provide a weatherproof seal
on site between the core hole and the wall
sleeve.
Connecting the condensate drain
Heat recovery generates condensate in the counter-
current heat exchanger.
!Please note
Condensate can cause damage to the appli-
ance.
Condensate must be able to drain freely. Route
condensate pipes with a steady fall. Do not
allow pipes to sag.
■Connect the condensate pipe to the waste water
pipe via a waterless trap and trap with a stench trap.
■Route the condensate pipe outside the appliance
with a steady fall.
■Should the condensate drain run through unheated
rooms, protect it from frost in such areas (e.g. ther-
mal insulation or ribbon heater).
■Because of the risk of back pressure, connecting the
condensate pipe to downpipes is not permissible.
Installation sequence
Connecting the outdoor air and exhaust air pipes
6152162
Installation

14
Maintenance-free waterless trap (standard delivery)
C
A
D
E
B
2.
1.
Fig. 6
AVentilation unit (right-hand version)
BWaterless trap (standard delivery)
CWaste water pipe DN 32 (on site)
DConnection for waterless trap for ventilation unit,
left-hand version
EExample for stench trap (on site)
!Please note
The waterless trap can be damaged or leaks
can occur if any load is applied to it from the
side.
When fitting the waste water pipe (step 2), do
not apply any stress to the waterless trap from
the side.
Note
We recommend also installing the condensate drain if
using an enthalpy heat exchanger (accessories).
Electrical connections
Danger
Damaged wiring insulation can lead to serious
injury from electrical current and result in appli-
ance damage.
Route cables so that they cannot touch very hot,
vibrating or sharp-edged components.
Note
If 2 components are connected to the same terminal,
press both cores together in a single wire ferrule.
Installation sequence
Connecting the condensate drain (cont.)
6152162
Installation

15
Overview of electrical connections
A
H
G
FEDCB
Fig. 7
APower cable with standard plug (1/N/PE 230 V/
50 Hz, factory-fitted)
BSignal output (X19)
C24 V connection (X18)
DeBus connection (X17), additional preheating coil,
CO2 sensor
E24 V output (X16), connection to ventilation pro-
gramming unit, type LB1
FModbus connection (X15), for connecting cable to
ventilation programming unit, type LB1 or Vitocal/
Vitovent connecting cable
GWireless receiver for wireless operating switch
(X14)
HUSB connection for wireless sensors: CO2 and
humidity sensor
Fitting and connecting the ventilation programming unit
Installation and service instructions for "Ventila-
tion programming unit, type LB1"
Connecting the heat pump
Heat pump installation and service instructions
Installation sequence
Electrical connections (cont.)
6152162
Installation

16
Installing the wireless operating switch (accessories)
The ventilation unit can be operated via max. 6 wire-
less operating switches.
When selecting an installation site for the wireless
receiver and wireless operating switches, note that the
range may be reduced due to the following factors:
There may be no wireless reception.
■On their way between transmitter and receiver, wire-
less signals are damped, e.g. by air or walls.
■Wireless signals are reflected by metallic objects,
e.g. reinforcements embedded in walls, metal foil on
thermal insulation, thermal glazing with metallised
thermal vapour deposit.
■Wireless signals are isolated by service ducts and
lift shafts.
■Wireless signals suffer interference from devices
that also operate with high frequency signals,
such as
–Computers
–Audio and video systems
–WiFi
–Electronic transformers
–Pre-ballasts
Where to install wireless components
■Choose the installation location such that the radio
signals impinge on walls and other equipment as
horizontally as possible.
■Install at mid wall height, at least 1 m below the ceil-
ing
■Distance to other transmitters (GSM, DECT, WLAN)
at least 2 m
■Distance from room corners at least 0.2 m
■Do not install in wall recesses.
Installing and connecting the wireless receiver
2.
8.1.
Fig. 8
2. On smooth surfaces, the wireless receiver can be
affixed with the supplied adhesive film.
Installation sequence
Electrical connections (cont.)
6152162
Installation

17
4.
3.
Fig. 9
Installing the wireless operating switch on the wall
4x
1.
3.
2.
Fig. 10
Installation sequence
Electrical connections (cont.)
6152162
Installation

18
1. On smooth surfaces, the wireless operating switch
can be affixed with the supplied adhesive tape.
Enabling the wireless operating switch
Fig. 11
1. Press the "LRN/SET" button on the wireless
receiver.
The "LRN/SET" button flashes red.
2. Press once on the wireless operating switch.
The "LRN/SET" button lights up red for approx. 2 s.
The button then flashes again.
3. Press the "LRN/SET" button on the wireless
receiver.
The "LRN/SET" button stops flashing. The wireless
operating switch is now enabled.
Note
To enable additional wireless operating switches,
repeat steps 1 to 3.
4. Close the wireless receiver; perform steps in Fig. 8
in reverse order.
Air pressure switch (on site)
Fit the air pressure switch in rooms where open flue
combustion equipment operates.
Additional external electric preheating coil
Additional external electric preheating coil (accesso-
ries) for continuous operation of the ventilation unit
when outside temperatures are very low (application in
passive houses): Installation in the outdoor air duct,
close to the unit connector.
Installation instructions for preheating coil
Central humidity sensor (accessories)
Installation instructions for the "humidity sensor"
CO2 sensor (accessories)
Installation instructions for "CO2 sensor"
Installation sequence
Electrical connections (cont.)
6152162
Installation

19
Power supply
Danger
Incorrectly executed electrical installations can
result in injuries from electrical current and dam-
age to the appliance.
Connect the power supply and implement all
safety measures in accordance with the follow-
ing regulations:
■IEC 60364-4-41
■VDE regulations
■TAR medium voltage VDE-AR-N-4110
The Vitovent 300-W is delivered fully wired.
Insert the mains plug into a standard socket
(230 V/50 Hz) with separate fuse/MCB protection.
Installation sequence
Electrical connections (cont.)
6152162
Installation

20
Commissioning steps
Inspection steps
Maintenance steps Page
•1. Checking the mechanical ventilation system.................................................................. 21
••• 2. Starting the ventilation unit............................................................................................... 21
•3. Setting the language, time and date................................................................................. 22
•4. Setting air flow rates.......................................................................................................... 22
•5. Adjusting the air flow rates............................................................................................... 22
•6. Balancing the air flow rates on the supply air / extract air sides.................................. 23
••• 7. Shutting down the ventilation unit................................................................................... 23
•8. Cleaning and replacing filters........................................................................................... 23
•9. Removing the front panel.................................................................................................. 25
•10. Cleaning the countercurrent heat exchanger.................................................................. 26
•11. Cleaning the interior.......................................................................................................... 27
• • 12. Checking the condensate drain........................................................................................ 28
••• 13. Checking the firm seating of electrical plug-in connectors and cable entries
••• 14. Closing the unit and commissioning the mechanical ventilation system
•15. Instructing the system user.............................................................................................. 28
Commissioning, inspection, maintenance
Steps - commissioning, inspection and maintenance
6152162
Other manuals for Vitovent 300-W
5
This manual suits for next models
2
Table of contents
Other Viessmann Fan manuals

Viessmann
Viessmann Vitovent 300-W Operating instructions

Viessmann
Viessmann Vitovent 300-W User manual

Viessmann
Viessmann VITOVENT 300 User manual

Viessmann
Viessmann VITOVENT 300 Quick start guide

Viessmann
Viessmann Vitovent 300-W User manual

Viessmann
Viessmann VITOVENT 300 Operating instructions

Viessmann
Viessmann Tecto Refrigo CMC1 User manual

Viessmann
Viessmann Vitovent 300-W User manual

Viessmann
Viessmann VITOVENT 300 Operating instructions

Viessmann
Viessmann VitoAid User manual