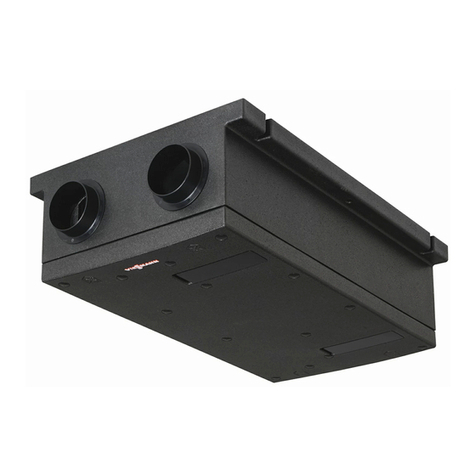
Viessmann Vitovent 300-W User manual

Operating instructions
for the system user
VIESMANN
Mechanical ventilation system with heat recovery
for a maximum air flow rate of 300 m3/h and 400 m3/h
VITOVENT 300-W
5793 597 GB 5/2013 Please keep safe.

2
Please follow these safety instructions closely to prevent accidents and mate-
rial losses.
Safety instructions explained
Danger
This symbol warns against the
risk of injury.
!Please note
This symbol warns against the
risk of material losses and envi-
ronmental pollution.
Note
Details identified by the word "Note" con-
tain additional information.
Target group
These operating instructions are inten-
ded for system users.
This appliance can also be operated by
children of 8 years and older, as well as
by individuals with reduced physical,
sensory or mental faculties or those lack-
ing in experience and knowledge, provi-
ded such individuals are being super-
vised or have been instructed in the safe
use of this appliance as well as in any
risks arising from it.
!Please note
Supervise children in the proxim-
ity of the appliance.
■ Never permit children to play
with the appliance.
■ Cleaning and maintenance
must not be carried out by
unsupervised children.
Danger
Incorrect work on the system can
lead to life-threatening acci-
dents.
Work on electrical equipment
must only be carried out by a
qualified electrician.
In case of fire
Danger
In case of fire there is a risk of
burning.
■ Switch the system OFF.
■ Use a tested fire extinguisher,
class ABC.
Installation conditions
!Please note
Incorrect ambient conditions can
lead to system damage and can
put safe operation at risk.
■ Maintain the permissible ambi-
ent temperatures in line with
the details in the operating
instructions.
■Appliance for indoor instal-
lation:
– Avoid air contamination
through halogenated hydro-
carbons (e.g. as in paints,
solvents and cleaning
agents).
– Avoid continuously high
humidity levels (e.g. through
continuous drying of wash-
ing).
Safety instructions
For your safety
5793 597 GB

3
Auxiliary components, spare and
wearing parts
!Please note
Components that are not tested
with the system may cause sys-
tem damage, or may affect its
functions.
Have installation or replacement
work only carried out by qualified
contractors.
Safety instructions
For your safety (cont.)
5793 597 GB

4
Introductory information
Intended use......................................................................................................... 7
■ Passive house use............................................................................................ 7
Commissioning..................................................................................................... 7
■Permissible ambient temperatures................................................................... 8
Terminology.......................................................................................................... 8
Your system is preset at the factory..................................................................... 8
Energy saving tips................................................................................................ 9
Tips for greater comfort........................................................................................ 9
Recommended ventilation stages........................................................................ 9
Operation
Remote control..................................................................................................... 10
■ Symbols............................................................................................................ 11
Default menu........................................................................................................ 11
Main menu............................................................................................................ 13
How to use the controls........................................................................................ 13
Start-up/shutdown
Starting the mechanical ventilation system.......................................................... 15
Switching off the mechanical ventilation system.................................................. 15
Time programs................................................................................................... 16
Manual mode
Permanently change ventilation stage................................................................. 20
Device settings................................................................................................... 21
Further adjustments
Setting the time.................................................................................................... 26
Setting the date.................................................................................................... 26
Language selection.............................................................................................. 26
Restoring factory settings..................................................................................... 26
■ Resetting operational settings........................................................................... 26
■ Resetting the appliance settings....................................................................... 28
Scanning
Scanning information............................................................................................ 29
■ Scanning settings and operating conditions..................................................... 29
■ Scanning actual values..................................................................................... 30
Scanning messages............................................................................................. 30
Index
Index
5793 597 GB

5
What to do if...
Insufficient air change.......................................................................................... 32
Excessive air change........................................................................................... 33
" " and "E..." are displayed.................................................................................. 33
"Filter" is displayed............................................................................................... 33
Doors/windows can only be opened with difficulty............................................... 34
Doors/windows bang when opened..................................................................... 34
Repair work
Cleaning............................................................................................................... 35
■ Cleaning supply air/extract air valves............................................................... 35
■ Cleaning the kitchen extract air valve............................................................... 36
Cleaning or replacing filters.................................................................................. 36
■ Filter in the ventilation unit................................................................................ 37
■ Extract air valve filter......................................................................................... 39
■ Resetting the filter service display.................................................................... 39
Appendix
Main menu overview............................................................................................ 40
Index
Index
5793 597 GB

6
Terminology.......................................................................................................... 41
■ 3-way diverter damper...................................................................................... 41
■ Extract air.......................................................................................................... 41
■ Extract air temperature..................................................................................... 41
■ Set extract air temperature............................................................................... 41
■ Extract air temperature differential.................................................................... 41
■ Outdoor air........................................................................................................ 42
■ Outdoor air temperature.................................................................................... 42
■ Bypass.............................................................................................................. 42
■ Bypass function................................................................................................. 43
■ CO2/humidity sensor......................................................................................... 43
■ CO2 concentration............................................................................................. 44
■ Pressure differential.......................................................................................... 44
■ Geothermal heat exchanger............................................................................. 44
■ External electric preheater coil.......................................................................... 44
■ Window ventilation............................................................................................ 45
■ Humidity sensor................................................................................................ 45
■ Exhaust air........................................................................................................ 45
■ Frost protection................................................................................................. 45
■ Background ventilation...................................................................................... 46
■ Intensive ventilation.......................................................................................... 46
■ Carbon dioxide concentration........................................................................... 46
■ Regulated mechanical ventilation..................................................................... 46
■ Air pressure switch............................................................................................ 46
■ Humidity............................................................................................................ 47
■ Ventilation stage............................................................................................... 47
■ Air flow rate....................................................................................................... 47
■ Standard ventilation.......................................................................................... 48
■ Period................................................................................................................ 48
■ Reduced ventilation.......................................................................................... 48
■ Preheater coil.................................................................................................... 48
■ Heat recovery.................................................................................................... 48
■ Heat exchanger................................................................................................. 49
■ Mechanical ventilation system.......................................................................... 49
■ Time program.................................................................................................... 49
■ Supply air.......................................................................................................... 49
Keyword index.................................................................................................... 50
Index
Index (cont.)
5793 597 GB

7
The appliance is only intended to be
installed and operated in ventilation sys-
tems that comply with EN 1946-6, with
due attention paid to the associated
installation, service and operating
instructions. It is only designed for the
controlled mechanical ventilation of liv-
ing spaces.
Intended use presupposes that a fixed
installation in conjunction with permissi-
ble, system-specific components has
been carried out.
Commercial or industrial usage for a pur-
pose other than mechanical ventilation
of living spaces shall be deemed inap-
propriate.
Any usage beyond this must be
approved by the manufacturer for the
individual case.
Incorrect usage or operation of the appli-
ance (e.g. the appliance being opened
by the system user) is prohibited and
results in an exclusion of liability. Incor-
rect usage also occurs if the components
in the ventilation system are modified
from their intended function.
Note
The appliance is intended exclusively for
domestic use, i.e. even users who have
not had any instruction are able to oper-
ate the appliance safely.
Passive house use
Vitovent 300-W meets the requirements
for passive house use.
Commissioning
The commissioning and matching up of
the mechanical ventilation system to
local conditions and to the structural
characteristics of the building, as well as
the instruction of the user in operating
the system, must be carried out by your
HVAC contractor.
Note
These operating instructions also
describe functions that are only available
on some ventilation units or only with
accessories. These functions are not
specifically identified.
For questions relating to the range of
available functions and accessories for
your mechanical ventilation system,
check with your HVAC contractor.
Introductory information
Intended use
5793 597 GB

8
Permissible ambient temperatures
The appliance may only be operated at
ambient temperatures inside the instal-
lation location of between 2 °C and
35 °C.
Terminology
To provide you with a better understand-
ing of the functions of your mechanical
ventilation system some terminology is
explained.
The terms are marked as follows:
Further information can be found
in chapter "Terminology" in the Ap-
pendix.
Your system is preset at the factory
Your mechanical ventilation system is
preset at the factory and is therefore
ready for operation.
Ventilation stages
■ The following ventilation stages are
factory-set:
Period Ventilation stage
22:00 to 07:00
h
Reduced venti-
lation
07:00 to 08:00
h
Standard venti-
lation
08:00 to 17:00
h
Reduced venti-
lation
17:00 to 22:00
h
Standard venti-
lation
Winter/Summertime changeover
■ This changeover is automatic.
Time and date
■ The date and time were set by your
HVAC contractor.
You can change the settings at any time
to suit your individual requirements.
Power failure
All settings are saved if there is a power
failure.
Introductory information
Commissioning (cont.)
5793 597 GB

9
Brief absence, e.g. to go shopping (see
page 12):
■ Temporarily select a lower ventilation
stage, e.g. background ventilation.
Holidays (see page 20):
■ If you intend going away, select a
lower ventilation stage in "Manual"
mode for the duration of your absence,
e.g. background ventilation.
Contaminated filters (see page 36)
■ Regularly clean the filters inside the
ventilation unit and in the extract air
valves or, alternatively, replace them.
Tips for greater comfort
Increased relative humidity and/or
higher odour loads, e.g. when cooking
(see page 12)
■ Temporarily select a higher ventilation
stage, e.g. intensive ventilation.
Recommended ventilation stages
Select the ventilation state that suits the
current circumstances.
Ventilation stage Situation
Background ventilation
(minimum air flow rate)
Unoccupied building, e.g. during holidays
Reduced ventilation (re-
duced air flow rate)
Few occupants inside the building, e.g. Monday to
Friday during the daytime
Standard ventilation (stand-
ard air flow rate)
Standard use of the building by several occu-
pants
Intensive ventilation (maxi-
mum air flow rate)
■ Higher odour loads, e.g. when cooking
■ Increased humidity, e.g. when taking a shower
■ Utilisation of the building by may persons, e.g.
during a party
Introductory information
Energy saving tips
5793 597 GB

10
You can change all settings of your
mechanical ventilation system centrally
at the remote control.
Monday
08:00 - 23:00
G: 1
09/01/2013
Filter
08:30
A B C
D
AWall mounting bracket
BProgramming unit
CSelector
■Turn:
Scroll through the menu or set val-
ues.
■Press:
Confirms your selection or saves
the setting.
DBacklit LCD
Takes you to the previous step in the
menu or cancels a setting that has
been started.
No function
Select "Manual" mode (see
page 20).
You will display settings and oper-
ating conditions of your mechanical
ventilation system (see page 29).
Two control levels are available:
■ Default menu (see page 11)
■ Main menu (see page 13)
Operation
Remote control
5793 597 GB

11
Note
The background lighting of the display
will switch off if you have not adjusted
any settings on the programming unit for
a few minutes.
Symbols
Further information can be found
in chapter "Terminology" in the Ap-
pendix.
Some symbols are not displayed con-
stantly but appear subject to settings and
operating conditions.
Ventilation stages
Background ventilation
Reduced ventilation
Standard ventilation
Intensive ventilation
Operating conditions
Fault display (see page 30)
Ventilation unit fans are ON.
Data connection with ventila-
tion unit 'live'.
"Filter" Filters are contaminated (see
page 33).
Default menu
The default menu shows the currently
active operating conditions and the
selected ventilation stage. You can
change the ventilation stage temporarily
(see page 12).
Call up the default menu as follows:
Press until the default menu is dis-
played.
Operation
Remote control (cont.)
5793 597 GB

12
Monday
08:00 - 23:00
G: 1
09/01/2013
Filter
08:30 A
C
B
DE
ADay, time and date
BSubject to active settings:
■ Start and end points of the cur-
rently active period within the
selected time program (see
page 17)
or
■"Temporary" and end point in the
case of a temporarily changed
ventilation stage (see following
chapter)
or
■"Manual", if selected (see
page 20)
CCurrently selected ventilation stage
(see page 11)
or
Fault code, if currently there is a
fault.
DOperating conditions (see page 11)
EFilter change display
Changing the ventilation stage tem-
porarily
For recommended ventilation stage set-
tings, see page 9.
Operation
Default menu (cont.)
5793 597 GB

13
Monday
Temporarily - 17:00
G: 1
09/01/2013
08:30
Turn the selector until the required ven-
tilation stage is shown.
■, and remain active, until the
current period of the selected time pro-
gram ends.
■ remains active for 30 minutes.
With you will prematurely reactivate
the previously selected time program.
Main menu
In the main menu, you can scan and
adjust the settings of the mechanical
ventilation system.
This includes, for example, the time pro-
grams. In addition, you can display and
acknowledge messages.
You can find the menu overview on
page 40.
You call up the main menu as fol-
lows:
Press the selector in the default menu.
G: 1
09/01/2013
08:30
Monday
Main menu
Setting appliance
Information install.
back
Service menu
Setting control unit
How to use the controls
The background lighting of the display
will switch off if you have not adjusted
any settings on the remote control for a
few minutes. Press any key to switch the
background lighting on again.
1. Call up the main menu:
Press the selector in the default
menu.
Operation
Default menu (cont.)
5793 597 GB

14
2. In order to select the required menu
point, turn the selector.
The selected menu point is highligh-
ted against a black background.
3. To confirm your selection, press the
selector.
The current setting is displayed and
highlighted against a black back-
ground.
4. To change the highlighted menu
point, turn the selector.
5. To confirm the setting, press the
selector.
6. Press until the default menu is dis-
played.
Operation
How to use the controls (cont.)
5793 597 GB

15
Insert the mains plug of the ventilation
unit into a standard socket.
After a short while, the default display
appears on the remote control (see
page 11). Your mechanical ventilation
system is now ready for operation.
Switching off the mechanical ventilation system
!Please note
There is a risk of moisture dam-
age to the building if the mechan-
ical ventilation system is perma-
nently switched off.
Only switch the mechanical ven-
tilation system off briefly, e.g. to
change the filters.
Pull the mains plug of the ventilation unit
from its socket.
The remote control display extinguishes
after a short time.
Start-up/shutdown
Starting the mechanical ventilation system
5793 597 GB

16
Further information can be found
in chapter "Terminology" in the Ap-
pendix.
Time programs enable you to adapt the
mechanical ventilation system to your
personal preferences. In the time pro-
gram, divide the day into sections. These
are called periods. You determine the
ventilation stage to be applied during
these periods.
For recommended ventilation stage set-
tings, see page 9.
The following time programs are availa-
ble:
■"P1: Week"
The same time programs apply every
day.
■"P2: week/w-end" ("P2: Week/
Weekend")
You may select a different sequence
for Monday to Friday than for Saturday
and Sunday.
■"P3: days individual"
You can select a different sequence
for every day of the week.
When setting the time programs,
observe the following:
■ Time programs include up to 6
sequential periods per day ("Period
1" to "Period 6").
■ The period with the highest number is
disabled. This period will be ignored
in the time program sequence.
■ You can disable or delete periods (see
page 19).
■ You can enable disabled periods or
add periods (see page 18).
■ For every period select the start time.
■ The end time results from the start
time for the following period. This pre-
vents gaps between the individual
periods or an overlap of successive
periods.
■ If you have set "- - : - -" as start time,
then this period will be disabled. At the
same time, all of the following periods
will be deleted.
Selecting a time program
Factory setting: "P1: Week"
Main menu
1. "Setting control unit"
2. "Program choice"
3. Select the required time program:
"P1: week", "P2: week/w-end" or
"P3: days individual"
4. Confirm your selection.
5. Press to exit the menu.
Time programs
Time programs
5793 597 GB

17
Setting periods for time program "P1: week"
Factory settings
Period Start time Ventila-
tion stage
"Period 1" 07:00 h
"Period 2" 08:00 h
"Period 3" 17:00 h
"Period 4" 22:00 h
"Period 5" - - : - -
"Period 6" Not available
Main menu
1. "Setting control unit"
2. "Periods"
3. "P1: Week"
4. Select the required period: "Period
1" to "Period 6"
5. "Start time": Set the required start
time. Confirm your settings.
6. "Ventilation": Set the required venti-
lation stage. Confirm your settings.
7. To exit the menu, select "back" or
press .
8. Repeat the settings for all remaining
periods.
Setting periods for time program "P2: week/w-end"
Factory settings for "week"
Period Start time Ventila-
tion stage
"Period 1" 07:00 h
"Period 2" 08:00 h
"Period 3" 17:00 h
"Period 4" 22:00 h
"Period 5" - - : - -
"Period 6" Not installed
Factory settings for "weekend"
Period Start time Ventila-
tion stage
"Period 1" 08:00 h
"Period 2" 23:00 h
"Period 3" - - : - -
"Period 4" Not installed
"Period 5"
"Period 6"
Main menu
1. "Setting control unit"
2. "Periods"
3. "P2: week/weekend"
4. Select "week" in order to set periods
for Monday to Friday.
Select "weekend" in order to set peri-
ods for Saturday and Sunday.
5. Select the required period: "Period
1" to "Period 6"
6. "Start time": Set the required start
time. Confirm your settings.
7. "Ventilation": Set the required venti-
lation stage. Confirm your settings.
8. To exit the menu, select "back" or
press .
9. Repeat the settings for all remaining
periods.
Time programs
Time programs (cont.)
5793 597 GB

18
Setting periods for time program "P3: day individual"
Factory settings for "Monday" to "Fri-
day"
Period Start time Ventila-
tion stage
"Period 1" 07:00 h
"Period 2" 08:00 h
"Period 3" 17:00 h
"Period 4" 22:00 h
"Period 5" - - : - -
"Period 6" Not installed
Factory settings for "Saturday" and
"Sunday"
Period Start time Ventila-
tion stage
"Period 1" 08:00 h
"Period 2" 23:00 h
"Period 3" - - : - -
"Period 4" Not installed
"Period 5"
"Period 6"
Main menu
1. "Setting control unit"
2. "Periods"
3. "P3: days individual"
4. Select the required day of the week:
"Monday" to "Sunday"
5. Select the required period: "Period
1" to "Period 6"
6. "Start time": Set the required start
time. Confirm your settings.
7. "Ventilation": Set the required venti-
lation stage. Confirm your settings.
8. To exit the menu, select "back" or
press .
9. Repeat the settings for all remaining
days and periods.
Enabling and adding periods
You can enable disabled periods. At the
same time 1 following period is added
that is not enabled.
Main menu
1. "Setting control unit"
2. "Periods"
3. Select the required time program:
"P1: week", "P2: week/weekend" or
"P3: days individual"
4. For "P2: week/weekend" select
"week" or "weekend".
For "P3: day individual" select the
required day of the week: "Monday"
to "Sunday"
5. Select the period with the highest
number; see the following example.
6. "Start time": Set a time. Confirm your
settings.
7. To exit the menu, select "back" or
press .
Example:
Your weekend time program includes 3
enabled periods ("Period 1" to "Period
3"). "Period 4" is disabled. You would
like to add and enable 2 further periods.
Time programs
Time programs (cont.)
5793 597 GB

19
Main menu
1. "Setting control unit"
2. "Periods"
3. "P2: week/weekend"
4. "weekend"
5. For "Period 4", select a start time.
Confirm your settings.
"Period 4" is enabled. "Period 5" is
added, but not enabled.
6. For "Period 5", select a start time.
Confirm your settings.
"Period 5" is enabled. "Period 6" is
added, but not enabled.
Disabling and deleting periods
Any disabled periods will remain saved,
but will be ignored in the time program
sequence. At the same time, all of the
following periods will be deleted.
Note
"Period 1" cannot be disabled.
Main menu
1. "Setting control unit"
2. "Periods"
3. Select the required time program:
"P1: week", "P2: week/weekend" or
"P3: days individual"
4. For "P2: week/weekend" select
"week" or "weekend".
For "P3: day individual" select the
required day of the week: "Monday"
to "Sunday"
5. Select a period to be disabled.
"Period 2" to "Period 6"
6. "Start time": Retard the time until
"- - : - -" is displayed. Confirm your
settings.
7. To exit the menu, select "back" or
press .
Example:
On Tuesdays, your time program should
only comprise 3 periods.
Main menu
1. "Setting control unit"
2. "Periods"
3. "P3: days individual"
4. "Tuesday"
5. Set the start time for "Period 4" to
"- - : - -".
"Period 4" is disabled. "Period 5"
and "Period 6" (if set up) will be
deleted.
Time programs
Time programs (cont.)
5793 597 GB

20
In "Manual" mode, your mechanical
ventilation system operates constantly
with the selected ventilation stage.
For recommended ventilation stage set-
tings, see page 9.
Manual mode
G: 1
09/01/2013
08:30
Monday
Default menu
1. Press .
2. Set the required ventilation stage.
Confirm your settings.
3. The display shows "Manual".
"Manual" will remain enabled until you
press again or .
Manual mode
Permanently change ventilation stage
5793 597 GB
Other manuals for Vitovent 300-W
5
Table of contents
Other Viessmann Fan manuals

Viessmann
Viessmann VITOVENT 300 User manual

Viessmann
Viessmann VITOVENT 300 Quick start guide

Viessmann
Viessmann VITOVENT 300 Operating instructions

Viessmann
Viessmann Vitovent 200-C Quick guide

Viessmann
Viessmann VITOVENT 300 Operating instructions

Viessmann
Viessmann VitoAid User manual

Viessmann
Viessmann Vitovent 300-W User manual

Viessmann
Viessmann Vitovent 300-W Operating instructions

Viessmann
Viessmann Vitodens 100-W WB1B Series User manual

Viessmann
Viessmann EVO-COOL CS 900 User manual