manuals.online logo
Brands
  1. Home
  2. •
  3. Brands
  4. •
  5. Viessmann
  6. •
  7. Toy
  8. •
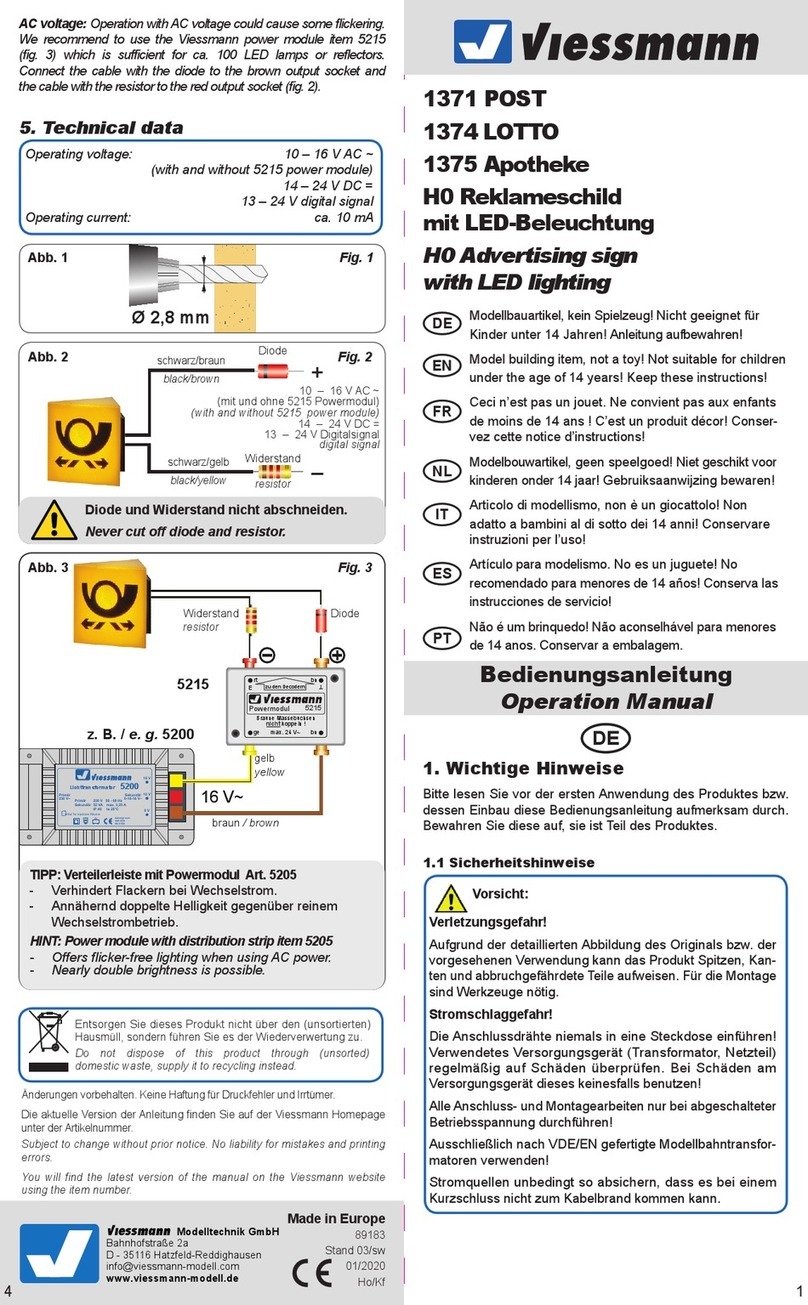
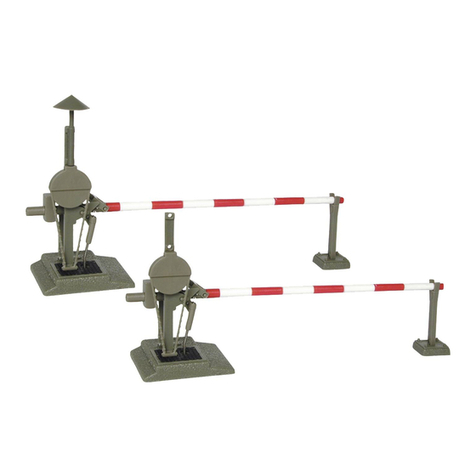
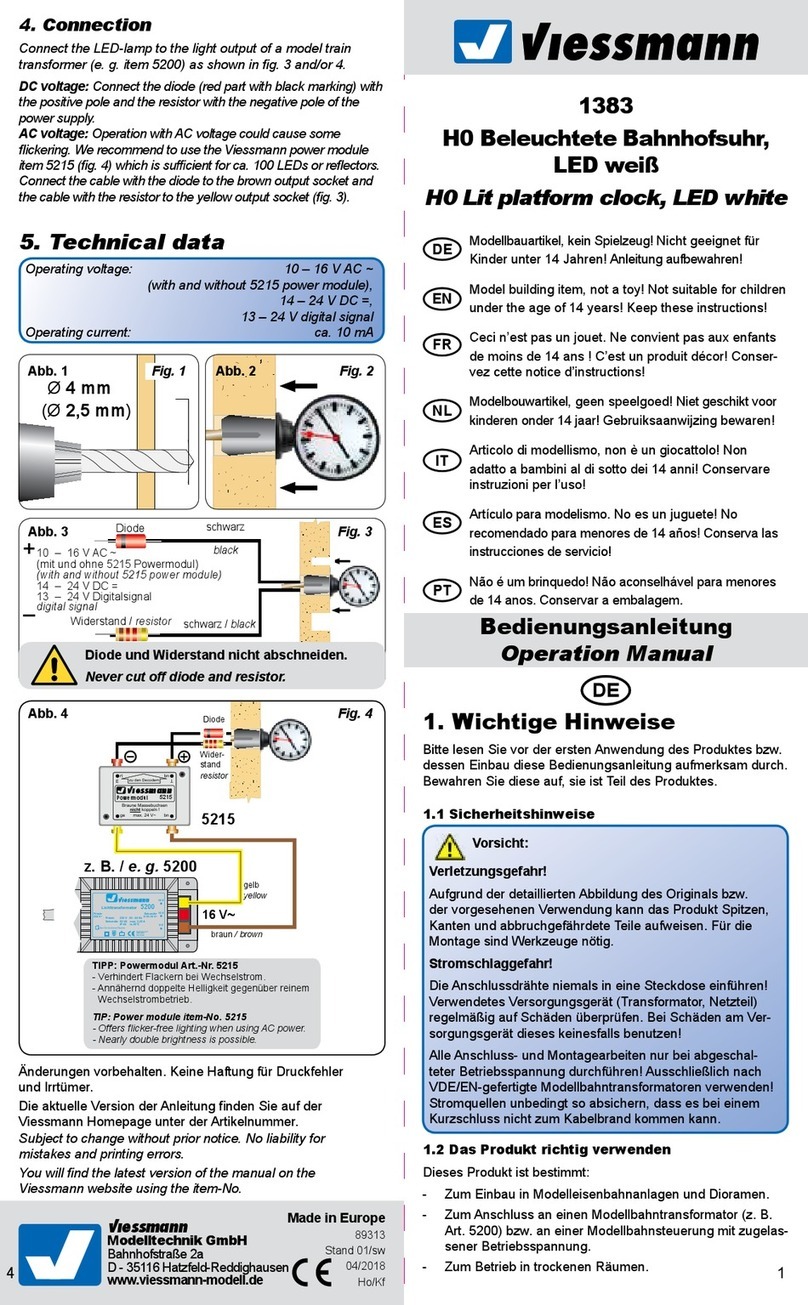
  9. Viessmann 4175 User manual

Viessmann 4175 User manual

Other Viessmann Toy manuals

Viessmann 4360 User manual

Viessmann

Viessmann 4360 User manual

Viessmann 6006 User manual

Viessmann

Viessmann 6006 User manual

Viessmann 4502 User manual

Viessmann

Viessmann 4502 User manual

Viessmann 1539 User manual

Viessmann

Viessmann 1539 User manual

Viessmann 2310 User manual

Viessmann

Viessmann 2310 User manual

Viessmann H0 4720 User manual

Viessmann

Viessmann H0 4720 User manual

Viessmann 1370 User manual

Viessmann

Viessmann 1370 User manual

Viessmann 6333 User manual

Viessmann

Viessmann 6333 User manual

Viessmann kibri 36606 User guide

Viessmann

Viessmann kibri 36606 User guide

Viessmann 5108 User manual

Viessmann

Viessmann 5108 User manual

Viessmann Vollmer 45146 User guide

Viessmann

Viessmann Vollmer 45146 User guide

Viessmann 5023 User manual

Viessmann

Viessmann 5023 User manual

Viessmann 9500 User manual

Viessmann

Viessmann 9500 User manual

Viessmann 4129 User manual

Viessmann

Viessmann 4129 User manual

Viessmann 98123 User manual

Viessmann

Viessmann 98123 User manual

Viessmann 5547 User manual

Viessmann

Viessmann 5547 User manual

Viessmann 4509 User manual

Viessmann

Viessmann 4509 User manual

Viessmann 4518 User manual

Viessmann

Viessmann 4518 User manual

Viessmann 5205 User manual

Viessmann

Viessmann 5205 User manual

Viessmann TT 6923 User manual

Viessmann

Viessmann TT 6923 User manual

Viessmann 4509 User manual

Viessmann

Viessmann 4509 User manual

Viessmann 5061 User manual

Viessmann

Viessmann 5061 User manual

Viessmann 4507 User manual

Viessmann

Viessmann 4507 User manual

Viessmann 4176 User manual

Viessmann

Viessmann 4176 User manual

Popular Toy manuals by other brands

FUTABA GY470 instruction manual

FUTABA

FUTABA GY470 instruction manual

LEGO 41116 manual

LEGO

LEGO 41116 manual

Fisher-Price ColorMe Flowerz Bouquet Maker P9692 instruction sheet

Fisher-Price

Fisher-Price ColorMe Flowerz Bouquet Maker P9692 instruction sheet

Little Tikes LITTLE HANDIWORKER 0920 Assembly instructions

Little Tikes

Little Tikes LITTLE HANDIWORKER 0920 Assembly instructions

Eduard EF-2000 Two-seater exterior Assembly instructions

Eduard

Eduard EF-2000 Two-seater exterior Assembly instructions

USA Trains EXTENDED VISION CABOOSE instructions

USA Trains

USA Trains EXTENDED VISION CABOOSE instructions

Modellbau Laffont Z1601 Assembly instructions

Modellbau Laffont

Modellbau Laffont Z1601 Assembly instructions

NOCH 12905 instruction manual

NOCH

NOCH 12905 instruction manual

Eduard Ki-61-Id quick start guide

Eduard

Eduard Ki-61-Id quick start guide

Vollmer 42004 Mounting instruction

Vollmer

Vollmer 42004 Mounting instruction

Phoenix Model CLASSIC-EP instruction manual

Phoenix Model

Phoenix Model CLASSIC-EP instruction manual

H-KING Sopwith Camel British WW1 Fighter instruction manual

H-KING

H-KING Sopwith Camel British WW1 Fighter instruction manual

MODSTER Predator 4x4 Crawler user manual

MODSTER

MODSTER Predator 4x4 Crawler user manual

DHK Hobby 8136 User instruction manual

DHK Hobby

DHK Hobby 8136 User instruction manual

THUNDER TIGER Raptor 50 V2 kit manual

THUNDER TIGER

THUNDER TIGER Raptor 50 V2 kit manual

Timberkits Skateboarder instructions

Timberkits

Timberkits Skateboarder instructions

Hangar 9 Funtana 125 Assembly manual

Hangar 9

Hangar 9 Funtana 125 Assembly manual

QModeling XP Series instruction manual

QModeling

QModeling XP Series instruction manual

manuals.online logo
manuals.online logoBrands
  • About & Mission
  • Contact us
  • Privacy Policy
  • Terms and Conditions

Copyright 2025 Manuals.Online. All Rights Reserved.

4175
H0 Fahrdrahttrenner, 2 Stück
H0 Insulating section, 2 pieces
min. 16 mm – max. 23 mm
98037
Stand 03/sw
01/2022
Ho/Kf
4
1. Wichtige Hinweise
Bitte lesen Sie vor der ersten Anwendung des Produktes bzw.
dessen Einbau diese Bedienungsanleitung aufmerksam durch
und bewahren Sie diese auf. Sie ist Teil des Produktes.
1.1 Sicherheitshinweise
Vorsicht:
Verletzungsgefahr!
Aufgrund der vorgesehenen Verwendung kann das Produkt
Spitzen, Kanten und abbruchgefährdete Teile aufweisen. Für
die Montage sind Werkzeuge nötig.
1.2 Das Produkt richtig verwenden
Dieses Produkt ist bestimmt:
- Zum Trennen von Oberleitungsfahrdrähten.
- Zum Einbau in Modelleisenbahnanlagen und Dioramen.
- Zum Betrieb in trockenen Räumen.
Jeder darüber hinausgehende Gebrauch gilt als nicht bestim-
mungsgemäß. Für daraus resultierende Schäden haftet der
Hersteller nicht.
1.3 Packungsinhalt überprüfen
Kontrollieren Sie den Lieferumfang auf Vollständigkeit:
- 2 Fahrdrahttrenner
- 2 Isolatoren
- Anleitung
DE
Made in Europe
min. 11 mm
1,5 mm herausschneiden/cut out
Abb. 1 Fig. 1
Abb. 2 Fig. 2
1
Abb. 3 Fig. 3
Modellbauartikel, kein Spielzeug! Nicht geeignet für
Kinder unter 14 Jahren! Anleitung aufbewahren!
Model building item, not a toy! Not suitable for children
under the age of 14 years! Keep these instructions!
Ce n’est pas un jouet! Ne convient pas aux enfants de
moins de 14 ans! Conservez cette notice d’instructions!
Não é um brinquedo! Não aconselhável para menores
de 14 anos! Conservar o manual de instruções!
Modelbouwartikel, geen speelgoed! Niet geschikt voor
kinderen onder 14 jaar! Gebruiksaanwijzing bewaren!
Articolo di modellismo, non è un giocattolo! Non adat-
to a bambini al di sotto dei 14 anni! Conservare istruzioni
per l’uso!
Artículo para modelismo ¡No es un juguete! No reco-
mendado para menores de 14 años! Conserva las inst-
rucciones de servicio!
DE
EN
FR
NL
IT
ES
PT
Bedienungsanleitung
Operation Manual
Viessmann
Modelltec
hnik GmbH
Bahnhofstraße 2a
D - 35116 Hatzfeld-Reddighausen
[email protected]
+49 6452 9340-0
www.viessmann-modell.de
Subject to change without prior notice. No liability for mistakes and printing
errors.
You will find the latest version of the manual on the Viessmann website using
the item number.
Änderungen vorbehalten. Keine Haftung für Druckfehler und Irrtümer.
Die aktuelle Version der Anleitung finden Sie auf der Viessmann Homepage
unter der Artikelnummer.
2. Einleitung
Der Fahrdrahttrenner wird an einer Trennstelle eines Fahrdraht-
stückes eingesetzt. Auf diese Weise lassen sich beim elektri
-
schen Oberleitungsbetrieb mehrere Stromkreise einrichten. Aber
auch für den Digitalbetrieb, bei dem die Oberleitung stromlos
bleibt, findet der Fahrdrahttrenner aus optischen Gründen Ver-
wendung – beim Vorbild sind die Streckentrenner unverzichtbar!
Der Trenner Art. 4175 wirkt elektrisch isolierend und ist sehr
einfach in der Handhabung.
3. Einbau
1.
Wählen Sie den Fahrdraht (Standard- oder Universal-Fahr-
draht) aus, in den der Fahrdrahttrenner eingebaut werden
soll.
2.
Trennen Sie den Fahrdraht entsprechend Abb. 1 auf und
kürzen Sie die Fahrleitung bzw. das Tragseil um das jeweils
angegebene Maß.
3.
Fügen Sie den Fahrdrahttrenner in die untere Trennstelle
ein und hängen Sie das Rädchen am Tragseil ein (Abb. 2).
4. Stecken Sie den Isolator in die obere Trennstelle (Abb. 2).
5.
Stecken Sie nun beide Fahrdrahtteile wieder zusammen
(Abb. 3). Bei stärkerer Zugbelastung des Fahrdrahtes können
die Fügestellen mit etwas Sekundenkleber fixiert werden.
6. Hängen Sie den Fahrdraht mit montiertem Fahrdrahttrenner
zwischen den beiden vorgesehenen Masten auf Ihrer Anlage
ein.
DE
1. Important information
Please read this manual completely and attentively before using
the product for the first time. Keep this manual. It is part of the
product.
1.1 Safety instructions
Caution:
Risk of injury!
Due to the intended use, this product can have peaks, edges
and breakable parts. Tools are required for installation.
1.2 Using the product for its correct purpose
This product is intended:
- For cutting catenary wires.
- For installation in model train layouts and dioramas.
- For operation in dry rooms only.
Using the product for any other purpose is not approved and is
considered inappropriate. The manufacturer is not responsible
for any damage resulting from the improper use of this product.
1.3 Checking the package contents
Check the contents of the package for completeness:
- 2 insulating sections
- 2 insulators
- Manual
2. Introduction
The insulating section is used at a disconnecting point of a
catenary wire. This allows to set up several electrical circuits
during electrical catenary operation. But also for digital oper-
ation, where the catenary is without any current, the insulating
section is used for optical reasons - the insulating sections
are essential for the model! The insulating section item 4175
is electrically insulated and is very easy to handle.
3. Mounting
1. Choose the catenary wire (standard- or universal catenary
wire) in which you want to install the insulating section.
2. Disconnect the catenary wire and shorten the catenary resp.
the track rope as shown in fig. 1.
3. Insert the insulating section into the lower disconnecting
point and hang the wheel on the track rope (fig. 2).
4. Insert the insulator into the upper disconnecting point (fig. 2).
5. Reassemble both wires (fig. 3). In case of stronger tensile
load of the catenary wire the join patches can be fixed with
a bit of superglue.
6. Hang the catenary wire with the mounted insulating sections
between the two provided masts on your layout.
EN
2 3