manuals.online logo
Brands
  1. Home
  2. •
  3. Brands
  4. •
  5. View
  6. •
  7. Laboratory Equipment
  8. •
  9. View Benchmark 250 User manual

View Benchmark 250 User manual

Other manuals for Benchmark 250

2

Other View Laboratory Equipment manuals

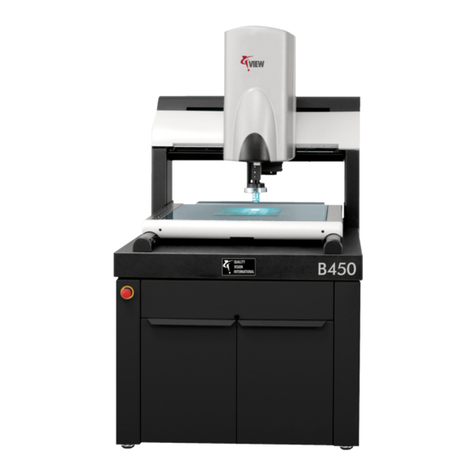
View Benchmark 450 User manual

View

View Benchmark 450 User manual

View Benchmark 250 User manual

View

View Benchmark 250 User manual

Popular Laboratory Equipment manuals by other brands

Radleys Carousel 6 Plus instructions

Radleys

Radleys Carousel 6 Plus instructions

Hemotherm 400MR Operation & technical manual

Hemotherm

Hemotherm 400MR Operation & technical manual

mrclab DVO Series Operation manual

mrclab

mrclab DVO Series Operation manual

CoolLED pE-800 quick start guide

CoolLED

CoolLED pE-800 quick start guide

Luminex Guava easyCyte Maintenance Guide

Luminex

Luminex Guava easyCyte Maintenance Guide

IKA A10 basic operating instructions

IKA

IKA A10 basic operating instructions

Belden HIRSCHMANN RPI-P1-4PoE installation manual

Belden

Belden HIRSCHMANN RPI-P1-4PoE installation manual

Koehler K1223 Series Operation and instruction manual

Koehler

Koehler K1223 Series Operation and instruction manual

Globe Scientific GCM-12 quick start guide

Globe Scientific

Globe Scientific GCM-12 quick start guide

Getinge 86 SERIES Technical manual

Getinge

Getinge 86 SERIES Technical manual

CORNING Everon 6000 user manual

CORNING

CORNING Everon 6000 user manual

Biocomp GRADIENT MASTER 108 operating manual

Biocomp

Biocomp GRADIENT MASTER 108 operating manual

Cole Parmer Stuart SB3/1 instruction manual

Cole Parmer

Cole Parmer Stuart SB3/1 instruction manual

BEVS 2501/2A user manual

BEVS

BEVS 2501/2A user manual

Qiagen DML 3000 user manual

Qiagen

Qiagen DML 3000 user manual

Queensgate NANOSCAN OP400 Quick start instructions

Queensgate

Queensgate NANOSCAN OP400 Quick start instructions

Parr Instrument 4560 Operating instructions manual

Parr Instrument

Parr Instrument 4560 Operating instructions manual

Integra DOSE IT operating instructions

Integra

Integra DOSE IT operating instructions

manuals.online logo
manuals.online logoBrands
  • About & Mission
  • Contact us
  • Privacy Policy
  • Terms and Conditions

Copyright 2025 Manuals.Online. All Rights Reserved.

UNPACKING
THE MACHINE
LIFTING
THE MACHINE
Move the shipping carton or crate
to the installation site.
Cut and remove the metal bands
around the shipping carton/crate.
Remove the top of the carton and
cardboard sleeve, or disassemble
the crate.
Remove the external packing
material.
External
Packing
Material
Remove the front cover by lifting it
up, off of its guides.
Attach the lifting straps to the hook
of a hoist.
Insert the metal plate
attached to the wooden stabilizer into
the slot on top of the machine.
Slowly lift the machine with a hoist,
steadying it at all times.
Move the machine to the final
operating location, and slowly lower it
into position on a workbench capable
of bearing the full weight of the
machine (155 kg).
Remove the lifting materials.
IMPORTANT:
Eyebolt (2)
BENCHMARK 250
QUICK INSTALLATION GUIDE
Shipping
Screw
End Stop
Screw
Remove the X-axis end stop screw
and shipping screw.
Remove the shipping restraint.
Re-install the X-axis end stop screw.
If the small, black X-axis
ball retainer falls out, put it back in
place before continuing.
Do not remove/discard
the end stop. It is essential to the
operation of the X-axis transport.
This describes how to unpack, install, and set up the Benchmark 250 system. It is a quick
overview. It does NOT replace the Benchmark 250 Installation Manual (P/N 799030).
Be sure to review all safety information provided in the Benchmark 250
Installation Manual before operating the system.
TOOLS REQUIRED/EQUIPMENT
Copyright © 2012 Quality Vision International, Inc. All rights reserved. Printed in the U.S.A. Information subject to change without notice. P/N 799033-0812
REMOVING THE
X RESTRAINT
Shipping
Restraint
Metal
Plate
Wooden
Stabilizer
Lifting
Strap (2)
Slot
IMPORTANT: The workbench must be stable during
system operation, with no movement or vibration.
1.
1.
1.
2. 2.
2.
3.
3.
3.
4.
4.
5.
6.
REMOVING THE
Z RESTRAINTS
REMOVING THE
Y RESTRAINT
Remove the two shipping screws.
Remove the shipping restraint.
Remove the Y-axis end stop screw
from its storage position in the stage.
Install the Y-axis end stop screw.
If the small, black Y-axis
ball retainer falls out, put it back in
place before continuing.
Do not remove/discard
the end stop. It is essential to the
operation of the Y-axis transport.
Shipping
Screw (2)
Shipping
Restraint
End Stop
Screw
There are two Z restraints.
Remove the shipping screw from
each restraint.
Loosen the pivot screw in each
restraint.
Move each shipping restraint so
it does not interfere with the
movement of the Z-axis slide.
Tighten both pivot screws.
Pivot
Screw (2)
Shipping
Screw (2)
Shipping
Restraint (2)
P/N 799033-0812
Copyright © 2012 Quality Vision International, Inc. All rights reserved. Printed in the U.S.A. Information subject to change without notice.
STOP HERE!!
Do not apply power to the system
unless trained or qualified. Potential
for system damage and personal injury.
1.
1.
2.
2.
3.
3.
4.
INSTALLING THE
STAGE GLASS
Carefully unwrap the stage glass.
Clean both sides of the stage glass
with glass cleaner.
Carefully set the stage glass into the
recessed area in the stage.
Tighten the two stage glass setscrews
in the front of the stage.
Do not overtighten the stage
glass setscrews. Excessive
pressure may damage the glass.
1.
2.
3.
4.
4.
CONNECTING
THE SYSTEM
Stage Glass
Setscrews
REMOTE
E-STOP
JOYSTICK
CONTROLLER
POWER
MONITOR
USB HUB
BENCHMARK 250
POWER
SYSTEM
COMPUTER
POWER
USB
LPT1
MONITOR (VGA or DVI)
P72
USB 1
VIDEO IN (FIREWIRE)
USB 2
PARALLEL PORT
CAMERA 2*
†
CAMERA 1*
J52
USB 1
USB 2
USB
Firewire Camera 0 cable (P/N 061216-2)
Firewire Camera 1 cable (P/N 061216-2)†
Parallel cable (P/N 049082.01)
Soft Start cable (P/N 041040-1)
USB Dual Mag I/O cable (P/N 060151.04)
P/N 039037
P/N 039836
*Cable passes through bulkhead and connects directly to camera
Dual magnification systems only
†
P/N 033893
P/N 061923.02
P/N 035136
USB
USB
USB
USB Laser cable (P/N 060151.06)
POWER STRIP
EXTERNAL
POWER