ViewPlay SmartShare mini User manual

1 / 14
Wireless Presentation and Collaboration System
for the modern enterprise
SmartShare mini
G102RX
User Guide
Version 1.0
ViewPlay Co., Ltd.

2 / 14
Introduction
SmartShare mini is an intuitive and high efficiency 1080p wireless presentation and collaboration
system that enables any meeting participant to simply share the content from their laptop, mobile
phone, or tablet on the projector or large screen wirelessly, no APP required, no set up, no messy
cables, just click and share. SmartShare mini support up to 30 presenters to share their contents
instantly without wasting valuable meeting time.
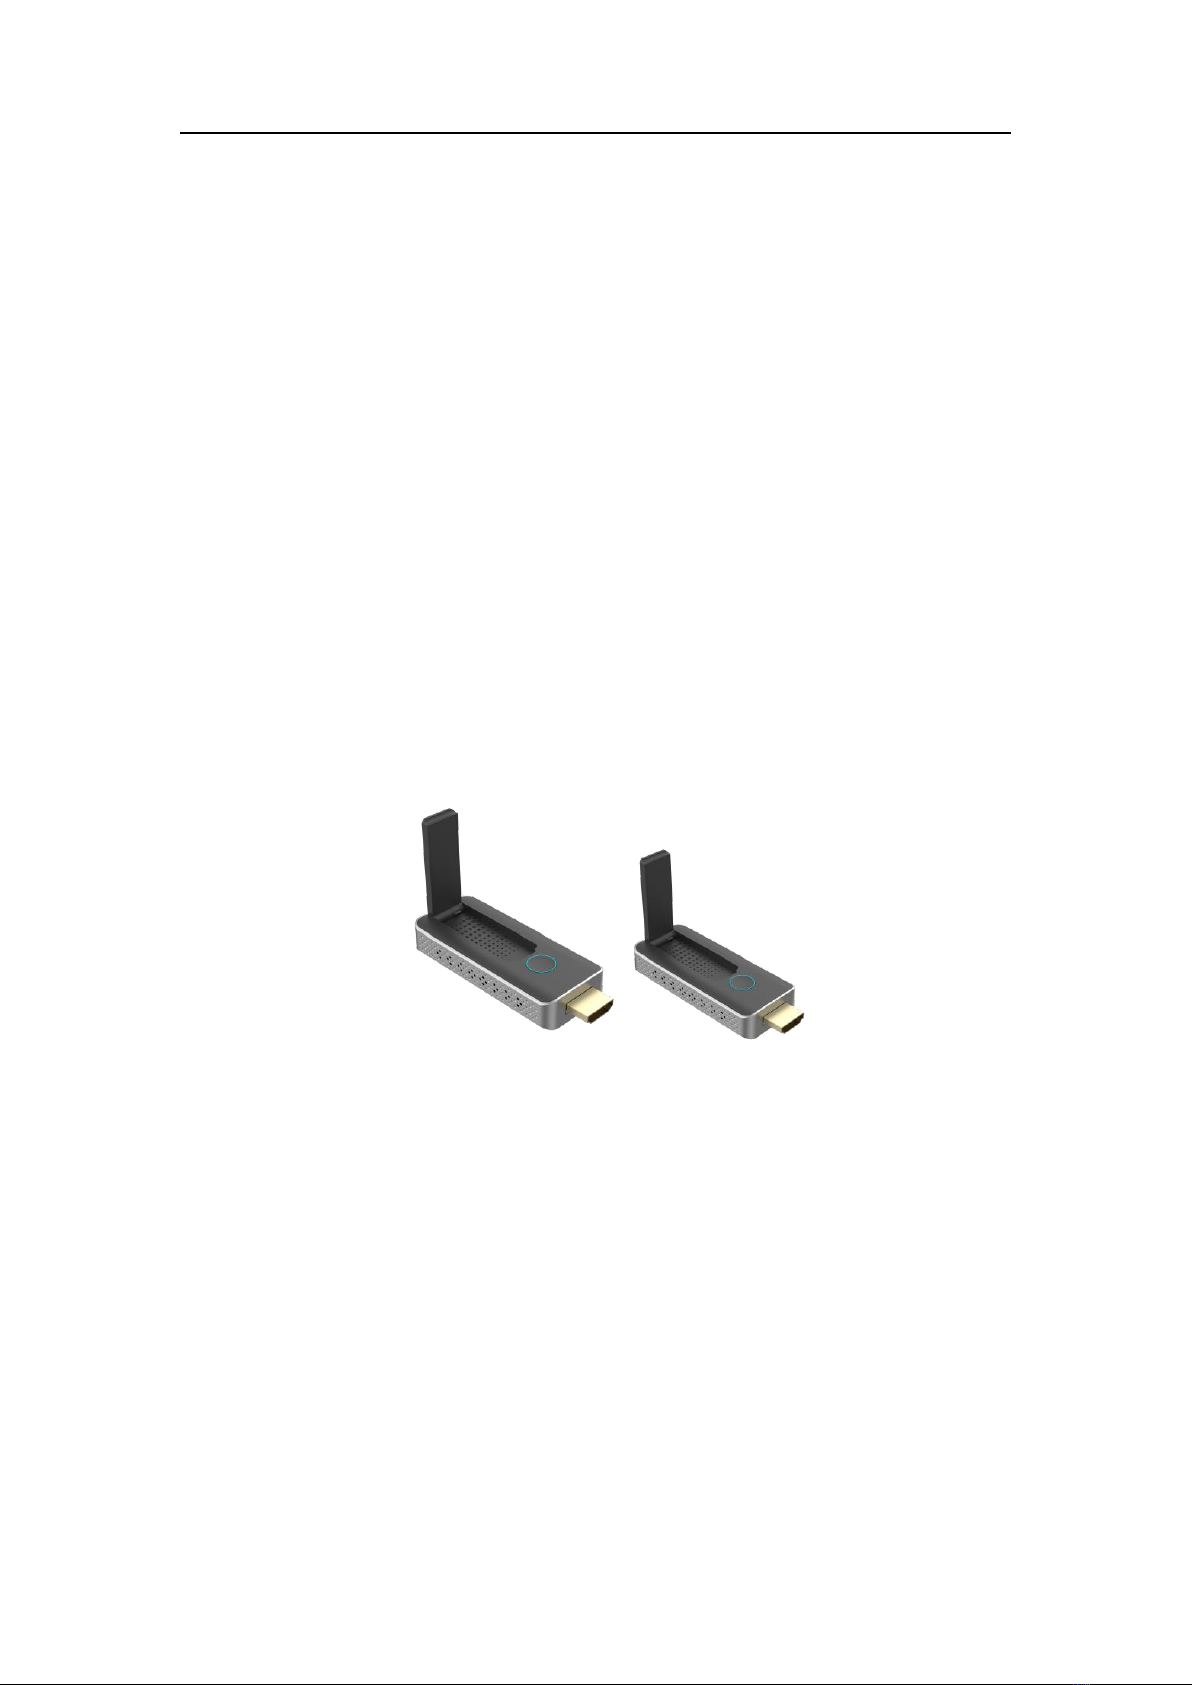
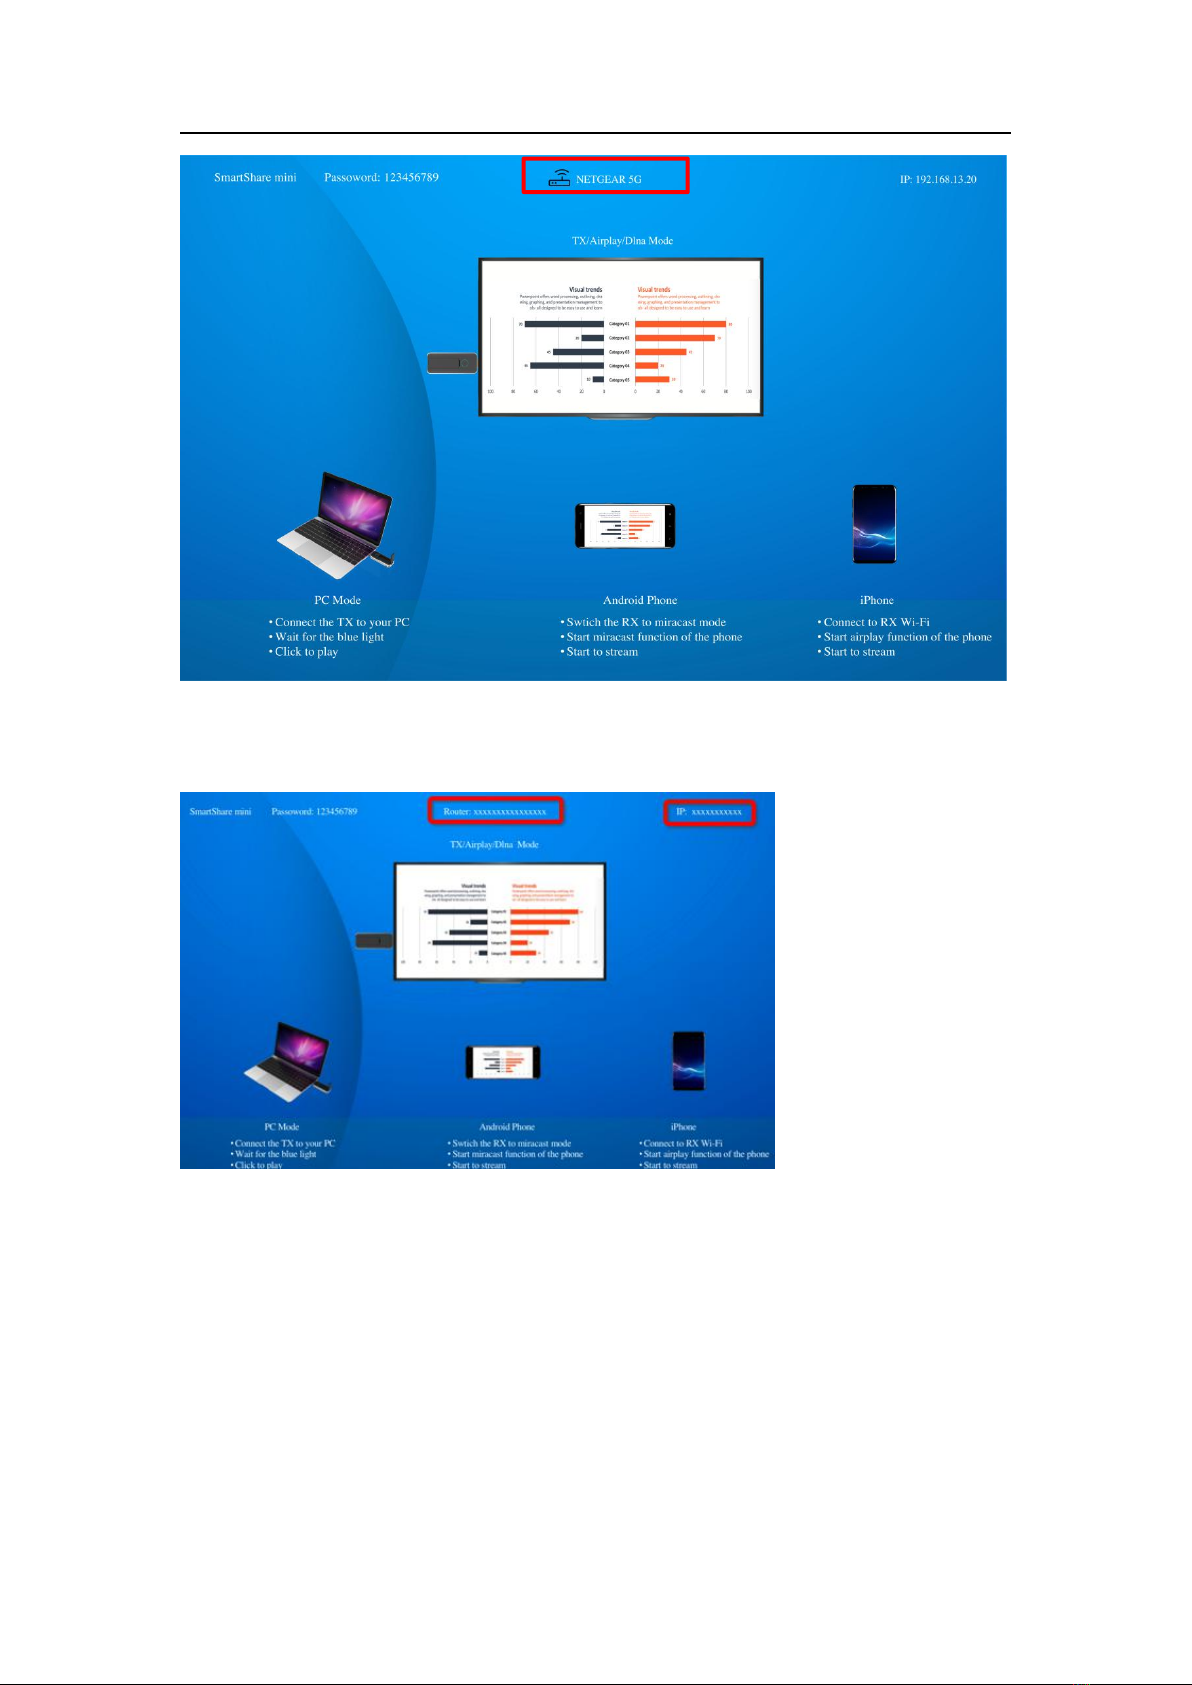
A standard SmartShare mini is a combination of one transmitters and one receiver, the receiver is
connected to a projector or display, and the transmitters are connected with PC or any device with
HDMI jack, after connected, users click the button on the transmitter and the screen will be
streaming to the display, it’s easy for other users to switch by click. You can buy additional
transmitter or receiver if needed.
Never have to worry about the software configuration, no compatibility, WIFI and network set up,
no need IT support, with our powerful and simplicity solution, everyone can immediately know
how to use it for collaborative presentations, which significantly improves corporate efficiency
and productivity.

3 / 14
Product features
Features
Description
Plug and play
Simple connect the transmitter with the PC HDMI ports, then click the
button to start the streaming.
App Free
SmartShare mini doesn’t need any software or app installation, no setup,
no IT team.
All in one
Support iOS/Android/Windows system, support Blu-ray DVD player,
media player and any devices with HDMI jack.
Wireless Camera
Share the images and audio from smart-phone camera or to the large
display simultaneous.
Multi-user mode
Up to 30 user’s presentation at one time
Auto Channel Selection
The SmartShare mini will select the best Wi-Fi channel automatically after
power on to ensure streaming smoothly.
Fast Speed with 5G AC
MIMO Technology
The SmartShare mini comes with the fast 802.11ac MIMO technology
which increase Wi-Fi speeds by allowing a pair of wireless devices to
simultaneously send or receive multiple data streams.
1080p60 High Video
Quality
SmartShare mini support real 1080p60 decode, which means much
more clear pictures, rich in details and texture compared with 720p.
High Security
Protection
No worries about the data security, the SmartShare mini support AES
128-bit security encryption and WPA2/WPA-PSK/WPA2-PSK
authentication protocol to protect data. HDCP supported to protect the
content.

4 / 14
Package Included:
Transmitter x1 Receiver x 1 USB cable x 2 HDMI extender cable x 1
Devices Requirement
Please ensure the devices meets the following requirements:
iOS 9.0 or above
Android 5.0 or above
Product Specification
Feature
Video input
Up to 1080P/60
Video decode and output
Up to 1080P60
Audio
Stereo, quality 16bits 48KHz
Wireless Channel
IEEE 802.11ac, 5GHz, 2T2R
Latency
About 120ms latency
Streaming Protocol
Airplay, Miracast, DLNA
HDMI Version
HDMI 1.4 with HDCP1.3
Authentication Protocol
WPA2 (WPAS-PSK / WPA2-Enterprise)
Security
AES 128 bit
Platform supported
Windows, iOS, Android system, Any devices with HDMI jack
Distance
About 50 meters in the clean line of sight
Transmitter
interface
HDMI in jack x 1, micro USB x 1, button x 1
LED
Red and blue
Switch button
x 1
Power supply
DC5V/0.5A
Power Consumption
About 2.5W
Dimension
83x32x13mm
Weight
27.1g
Receiver
Interface
HDMI out jack x 1, micro USB x 1, button x 1

5 / 14
LED
Red and Blue
Power supply
DC5V/0.5A
Power Consumption
About 2.5W
Dimension
83x32x13mm
Weight
27.1g
Temperature Range
Operating:
0°C to +40°C (+32°F to +104°F)
Storage:
-10°C to +60°C (+14°F to +140°F)
Humidty
Operating:
10% to 80% relative humidity
Storage:
5% to 90% relative humidity
Overview
SmartShare Pro TX
1. HDMI in: connect source devices, like computer or other devices with HDMI, the HDMI in
also support 5V power in if the source devices HDMI with 5V output.
2. Button: click to cast or click to switch to other user
3. LED: to display different statue.
4. Micro USB: for power supply.
Remark: if the source devices HDMI with 5V power output, then no need connect USB cable for
power.
LED indicator of the SmartShare mini TX
Description
Static red
TX system is booting on
Flashing red
TX is searching for RX
Flashing blue
Waiting for connection
Static blue
Connected and start to presenting
Purple
No HDMI in

6 / 14
SmartShare mini RX
5. HDMI out: connect with monitor or projector.
6. Button: switch to different mode, TX/airplay/dlna mode or miracast mode.
7. LED: to display different statue.
8. Micro USB: for power supply.
LED indicator of the SmartShare mini RX
Description
Flashing blue
Waiting for connection
Static blue
Connected and start to presenting
Receiver Installation
1. Connect with TV or projector.
1) Connect the RX HDMI with the big screen TV or projector’s HDMI jack.
2) Connect the USB port of RX to the USB port of the TV through a USB cable for power supply.
2)Mode selection:
The receive support two mode as below, press the RX button to switch to different mode, the
mode will show on the middle of the RX screen.
1)TX/Airplay/Dlna mode: for TX/iOS devices, or the devices support dlna function.
HDMI out Button with LED Antenna

7 / 14
2)Miracast mode: for android phone which support miracast mode.
3) Connect to internet:
Connect the RX SSID with your smart devices, the SSID and password are showed on the
left upper corner of the screen.

8 / 14
Open the browser with your phone, and input the IP address which show on the right upper
corner of the screen to enter to the RX management platform.
Remark: when connect to router, the IP address will be update accordingly.

9 / 14
Select the network and connect in the management platform, the RX will link to the network
and show the network SSID on the middle of the screen. (to get a better performance, we
recommend to connect with 5G router)

10 / 14
Select the network and connect in the management platform, the RX will link to the network
and show the network SSID on the middle of the screen. (to get a better performance, we
recommend to connect with 5G router)
4)AP password management:
user can change AP password in the management page.
Remark: if the password are changed, the TX and RX have to pair again.

11 / 14
5) Language
User can change language in the management page:
6) Screen Position
If the RX HDMI OUT size is not compatible with the display, user can use Screen Position to
adjust the zoom in and zoom out the screen.
7)Airplay mode: you can select to use streming mode or mira mode.
Stream from TX:
SmartShare mini TX Installation

12 / 14
1. Connect the SmartShare mini TX’s HDMI to PC HDMI port.
Remark: if the source devices HDMI with 5V power output, then no need connect USB cable for
power, if not, please connect the TX with PC by USB cable for power.
2. The LED indicator of the SmartShare mini TX will turn red when it’s booting up.
3. The LED indicator will become blue and flashing when SmartShare mini is ready to stream.
4. Click the button to start casting, the LED indicator will become constant blue.
Streaming from smart devices:
1. iOS devices
Step 1: please make sure the RX is in TX/airplay/dlna mode:

13 / 14
Stpe2:
Search RX SSID and connect. (SSID: RXxxxxx, Password: 12345678), the SSID show on
the left upper corner of the screen.
Or if the RX already connect with your network, and make sure your devices is in the same
network with RX.
Step 3: Stream the content from your iOS devices via Airplay.
2. Android devices
Step 1: switch the RX to miracast mode:
Step 2: make sure your android devices Wi-Fi are available, and select the miracast function of
your phone and start to stream.

14 / 14
Remark: there are different name on difference brand phones or tablets: WIFI Display, WLAN
Display, Wireless Display, Allshare Display, Allshare Cast, Wireless Display

15 / 14
FCC STATEMENT :
This device complies with Part 15 of the FCC Rules. Operation is subject to the following
two conditions:
This device may not cause harmful interference, and
This device must accept any interference received, including interference that may
cause undesired operation.
Warning: Changes or modifications not expressly approved by the party responsible for
compliance could void the user's authority to operate the equipment.
NOTE: This equipment has been tested and found to comply with the limits for a Class
B digital device, pursuant to Part 15 of the FCC Rules. These limits are designed to
provide reasonable protection against harmful interference in a residential installation.
This equipment generates uses and can radiate radio frequency energy and, if not
installed and used in accordance with the instructions, may cause harmful interference
to radio communications. However, there is no guarantee that interference will not
occur in a particular installation. If this equipment does cause harmful interference to
radio or television reception, which can be determined by turning the equipment off and
on, the user is encouraged to try to correct the interference by one or more of the
following measures:
Reorient or relocate the receiving antenna.
Increase the separation between the equipment and receiver.
Connect the equipment into an outlet on a circuit different from that to which
the receiver is connected.
Consult the dealer or an experienced radio/TV technician for help.
FCC Radiation Exposure Statement:
This equipment complies with FCC radiation exposure limits set forth for an
uncontrolled environment. This equipment should be installed and operated with
minimum distance 20cm between the radiator & your body.
This manual suits for next models
1
Table of contents
Popular Transmitter manuals by other brands

BEKA
BEKA BA374C manual

EUTECH INSTRUMENTS
EUTECH INSTRUMENTS 2-WIRE PHORP TRANSMITTER operating instructions

Tekkeon
Tekkeon myPower FM MP1100-50 Specifications

Accsoon
Accsoon CineView SE user manual

Endress+Hauser
Endress+Hauser iTEMP TMT162 technical information

DigitaLinx
DigitaLinx DL-HDE100 Quick install guide