Quick Start Guide for Vinmetrica SC-300™ Kit
Set-Up:
For the first time set up, please see the ‘Setting up the instrument’ sec-
tion of the manual provided.
Free SO2Test:
1. Select SO2mode and press ENTER. Attach SO2
electrode. (Figure 1).
2. The value on the screen (current) should show a
value less than 50 (usually 0.00) and the green
PROCEED light should be illuminated.
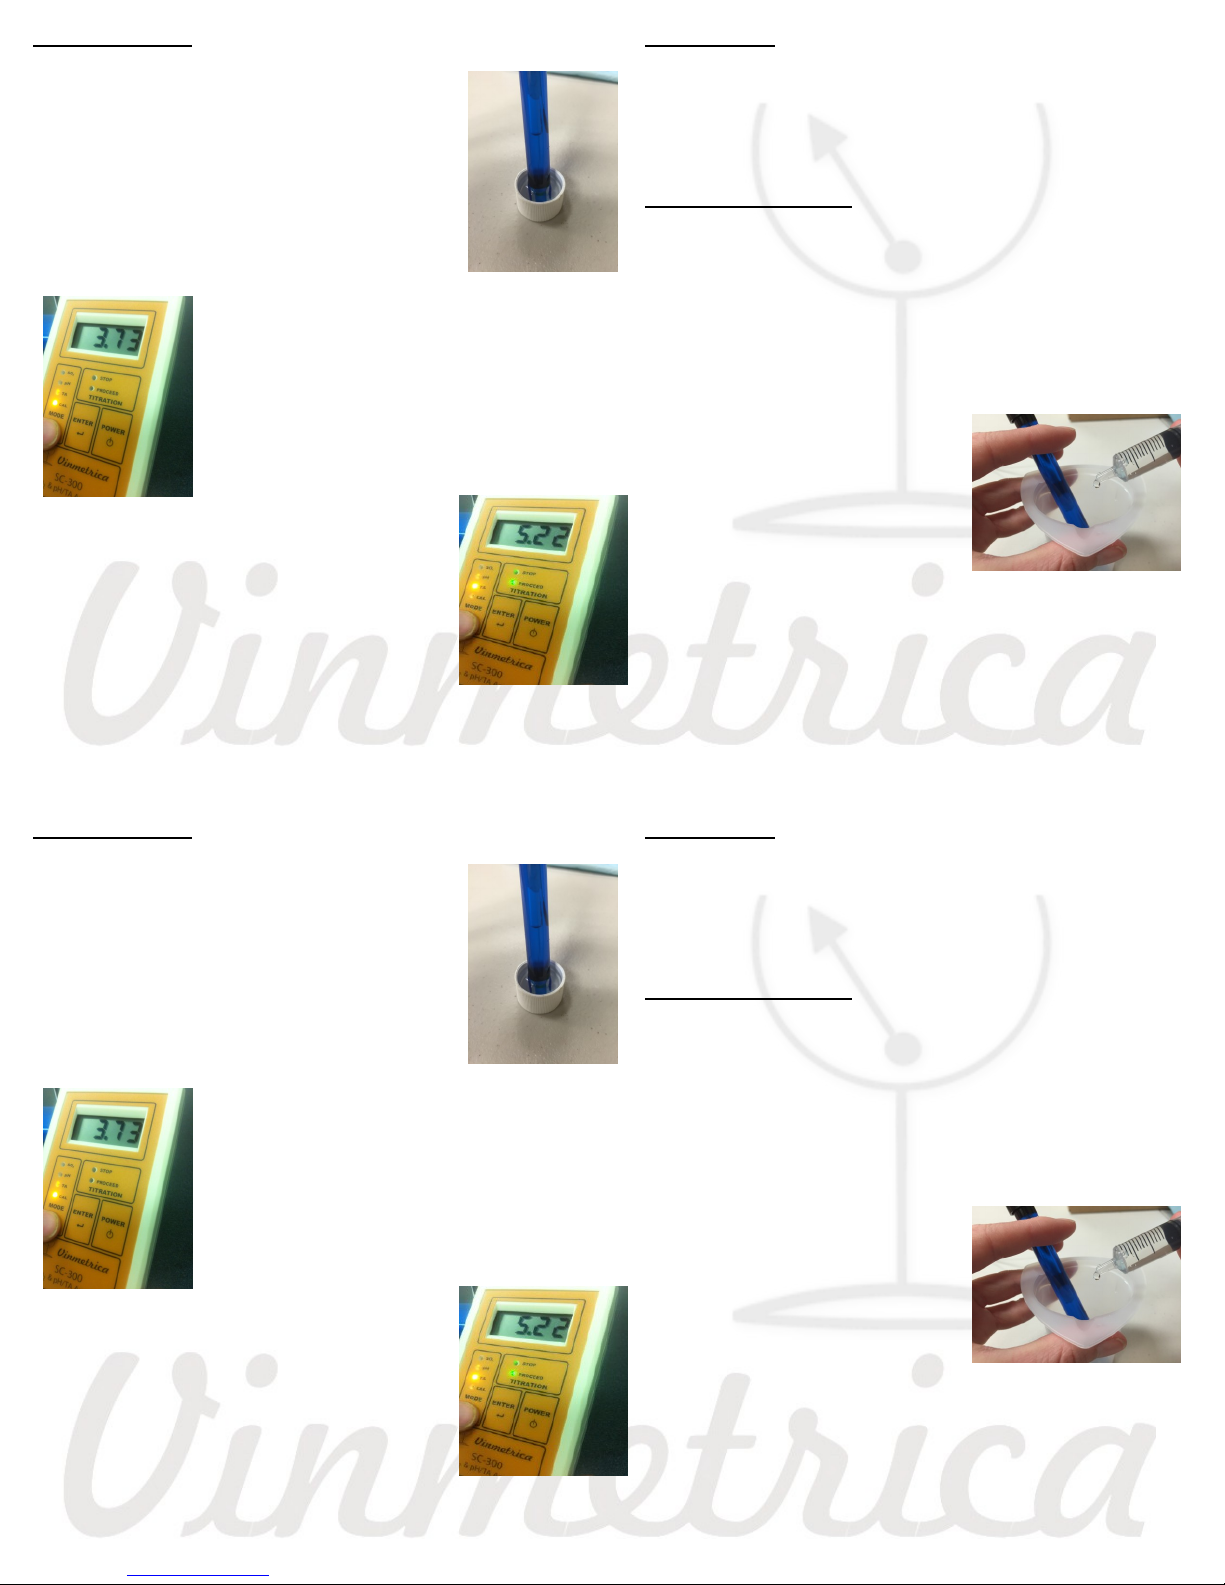
3. Fill syringe with SO2titrant, set syringe to
the 5.0 mL line. (Figure 2).
4. Draw up a 25mL sample of wine or must
and dispense into the titration vessel. (Figure
3).
5. Using the transfer pipettes, add about 2mL
Acid Solution and 2mL Reactant solution to the
titration vessel.
6. Place SO2 electrode into the titration
vessel. Stir or swirl constantly holding
electrode in place. (Figure 4).
7. With a current less than 50 and the green
PROCEED light lit, go to step 8. If the
current is greater than 50 and/or the
STOP light is illuminated, no need to
proceed (you have less than 2ppm Free
SO2)
8. Titrate the sample by adding the SO2
Titrant dropwise from the syringe; be sure
to maintain constant, swirling motion.
9. Stop titrating when beeper sounds for 15
seconds (20 beeps), red “STOP”
light is on and the current exceeds
50; maintain swirling motion
throughout 20 beeps.(Figure 5).
10. Calculate Free SO2 ppm SO2= 20 *
V, Where V is 5mL minus the end-
point on the syringe (mL). (e.g.,
Figure 6 shows an endpoint of 1.0, so V is 5.0 - 1.0 = 4. So
ppm is 4 * 20 = 80).
Cap and seal all reagents and store in a dark, cool loca-
tion. When finished testing, rinse SO2electrode with DI
water and allow to air dry. For “Total SO2” please refer
to user manual.
Figure 1
Figure 2
Figure 5
Figure 6
Figure 3
Figure 4
Quick Start Guide for Vinmetrica SC-300™ Kit
Set-Up:
For the first time set up, please see the ‘Setting up the instrument’ sec-
tion of the manual provided.
Free SO2Test:
1. Select SO2mode and press ENTER. Attach SO2
electrode. (Figure 1).
2. The value on the screen (current) should show a
value less than 50 (usually 0.00) and the green
PROCEED light should be illuminated.
3. Fill syringe with SO2titrant, set syringe to
the 5.0 mL line. (Figure 2).
4. Draw up a 25mL sample of wine or must
and dispense into the titration vessel. (Figure
3).
5. Using the transfer pipettes, add about 2mL
Acid Solution and 2mL Reactant solution to the
titration vessel.
6. Place SO2 electrode into the titration
vessel. Stir or swirl constantly holding
electrode in place. (Figure 4).
7. With a current less than 50 and the green
PROCEED light lit, go to step 8. If the
current is greater than 50 and/or the
STOP light is illuminated, no need to
proceed (you have less than 2ppm Free
SO2)
8. Titrate the sample by adding the SO2
Titrant dropwise from the syringe; be sure
to maintain constant, swirling motion.
9. Stop titrating when beeper sounds for 15
seconds (20 beeps), red “STOP”
light is on and the current exceeds
50; maintain swirling motion
throughout 20 beeps.(Figure 5).
10. Calculate Free SO2 ppm SO2= 20 *
V, Where V is 5mL minus the end-
point on the syringe (mL). (e.g.,
Figure 6 shows an endpoint of 1.0, so V is 5.0 - 1.0 = 4. So
ppm is 4 * 20 = 80).
Cap and seal all reagents and store in a dark, cool loca-
tion. When finished testing, rinse SO2electrode with DI
water and allow to air dry. For “Total SO2” please refer
to user manual.
Figure 1
Figure 2
Figure 5
Figure 6
Figure 3
Figure 4