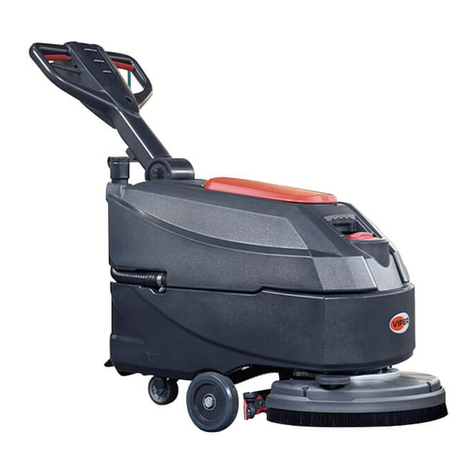
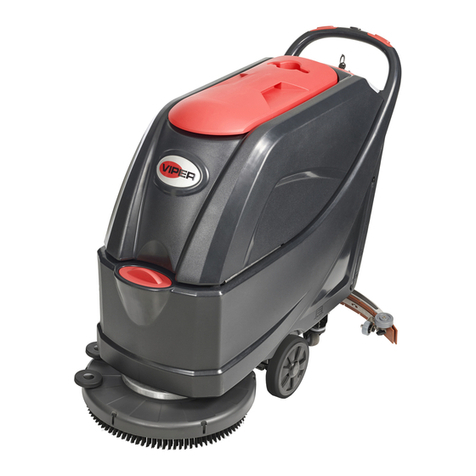
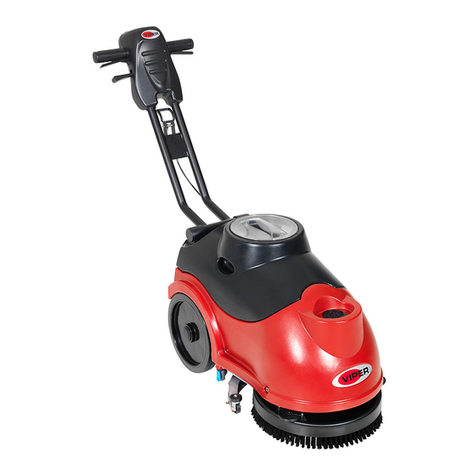
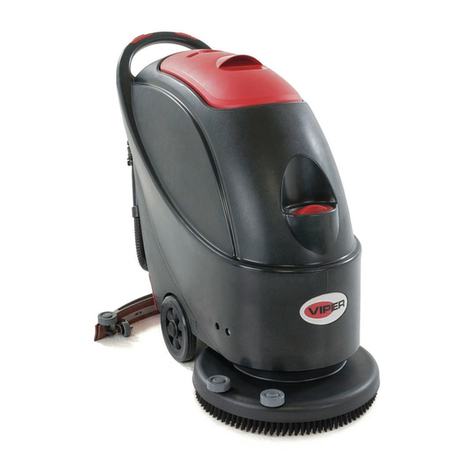
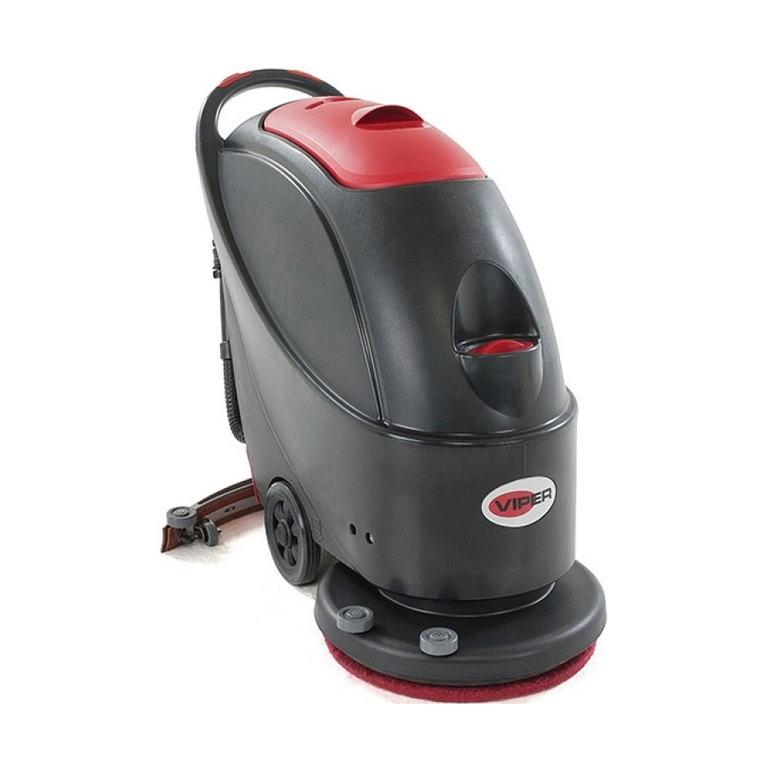
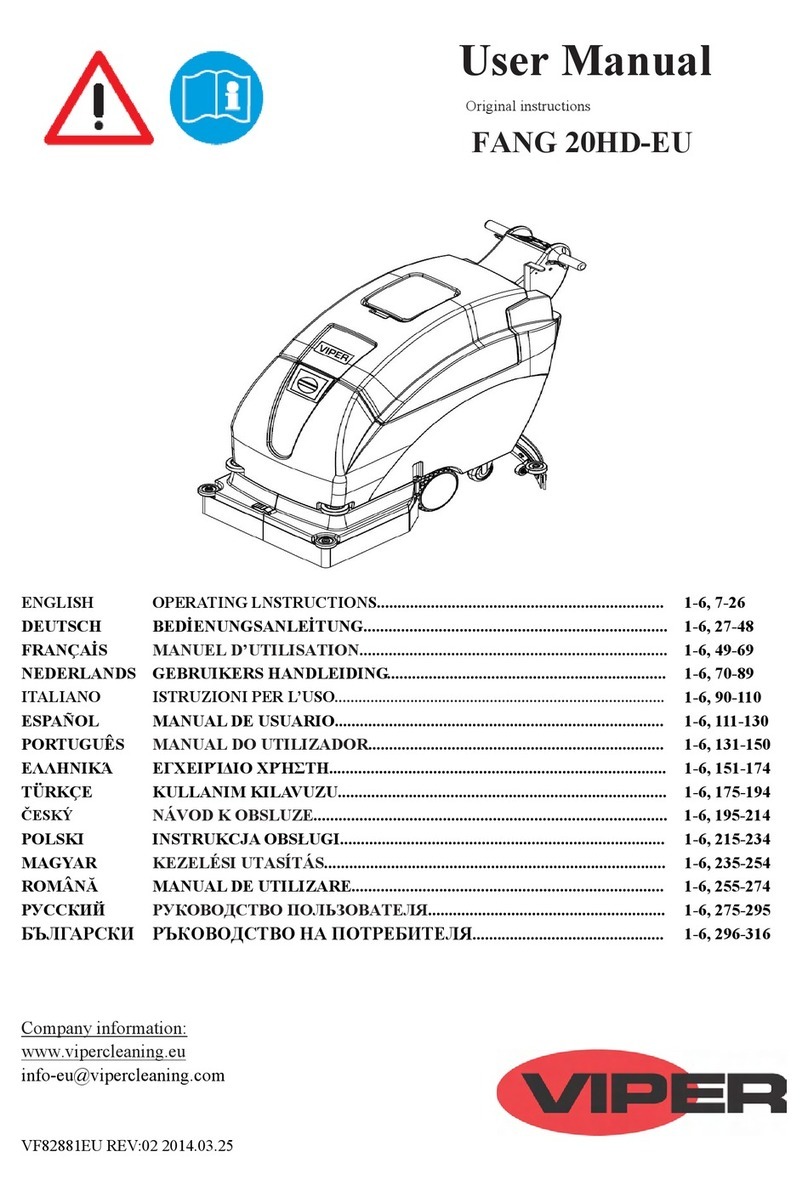
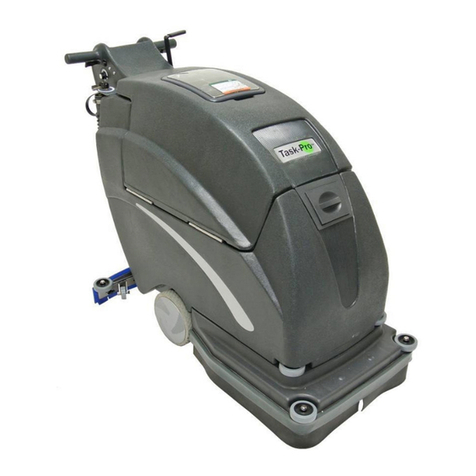
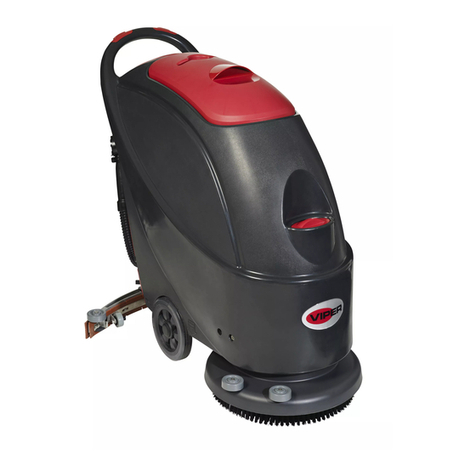
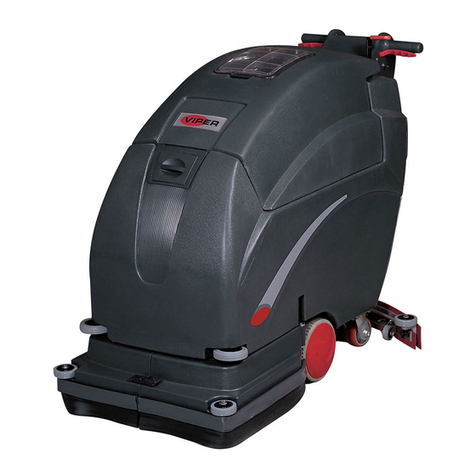
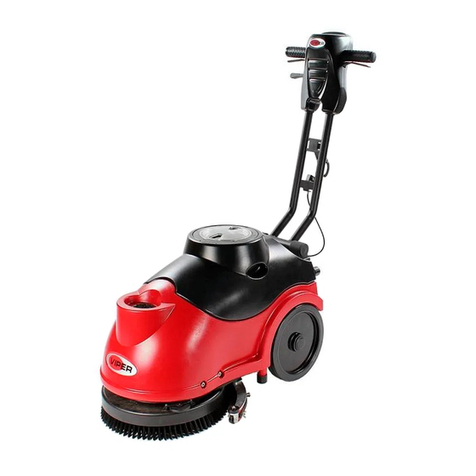
Viper Fang15B User manual

2013-06-18
VF89027 REV.04
FANG15B AS380/15B-CN
www.vipercleaning.com

SAFETY PRECAUTIONS
This machne is intended for commercial use.It is constructed for use in an indoor environment and is
Not intended for any other use. Use only with recommended accessories.
All operators shall read, understand and exercise the following safety precautions:
1) DO NOT OPERATE MACHINE:
Unless trained and authorized.
Unless you have read and understand the operators manual.
In flammable or explosive areas.
In outdoor areas.
2) BEFORE OPERATING MACHINE:
Make sure all safety devices are in place and operate properly.
3) WHEN USING MACHINE:
Go slow on inclines and slippery surfaces.
Follow all safety guidelines.
Be very careful when using the machine in reverse.
Report and fix any damage to machine prior to operating it.
4) BEFORE LEAVING OR SERVICING MACHINE:
Stop machine on level ground.
Turn machine off.
5) WHEN SERVICING MACHINE:
Read operators manual thoroughly prior to operating or servicing this machine.
Use manufacturer supplied or approved replacement parts.
Secure machine with wheel blocks prior to jacking the machine up.
Use approved jack or hoist to safely elevate the machine.
WHEN SERVICING MACHINE:(con’t)
Disconnect batteries prior to working on machine.
Wear gloves when handling batteries or battery cables.
Avoid any contact with battery acid.
Avoid moving parts,Do not wear loose fitting clothing while servicing machine.
WARNING!
WARNING!
WARNING!
1
USERMANUAL
Batteries emit hydrogen gas.Explosion or fire can result from hydrogen gas. Keep
Sparks and open flames away! Keep battery compartment open when charging.
Flammable materials can cause an explosion or fire. Do not use flammable materials
In tanks.
Flammable materials or reactive metals can cause explosion or fire .Do not pick up.
If not in proper operating condition.

Check battery are fully charged.(see BATTERY CHARGING)
6. connecting wire for battery and charger (if equipped)
7. brush or pad driver
2
1. Turn off the machine .
MACHINE SET UP&INSTALLATION
UNCRATING MACHINE
Be sure and check packing carton for any damage. Immediately report any damage to carrier.
Check contents of package to ensure that the following items are included:
1. Machine
2. Batteries(x2)
3. Squeegee assembly
4. Scrubber-dryer User Manual
5. Electric Battery Charger Manual(if equipped)
(if equipped)
BATTERY DISASSMBLY AND INSTALLATION
1. Switch off the main switch (47).
2. Remove the recovery tank (2) as shown in the relevant paragraph.
3. Unscrew the bolt from batteries (16), then remove or change.
4. Install the batteries on the machine according to the diagram below.
5. Install the recovery tank.
WARNING
Do not connect+ to +,or - to-,when disassembly or install the batteries. It is very dangerous.
Battery charging
Charge the batteries(see the procedure in Maintenance chapter).
MACHINE SET UP
Pre-operation checks
1.Sweep or dust mop the surface to be cleaned.
2.Check that squeegee is properly installed.
3.Lower the squeegee (33) with the lever(26).
4.
5.Check that brush/pad is properly installed.
Brush/Pad driver installation and disassembly
NOTE
2. Lay down the machine in this position as indicated in the figure2, Pull up the lift lever (26) to raise
the squeegee up (33) .
USERMANUAL
Only install manually. If auto-installation, it will wear brush hub.
Make sure that the tanks are empty before disassembling the brush.
Figure1

brackets.
3
3. Mount the brush or pad driver onto the drive wheel hub and then rotate counterclockwise until it
locks , as indicated in the figure3.
WARNING
Do not turn on the machine in this position as below
Squeegee installation
1.Turn off the machine (47).
2.Pull down the squeegee lift lever (26) to put down the squeegee on the “working” position .
3.Lay down the machine in this position as indicated in the figure2.
4.Loosen the two knobs (55) on the squeegee and slide the squeegee into the slots of squeegee
Tighten the knobs securely (unscrew the knobs, if disassembly).
5.To replace the front/rear squeegee(56/57), unscrew the thumb nut(37).
Solution tank filling
NOTE
Figure3
Figure2
USERMANUAL
hub.
4. To remove the brush/pad,rotate the brush/pad clockwise until it is released from drive wheel
. The brush/pad could disengage andcause injury.
with a pipe or bucket. Do not remove the Solution filter (21) whileThe machine can be fulled
filling.

build up and clogging of the solution lines.
intended for automatic scrubber applications.
4
Turn on the vacuum motor switch (49), the indicate light will be on.
tion switch(50), the indicate light will be on.
ine and turn the latch(17) to lock the tank.
1. Fill water into solution tank (3) from the inlet (20) through pipe or bucket
2. Do not fill the solution tank completely, leave a few centimeters from the edge.
3. The water temperature must not exceed 40℃.
Solution tank draining
NOTE
1.Unscrew the drain cap (22) on the bottom of solution tank. The solution/water will flow
freely into a bucket or floor drain.
2.Rinse the solution tank with clean water after every use. This will help prevent chemical
3.Screw up the drain cap (22).
Recovery tank draining
NOTE
1.Turn the latch(17) off the recovery tank, take off the recovery tank from machine by
grasping two grooves of tank. Open the lid(1) and overturn the recovery tank to drain the
dirty water into a container , or unscrew the drain cap(22) to let water pipe out to a bucket.
2.Clean and Rinse the recovery tank with clean water after every use.
3.Re-place the recovery tank on the mach
MACHINE OPERATION
1.Set the handle to a comfortable height by pressing level (25).
2.
3.Turn on the main switch(47).
4.Turn on the brush motor switch (48) and the solu
5.
6.If necessary, adjust the water flow by turn the ball valve (31) manually
7.
NOTE
.
CAUTION!
CAUTION!
USERMANUAL
Solution tank should be drained and cleaned after each scrubber operation is
completed.
Recovery tank should be drained and cleaned after each scrubber operation is
completed.
If the battery indicator light (51) is green, the machine can be used. If it is yellow or red, the
batteries must be charged.
CAUTION!
Use only low-foam and non-flammable detergents,
Before lifting the brush, turn it off by pressing the switch (47).
Lower the squeegee (33) onto the floor by pulling down the lift mechanism(26).
will start to spin, solution will begin to flow.Pull one or both operating triggers(24), and then brush
Move the machine and start cleaning,
neously. It means the machine is being overloaded.
When cleaning excessively aggressive floors or other'''' s this could cause the machine do not work, brush motor and
Please turn off
vacuum indicators on the Control panel(46) flashing simulta
all the switches on the Control panel (46).
2. Empty the tanks as shown in the previous paragraph.
5
CAUTION!
Do not use the machine with discharged batteries to avoid damaging the batteries and reducing the battery
life.
AFTER USING THE MACHINE
After scrubbing, please proceed with below actions before leaving the machine:
1. Remove the brush/pad-holder.
3. Perform the daily maintenance procedures (see the maintenance chapter)
4. Store the machine in a clean and dry place, with the brush/pad-holder and the squeegee
5. If storing in an area which may reach freezing temperatures, be sure to drain all fluids from the
machine prior to storage . any damage caused by freezing temperatures will not be covered by the
warranty
If the machine is not going to be used for more than 30days, please proceed with below actions:
1. Perform the procedures shown in ‘After Using the Machine paragraph’.
2. Disconnect the battery connector.
MAINTENANCE
The lifespan of the machine and its maximum operating safety are ensured by correct and regular
maintenance. The following chart provides the scheduled maintenance. The intervals shown may
vary according to particular working conditions, which will be defined by the person in charge of the
maintenance.
WARNING
Maintenance procedures must be performed with the machine switched off and the batteries/battery
charger cable disconnected. Moreover, carefully read the instruction in the Safety chapter.
All scheduled or extraordinary maintenance procedures must be performed by qualified personnel, or
by an authorized Service Center.
This Manual describes only the easier and most common maintenance procedures.
For other maintenance procedures shown in the Scheduled Maintenance Table, refer to the Service
Manual that can be consulted at any Service Center.
SCHEDULED MAINTENANCE TABLE
Procedure Daily, after using
the machine
Weekly Every six
mouths
yearly
Battery charging
Squeegee cleaning
Brush cleaning
Tank and vacuum grid with float cleaning, the
cover gasket check
Squeegee blade check and replacement
Solution filter cleaning
USERMANUAL
ERIODS
MACHINE NOT BEING USED FOR LONG P

machine socket. Connect the charging cable to the
he grounded wall outlet (100v~240v).
5. The charging indicator light (30) turn on means
6. Upon the completion of charging, first unplug
7.
6
or eyes, rinse thoroughly with water and consult a
Out-water pipe filter cleaning
Screw and nut tightening check (1)
rotary parts getting lubricant (1)
Brush/Pad-holder motor carbon brush check or
replacement (2)
Vacuum system motor carbon brush check or
replacement (2)
(1)And after the first 8 working hours.
(2)This maintenance procedure must be performed by an authorized viper Service Center.
BATTERY CHARGING
NOTE
CAUTION!
Keeping the batteries charged make their life last longer.
CAUTION!!
If the machine is not equipped with on-board battery charger, choose an external battery charger
suitable for the type of batteries installed.
WARNING!
Please use viper approved charger to charge the battery
WARNING!
Pay careful attention when charging WET batteries as there may be battery fluid leakages. The battery
fluid is corrosive. If it comes in contact with skin
physician.
1. Place charger and machine in a well ventilated area.
2. Turn machine off (47).
3. Take away the recovery tank (2),Exposing battery compartment.
4. Plug the charging cable to t
It is in charging, green light means battery charging
is completed. the charging cable from the wall outlet and then
disconnect from machine.
Replace the recovery tank .
NOTE
USERMANUAL
relevant paragraph.
For further information about the operation of the battery charger (29), see the
Charge the batteries when the yellow or red indicator(51),or at the end of every working cycle.

are integrity or not.
7
SQUEEGEE CLEANING
NOTE
CAUTION !
It is advisable to wear protective gloves when cleaning the squeegee because there may be sharp debris.
SQUEEGEE BLADE CHECK AND REPLACEMENT
1. Take off the squeegee as shown in the previous paragraph.
3. Unscrew six the thumb nut (37) to get off the blades.
5. Install the squeegee in the reverse order of removal.
BRUSH /PAD DRIVER CLEANING
CAUTION!
It is advisable to wear protective gloves when cleaning the brush/pad because there may be sharp debris.
2. Clean and wash the brush/pad with water and detergent.
3. Check the brush bristles for integrity and wearing status; if necessary, replace the brush.
4. Check the pad for wearing status; if necessary, replace the pad driver.
TANK/VACUUM GRID WITH FLOAT CLEANING AND COVER GASKET
CHECK
CAUTION!
It is advisable to wear protective gloves when cleaning the tank and vacuum/suction assembly because there
may be sharp debris.
1. Move the machine to the appointed disposal area.
2. Turn off the main switch (47).
3. Take off the recovery tank (2), clean and rinse both solution/recovery tank, and drain out.
4. Take off all vacuum kits, gasket ,filter , clean and re-install.
5. Check the recovery tank lids gasket ring and the vacuum rubber connector(18) between two tanks
NOTE
USERMANUAL
The gasket ring of recovery tank and the rubber connector between two tanks create
vacuum in the tank. If necessary, replace them. .
a good drying performance.
The squeegee must be clean and its blades must be in good condition in order to getting
are cracked or split, if necessary replace them with new.2. Check to see if the edge of the front/rear blades
s. If they are not adequate, overturn or replace
4. Check the front/rear blades for integrity, cut and tear
them.
as shown in the previous paragraph.1. Remove the brush/pad

35. Squeegee hose
34. Squeegee wheels
8
MACHINE STRUCTURE
1. Recovery tank lid
2. Recovery tank
3. Solution tank
5. Protective rollers
6. Brush
7. Front handle shell
8. Control panel
9. Rear handle shell
10. Handle rubber
11. Handle iron pipe
12. Squeegee vacuum assembly
13. Squeegee suction assembly
14. Left positioning
15. Right positioning
16. Batteries
17. Latch
18. Rubber sealing
19. Limit hose joint
20. Inlet
21. Solution filter
22. Solution tank drain
23. Wheels on fixed axle
24. Handle left and right
25. Handle rotate lever
26. Squeegee lift lever
27. Squeegee string
28. Box circuit
29. Charger
30. Battery charge indicator
31. Solution flow control lever
32. Electromagnetic valve data
33. Squeegee
36. Axle
37. Thumb nut
38. Vacuum system motor
39. Brush motor
40. Drive belt
41. Belt
42. Squeegee rotation plate
43. Squeegee lift plate
44. Squeegee fixing plate
45. Motor fixing plate
USERMANUAL
cover4. Brush

9
32
31 33
37
56
57
30
29
28
27
26
24
25 41
42
45
44
43
40
3938
8
2322
20
21
1819
9
16
17
15
14
13
12
11
10
3
4
7
6
5
2
1
36
22
35
34
USERMANUAL
59
58
33

Sound lever 68dBA
Vacuum motor data 24V 300W
Control panel
Input 100-240
Carton spec 780x415x590MM
10
54
53
52
51
Vacuummotorswitch
Brushmotorswitch
Mainswitch
Control panel
46.Electric quantity indicator
47.Brush motor indicator
48.Vacuum motor indicator
49.Suction Electromagnetic valve data indicator
50.Suction Electromagnetic valve data switch
TECHINICAL DATA
Machine length*width*height 770x500x550MM
Solution tank capacity 15L
Recovery tank capacity 15L
Wheel diameter 254MM
Brush motor data 24V 250W
Electromagnetic valve data 24V
Maximum gradient 2%
Batteries data (2×12V)24V 33Ah/20h
Power cable length /
Batteries spec 196 x 130 x 175mm
Working capacity, up to 800mm
Cleaning productivity 750m2/hour
Squeegee width 490mm
Brush diameter 380mm
Brush rpm 150rpm
Charger Vac,50-60HZ
Output 24Vdc,5A
Machine weight 60kg
Machine weight(with charger and
package) 65kg
.
.
.
.
USERMANUAL

the appropriate position
ust the screw nut(59 )to
Adj
ustment piece(58 )not set at an
appropriate position
j
Squeegee ad
11
TROUBLESHOOTING
The solution is dirty Empty the solution,clean
clean solution.
the tank and refill with
The solution is empty Fill the tank
The recovery tank does not limited Lock the latch(17)
Connect
The power line disconnected from the power Connect
The PCB or key board is faulty Change the PCB or key
The suction power is insufficient
Vacuum system motor does not work,
indicator lights (52) flash
Brush motor does not work, brush
indicator light (52) do not turns on
light(51) display red
The machine does not work, indicator
light(51) do not turns on
The machine does not work, indicator
brush indicator lights (53) flash
Trouble Possible Cause Remedy
The battery connector is disconnected Connect
The batteries are completely discharged Charge the batteries
The batteries are discharged Charge the batteries
board
The deck motor is overloaded Use less aggressive
brushes suitable for the
floor to be cleaned
There are foreign materials(tangled
threads,etc)preventing the brush from
rotating
Clean the brush hub
vacuum motor indicator light (53) do not
turns on
board
The vacuum system motor is overloaded Check the vacuum system
motor
The recovery tank is full. Empty the recovery tank.
The hose is disconnected from the
squeegee
Vacuum assembly is clogged Clean or check
The squeegee is dirty, or the squeegee
blades are worn or damaged
Clean and check the
squeegee
The tank cover is not properly closed, or the
gasket is damaged
Close the cover properly
or replace the gasket
The solution flow is insufficient. Solution flow control valve(31) is block up Clean the valve
The squeegee leaves marks on the floor.
There is debris under the squeegee blades Remove the debris
The squeegee blades are worn, chipped or
torn
Replace the blades
USERMANUAL

12
安全预防
本机仅作商业用途,仅限于室内使用,敬请使用本机所推荐的附件。
本机操作者应仔细阅读,理解,遵照以下安全预防措施操作本机。
1) 以下情况不得操作本机
-- 未经培训或取得相应的资格。
-- 未认真阅读并理解本机操作说明
-- 于易燃易爆场所。
-- 机器存在故障隐患而不适宜操作时。
-- 户外作业时。
2)操作本机前
-- 应确保所有安全装置功能正常。
3)使用时
-- 在斜坡和打滑的地面使用低速操作。
-- 请遵照安全指引作业。
-- 当机器在倒传运行时应该特别小心。
-- 立即反映本机之任何不正常状况。
4)离开本机或维修前必须
-- 将本机停于水平地面。
-- 关掉本机。
5)维修本机时
-- 应该仔细阅读本机说明书。
-- 应使用原厂配件。
-- 在提升本机前,轮子前设档块。
-- 使用特定起重器来提升本机。
维修本机时
-- 断开电瓶连接线。
-- 当对电瓶或电瓶线维修时,应该戴手套。
-- 避免接触电瓶酸性物质。
-- 避免移动部件,勿穿太宽松服装。
!!! 电瓶会放射氢气,并会导致燃烧或爆炸,电瓶应远离火源!充电时请打开电瓶盖。
易燃物质会导致燃烧和爆炸,水箱内勿使用易燃物质。
易燃物质或活性金属会导致燃烧或爆炸,勿用手拾取。
用户手册

个(选配)2
仔细检查箱内所装之物件是否完整
13
刷盘/针座(如果有配备)
电瓶连接线(如果有配备)
7
6
机器调试与安装
打开机器包装
仔细检查所装本机之纸箱有无损坏,如有损坏,立即向运送货物相关人员反映。
1.自动洗地车
2.电瓶
3.水刮组件
4.洗地车用户手册
5.车载充电器手册(如果有配备)
.
.
电瓶安装
在交付机器前,电瓶已放于机器内,但还需将电瓶电源接上。
!!! 电瓶会放射氢气,并会导致燃烧或爆炸,电瓶应远离火源!充电时请打开电瓶盖
1)确保电源开关(47)处于关闭状态。
2)
打开污水箱体(2),将电瓶放置好。
3)用扳手把电瓶(16)四个固定螺栓扭开,取出电瓶。
请勿摔落电瓶至电瓶盒内!
4)安装时请把红色线接头接入电瓶“+ ”级,黑色接头接入“-”级。没有红黑接头可以随意连接。
5)装好污水箱。
WARNING(警告!)
拆卸或安装时不要让导电体使两个电瓶的“+ +”或“- -”连接,不能使单个电瓶“+ -”连
接。
电瓶连接后如下图所示(BLACK 为黑色线,RED 为红色线。
)
蓄电池充电
给蓄电池充电(参见保养章节里的步骤)。
机器调试
操作前检查
1.
外观是否清洁。
2.
检查水刮是否正确安装。
3.
使用水刮拉绳手把(26)放下水刮(33)。
4.
确保电瓶已充满电(参见电瓶充电章节)。
5. 检查刷盘是否正确安装。
用户手册

14
5
关掉电源接通开关(47)。
刷盘/针座安装和拆卸步骤
NOTE(提示)
根据所要执行的清洁任务,机器可以安装上刷盘(如下图),或者是带抛光垫的针座。
只能是手动安装,不可自动安装,自动安装会使刷盘磨损。
1.
2.
把机器如下图所示摆放, 提升水刮拉绳手把(26)使水刮为非工作状态。(见上刷时机器摆放示意图)
3.
把刷盘(6)或针座扣入皮带轮(40),再逆时针旋转配合。(见上刷后示意图)
4.
把机器如下图所示摆放。(见上刷时机器摆放示意图),再将刷盘/针座顺时针旋转可取出。
WARNING!(警告)
不可在(上刷时机器摆放示意图)时启动刷盘/针座,防止刷盘/针座甩出造成其它事故。
水刮安装步骤
1.
关闭电源接通开关(47)。
2.
放下水刮拉绳手把(26)使水刮为工作状态。
3.
。
上刷后示意图
上刷时机器摆放示意图
4. 一手拿水刮,一手拧紧手柄螺钉(55)。(拆卸水刮时拧开手柄螺钉)
机器摆放如(上刷时机器摆放示意图)
当更换前刮条(56)和后刮条(57)时,拧开蝶形螺母(37)即可。
.
用户手册

调节手柄至合适角度。
15
清水箱注水或清洁溶液
NOTE(提示)
此机器可注入清水和注入清洁溶液,可使用喉管和桶注水。注水时不可拿开清水箱过滤网(21)。
1. 使用注水口(20)把配好的合适的清洁溶液或清水注入清水箱(3)。
2. 不需完全注满,注到入水口边缘即可。
3. 清洁溶液和清水的温度不得超过 40℃。
CAUTION!(小心)
只能使用低泡沫、难燃,弱酸弱碱清洁剂,注入清水一定要干净。
清水箱排水
NOTE(提示)
每次洗地完成后,清水箱应排水并清理干净。
1.把机器推至特定排水区排水,拧开放水盖(22),把清水箱(3)中剩余的水和溶液排出。
2.每次使用后用清水冲洗清水箱(3)内部,以避免化学品堵塞,腐蚀清水箱(3)。
3.清水箱(3)冲洗完毕,将放水盖(22)重新装好。
污水箱排水
1.打开污水箱盖(1)看污水箱是否有污水,如果有污水,请拧开限位扣(17),端开污水箱(2)
倒掉污水/或者直接拧开污水箱放水盖(22)放掉污水。
2.把污水箱放在工作状态,拧紧限位扣(17),拧好污水箱盖。
3.每次洗地完成后,污水箱应排出污水并清理干净。
机器操作
1.
2.使用水刮拉绳手把(26)放下水刮(33)。
3.按下电源开关(47)。
4.按下刷盘启动开关(48)和电磁阀启动开关(50),对应指示灯(52)/(54)为亮光状态。
5.按下吸力泵启动开关(49),对应指示灯(53)为亮光状态,此时吸力泵(38)为工作状态。
6.根据清洗情况,可调节球阀(31)控制水量大小。
7.双手抓紧控制手柄,移动机器,开始清洗工作。
用户手册

16
机器可工作。
)然后按正常启动,)闪烁。表示机器过载保护,请关掉薄膜面板(5453
52
NOTE(提示)
如果电量显示灯(51)显示为绿色时,表示电量饱和。如果显示为黄色时,表示电量不足,需
要给电池充电。显示闪红灯时,必须对电池充电。
CAUTION!(小心)
在拿取刷盘/针座时请关掉电源接通开关(47)。
CAUTION!(小心)
当清洗凹凸不平的地面或其它因素导致机器不能工作时,而薄膜面板(46)上对应的指示灯( ,
,46)上所有开关(47 。
CAUTION!(小心)
蓄电池电量不足时不要使用机器,以免损坏蓄电池和缩短蓄电池寿命。
机器使用完以后
工作完毕,在离开机器前,完成如下步骤:
1. 根据相关段落里描述的步骤取下刷盘/针座。
2. 根据相关段落里描述的步骤排空水箱。
3. 完成每日的保养步骤(参见保养章节)。
4. 把机器包括刷盘/针座、水刮储存在一个干净及干燥的地方。
5.如果存放场所极度寒冷,存放之前机器必须完全干燥,任何因为低温造成的损坏,不予保修。
机器长期不使用时
如果机器将有超过 30 天不使用的话,请按如下方法处理:
1. 完成机器在使用完以后应该进行的步骤。
2. 断开蓄电池和机器的连接。
维护和保养
机器的使用寿命和最大操作安全性是靠正确和按时地保养来保证的。
以下的表格提供了机器的一般保养计划。保养的时间间隔在很大程度上取决于机器的工作状况,这个间
隔时间应该由负责保养的人来制定。
WARNING!(警告)
必须在关掉机器的电源和断开机器和蓄电池的连接后才能进行这些步骤。
进行任何的保养步骤之前请仔细阅读有关安全的章节。
所有计划内或额外的保养必须由合格的人员或得到授权的维修中心来完成。
本手册仅仅描述了最简单和最通用的保养步骤。
对本计划保养表内的其它保养步骤,请参见维修中心的维修手册。
定期保养表
步骤
每天,机器
使用完以后
每周 每六个月 每年
蓄电池充电
水刮清洁
用户手册

17
保持蓄电池处于充满电的状态以延长蓄电池的使用寿命。
刷盘/抛光垫清洁
水箱和封堵装置清洁,水箱密封条的检
查
水刮条的检查和更换
清水箱滤网的清洁
出水管滤网
螺丝和螺母紧固性的检查 (1)
转动零件处打润滑油 (1)
刷盘/针座,电机碳刷的检查或更换 (2)
吸力泵碳刷的检查或更换 (2)
(1)机器刚开始工作 8 个小时后就要执行。
(2)这些保养步骤必须由一家得到授权的威霸服务中心来完成。
蓄电池充电
NOTE(提示)
当指示灯(51)黄色灯时就需要给蓄电池充电了,亮红灯时必须给蓄电池充电,或者在
每次工作结束后进行充电。
CAUTION!(注意)
CAUTION!(注意)
如果没有配备车载充电器,请选择威霸推荐的充电器进行充电。
WARNING!(警告)
WET 加水式蓄电池在充电时将产生易爆的氢气,请在通风良好的区域充电并远离明火,
充电过程中禁止抽烟。充电时保持蓄电池容器敞开。
WARNING!(警告)
给蓄电池充电时要特别的小心,因为充电过程中可能有酸液的泄露。蓄电池酸液具有腐蚀
性,不慎接触到皮肤或眼睛请马上用大量水冲洗并去看医生。
1. 移动机器到良好通风区域。
2. 按下电源接通开关(47)关掉机器。
3. 端开污水箱(2)。
4. 将充电器电线与 AC 市电连接好,连接 AC 电源后充电指示灯亮,所有其它功能将被自动切断。
5. 当充电器指示灯(30)变亮时,表明充电器在充电,如果亮绿灯时表示充电完成。
6. 充电完成后将 AC 市电断开再拔出充电连接线,放回原来位置。
7. 重新装好污水箱。
NOTE(提示)
想得到更多关于车载充电器(29)的信息,请参见相关手册。
用户手册

18
4. 检查抛光垫的磨损状况,有必要的话,更换抛光垫
3. 检查刷盘上刷毛的完整性和磨损状况,有必要的话,更换刷盘。
2. 用水和清洁剂清洗刷盘/抛光垫。
1. 按照前面使用的章节所述的方法从机器上取下刷盘/抛光垫。
水刮的清理
NOTE(提示)
为了保证良好的吸水效果,水刮必须保持清洁,水刮条必须处于良好的状态。
CAUTION!(注意)
清洁水刮时建议佩戴保护手套,因为水刮中可能含有尖锐的碎片。
水刮条的检查和更换
1. 按水刮清理的方法取下水刮组件。
2. 目视前后刮条是否有裂痕,如有裂痕需更换刮条。
3. 拧开 6 个蝶形螺母(37)。
4. 检查前刮条和后刮条是否完整,有否缺口和裂痕。如果有缺口或裂痕,可以把刮条上下颠倒安装(要
求上面的边是完整的)。如果上面的边也磨损了的话,可以前后调换刮条(一条刮条四个长脚边都可
以用,最少可以用上下两个脚边)。
5. 按拆卸的相关顺序安装好水刮。
刷盘/抛光垫的清理
CAUTION!(注意)
清洁刷盘/抛光垫时建议佩戴保护手套,因为其中可能含有尖锐的碎片。
污水箱,吸水组件,吸力组件的清洁,污水箱盖密封条的检查
CAUTION!(注意)
清洁水箱和吸力吸水组件时建议佩戴保护手套,因为其中可能碰到水箱的利边和碎片。
1. 移动机器到指定平整的排水区域。
2. 把电源开关(47)关闭。
3. 用水枪冲洗清/污水箱内部,把污水倒出。
4. 拔出吸水组件(13)和过滤网(21)并清洗,清洗完安装至原位。
5. 检查污水箱盖密封圈,清水箱与污水箱连接的密封橡胶锥(18)是否完整,并清洗干净。
NOTE(提示)
污水箱密封条可使污水箱内产生真空,必须密闭才可有效地从地面上吸取污水。
如果有必要,把污水箱密封条从槽里取出更换,并检查密封条是否完整和足够密封。
用户手册

接头限位片
19
机器结构
1.
污水箱盖
2.
污水箱
3.
清水箱
4.
刷盘罩
5. 防撞轮
6. 刷盘
7. 前壳
8. 操作面板
9. 后壳
10. 手柄橡胶套
11. 手柄焊接件
12. 吸力组件
13. 吸污水组件
14. 左定位块
15. 右定位块
16. 电瓶
17. 限位扣(限制污水箱上下摆动)
18. 橡胶锥
19.
20. 注水口
21. 清水箱过滤网
22. 放水盖
23. 运输轮
24. 左右驱动开关
25. 手柄旋转把手
26. 水刮拉绳手把
27. 水刮拉绳
28. 电路箱盒
29. 充电器
30. 充电器指示灯
31. 球阀
32. 电磁阀
33. 水刮
34.
吸污管
35.
水刮轮
36. 轮轴焊接件
37. 蝶形螺母
38. 吸力泵
39. 刷盘电机
40. 皮带轮
41. 皮带
42. 左右旋转板
43. 水刮上下旋转板
44. 水刮固定板
45. 电机固定板
用户手册
Other manuals for Fang15B
1
This manual suits for next models
1
Table of contents
Other Viper Scrubber manuals

Viper
Viper AS6690T User manual

Viper
Viper AS380/15C-EU User manual

Viper
Viper AS510B User manual

Viper
Viper AS710R User manual

Viper
Viper VE13P User manual

Viper
Viper AS710R User manual

Viper
Viper AS5160 User manual

Viper
Viper AS430B User manual

Viper
Viper FANG 20T User manual

Viper
Viper AS380/15B-EU User manual