manuals.online logo
Brands
  1. Home
  2. •
  3. Brands
  4. •
  5. Viper
  6. •
  7. Scrubber
  8. •
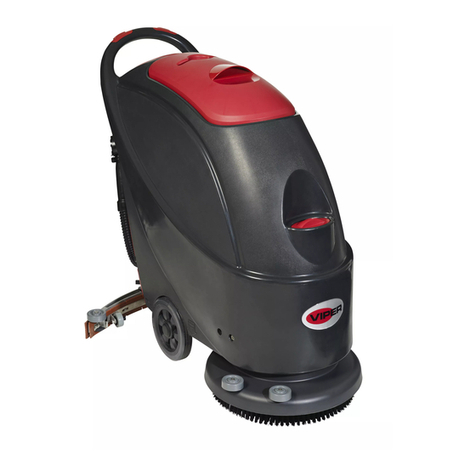
  9. Viper AS4325B Instruction Manual

Viper AS4325B Instruction Manual

Other manuals for AS4325B

3

Other Viper Scrubber manuals

Viper DRAGON Series User manual

Viper

Viper DRAGON Series User manual

Viper 50000398 User manual

Viper

Viper 50000398 User manual

Viper AS6690T User manual

Viper

Viper AS6690T User manual

Viper AS5160-US User manual

Viper

Viper AS5160-US User manual

Viper AS5160 User manual

Viper

Viper AS5160 User manual

Viper FANG 18 C User manual

Viper

Viper FANG 18 C User manual

Viper AS4335C Instruction Manual

Viper

Viper AS4335C Instruction Manual

Viper DR 1500 H User manual

Viper

Viper DR 1500 H User manual

Viper AS430C User manual

Viper

Viper AS430C User manual

Viper AS5160 User manual

Viper

Viper AS5160 User manual

Viper AS1050R User guide

Viper

Viper AS1050R User guide

Viper AS380/15C-EU User manual

Viper

Viper AS380/15C-EU User manual

Viper FANG 20 User manual

Viper

Viper FANG 20 User manual

Viper AS530R User manual

Viper

Viper AS530R User manual

Viper AS430C User manual

Viper

Viper AS430C User manual

Viper AS430C-US User manual

Viper

Viper AS430C-US User manual

Viper AS430C User manual

Viper

Viper AS430C User manual

Viper AS380/15B-EU User manual

Viper

Viper AS380/15B-EU User manual

Viper AS430B User manual

Viper

Viper AS430B User manual

Viper AS1050R User manual

Viper

Viper AS1050R User manual

Viper AS430B User manual

Viper

Viper AS430B User manual

Viper VE13P User manual

Viper

Viper VE13P User manual

Viper Fang15B User manual

Viper

Viper Fang15B User manual

Viper AS510B User manual

Viper

Viper AS510B User manual

Popular Scrubber manuals by other brands

Windsor Saber Cutter SC326 10052220 operating instructions

Windsor

Windsor Saber Cutter SC326 10052220 operating instructions

Powr-Flite PFX1380 SERIES Operators manual and parts lists

Powr-Flite

Powr-Flite PFX1380 SERIES Operators manual and parts lists

Olympus M200H operating manual

Olympus

Olympus M200H operating manual

Clarke BEXT 100H Operation?and safety

Clarke

Clarke BEXT 100H Operation?and safety

JOHNY VAC JVC70BCT user guide

JOHNY VAC

JOHNY VAC JVC70BCT user guide

RCm Elan Series Instruction and maintenance handbook

RCm

RCm Elan Series Instruction and maintenance handbook

Floorpul ruby 48 blt Use and maintenance

Floorpul

Floorpul ruby 48 blt Use and maintenance

Kärcher B 120 W quick start

Kärcher

Kärcher B 120 W quick start

Truvox Orbis MotorScrubber 20 user manual

Truvox

Truvox Orbis MotorScrubber 20 user manual

Numatic TTB 4045/100 Original instructions

Numatic

Numatic TTB 4045/100 Original instructions

U.S. Products PEX 500-C-TICK Information & operating instructions

U.S. Products

U.S. Products PEX 500-C-TICK Information & operating instructions

Mclennan C510 Operator's manual

Mclennan

Mclennan C510 Operator's manual

Columbus ARA 66 BM 100 operating manual

Columbus

Columbus ARA 66 BM 100 operating manual

Numatic TTV 678G / 300T Owner's instructions

Numatic

Numatic TTV 678G / 300T Owner's instructions

Onyx RX-34 Operator's manual

Onyx

Onyx RX-34 Operator's manual

REMS Twist instruction manual

REMS

REMS Twist instruction manual

Tennant 7200 Service manual

Tennant

Tennant 7200 Service manual

Clarke CA30 20B Service manual

Clarke

Clarke CA30 20B Service manual

manuals.online logo
manuals.online logoBrands
  • About & Mission
  • Contact us
  • Privacy Policy
  • Terms and Conditions

Copyright 2025 Manuals.Online. All Rights Reserved.

Use and maintenance
Operating guidelines AS4325B
Lift the squeegee up by hand until it locks in the
UP position, and turn off the vacuum, to perform
double scrubbing. To return to normal working
mode, use the red lever to release the squeegee,
and turn the vacuum back on.
When scrubbing is complete, turn off the machine
to perform the following maintenance.
You can check the level of the solution anytime
using the red ball on the left side of the machine.
Start cleaning by placing the hands on
the safety switches.
Press the + or – buttons to increase / decrease
the solution flow rate.
Turn on the machine and verify there is enough
battery power to complete the work. Charge
batteries if required.
Lift the deck by pressing the pedal down and to
the left. The squeegee is raised and lowered with
the deck.
Place the brush or pad-holder under the center of
the drive plate and lower the deck by pressing the
foot pedal down and to the right.
Turn the machine ON, and press one of the safety switches to install the brush/pad-holder. If necessary, repeat
the procedure until the brush/pad-holder is fully engaged. The brush pad-holder can also be installed manually
if needed. Use the black lever to adjust the handle height to a comfortable position.
Remove the red cover, fill the tank 1/2 full,
then add an appropriate amount of low foaming
detergent. Complete the filling of the tank,
and replace the red cover.
July 2020
Additional features (battery version only):
• Eco Mode optimizes use of water
and detergent to extend runtime
and increase productivity.
• Silent Mode allows for cleaning in
sound-sensitive areas, or during daytime.
Maintenance
Operating guidelines AS4325B
When scrubbing is complete, turn off the on/off
button to perform the following maintenance.
Daily: Empty the clean water tank using the
solution tank drain knob under the machine.
Daily: Empty the recovery tank using the recovery
empty hose. Bend the soft part before removing
the cap to control the flow.
Daily: Inspect and rinse the float ball cage
and inspect and clean the lid gasket if required.
Daily: Remove the squeegee, and clean. Inspect
the blades and flip them or replace them if required.
Daily: With the machine turned on and the deck
lifted, press the click off button to release the brush/
pad holder then clean and inspect before next use.
Weekly: Inspect the solution filter and clean
if required.
Daily: Leave the recovery tank lid open to let the
tank dry after it’s been cleaned to avoid bad odor.
Charge the batteries whenever the machine is not
in use. Connect the charger cable to the machine
socket, then plug the cable into a grounded
3-prong electrical outlet. Red LED will be on during
charging, and the Green LED will turn on when
charging is complete.
Local Viper dealer:
Phone number:
SN:
183 7/2020
July 2020 © 2020 Nilfisk, Inc.