Virone DB-1 User manual

1
DB-1
(PL) DZWONEK BEZPRZEWODOWY PRESSO AC
(EN) PRESSO AC WIRELESS DOORBELL
(DE) KABELLOSE KLINGEL PRESSO AC
ORNO-LOGISTIC Sp. z o.o.
ul. Rolników 437
44-141 Gliwice
tel. (+48) 32 43 43 110
(PL) WAŻNE!
Przed rozpoczęciem korzystania z urządzenia, należy zapoznać się z niniejszą instrukcją obsługi oraz zachować ją na przyszłość. Dokonanie samodzielnych napraw i modyfikacji
skutkuje utratą gwarancji. Producent nie odpowiada za uszkodzenia mogące wyniknąć z nieprawidłowego montażu czy eksploatacji urządzenia.
Z uwagi na fakt, że dane techniczne podlegają ciągłym modyfikacjom, Producent zastrzega sobie prawo do dokonywania zmian dotyczących charakterystyki wyrobu oraz
wprowadzania innych rozwiązań konstrukcyjnych niepogarszających parametrów i walorów użytkowych produktu.
Dodatkowe informacje na temat produktów marki ORNO dostępne są na: www.orno.pl. Orno-Logistic Sp. z o.o. nie ponosi odpowiedzialności za skutki wynikające
z nieprzestrzegania zaleceń niniejszej instrukcji. Firma Orno-Logistic Sp. z o.o. zastrzega sobie prawo do wprowadzania zmian w instrukcji - aktualna wersja do pobrania ze strony
www.orno.pl. Wszelkie prawa do tłumaczenia/interpretowania oraz prawa autorskie niniejszej instrukcji są zastrzeżone.
1. Nie używaj urządzenia niezgodnie z jego przeznaczeniem.
2. Nie zanurzaj urządzenia w wodzie i innych płynach.
3. Czyść suchą szmatką po wyłączeniu z sieci 230V.
4. Nie przykrywaj urządzenia podczas pracy.
5. Nie obsługuj urządzenia, gdy uszkodzona jest obudowa.
6. Nie rozkręcaj urządzenia i nie dokonuj samodzielnych napraw.
(EN) IMPORTANT!
Before using the device, read this Service Manual and keep it for future use. Any repair or modification carried out by yourselves results in loss of guarantee. The manufacturer
is not responsible for any damage that can result from improper device installation or operation.
In view of the fact that the technical data are subject to continuous modifications, the manufacturer reserves a right to make changes to the product characteristics and to
introduce different constructional solutions without deterioration of the product parameters or functional quality.
Additional information about ORNO products are available at www.orno.pl.
Orno-Logistic Sp. z o.o. holds no responsibility for the results of non-compliance with the provisions of the present Manual. Orno Logistic
Sp. z o.o. reserves the right to make changes to the Manual - the latest version of the Manual can be downloaded from www.orno.pl.
Any translation/interpretation rights and copyright in relation to this Manual are reserved.
1. Do not use the device contrary to its dedication.
2. Do not immerse the device in water or other fluids.
3. Clean with a dry cloth after switching off 230V.
4. Do not cover the device during operation.
5. Do not operate the device when the housing is damaged.
6. Do not disassemble the device and do not repair it yourself.
(DE) WICHTIG!
Vor der Inbetriebnahme des Geräts die Bedienungsanleitung sorgfältig lesen und für die zukünftige Inanspruchnahme bewahren. Selbständige Reparaturen und Modifikationen
führen zum Verlust der Garantie. Der Hersteller haftet nicht für die Schäden, die aus falscher Montage oder falschem Gebrauch des Geräts folgen können.
In Anbetracht der Tatsache, dass die technischen Daten ständig geändert werden, behält sich der Hersteller das Recht auf Änderungen in Bezug auf Charakteristik des Produktes
und Einführung anderer Konstruktionslösungen, die die Parameter und Gebrauchsfunktionen nicht beeinträchtigen, vor.
Zusätzliche Informationen zum Thema der Produkte der Marke ORNO finden Sie auf der Internetseite: www.orno.pl. Die Firma Orno-Logistic Sp. z o.o. haftet nicht für die Folgen
der Nichteinhaltung der Empfehlungen, die in dieser Bedienungsanleitung zu finden sind. Die Firma Orno-Logistic Sp. z o.o. behält sich das Recht auf Änderungen in der
Bedienungsanleitung vor –die aktuelle Version kann man von der Internetseite www.orno.pl herunterladen.
Alle Rechte auf Übersetzung/Interpretation sowie Urheberrechte an dieser Bedienungsanleitung sind vorbehalten.
1. Nutzen Sie das Gerät seinem Zweck entsprechend.
2. Tauchen Sie das Gerät nicht ins Wasser oder in andere Flüssigkeiten.
3. Reinigen Sie das Gerät mit einem trockenen Lappen, wenn das Gerät von der Stromversorgung abgetrennt ist.
4. Decken Sie das Gerät nicht während des Betriebs.
5. Nutzen Sie das Gerät nicht, wenn sein Gehäuse beschädigt ist.
6. Zerlegen Sie das Gerät nicht und nehmen Sie keine selbständigen Reparaturen vor.
Każde gospodarstwo jest użytkownikiem sprzętu elektrycznego i elektronicznego, a co za tym idzie potencjalnym wytwórcą niebezpiecznego dla ludzi i środowiska odpadu,
z tytułu obecności w sprzęcie niebezpiecznych substancji, mieszanin oraz części składowych. Z drugiej strony zużyty sprzęt to cenny materiał, z którego możemy odzyskać
surowce takie jak miedź, cyna, szkło, żelazo i inne.
Symbol przekreślonego kosza na śmieci umieszczany na sprzęcie, opakowaniu lub dokumentach do niego dołączonych oznacza, że produktu nie wolno wyrzucać łącznie
z innymi odpadami. Oznakowanie oznacza jednocześnie, że sprzęt został wprowadzony do obrotu po dniu 13 sierpnia 2005 r.
Obowiązkiem użytkownika jest przekazanie zużytego sprzętu do wyznaczonego punktu zbiórki w celu właściwego jego przetworzenia. Informacje o dostępnym systemie
zbierania zużytego sprzętu elektrycznego można znaleźć w punkcie informacyjnym sklepu oraz w urzędzie miasta/gminy.
Odpowiednie postępowanie ze zużytym sprzętem zapobiega negatywnym konsekwencjom dla środowiska naturalnego i ludzkiego zdrowia!
Every household is a user of electrical and electronic equipment and therefore a potential producer of hazardous waste to humans and the environment from the presence of
hazardous substances, mixtures and components in the equipment. On the other hand, waste equipment is a valuable material, from which we can recover raw materials such
as copper, tin, glass, iron and others.
The symbol of a crossed-out rubbish bin placed on the equipment, packaging or documents attached thereto indicates the necessity of separate collection of waste electrical
and electronic equipment. Products marked in this way, under penalty of a fine, may not be disposed of in ordinary waste together with other waste. The marking also means
that the equipment was placed on the market after the 13th August 2005.
It is the user’s responsibility to hand over the waste equipment to a designated collection point for proper treatment. Used equipment may also be returned to the seller in case
of purchase of a new product in a quantity not greater than the new purchased equipment of the same type. Information about the available waste electrical equipment
collection system can be found at the information point of the shop and in the municipal office.
Proper handling of waste equipment prevents negative consequences for the environment and human health!
Jeder Haushalt ist ein Benutzer von Elektro- und Elektronikgeräten und daher ein potenzieller Produzent von gefährlichen Abfällen für Mensch und Umwelt, da die Geräte
gefährliche Stoffe, Gemische und Komponenten enthalten. Andererseits sind gebrauchte Geräte ein wertvolles Material, aus dem wir Rohstoffe wie Kupfer, Zinn, Glas, Eisen
u.a. gewinnen können. Das Symbol des durchgestrichenen Mülleimers auf Geräten, Verpackungen oder den angehängten Dokumenten deutet auf die Notwendigkeit der
getrennten Sammlung von Elektro- und Elektronik-Altgeräten hin. So gekennzeichnete Produkte dürfen unter Androhung einer Geldstrafe nicht mit dem Hausmüll entsorgt
werden. Diese Kennzeichnung bedeutet gleichzeitig, dass das Gerät nach dem 13. August 2005 in Verkehr gebracht wurde.
Der Benutzer soll die Altgeräte einer festgelegten Sammelstelle zur entsprechenden Entsorgung zuführen. Gebrauchtgeräte können auch an den Verkäufer übergeben werden,
wenn Sie ein neues Produkt in einer Menge kaufen, die nicht höher ist als die der neu gekauften Ausrüstung desselben Typs. Informationen zum verfügbaren Sammelsystem
für Elektroaltgeräte finden Sie am Informationspunkt des Geschäfts und im Stadt- / Gemeindeamt. Der sachgemäße
Umgang mit gebrauchten Geräten verhindert negative Folgen für die Umwelt und die menschliche Gesundheit!
01/2020

2
BUDOWA/ CONSTRUCTION/ AUFBAU
Odbiornik/ Receiver/ Empfänger
Nadajnik/ Transmitter/ Sender
Rys. 1 Budowa dzwonka / Fig. 1 Doorbell construction / Abb. 1 Aufbau der Klingel
Rys. 2 Podłączanie dzwonka (odbiornika)/Fig. 2 Connection of the doorbell
(receiver) /Abb. 2 Anschließen des Klingels (Empfänger)
BUDOWA
CONSTRUCTION
AUFBAU
1. Regulacja głośności
2. Przycisk wyboru dźwięku dzwonka
3. Przycisk logowania
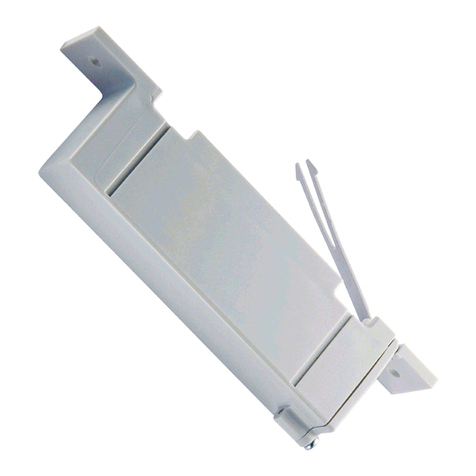
4. Płytka montażowa
5. Przycisk dzwonka (zewnętrzny)
1. Volume button
2. Ringtone selector button
3. Log-in button
4. Mounting plate
5. Push button
1. Lautstärke der Klingel
2. Taste zur Auswahl des Klingeltons
3. die Login-Taste
4. Montageplatte
5. Klingeltaste (extern)
Rys. 3 Montaż przycisku / Fig. 3 Installation of transmitter
Abb. 3 Montage der Taste
Rys. 4/ Fig. 4 / Abb. 4.
Rys. 5/ Fig. 5 / Abb. 5.
PL
Instrukcja obsługi i montażu
OPIS I ZASTOSOWANIE
Dzwonek bezprzewodowy i bezbateryjny przeznaczony jest do stosowania w domach, mieszkaniach, biurach, szpitalach, sklepach itp. Nie wymaga
instalacji dzwonkowej. Dzwonek (odbiornik) włączany jest bezpośrednio do gniazdka sieci ~230V, a nadajnik zasilany jest z przetwornika
elektromechanicznego nie wymaga stosowania baterii. Funkcja learning system umożliwia logowanie dodatkowych przycisków (max. 4).
W nadawaniu i odbieraniu sygnału wykorzystywana jest częstotliwość radiowa 433,92MHz. Zasięg dzwonka w terenie otwartym wynosi 100m.
Odbiornik posiada 6-stopniową regulację głośności do 88dB oraz 36 polifoniczne dźwięki dzwonka.
MONTAŻ/INSTALACJA
Zasięg pomiędzy przyciskiem, a dzwonkiem zależy od warunków otoczenia. Przed montażem zalecamy przetestowanie urządzenia w wybranym miejscu
w celu sprawdzenia czy jego zasięg nie został zakłócony.
Zasięg mogą znacząco obniżyć: ściany, stropy, metalowe powierzchnie, urządzenia o takiej samej częstotliwości, bliskość silników elektrycznych,
transformatorów, zasilaczy, komputerów itp.
Odbiornik
Umieść dzwonek (odbiornik) w gnieździe. Gniazdo powinno być zlokalizowane w miejscu oddalonym od źródeł ciepła i ruchomych przedmiotów
(np. drzwi). W przypadku podłączenia pośredniego, np. do przedłużacza, należy zadbać o to, by dzwonek był dobrze widzialny i słyszalny.
Nadajnik
1. Skorzystaj z dwustronnej taśmy klejącej (dołączonej do zestawu), aby szybko i sprawnie przykleić przycisk zewnętrzny do ściany lub drzwi
(Rys. 3).
2. Za pomocą dołączonej do zestawu płytki montażowej i śrub, można przytwierdzić dzwonek na stałe. Wywierć potrzebne otwory w ścianie
lub drzwiach i przykręć płytkę montażową śrubami (Rys. 4). Dołącz kasetę przycisku zewnętrznego do płytki montażowej w taki sposób,
aby zaczepy na tyle płytki montażowej weszły w odpowiadające im otwory na kasecie przycisku. Przesuń kasetę z przyciskiem w dół tak,
by zaczepy zablokowały się (Rys. 5).
UWAGA: na dole płytki mocującej znajduje się zaczep bezpieczeństwa, który zabezpiecza kasetę
z przyciskiem przed przypadkowym wycunieciem się z płytki mocującej. Aby odczepić kasetę
z przyciskiem, użyj śrubokrętu i wciśnij zaczep bezpieczeństwa w kierunku ściany. W tym samym czasie
wciśnij kasetę z przyciskiem i zdejmij ją z płytki mocującej.
OBSŁUGA
WYBÓR DŹWIĘKU DZWONKA
W celu wyboru dźwięku dzwonka wciśnij przycisk (2). Po każdym naciśnięciu tego przycisku usłyszysz inną melodię. Aby zaprogramować wybrany
dźwięk dzwonka wystarczy przestać wciskać przycisk. Od teraz przy każdym naciśnięciu przycisku wejścia, usłyszysz wybraną przez siebie melodię.
4 otwory /
4 holds /
4 Löcher
4 zaczepy do montażu
przycisku zewnętrznego /
4 mounting hooks / 4 Haken
zur Montage des externen
Tasters

3
GŁOŚNOŚĆ SYGNAŁU DŹWIĘKOWEGO
Wciśnij przycisk regulacji głośności (1), aby ją dostosować do własnych preferencji. Każdorazowe naciśnięcie zmieni głośność na jeden z sześciu
dostępnych poziomów. Aby zaprogramować wybrany poziom, wystarczy przestać wciskać przycisk wejścia.
LOGOWANIE
Naciśnij na odbiorniku przycisk (3) aż dzwonek wyda sygnał dźwiękowy „beep”. Następnie naciśnij przycisk wejścia, który chcesz zalogować.
Dzwonek zacznie dzwonić po skutecznym zalogowaniu urządzenia. Jeden odbiornik może współpracować maksymalnie z 4 nadajnikami.
W przypadku podłączenia kolejnego (piątego) nadajnika, nadajnik zalogowany jako pierwszy zostanie automatycznie wylogowany. Po odłączeniu
odbiornika od źródła zasilania urządzenie zachowuje wszystkie kody w pamięci.
KASOWANIE
Aby usunąć wszystkie informacje zapisane w odbiorniku, długo (3 sek.) wciskaj przycisk wejścia, aż usłyszysz pojedynczy dźwięk „bi”, następnie
zwolnij przycisk. Usłyszysz ciągły dźwięk „bibibibi”, który oznacza, że wszystkie zapisane kody i informacje zostały pomyślnie skasowane.
DANE TECHNICZNE
zasilanie odbiornika:
230V~, 50Hz
częstotliwość:
433,92 MHz
transmisja:
radiowa
pobór prądu dzwonka w czasie czuwania:
<2,2W
zasięg w terenie otwartym:
100 m
poziom głośności:
65-88 dB
stopień ochrony przycisku:
IP44
wymiary dzwonka:
78,5 x 5,7 x 78,5mm
wymiary przycisku:
43 x 15 x 84mm
wymiary płytki mocującej:
38 x 7 (razem z zaczepami) x 75,5mm
waga odbiornika (dzwonka):
0,08 kg
waga nadajnika (przycisku):
0,04 kg
ROZWIĄZYWANIE PROBLEMÓW
1. Reset dzwonka
Jeśli dźwięk dzwonka załącza się nawet bez wciskania przycisku wejścia, należy urządzenie zresetować. Reset wymagany jest również, gdy
występują interferencje pomiędzy sygnałem przycisku, a innymi odbiornikami lub gdy odbiornik nie reaguje po wciśnięciu przycisku wejścia.
Aby zresetować urządzenie należy:
•Wcisnąć i przytrzymać przez 3 sekundy przycisk logowania umieszczony z boku odbiornika, aż usłyszysz sygnał dźwiękowy „beep”.
Sygnał ten oznacza, że przycisk wejścia został skutecznie wylogowany. Ponownie zaloguj przycisk korzystając z instrukcji powyżej
(„Logowanie”).
2. Dzwonek nie działa
•Upewnij się, że dzwonek jest podłączony do zasilania.
•Przycisk wejścia może znajdować się poza zasięgiem – spróbuj ustawić go bliżej odbiornika.
•Jeśli urządzenie dalej nie działa, rozłącz przycisk wejścia i połącz go ponownie z odbiornikiem. W tym celu postępuj zgodnie z punktem
„Reset dzwonka”.
3. Zasięg działania odbiornika jest zbyt krótki
•Metalowe konstrukcje, w tym również framugi drzwiowe wykonane z uPVC mogą ograniczać zasięg odbioru. Upewnij się, że odbiornika
lub przycisk wejścia nie są zamontowane na metalowych konstrukcjach lub w ich pobliżu.
Deklaracja zgodności
Orno-Logistic Sp. z o.o. niniejszym oświadcza, że typ urządzenia radiowego: DB-1 Bezprzewodowy dzwonek PRESSO AC jest zgodny z dyrektywą
2014/53/UE. Pełen tekst deklaracji zgodności UE jest dostępny pod następującym adres internetowym: www.orno.pl.
EN
Operating and installation instructions
DESCRIPTION AND USE
Wireless and battery-free doorbell is designed for use in homes, apartments, offices, hospitals, shops, etc. It doesn't require a cable connection. The
receiver is plugged directly into a ~230V socket and the transmitter is powered by the electromechanical transducer, thus the battery is not required.
The learning system is used to log in additional buttons easily. Radio frequency 433.92MHz is used for transmitting and receiving the signal.
Operation range in the open area is 100m. The receiver has a 6-level volume adjustment (up to 88dB) and 36 polyphonic ringtones to choose from.
INSTALLATION
The range between the button and the ringing tone depends on the surrounding conditions. Before installation, we recommend that you test the device at a
location of your choice to ensure that its range is not disturbed.
Operation range of the device can be significantly reduced by: walls, ceilings, metal surfaces, same frequency devices, proximity to electric motors,
transformers, power supplies, computers, etc.
Receiver
Plug the receiver (doorbell) into a power outlet. Choose an outlet location that is not near a heat source or close to moving objects (eg. doors). For
non-mounting locations (eg. in an extension socket), choose a place where the doorbell will be easy to see and hear.
Transmitter
1. Use the provided double-sided adhesive tape to quickly and easily stick the push-button to the wall or door (see Fig. 3)
2. Use the provided mounting plate and screws for a more permanent installation. Drill appropriate holes in a wall or a door and fasten the
mounting plate with screws (see Fig.4). Attach the push-button to the mounting plate by inserting the four hooks of the mounting plate
into the corresponding four holds on the back of the push-button. Then slide the push-button down until it locks into place (see Fig.5).

4
NOTE: There is a safety tab at the bottom of the mounting plate to ensure the push-button can’t
easily or accidentally be removed from the mounting plate. In order to remove the push-button,
use a screwdriver to press this safety tab towards the wall. At the same time, push up on the
push-button to remove it.
OPERATION
SELECTION OF MELODY
Press the button on the receiver (2). A different ringtone will be played each time the ringtone selector button is pressed. Simply stop pressing this
button, once you hear your desired ringtone and this ringtone will now be played every time the push-button is pressed.
SOUND SIGNAL VOLUME
Press the button on the receiver (1) to adjust the volume. Each press will change the volume to one of six levels. Stop pressing this button when your
desired volume level is reached.
TRANSMITTERS LOG-IN
Press the button on the receiver (3) until you hear the ringtone sound "beep". Then press the button which you want to log in. The receiver will start
ringing, which means that you have logged the button correctly. One receiver can work with max. 4 transmitters. When the fifth transmitter is
attached with the receiver, the first matched transmitter will exit automatically. If the receiver is powered off, the codes are still memorized in it.
INFORMATION DELETING
If you want to delete all the information inside the receiver, please long press (3 sec) the push-button till you hear “bi” sound. Then release the
button. Next you will hear continuous “bibibibi” sound which means that all the codes are deleted successfully out of the receiver.
TECHNICAL DATA
(receiver) power supply:
230V~, 50Hz
frequency:
433.92 MHz
transmission:
radio
power consumption of the receiver (standby time)
<2.2W
open field range:
100 m
volume level:
65-88 dB
button protection level:
IP44
dimensions of the receiver:
78.5 x 5.7 x 78.5mm
dimensions of the button:
43 x 15 x 84mm
dimensions of the mounting plate:
38 x 7 (with the hooks) x 75.5mm
weight of the receiver (doorbell):
0.08 kg
weight of the transmitter (button):
0.04 kg
TROUBLESHOOTING
1. Reset
If the receiver starts ringing even when the push-button is not being pressed, or if it might have been interfered by another similar
doorbell, or if it does not work at all the device has to be reset. In order to do that:
•Press and hold down the log-in button at the side of the receiver for 3 seconds until a “beep” sound is played. It indicates that the push
button has been logged off. Log it in again (see “Transmitters log-in”).
2. The doorbell does not work
•Check that the receiver is being correctly powered.
•The push-button might be out of range. Try using the push-button closer to the receiver.
•If it is still not working, log the push-button off and redo the log-in process (see “Transmitters log-in”).
3. The doorbell’s reception is too short.
•Metal structures, including uPVC door frames, can reduce reception range. Make sure that the receiver and the push-button are not
mounted on such metal structures or surfaces.
Declaration of conformity:
Orno-Logistic Sp. z o.o. declares that the DB-1 is compatible with Directive 2014/53/UE. The full text of the EU declaration of conformity is available
at the following Internet address: www.orno.pl.
DE
Bedienungs- und Montageanleitung
BESCHREIBUNG UND ANWENDUNG
Kabellose und batterielose Klingel ist für die Anwendung in Häusern, Wohnungen, Büros, Krankenhäusern, Läden, etc. gedacht. Keine
Klingeltoninstallation ist erforderlich. Die Klingel (Empfänger) wird direkt an den Steckdose (Netzwerk ~230V) angeschlossen, der Sender ist mit
elektromechanischem Wandler betrieben, keine Batterien sind erforderlich. Die Funktion „Learning-System“ ermöglicht, zusätzliche Taste einfach
einzuloggen. Beim Senden und Empfangen des Signals wird die Funkfrequenz 433,92 MHz angewandt. Die Reichweite im Freien beträgt 100m.
Der Empfänger verfügt über 6-stufige Lautstärkeregelung bis zu 88dB, 36 polyphone Klingeltöne zur Auswahl.
MONTAGE/INSTALLATION
Die Reichweite zwischen der Taste und der Klingel hängt von Umgebungsbedingungen ab. Vor der Montage empfehlen wir das Gerät an den gewählten
Montageort zu testen, um zu prüfen, ob seine Reichweite nicht gestört wird.
Die Reichweite kann deutlich reduzieren: Wände, Decke, Metalloberflächen, Geräten mit einer gleichen Frequenz, elektrische Motoren, Transformatoren,
Netzgeräte, Rechner, etc.
Empfänger:

5
Setzen Sie die Klingel (Empfänger) in die Steckdose ein. Die Steckdose sollte sich in einem Abstand von Wärmequellen und beweglichen
Gegenständen (z.B. Türen) befinden. Bei indirektem Anschluss, z.B. an ein Verlängerungskabel, ist darauf zu achten, dass die Klingel gut sichtbar
und hörbar ist.
Sender:
1. Verwenden Sie das doppelseitige Klebeband (enthalten), um den äußeren Taster schnell und effizient an der Wand oder Tür anzubringen
(Abb. 3).
2. Die Klingel kann mit der mitgelieferten Montageplatte und Schrauben befestigt werden. Bohren Sie die erforderlichen Löcher in die Wand
oder Tür und verschrauben Sie die Montageplatte mit Schrauben (Abb. 4). Befestigen Sie die externe Tasterkassette so an der
Montageplatte, dass die Haken auf der Rückseite der Montageplatte in die entsprechenden Löcher der Tasterkassette einrasten. Schieben
Sie die Tasterkassette nach unten, so dass die Haken einrasten (Abb. 5).
WICHTIG: An der Unterseite der Montageplatte befindet sich ein Sicherheitsclip, der verhindert,
dass die Tasterkassette versehentlich aus der Montageplatte herausfällt. Um die Tasterkassette
zu lösen, verwenden Sie einen Schraubendreher und drücken Sie den Sicherheitsclip zur Wand.
Drücken Sie gleichzeitig die Tasterkassette und nehmen Sie diese von der Montageplatte ab.
SERVICE
KLINGELTON-AUSWAHL
Drücken Sie die Taste (2), um den Klingelton zu wählen. Jedes Mal, wenn Sie diese Taste drücken, hören Sie eine andere Melodie. Um den gewählten
Klingelton zu programmieren, hören Sie einfach auf, die Taste zu drücken. Von nun an hören Sie bei jedem Drücken der Eingabetaste die gewünschte
Melodie
LAUTSTÄRKE DES KLINGELTONS
Drücken Sie die Lautstärketaste (1), um die Lautstärke nach Ihren eigenen Wünschen einzustellen. Mit jedem Druck wird die Lautstärke auf eine von
sechs verfügbaren Stufen geändert. Um den gewählten Pegel zu programmieren, brauchen Sie nur die Eingabetaste nicht mehr zu drücken
LOGGEN
Drücken Sie die Taste (3) am Empfänger, bis der Klingelton " beep" ertönt. Drücken Sie dann die Eingabe-Taste, die Sie einloggen möchten. Der
Klingelton beginnt, wenn das Gerät erfolgreich angemeldet ist. Ein Empfänger kann mit bis zu 4 Sendern arbeiten.
Ist ein anderer (fünfter) Sender angeschlossen, wird der zuerst angemeldete Sender automatisch abgemeldet. Nachdem der Empfänger von der
Stromversorgung getrennt wurde, speichert das Gerät alle Codes in seinem Speicher.
RÜCKSTELLUNG
Um alle im Empfänger gespeicherten Informationen zu löschen, drücken Sie die Eingabetaste 3 Sekunden lang, bis Sie einen einzelnen "bi"-Ton hören,
und lassen Sie dann die Taste los. Sie hören einen kontinuierlichen "bibibi"-Ton, was bedeutet, dass alle gespeicherten Codes und Informationen
erfolgreich gelöscht wurden.
TECHNISCHE DATEN
Betriebsspannung:
230V~, 50 Hz
Frequenz:
433,92 MHz
Übertragung:
Funkübertragung
Klingelstromaufnahme im Standby:
<2,2W
Reichweite im offenen Feld:
100 m
Schallpegel:
65-88 dB
Schutzart der Taste:
IP44
Abmessungen des Empfängers:
78,5 x 5,7 x 78,5mm
Abmessungen der Taste:
43 x 15 x 84mm
Abmessungen der Montageplatte:
38 x 7mm (einschließlich Haken) x 75,5mm
Gewicht des Empfängers (Klingel):
0,08 kg
Gewicht des Senders (Taste):
0,04 kg
PROBLEMLÖSUNG
1. Die Klingeltonrückstellung:
•Wenn der Klingelton auch ohne Drücken der Eingabetaste ertönt, setzen Sie das Gerät zurück. Ein Reset ist auch dann erforderlich, wenn
das Tastersignal mit anderen Empfängern gestört ist oder der Empfänger beim Drücken der Eingabetaste nicht reagiert. Um das Gerät
zurückzusetzen, müssen Sie es zurücksetzen:
Halten Sie die Login-Taste an der Seite des Empfängers 3 Sekunden lang gedrückt, bis Sie den Beep-Ton hören. Dieses Signal zeigt an,
dass der Eingabebutton erfolgreich abgemeldet wurde. Melden Sie sich erneut an, indem Sie die obigen Anweisungen befolgen ("Loggen”).
2. Die Klingel funktioniert nicht:
•Stellen Sie sicher, dass die Klingel an die Stromversorgung angeschlossen ist.
•Die Eingabetaste kann sich außerhalb der Reichweite befinden - versuchen Sie, sie näher an den Empfänger zu positionieren.
•Wenn das Gerät immer noch nicht funktioniert, trennen Sie den Eingangstaster und schließen Sie ihn wieder an den Empfänger an.
Gehen Sie dazu wie unter " Klingelton-Reset" beschrieben vor.
3. Die Reichweite des Empfängers ist zu gering:
•Metallkonstruktionen, einschließlich Türrahmen aus PVC, können den Empfangsbereich einschränken. Stellen Sie sicher, dass der
Empfänger oder die Eingabetaste nicht an oder in der Nähe von Metallstrukturen montiert ist.
Konformitätserklärung:
Orno-Logistic Sp. z o.o. erklärt hiermit, dass der Typ des Funkgerätes: DB-1 der Richtlinie 2014/53/EU entspricht. Der vollständige Text der EU-
Konformitätserklärung ist unter folgender Internetadresse verfügbar: www.orno.pl.
Table of contents
Other Virone Accessories manuals
Popular Accessories manuals by other brands

Olympus
Olympus AS4000 - AS Transcription Kit instructions

Omron
Omron E3NW-ECT Operation manual

Hytronik
Hytronik HMW12 Installation and instruction manual

VueTech
VueTech Fluval "E" Series Instructions for use

Action
Action Platinum AP-360 Assembly, Installation, Care, Maintenance, and Use Instructions

CombiSteel
CombiSteel 7455.22 Series user manual