Virone PLUTON Specification sheet

VIDEO-DOORPHONE SET
PLUTON
OPERATING AND INSTALLATION MANUAL
VDP-51

TABLE OF CONTENTS
-10-
1. Table of contents........................................................................................
2. Introduction ................................................................................................
3. Cleaning and maintenance .......................................................................
4. Description .................................................................................................
5. Elements of the set ....................................................................................
6. Installation ..................................................................................................
a) Monitor installation .......................................................................................
b) Outdoor unit installation ...............................................................................
7. Wiring schemes .........................................................................................
a) Set wiring scheme .......................................................................................
b) Additional monitor wiring scheme ................................................................
8. Operation ....................................................................................................
9. Troubleshooting ........................................................................................
10. Technical specification ...........................................................................
10
11
11
12
12
13
13
13
14
14
14
15
16
16

INTRODUCTION
-11-
Before using the device, read this Service Manual and keep it for future use. In case something written herein is unclear,
please contact the seller. Installation and commissioning of the equipment by the customer are possible if the installer has
basic knowledge of electrical systems and the use of proper tools. Nevertheless, the device installation by qualified
personnel is recommended.
The manufacturer is not responsible for any damage that can result from improper device installation or
operation. Any repair or modification carried out by yourselves results in loss of guarantee.
In view of the fact that the technical data are subject to continuous modifications, the manufacturer reserves a right to make
changes to the product characteristics and to introduce different constructional solutions without deterioration of the
product parameters or functional quality.
Additional information about ORNO products are available at www.orno.pl. Orno-Logistic Sp. z o.o. holds no responsibility
for the results of non-compliance with the provisions of the present Manual. Orno Logistic Sp. z o.o. reserves the right to
make changes to the Manual - the latest version of the Manual can be downloaded from www.orno.pl. Any
translation/interpretation rights and copyright in relation to this Manual are reserved.
1. Disconnect the power supply before performing any activities.
2. Do not immerse the product in water or other liquids.
3. Do not operate the device with damaged housing.
4. Do not open or repair the device yourself.
5. Do not use the device contrary to its dedication.
6. Do not install the monitor near devices that emit strong magnetic fields such as TV sets or speakers.
7. Do not install the monitor in a location subject to high humidity, vibration, shock or strong sunlight.
8. Turn off the power if there are "abnormal" sounds coming from the device.
9. After installation and mounting, remove the protective foil from the monitor screen.
It is forbidden to make connections to live devices!
Failure to comply with the above recommendations may result in permanent damage to the device.
WARNING
All dirt and dust should be removed with a soft and slightly moist cloth with gentle cleansers for plastic.
Do not use detergents that contain dissolvents, petrol, etc. and any other abrasive substances.
CLEANING AND MAINTENANCE
Each household is a user of electrical and electronic equipment, and hence a potential producer of hazardous waste for
humans and the environment, due to the presence of hazardous substances, mixtures and components in the
equipment. On the other hand, used equipment is valuable material from which we can recover raw materials such as
copper, tin, glass, iron and others. The weee sign placed on the equipment, packaging or documents attached to it
indicates the need for selective collection of waste electrical and electronic equipment. Products so marked, under
penalty of fine, cannot be thrown into ordinary garbage along with other waste.
The marking means at the same time that the equipment was placed on the market after August 13, 2005. It is the responsibility
of the user to hand the used equipment to a designated collection point for proper processing. Used equipment can also be
handed over to the seller, if one buys a new product in an amount not greater than the new purchased equipment of the same
type. Information on the available collection system of waste electrical equipment can be found in the information desk of the
store and in the municipal office or district office. Proper handling of used equipment prevents negative consequences for the
environment and human health!

-12-
PLUTON video-doorphone set has been designed for single-family buildings, office buildings,
schools, kindergartens, hospitals, etc.
Functions:
- integrated monitoring function that delivers camera image at all times,
- conversation with the visitor standing outside,
- independent, remote door lock opening and gate access control from the monitor panel,
- high-quality night vision with LED diodes,
- backlit nameplate on the camera panel,
- smooth adjustment of monitor parameters (brightness, colour, talking volume) and 3-step
ringtone volume adjustment,
- 16 ringtones to choose from,
- can be upgraded with an additional monitor from PLUTON series.
Main features:
- high-quality multicolour camera,
- vandal-proof camera case for surface mounting (protective hood included),
- hands-free monitor with 7” multicolour LCD screen and touch panel,
- 4-wire installation and 2 wires for gate opener,
- door lock with power supply directly from the outside camera unit (no additional power supply
required).
DESCRIPTION
ELEMENTS OF THE SET
1 3 4
5
14
15
2
6
7
8
10
9
MONITOR – indoor unit
1. Monitoring
2. Unlock button
3. Gate unlock button
4. Talk
5. Microphone
6. Ringtone volume
7. Ringtone selection
8. Brightness adjustment
9. Colour adjustment
10. Talking volume adjustment
11. Hooks to clasp the monitor inside the mounting frame
12. Power socket for 12 VDC adapter
13. Outdoor unit and gate opener terminals
14. LCD screen
15. LED indicator (red – power, green – talking mode)
16. Monitor adapter
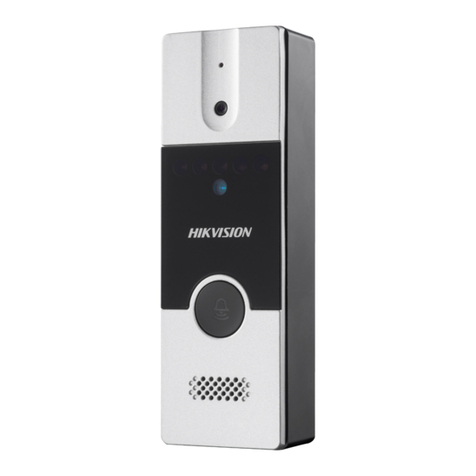
OUTDOOR UNIT WITH CAMERA
1. Protective hood
2. LED diodes
3. Camera
4. Speaker
5. Call button
6. Microphone
12 13
11
Fig. 2 Outdoor panel
Fig. 1 Video monitor
1
3
4
5
6
2
16

-13-
1. Use screws to install monitor mounting frame (included to the set) to the wall.
2. Connect wires to terminals placed at the back of the monitor, as per the wiring scheme.
3. Plug the 12 VDC adapter into the power outlet at the back of the monitor.
4. Carefully install the monitor on the mounting frame.
5. Plug the adapter into the 230V~, 50Hz power socket.
Fig.3 Monitor installation
a) Monitor installation
b) Outdoor unit installation
Installation of the outdoor unit in a proper place determines user's level of comfort when operating the device. It
is recommended to test the device before drilling any mounting holes. In order to avoid electric coupling, do not
place the monitor and the camera panel in the same room.
The outdoor unit is designed for surface mounting.
1. Use screws to install the protective roof on the wall.
2. Connect respective wires as per the wiring scheme.
3. Place the camera body inside the protective roof, already mounted to the wall.
4. Tighten the bottom screw to ensure firm installation of the outdoor unit.
Fig. 4b
Fig. 4a
1
1
2
24
127mm
40mm
1 2 3 4 5 6
+
+
+
+
+
+
Recommended installation height for the monitor is ca. 145-160cm, and 140-170cm for the outdoor unit.
INSTALLATION
Vertical view angle Horizontal view angle
0
36
35 cm
0
49
50 cm

Electric door strike, additional monitor and gate opener are not included to the set!
-14-
WIRING SCHEME
It is not recommended to put video-doorphone wires together with other installation wires
(chime, alarm, etc.) in one cable. All telecommunication and power cables that emit strong
magnetic fields (e.g. column loudspeakers, TV sets) may have negative impact on the
video-doorphone set operation, if they are placed close to the wires that connect outdoor
panel with the monitor.
Before you connect any wires make sure that the 230V/50Hz power is disconnected.
Non-compliance with the above principle may lead to potential damage of the device.
Fig. 5a
Outdoor unit
Electric door strike
1. AUDIO
2. GND
3. VIDEO
4. Power
gate control
When designing electrical installation, it is important to take into account a proper section of the wires:
- up to 30m – recommended wire: XzTKMXpw 3 x 2 x 0.5 mm2
- from 30m to 100m – recommended wire: XzTKMXpw 3 x 2 0.8 mm2
2
It is recommended to connect the electric door strike with a 2 x 1 mm wire.
The set is compatible with any electric door strike supplied with 12VDC voltage and power consumption of
max. 500mA.
The overall length of the installation cannot exceed 100m.
The manufacturer does not recommend to use any stranded wires.
DC12V
1234
4321
a) Wiring the set with electric door strike and a gate opener
b) Wiring the set with an additional monitor
(not included)
Fig. 5b
1. AUDIO
2. GND
3. VIDEO
4. Power
Main monitor Additional monitor
gate control
DC12V
DC12V
1234
1234
4321
(not included)
Outdoor unit

1. Talking mode
Press the call button on the outdoor unit to trigger the ringtone on the indoor monitor and to display
visitor's image on the screen. In order to start a conversation press on the monitor. In order to
end it, press again.
Talking and monitoring mode are activated for ca. 2 minutes and after that the image is switched off
automatically.
2. Real view/monitoring
It is possible to activate the camera to see the outside image, without pressing the outdoor call
button. To do that, press when in standby mode. The image will be available for ca. 30s. In the
monitoring mode, the outdoor speaker is not active. To start a conversation press .
-15-
OPERATION
3. Remote door lock opening
If electric door strike has been connected to the device, you can open the door remotely. In order to
do that press during talking or monitoring mode.
4. Remote gate opening
If automatic gate opener has been connected to the device, you can open it remotely from the
monitor. In order to do that press .
5. Monitor parameters adjustment
Use the potentiometers situated on the side of the monitor to adjust monitor brightness ,
colour and talking volume .
6. Ringtone volume adjustment
There are 16 ringtones to choose from.
Press the button at the side of the monitor to select one of the available ringtones.
7. Intercom
Press and hold for 2s button on the monitor to call another monitor. Conversation time between
the monitors can last 60s. If the call is not accepted within 30s, the indoor unit will switch back to
standby mode.

TROUBLESHOOTING
1. There is no sound and image. The device does not work
a) check power connection
b) monitor is damaged or wrongly wired
2. Image is unclear and blur
a) check and adjust the settings
3. There are strong interferences, the image is not synchronized (it flashes)
a) section of the connecting wire does not correspond to its length
b) installation is too long – use shielded cable
c) quality of the wire is poor
d) strong source of electromagnetic interferences – use shielded cable
4. The quality of monitor sound is poor
a) check your installation in terms of technical requirements
b) check whether the installation is exposed to water or moisture, etc.
5. The system fails to release the electric door strike at each time
a) check if your electric door strike works properly outside the installation
6. The screen of the monitor is scratched
a) check if the protective film has been removed from the screen
TECHNICAL SPECIFICATION
Communication type:
Connection type:
Number of wires:
Electric door strike power supply:
Net weight of the set:
OUTDOOR CAMERA
Power supply:
Installation type:
Type of camera converter:
Viewing angle:
Camera resolution:
Night vision:
Working temperature:
External dimensions:
MONITOR
Power supply:
Communication type:
Power consumption:
Diagonal:
Resolution:
External dimensions:
Net weight:
Number of ringtones:
Additional functions:
wired
4-wire
4+2
From the outdoor unit
1.26 kg
DC12V from monitor
surface-mounted
CMOS
0 0
horizontal: 49 , vertical: 36
>700 TVL
5 LEDs
0 0
-25 C ~+50 C
58 x 145 x 30 mm
12VDC, 1.5A
Hands-free, no uniphone needed
standby <0.2W, operation max <5W
7" TFT LCD
800 x 480
214 x 151 x 18mm
0.48 kg
16
Gate access control
-16-
This manual suits for next models
1
Table of contents
Other Virone Intercom System manuals
Popular Intercom System manuals by other brands
HIK VISION
HIK VISION DS-KH6320-LE1/White Configuration guide
Planet
Planet HDP-5240PT Quick installation guide
Firecom
Firecom 210 Series Installation & operation manual

Contro l4
Contro l4 C4-DSC-EN-BL Setup guide

HIK VISION
HIK VISION DS-KD8003-IME1 quick start guide
Silvercrest
Silvercrest HG04735-US-TX manual
