WHAT IS SHOWN
ON THE DISPLAY DESCRIPTION PROBLEM SOLUTION
Forehead reading with
button :
the display
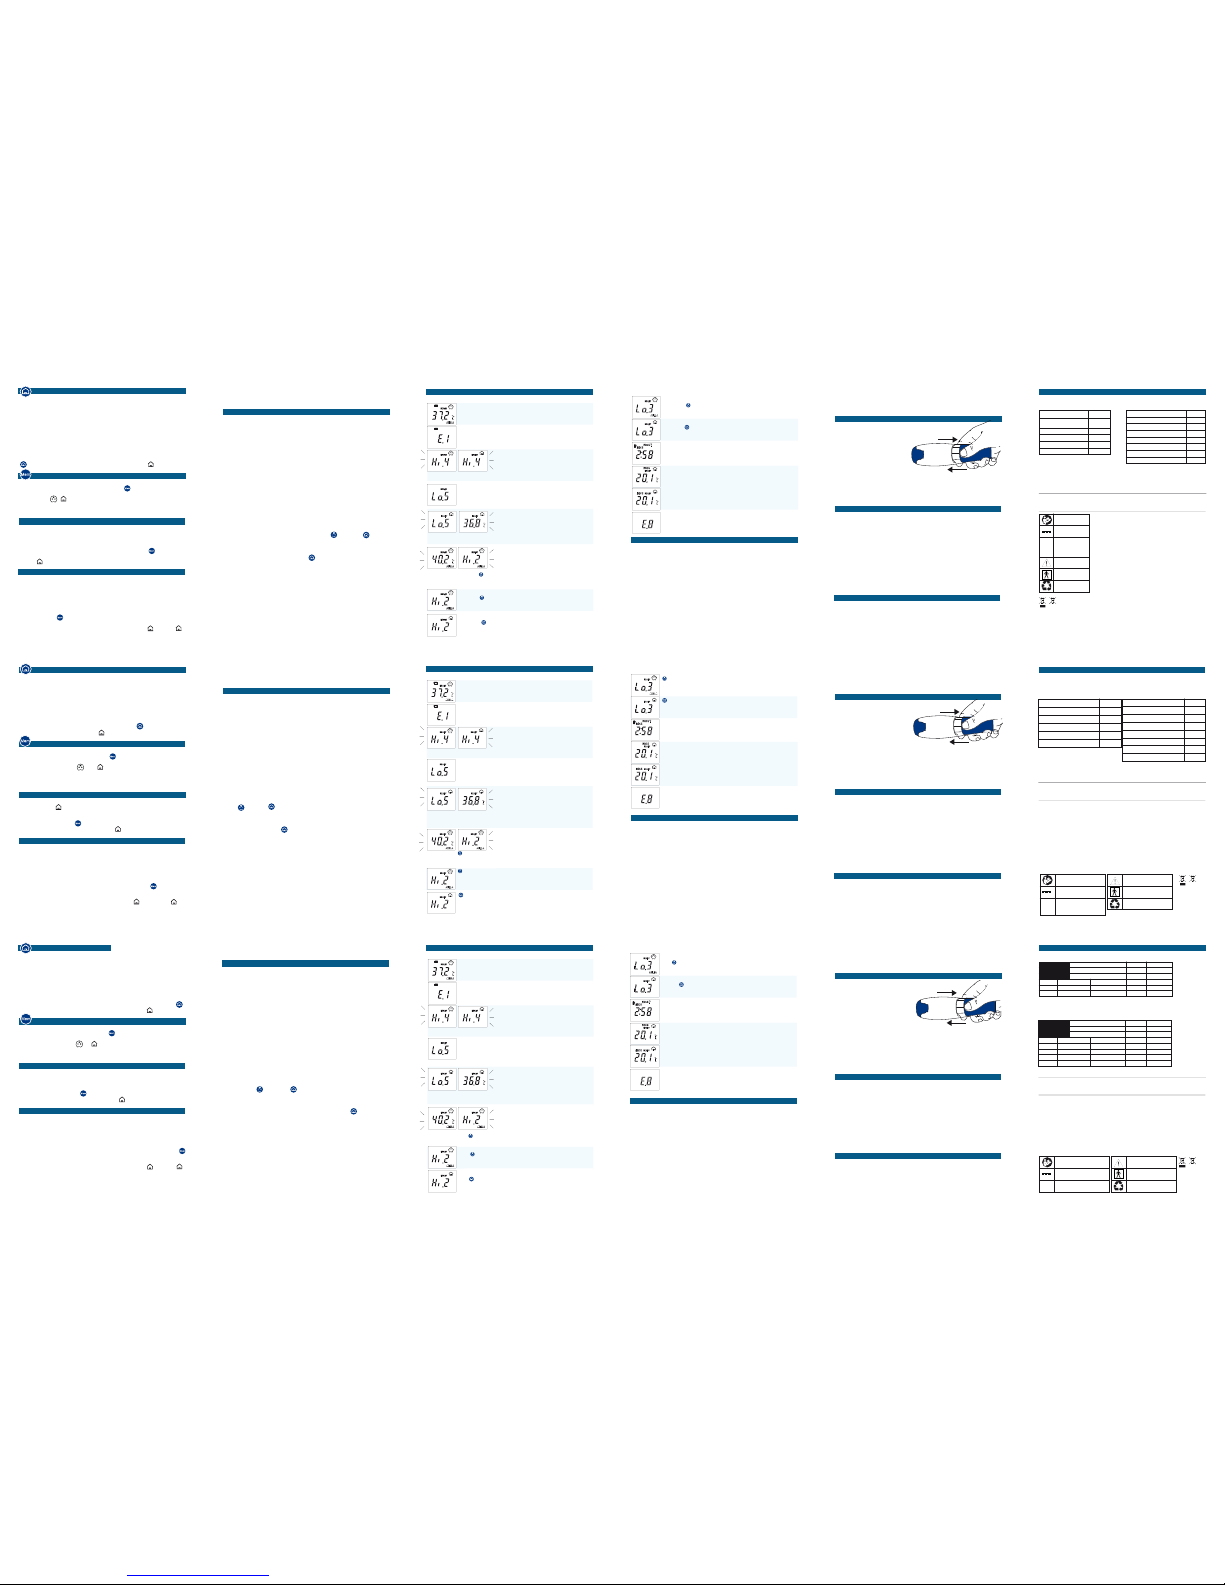
reads "Lo.3".
The forehead temperature
appears too low (<34.0°C
or <93.2°F).
Make certain the waveguide
is not soiled or damaged
and thatthe subject has not
come froma cold room.
Reading the temperature
with button :
the display
reads "Lo.3".
The surface temperature
read is below the operating
limit (<1°C or <33.8°F).
The temperature reading
cannot be taken.
The display reads the
countdown, in minutes
and seconds, required for
VisioFocus automatic
calibration.
The thermometer has not
stabilized. The symbols
prompt you to choose
between:
• wait until the AQCS
countdown has run its
course - remember to not
touch the thermometer
during this time • or perform
an MQCS (par. 8, page 6).
While in stand-by mode,
the room temperature
displayed is accompanied
by the symbol MQCS or
AQCS.
The thermometer has
undergone
automatic or
manual quick
calibration:
Precision is guaranteed,
but to ensure a perfect
reading, wait until normal
thermometer calibration
has been completed
(from 10 to 30 minutes).
The display reads "E.8". The thermometer was
moved before the light
started flashing, or the area
is subject to strong
electromagnetic fields.
Wait until the lights flash
before moving the
thermometer; make certain
that there are no mobile or
cordless telephones in the
vicinity.
10. TROUBLESHOOTING
1.The display does not turn on: the batteries are completely dead or incorrectly
inserted; replace or reinsert them.
2.The temperature is not projected between the two arches: the unit is not at
the correct distance; move the thermometer forward or back until the projected
temperature falls precisely between the two arches (fig. 5).
3.The projected temperature is not clearly visible: the room lighting is too strong;
shade the subject.
4.The waveguide is damaged or water has seeped into the thermometer: contact
your Dealer right away for technical service.
5.The thermometer temperature reading is too low:
- make certain that the conditions outlined in the warnings have been met;
- check that the waveguide is not soiled or damaged; if it is, clean it as indicated
in par. 12, page 09 or contact your Dealer for technical service;
- check that the thermometer is perpendicular to the forehead as indicated in
figure 2.
6. The thermometer temperature reading is too high: make certain that the
08 - English -
“E.1” and the battery
symbol appear on the
display, or the unit
does not turn on at all.
Remove the batteries
immediately and replace
them when necessary
(see chapter 11
on page 9).
The batteries are
dead.
Obtain the new
batteries for changing
them when the signal
E.1 (below) appears.
During normal
operation, the battery
symbol appears on
the display.
The batteries are
running low but it is
still possible to take
several readings.
ITEM DISPLAYED
9. MEANING OF DISPLAY MESSAGES
The temperature detected
exceeds the limit for
unit operation (>80°C or
>176°F).
The temperature reading
cannot be taken.
Readingwith
button :the value
displayed changes to
“Hi.2”.
Seek medical attention.
The person has a
very high fever
(above 40°C or 104°F).
"Hi.4" appears on the
display.
The room temperature is
too high (above 45°C or
113°F).
Move to another,
cooler site.
Reading with
button :
the display reads
"Hi.2".
The temperature
detected exceeds the
limit for operation with
this button (>42.5°C or
>108.5ºF).
Make certain that you use
the rightbutton. Make
certainthat all necessary
conditions have been met.
Reading with
button :
the display
reads "Hi.2".
The room temperature is
between 5 and 15.9°C
(41 and 60.6ºF).
The display
reads "Lo.5".
The room temperature
is too low (below
10°C/50°F with “face”
button or below
5°C/41°F with “home”
button).
Move to another,
warmer room.
The displays shows
"Lo.5"and the value
alternately.
The temperature reading
can be taken but accuracy
is not guaranteed.
DESCRIPTION PROBLEM REMEDY
07 - English -
06 - English -
- When the desired setting appears, release the button.
Only one setting can be modified at a time.
8. ROOM TEMPERATURE CALIBRATION
If the thermometer is handled at length or if there is a significant temperature
difference with respect to the room temperature, a countdown will appear on the
display indicating that you should wait until automatic temperature calibration has
been completed. At this point you have 3 options:
1. Automatic Quick Calibration System (AQCS): without touching the
thermometer, wait until the countdown has run its course and automatic quick
calibration is completed. The countdown will continue updating as long as
differences in temperature are detected (for example, because the thermometer
has been handled). At the end of the countdown, the thermometer can take
sufficiently accurate readings. When the thermometer is in stand-by mode, “AQCS”
appears on the display indicating that automatic quick calibration has been
performed. During the countdown is not possible to make a body temperature
measurement. To detect the body temperature you need to wait until the count
down has run its course (without touching the thermometer) or you can perform
manual calibration (MQCS) as explained below.
2. Manual Quick Calibration System (MQCS): the alternative is to promptly
correct the thermometer temperature, adapting it to the real temperature of the
room where the reading is to be taken. Proceed as follows (the room temperature
must be in the 10-45°C (50-113°F) temperature range):
- press the “face” and “home” buttons (fig. 8) simultaneously: the symbol
CAL will appear and the display will light up in blue. Open the cap.
- within 10 seconds focus the thermometer on an internal wall (not the inside of
an external wall) or wardrobe with uniform temperature and ata point approximately
80/150 cm (30 to 60 inches) from the floor. Press the "home” button (fig. 9);
- release the button: the lights flash slowly and the display shows the room
temperature. To ensure a reliable temperature reading, do not focus the
thermometer on an outside wall, window, source of heating or cooling (radiator,
air conditioner, lamp, computer, surface in contact with the human body, etc.).
- The thermometer is ready to take a reading.
Manual quick calibration (MQCS) can also be performed without the countdown
if, for example, you need to move between rooms at different temperatures.
This system, too, enables the thermometer to take sufficiently accurate readings.
In this case, when the thermometer is in stand-by mode, “MQCS” appears on the
display indicating that manual quick calibration has been performed.
conditions outlined in the warnings have been met (chapter 2, page 1).
7. The thermometer appears blocked or does not revert to stand-by after
being idle for 20 seconds, or the aiming LEDs remain on after the
buttonis released: reset the thermometer by removing and reinserting thebatteries.
11. REPLACING THE BATTERIES
- Set your thumb in the oval hollow on the
back of the unit, press down and slide the
battery hatch out as shown in figure 11
- Remove the battery hatch.
- Remove the old batteries and
dispose of them as required in the
containers provided for this purpose.
- Insert 4 new AAA - LR03 batteries,
preferably alkaline batteries, carefully complying
with the position indicated in their housing.
- To close the hatch, slide it in the opposite direction from which it was
opened. After changing the batteries, let the thermometer stabilize for
20 minutes before taking a temperature reading, or run a manual quick
calibration (MQCS, chapter 8, page 6).
- Remove the batteries if you do not expect to use the thermometer
for a long time.
12. CLEANING
CLEANING THE WAVEGUIDE: the thermometer waveguide is very delicate.
Therefore, when the thermometer is not being used, we recommend that you
always keep the cap on. However, if you need to remove dust or dirt from the
waveguide or sensor at its base, use a cotton swab that has been slightly
dampened with alcohol. Remove all dirt and make certain that nothing
accumulates at the bottom of the waveguide where the sensor is located. Do
not use any other objects or liquids as the surface of the lens or sensor could
easily be scratched or damaged. Never let any excess liquid penetrate into the
waveguide and sensor.
CLEANING THE THERMOMETER BODY: use a soft cloth dampened with
soap and water and possibly re-wipe with a sodium hypochlorite disinfectant.
DO NOT USE the thermometer for at least 30 minutes after cleaning.
13. DISPLAY
The VisioFocus Display is backlit in 5 colours:
1. light blue (button used: FACE. See par. 4.1 and 4.2);
2. green (button used: HOME. See par. 4.3);
3. violet (button used: MEM, memory function. See par. 5);
4. orange (button used: MEM, ambient temperature function. See par. 6);
5. blue (MQCS function. See par. 8).
Fig. 11
open
close
09 - English - 10 - English -
Power supply 4 AAA (LR03) alkaline batteries - 1.5 V (included)
Life of high quality batteries: up to 3 years or 30,000 readings (depending on use)
Dimensions: 144 x 43.5 x 21.5 mm (5.67 x 1.71 x 0.85 inches) - including cap
Weight: 98 gr. (3.46 oz.) - batteries included
Distance from the subject: calculated using an optical aiming system (approximately 6 cm/2.36 inches).
Large, clearly visible, backlit display in 5 colors: light blue, green or violet, depending on the button used (respectively,
“face”, “home” or “Mem”); orange and blue depending on the function (respectively, room temperature and MQCS).
Atmospheric pressure range of operating conditions: from 700 hPa to 1,060 hPa.
Relative humidity range of operating conditions: from 15 % to 93 %, non-condensing.
Keep in a clean, dry place, preferably at a temperature ranging between +16 and +40°C (60.8 and 104°F). Store at
a temperature included between -10 and +60°C (14 and 140°F) and in any case not lower than -18°C (-0.4°F)
or higher than +70°C (158°F).
Expected life: 10 years
VisioFocus is a class IIa medical device (per Directive 93/42/EEC and subsequent amendments and integrations)
tested in hospitals, private clinics and medical offices. Contact the manufacturer for clinical precision, characteristics
and procedures. Tecnimed srl, P.le Cocchi, 12 - 21040 Vedano Olona (VA) - Italy undertakes full responsibility for
this product's compliance with the reference standards. VisioFocus is compliant with the pertinent ASTM standard
(E1965-98:2009) and CEI EN 60601-1, 60601-1-2 and 60601-1-11 standards. Internally powered equipment for
continuous operation.The VisioFocus LEDs emit low light radiation in compliance with IEC 62471.
14. TECHNICAL CHARACTERISTICS
VISIOFOCUS®Non-contact infrared thermometer
Dispose of the
device in
compliance with
applicable
legislation regarding
electrical equipment
and batteries.
Follow instructions for use
Device designed for
continuous use
Protected against insertion of objects
>12,5 mm and against vertical dripping
water when tilted up to 15°.
ATTENTION: read the
warnings
Recyclable material
Applied part: type BF
IP 22
(3) When theroom temperatureis between 5 and 9.9°C (41 and 48.2°F):accuracy and theoperating rangeare not
guaranteed and the symbol“Lo.5" and the temperature value are displayed alternately.
(1) When theroom temperatureis between 10 and 15,9°C (50-59°F) orbetween 40 and 45°C(104-113°F), accuracy and the
operating range are not guaranteed and the symbol“Lo.5" or “Hi.4”and the temperature value are displayed alternately.
(2) The ASTM E1965-98-2009 standard requires +/-0.2°C (+/-0.4°F) accuracy for infrared thermometers in the
37-39°C (98.6-102.2°F) temperature range while the ASTM E667-86 and E1112-86 standards require +/- 0.1°C
(+/-0.2°F) precision for mercury and electronic thermometers in that same temperature range.
Measurement range
Room temperature working range
Resolution
93.2/108.5°F
50/113°F (1)
0.1
+/- 0.5°F
+/- 0.4°F (2)
+/- 0.5°F
Taking the body
temperature at
the forehead
34,0/42,5°C
10/45°C (1)
0,1
+/-0,3°C
+/-0,2°C (2)
+/-0,3°C
Accuracy
Accuracy
Accuracy
from 34,0 to 35,9°C
from 36,0 to 39,0°C
from 39,1 to 42,5°C
from 93.2 to 96.7°F
from 96.8 to 102.2 °F
from 102.3 to 108.5°F
33.8/176°F
41/113 °F (3)
0.1
+/- 1.8°F
+/- 0.5°F
+/- 0.4°F
+/- 0.5°F
+/- 1.8°F
Measurement range
Room temperature working range
Resolution
1,0/80,0°C
* 5/45°C (3)
0,1
+/-1,0°C
+/-0,3°C
+/-0,2°C
+/-0,3°C
+/-1,0°C
Accuracy
Accuracy
Accuracy
Accuracy
Accuracy
from 1,0 to 19,9°C
from 20,0 to 35,9°C
from 36,0 to 39,0°C
from 39,1 to 42,5°C
from 42,6 to 80,0°C
from 33.8 to 67.9°F
from 68.0 to 96.7°F
from 96.8 to 102.2 °F
from 102.3 to 108.5°F
from 108.7 to 176 °F
Other
readings
05 - English -
4.3 Other readings
VisioFocus can also be used to read the temperature of objects and liquids in the
1-80°C (33.8-176°F) temperature range. For example:
1. temperature of a baby's feed bottle (fig. 7), food, bath, etc. In this case,
remember to mix the liquid well before taking the reading (with hot liquids or foods,
take the reading quickly to prevent condensation from forming on the lens and
wait 30 min. before taking another reading).
2. temperature of a wound, inflammation, scar (for medical use);
3. room temperature by pointing the thermometer against a wall or a piece of
furniture (also see par. 6 “Room Temperature”);
Proceed as you would for a forehead reading but press the “home” button ;
the display will light up in green and show the house symbol .
5. MEMORY FUNCTION
The memory function lets you call up the last 9 temperature readings.
To activate this function, press the "Mem” button twice: the display will light
up in violet and the value of the last reading will be shown accompanied by the
number 1 and the symbol or depending on which button was used for
that reading. Pressing the button again calls up the second to last, third to last
reading and so on, accompanied by the numbers 2, 3, etc.
6. ROOM TEMPERATURE
When the thermometer is in stand-by mode (“Peak Performance” - see par. 7),
the room temperature and the symbol flash and remain displayed automatically
for 4 hours after the last reading is taken.
To display the room temperature on the backlit display, while the thermometer is
in stand-by mode, press the button once: the display illuminates in orange
showing the room temperature and the symbol flashing.
7. HOW TO CHANGE THE SETTINGS
Depending on where it is to be sold, your thermometer leaves the factory preset
to: Centigrade (°C) or Fahrenheit (°F); and referred to AXILLARY, ORAL or
RECTAL, CORE temperature readings, or only to internal temperature readings
(no symbol will be shown); and display off when in stand-by mode (“Energy
Savings”) or always on (“Peak Performance”).
If necessary, these settings can be modified as follows:
- while the thermometer is off or in stand-by mode, press and hold the “Mem”
button; after about 8 seconds the display changes, showing the settings in
sequence:
°C; °F; AXILLA; ORAL; RECTAL; CORE; “on” ; “off” .
If the thermometer was produced with the sole internal temperature setting, the
AX., ORAL, RECTAL and CORE settings would not be available for changing.
7. Termometrenin kullanımı engellenmiş görunuyor, nişan LED’ leri buton serbest
bırakıldıktan sonra yanmaya devam ediyor veya termometre 20 saniyelik atıl
durumdan sonra bekleme moduna dönmuyor: pilleri çıkartıp yeniden takarak
termometreyi sıfırlayın.
11. PİLLERİN DEĞİŞTİRİLMESİ
- Başparmağınızı ünitenin arka tarafındaki oval
çukura yerleştirin, pil bölmesini aşağı basıp
kaydırmak suretiyle Şekil 11’ de
görüldüğü gibi açın.
- Pil bölmesini çıkartın.
- Eski pilleri çıkartın ve onları
öngörüldüğü şekilde bu amaç için
sağlanan konteynırlara atın.
- 4 adet yeni AAA – LR03 pil, tercihen alkali pil,
dikkatlice gövdelerinde belirtilen pozisyona uygun şekilde takın.
- Bölmeyi kapatmak için, bölmeyi açılan yönün tersi yönde kaydırın. Pilleri
değiştirdikten sonra, bir ölçüm yapmadan veya manüel hızlı kalibrasyon (MQCS)
yürütmeden (bölüm 8, sayfa 6) önce termometrenin 20 dakika stabil hale
gelmesine izin verin.
- Termometreyi uzun bir süre kullanmayacaksanız, pilleri çıkartın.
12. TEMİZLİK
DALGA KILAVUZUNU N TEMİZLENMESİ: Termometrenin dalga kılavuzu
son derece hassastır. Bu nedenle, termometre kullanılmadığında, kapağını
her zaman kapalı tutmanızı tavsiye ediyoruz. Ancak, dalga kılavuzu veya
alt kısmındaki sensorun kir veya tozunu temizlemeniz gerekiyorsa, alkolle
hafif nemlendirilmiş pamuklu çubuk kullanın. Tüm kiri temizleyin ve sensorun
bulunduğu dalga kılavuzunun alt kısmında birikmiş hiçbir şey olmadığından
emin olun. Lenslerin veya sensorun yüzeyi kolaylıkla çizilebileceği veya hasar
görebileceği için başka objeler veya sıvılar kullanmayın. Dalga kılavuzu veya
sensora fazla sıvının girmesine asla izin vermeyin.
TERMOMETRE GÖVDESİNİN TEMİZLENMESİ: Sabunlu suyla hafif
nemlendirilmiş yumuşak bir bez kullanın ve mümkünse sodyum hipoklorit dezen-
fektan ile yeniden silin.
Termometreyi temizledikten sonra en az 30 dakika KULLANMAYIN.
13. EKRAN
VisioFocus Ekranının 5 renkte arka aydınlatması vardır:
1. Açık mavi (kullanılan buton: YÜZ; bkz: paragraf 4.1 ve 4.2);
2. Yeşil (kullanılan buton: EV; bkz: paragraf 4.3);
3. Mor (kullanılan buton: MEM; hafıza fonksiyonu; bkz: paragraf 5);
4. Turuncu (kullanılan buton: MEM; ortam sıcaklığı fonksiyonu; bkz: paragraf 6);
5. Mavi (MQCS fonksiyonu; bkz: paragraf 8).
Şek. 11
açık
kapalı
09 - Türkçe - 10 - Türkçe -
14. TEKNİK ÖZELLİKLER
VISIOFOCUS®Temassız Kızılötesi Termometre
Güç besleme: 4 AAA (LR03) alkali pil – 1,5 V (dahil)
Yüksek kaliteli pillerin ömrü: en fazla 3 yıl veya 30.000 okuma (kullanıma bağlı)
Boyutlar: 144 x 43.5 x 21.5mm – kapak dahil
Ağırlık 98gr – (piller dahil)
Denekten uzaklık: optik hedefleme sistemi kullanarak hesaplanır (yaklaşık 6cm).
5 renkli geniş, görünür, arkadan aydınlatmalı gösterge: kullanılan düğmeye göre (“yüz”, “oda” veya “Mem”) sırasıyla
açık mavi, yeşil veya mor; fonksiyona göre (oda ısısı ve MQCS) sırasıyla turuncu ve mavi
İşletim şartları için atmosfer basıncı: 700hPa veya 1,050hPa
İşletim şartları için bağıl nem aralığı: %15-%93, yoğuşmasız
Tercihen +16-40°C arasında temiz ve kuru bir yerde tutunuz. -10 ile +60°C arasında depolayınız, asla -18°C altında
veya +70°C üstünde depolamayınız.
Beklenen ömür: 10 yıl.
VisioFocus 93/42/EEC Yönergesi ve onun sonraki tadilatları ve eklemelerine göre sınıf IIa medikal aygıttır, hastanelerde,
özel kliniklerde ve muayenehanelerde test edilmiştir. Klinik hassasiyet, karakteristikler ve prosedürler için imalatçıya
başvurunuz. Tecnimed srl, p. Le Cocchi, 12-21040 Vedano Olona (VA) – İtalya bu ürünün referans standartlara tam
uyumuyla ilgili tüm sorumluluğu üstlenir. VisioFocus ASTM standardı (E1965-98:2009) ve CEI EN 60601-1, 60601-1-2
ve 60601-1-11 standartlarıyla uyumludur. Sürekli kullanıma uygun pilli ekipman. VisioFocus LED’leri IEC 62471 ile
uyumlu hafif ışık radyasyonu yayar.
Aygıtı yürürlükteki
elektrikli ekipmanlar
ve pillerle ilgili
mevzuata göre atın.
Kullanım talimatlarına uyun.
Sürekli kullanım için
tasarlanmış aygıt
DİKKAT: Uyarıları okuyun
Geri dönüştürülebilir materyal
Uygulanan parça: tip BF
IP 22
Ölçüm aralığı
Oda ısısı çalışma aralığı
Çözünürlük
Doğruluk 34-35,9°C arasında
Doğruluk 36-39°C arasında
Doğruluk 39,1-42,5°C arasında
(1)
34,0/42,5°C
10/45°C (1)
0,1
+/-0,3°C
+/-0,2°C (3)
+/-0,3°C
Ölçüm aralığı
Oda ısısı çalışma aralığı
Çözünürlük
Doğruluk 1.0-19.9°C arasında
Doğruluk 20.0-35.9°C arasında
Doğruluk 36.0-39.0°C arasında
Doğruluk 39.1-42.5°C arasında
Doğruluk 42.6-80.0°C arasında
1,0/80,0°C
5/45°C (2)
0,1
+/-1,0°C
+/-0,3°C
+/-0,2°C
+/-0,3°C
+/-1,0°C
Vücut ısısının alından ölçülmesi Diğer okumalar
(1) Oda ısısı 10-15,9°C/40-45°C arasında olduğunda
doğruluk ve çalışma aralığı garanti edilemez ve
“Lo.5”/“Hi.4” ve ısı değeri birbiri ardına gösterilir.
(2) Oda ısısı 5-9,9°C arasında olduğunda
doğruluk ve çalışma aralığı garanti edilemez ve “Lo.5” ve ısı değeri birbiri ardına gösterilir.
(3) ASTM E1965-98-2009 standardı kızılöncesi termometreler için doğruluğun 37-39°C vücut ısısı aralığında
+/-0,2°C olmasını gerektirirken, ASTM E667-86 ve E1112-86 standardı cıvalı ve elektronik termometreler için
doğruluğun aynı ısı aralığında +/- 0,1°C olmasını gerektirmektedir.
12.5 mm'den büyük nesnelerin
ve 15 derece eğik konumdayken
dikey olarak damlayan suyun
girmesine karşı korumalıdır.
butonu ile alından ısı
ölçümü yaparken,
ekranda “Lo.3” okunuyor.
Alın ısısı çok düşük
(<34.0 °C).
Dalga kılavuzunun kirli veya
zarar görmüş olmadığından
ve ısı ölçümü yapılan kişinin
soğuk bir odadan
gelmediğinden emin olun.
butonu ile ölçüm
yaparken, ekranda
“Lo.3” okunuyor.
Okunan yüzey sıcaklığı
çalışma limitinin altında
(<1 °C).
Isı ölçümü yapılamaz.
Ekranda VisioFocus
otomatik kalibrasyonu için
öngörülen dakika ve
saniye olarak geri sayım
okunuyor.
Termometre stabil değil.
Semboller sizi seçim
yapmanız için uyarıyor:
* AQCS geri sayımı bitene
kadar bekleyin – bu süre
içinde termometreye
dokunmamanız gerektiğini
unutmayın * ya da, bir MQCS
yürütün (par. 8, sayfa 6)
Bekleme modunda iken,
görüntülenen oda
sıcaklığına MQCS veya
AQCS sembolü eşlik
ediyor.
Termometrede otomatik
veya manüel hızlı
kalibrasyon yürütülmüştür:
Kesinlik garanti edilir,
ancak kusursuz bir ölçüm
sağlamak için, normal
termometre kalibrasyonu
tamamlanana kadar
bekleyin (10 ila 30 dakika).
Ekranda “E.8” okunuyor. Termometre ışık
yanmadan önce hareket
ettirilmiştir, ya da bölge
güçlü manyetik alanlara
maruzdur.
Termometreyi hareket
ettirmeden önce ışığın
yanmaya başlamasını
bekleyin; etrafta cep veya
telsiz telefon olmadığından
emin olun.
10. SORUN GİDERME
1. Ekran açılmıyor: piller tamamen bitmiş olabilir veya yanlış takılmış olabilir;
değiştirin veya yeniden takın.
2. Derece iki kemer arasına yansıtılmıyor: ünite doğru mesafede değildir; termom
treyi muhtemel derece tam olarak iki kemer arasına düşene kadar ileri veya geri
hareket ettirin (Şek. 5).
3. Muhtemel derece açık bir şekilde görünür değil: oda aydınlatması çok güçlü
olabilir; ölçüm yapılan bölgeyi hafif karartın.
4. Dalga kılavuzu hasar gördü veya termometreye su girdi:
teknik hizmet için, derhal Bayinizle temasa geçin.
5. Termometre ısı ölçümü çok düşük:
- uyarılarda ana hatları verilen koşulların karşılandığından emin olun;
- dalga kılavuzun kirli veya hasarlı olup olmadığını kontrol edin; kirli ise bölüm 12 sayfa,
09’ da belirtildiği gibi temizleyin veya teknik hizmet için Bayinizle temasa geçin;
- termometrenin Şekil 2’ de gösterildiği şekilde alın bölgesine dik pozisyonda olup
olmadığını kontrol edin.
6. Termometre ısı ölçümü çok yüksek: uyarılarda ana hatları verilen koşulların
karşılandığından emin olun (bölüm 2, sayfa 1).
08 - Türkçe -
GÖRÜNTÜLENE
KALEM AÇIKLAMA PROBLEM ÇÖZÜM
Ekranda “E.1” ve pil
sembolü görünüyor
veya ünite hiç
açılmıyor.
Pilleri derhal çıkartın ve
gerektiğinde yenileri ile
değiştirin (bkz: bölüm 11,
sayfa 9).
Pillerin ömrü bitmiş.
E.1 (aşağıdaki) sinyali
göründüğünde
değiştirmek için, yeni
piller edinin.
Normal işlem
sırasında, ekranda pil
sembolü görünüyor.
Pillerin gücü düşük,
ancak hala birden
fazla ölçüm almak
mümkün.
GÖRÜNTÜLENE
KALEM
9. EKRAN MESAJLARIN ANLAMI
Algılana sıcaklık ünitenin
çalışması için belirlenen
sınırları aşıyor (>80 °C).
Isı ölçümü yapılamaz.
butonuyla ölçüm
yaparken, gösterilen
değer “Hi.2” olarak
değişiyor.
Tıbbi yardım arayın.
Kişinin ateşi çok yüksek
(40 °C’ nin üzerinde).
Ekranda “Hi.4” ibaresi
görünüyor.
Oda sıcaklığı çok yüksek
(45 °C’ nin üzerinde). Daha soğuk başka bir
alana taşıyın.
butonuyla ölçüm
yaparken, ekranda “Hi.2”
okunuyor.
Algılanan sıcaklık bu
butonla işlem yapmak için
belirlenen sınırları aşıyor
(>42.5 °C).
Doğru butonu
kullandığınızdan emin olun.
Tüm gerekli koşulların
karşılanmış olduğundan
emin olun.
butonuyla ölçüm
yaparken, ekranda
“Hi.2” okunuyor.
Oda sıcaklığı 5 ve 15.9
°C arasında.
Ekranda“Lo.5” ibaresi
geliyor.
“Face” (yüz) düğmesinde
Oda sıcaklığı çok düşük
(°10 C’ nin altında).
“Home” (ev) düğmesinde
Oda sıcaklığı çok düşük
(5 °C’ nin altında).
Daha sıcak başka bir
odaya taşıyın.
Ekranda“Lo.5” ibaresi
okunuyor veya ekran
“Lo.5” ve değeri sırayla
gösteriyor.
Isı ölçümü
yapılabilir, ancak doğruluk
garanti edilmez.
AÇIKLAMA PROBLEM ÇÖZÜM
07 - Türkçe -
06 - Türkçe -
- İstenilen ayarlar göründüğünde, butonu serbest bırakın.
Bir kerede sadece birayar değiştirilebilir.
8. ODA SICAKLIĞI KALİBRASYONU
Termometreye uzun süre dokunulması veya oda sıcaklığı bakımından önemli bir
sıcaklık farkının olması halinde, ekranda otomatik sıcaklık kalibrasyonu
tamamlanıncaya kadar beklemeniz gerektiğine işaret eden bir geri sayım
görünecektir. Bu noktada, üç seçeneğiniz vardır:
1. Otomatik Hızlı Kalibrasyon Sistemi AQCS (Automatic Quick Calibration
System): termometreye dokunmadan, geri sayım bitene ve otomatik hızlı
kalibrasyon tamamlanana kadar bekleyin. Geri sayım sıcaklıktaki farklılıklar
algılandığı sürece güncellemeye devam edecektir (örneğin, termometreye
dokunulmuş olduğu için). Geri sayım sonunda, termometre yeterince doğru
ölçümler yapabilir. Termometre bekleme modunda iken, ekranda “AQCS” ibaresi
görünür; otomatik hızlı kalibrasyonun tamamlanmış olduğuna işaret eder.
Geri sayım sırasında vücut ısısının doğru yapılması mümkün değildir. Vücut
ısısını tayin etmek için geri sayımın bitmesini beklemeniz (termometreye
dokunmadan) veya aşağıda tanımlandığı gibi manuel kalibrasyın (MQCS)
yapmanız gerekir.
2. Manüel Hızlı Kalibrasyon Sistemi MQCS (Manual Quick Calibration
System): alternatif, termometreyi ölçümün yapılacağı gerçek oda sıcaklığına
alıştırmak suretiyle termometre sıcaklığının hızla düzeltilmesidir. Aşağıdaki şekilde
ilerleyin (oda sıcaklığı 10 – 45 °C sıcaklık aralığında olmalıdır).
- “Yüz” ve “Ev” butonlarına aynı anda basın (Şek. 8): CAL sembolü
görünecek ve ekran ışığı mavi olacaktır. Kapağı açın.
- 10 saniye içerisinde, termometreyi bir iç duvara (bir dış duvarın iç tarafına değil)
veya sıcaklığı her yerde aynı bir dolaba, zeminden yaklaşık 80/150cm yüksekte
bir noktaya odaklayın. “Ev” butonuna basın (Şek. 9);
- Butonu serbest bırakın: ışıklar yavaşça yanar ve ekran oda sıcaklığını gösterir.
Güvenilir bir sıcaklık ölçümü elde edilmesini sağlamak için, termometreyi bir dış
duvar, pencere, ısıtma veya soğutma kaynağı (radyatör, klima, lamba, bilgisayar,
insan vücudu ile temas halindeki yüzeyler vb) üzerine odaklamayın.
- Termometre ölçüm yapmaya hazırdır.
Manüel hızlı kalibrasyon (MQCS) ayrıca, örneğin, farklı sıcaklıklardaki odalar
arasında geçiş yapmanız gerekmesi halinde, geri sayım yürütülmeden de
yapılabilir.
Bu sistem, ayrıca, termometrenin yeterince doğru ölçümler yapmasına da izin
verir. Bu durumda, termometre bekleme modunda iken, ekranda “MQCS” ibaresi
görünür; bu manüel hızlı kalibrasyonun yapılmış olduğuna işaret eder.
05 - Türkçe -
4.3 Diğer Ölçümler
VisioFocus aynı zamanda 1-80 °C sıcaklık aralığındaki objelerin ve sıvıların
ısısını ölçmek için de kullanılır. Örneğin;
1. Bir bebeğin biberonunun, mamasının, banyosunun vb., ısısı (Şek. 7). Bu
durumda, ölçmeden önce sıvıyı iyice çalkalamayı unutmayın (sıcak sıvı veya
yiyeceklerde, lens üzerinde yoğuşma oluşumunu önlemek için ölçümü hızlı
bir şekilde yapın ve diğer ölçüme geçmeden 30 dakika bekleyin).
2. Bir yara, iltihap, sıyrık ısısı (medikal kullanım için)
3. Termometreyi bir duvara veya bir mobilyaya karşı tutmak suretiyle, oda
sıcaklığı (ayrıca bkz: paragraf 6 “Oda Sıcaklığı”).
Alından ölçme yapıyormuş gibi ilerleyin, ancak “Ev” butonuna basın;
ekran yeşil renkte aydınlanacak ve ev sembolünü gösterecektir.
5. HAFIZA FONKSİYONU
Hafıza fonksiyonu son 9 ısı ölçümünü geri çağırmanıza izin verir.
Bu fonksiyonu etkinleştirmek için, “Mem” butonuna iki kere basın; ekran
ren gi mor a dönecek ve ekranda 1 sayısı ve ölçüm için hangi butonun
kullanıldığına bağlı olarak veya sembolü ile birlikte son ölçüm değeri
gösterilecektir. Butona tekrar basıldığında ikinci son ölçüm, üçüncü kez
basıldığında üçüncü son ölçüm çağrılacak ve bu şekilde devam edecek olup,
eşlik eden sayı 2, 3 …. Olarak gidecektir.
6. ODA SICAKLIĞI
Termometre bekleme modunda iken (“Pek Performans” – bkz: paragraf 7),
oda sıcaklığı ve sembolü yanar ve son ölçümün yapılmasından sonra 4
saat otomatik olarak ekranda gösterilmeye devam eder.
Oda sıcaklığını arkadan aydınlatmalı ekranda görüntülemek için, termometre
bekleme modunda iken, butonuna bir kere basın; ekran rengi turuncu
olacak ve oda sıcaklığını gösterecektir ve sembolü yanacaktır.
7. AYARLAR NASIL DEĞİŞTİRİLİR
Nerede satılacağına bağlı olarak, termometrenin varsayılan ayarları Santigrat
(°C) veya Fahrenhayt (°F) olarak yapılır; ve KOLTUK ALTI (“AXILLA”), ORAL
(“ORAL”) veya REKTAL (“RECTAL”) ısı veya VÜCUT (“CORE”) ısısı ölçüm
moduna işaret edilir veya yalnızca iç ısı okumaları gösterilir (işaret gösterilmez);
bekleme modunda ekran kararır (“Enerji Tasarrufu) veya her zaman açık (“Pik
Performans) durumda ayarlıdır.
Gerekirse, bu ayarlar aşağıdaki şekilde değiştirilebilir:
- Termometre kapalı veya bekleme modunda iken, “Mem” butonuna 8
saniye kadar basılı tutun, ekran görüntüsü değişir ve ayarlar aşağıdaki sırada
görüntülenir:
°C; °F; AXILLA; ORAL; RECTAL; CORE; on (açık) ; off (kapalı) .
Termometre yalnızca iç ısı ayarında üretilmişse AX, ORAL, RECTAL ve CORE
ayarları değiştirilemez.
05 - Italiano -
4.3 Altre misurazioni
È possibile usare VisioFocus anche per rilevare la temperatura di oggetti e
liquidi, da 1 a 80°C. Ad esempio:
1. la temperatura del biberon (fig. 7), della pappa, del bagnetto, ecc. avendo
l’accortezza di mescolare bene i liquidi prima di effettuare la misurazione (in
caso di liquidi o alimenti caldi, eseguite la rilevazione velocemente per evitare
la formazione di condensa sulla guida d’onda ed attendete 30 min. prima di
altre misurazioni);
2. la temperatura in corrispondenza di ferite, infiammazioni, cicatrici (per uso
medico);
3. la temperatura ambiente puntando il termometro contro un muro o un mobile
(vedete anche par. 6 “Temperatura Ambiente”).
Procedete come per una misurazione sulla fronte ma premendo il tasto “casa”
; il display si illuminerà in verde e mostrerà il simbolo .
5. FUNZIONE MEMORIA
La funzione memoria consente di richiamare i valori delle ultime 9 misurazioni.
Per attivarla, premete due volte il pulsante “Mem” : il display si illuminerà in
violetto e visualizzerà il valore dell’ultima rilevazione accompagnato dal numero
1 e dal simbolo o a seconda del pulsante utilizzato per quella misurazione.
Ripremendo ripetutamente il pulsante, il display visualizzerà la penultima, la
terzultima misurazione, ecc, accompagnate dai numeri 2, 3, ecc.
6. TEMPERATURA AMBIENTE
Quando il termometro è in stand-by (“Massima Prestazione”- par. 7) la temperatura
dell’ambiente, unitamente al simbolo lampeggiante, viene mostrata
automaticamente sul display per 4 ore dopo l’ultima misurazione.
Per visualizzare la temperatura ambiente con il display retroilluminato, a
termometro in stand-by premete una sola volta il pulsante : il display si
illuminerà in arancio mostrando la temperatura dell’ambiente e visualizzerà il
simbolo lampeggiante.
7. COME CAMBIARE le IMPOSTAZIONI
Secondo il paese dove viene venduto, il vostro termometro è uscito dalla fabbrica
con le impostazioni in: gradi Centigradi (°C) o gradi Fahrenheit (°F); riferimento
ascellare (“AXILLA”), orale (“ORAL”), rettale (“RECTAL”), o interna (”CORE”); e
display spento quando in stand-by (“Risparmio Energia”) o sempre acceso
(“Massima Prestazione”).
Se necessario, è possibile modificare le impostazioni procedendo come segue:
- a termometro spento o in stand-by, premete e tenete premuto (senza rilasciarlo)
il pulsante “Mem” ; dopo 8 secondi, la visualizzazione cambierà mostrando
in sequenza le impostazioni:
°C; °F; AXILLA; ORAL; RECTAL; CORE; “on” ; “off” .
Se il termometro è stato prodotto con la sola impostazione di temperatura interna,
06 - Italiano -
le impostazioni AX., ORAL, RECTAL e CORE non compaiono nella sequenza.
- Quando compare l’impostazione desiderata, rilasciate il pulsante.
È possibile cambiare solo un’impostazione alla volta
8. CALIBRAZIONE ALLA TEMPERATURA AMBIENTE
Se il termometro viene manipolato a lungo o se riscontra una certa differenza di
temperatura rispetto alla temperatura dell’ambiente, sul display comparirà il conto
alla rovescia che inviterà ad attendere la stabilizzazione automatica. A questo
punto si hanno 3 possibilità:
1. Sistema di calibrazione rapida automatica AQCS (Automatic Quick
Calibration System): attendete la fine del conto alla rovescia senza toccare il
termometro affinché esso completi la stabilizzazione rapida automatica. Il conto
alla rovescia continuerà ad aggiornarsi fino a quando le condizioni di alterazione
della temperatura perdurano (ad esempio perché il termometro viene maneggiato).
Al termine del conto alla rovesciail termometro sarà in gradodi eseguire misurazioni
sufficientemente accurate.La scritta “AQCS” sul display del termometro in stand-by
indica che il termometro ha subito l’AQCS.
Durante il conto alla rovescia non è possibile effettuare una misurazione. È
necessario attendere la fine del conto alla rovescia (senza toccare il termometro)
o è possibile effettuare la calibrazione manuale MQCS, come spiegato nel
paragrafo successivo.
2. Sistema di calibrazione rapida manuale MQCS (Manual Quick Calibration
System): in alternativa è possibile correggere immediatamente la temperatura
interna del termometro ed adattarla a quella reale dell’ambiente in cui si vuole
eseguire la misurazione. Procedete come segue (la temperatura ambiente deve
essere compresa tra 10 e 45°C):
- premete contemporaneamente i pulsanti “faccia” e “casa” (fig. 8):
comparirà il simbolo CAL. Aprite il cappuccio protettivo.
- entro 10 secondi puntate il termometro contro una parete interna (non perimetrale)
o un armadio avente temperatura costante e collocato a circa 80/150 cm dal
pavimento, e premete il pulsante “casa” (fig. 9);
- rilasciate il pulsante: le luci lampeggeranno lentamente e il display indicherà la
temperatura dell’ambiente. Per essere sicuri che questa temperatura sia verosimile,
evitate di puntare il termometro contro pareti esterne, finestre, fonti di calore o
freddo (caloriferi, condizionatori, lampade, computer, superfici a contatto con il
corpo umano, ecc).
- Il termometro è pronto per eseguire una misurazione.
La stabilizzazione manuale MQCS è possibile anche in assenza del conto alla
rovescia in caso ci si debba spostare tra locali con temperature diverse.
Anche questo sistema metterà il termometro in grado di eseguire misurazioni
sufficientemente accurate e la scritta “MQCS” sul display del termometro in
stand-by ricorda che il termometro ha subito l’MQCS.
Il display visualizza
“E.1” e il simbolo delle
batterie, oppure non si
accende per niente.
Togliete immediatamente le
batterie e sostituitele
quando necessario (leggete
il paragrafo 10 a pag. 10).
Le batterie sono
completamente
scariche.
Procuratevi le batterie
per sostituirle quando
compariàt il simbolo
“E.1” (vedete sotto).
Il simbolo delle
batterie si accende
durante il normale
funzionamento.
Le batterie si stanno
scaricando ma è ancora
possibile eseguire un buon
numero di misurazioni.
VISUALIZZAZIONE
DEL DISPLAY
9. SIGNIFICATO DEI MESSAGGI SUL DISPLAY
La temperatura rilevata è
al di sopra dei limiti ope-
rativi dell’apparecchio.
(>80°C).
Non è possibile rilevare
la temperatura.
Misurazione
con pulsante :
il valore visualizzato si
alterna a “Hi.2”.
Consultate un medico.
Presenza di febbre
molto alta
(oltre 40°C).
Il valore visualizzato
si alterna a “Hi.4”.
Temperatura ambiente
troppo alta (oltre 45°C).
Spostatevi in un luogo
più fresco.
Misurazione
con pulsante :
il display visualizza
"Hi.2".
La temperatura rilevata è
al di sopra dei limiti ope-
rativi dell’apparecchio
con questo pulsante
(>42,5°C).
Assicuratevi che sia stato
utilizzato il pulsante
adatto.
Misurazione
con pulsante : il
display visualizza
"Hi.2".
Temperatura ambiente
compresa tra 10 e 15,9°C
con pulsante “faccia” e
compresa tra 5 e 9,9°C
con pulsante “casa”.
Il display mostra "Lo.5". Temperatura ambiente
troppo bassa (<10°C con
pulsante “faccia” e <5°C
con pulsante “casa”).
Spostatevi in un
ambiente più caldo.
Il display visualizza "Lo.5"
alternato al valore.
La misurazione è possibile
ma la precisione non è
garantita.
DESCRIZIONE PROBLEMA SOLUZIONE
07 - Italiano -
VISUALIZZAZIONE
DEL DISPLAY DESCRIZIONE PROBLEMA SOLUZIONE
10. EVENTUALI PROBLEMI E SOLUZIONI
1. Il display non si accende:
- le batterie sono completamente scariche oppure sono state inserite
erroneamente; sostituitele o reinseritele correttamente.
2. La temperatura proiettata non si trova al centro dei due archi:
- la distanza non è corretta; spostate il termometro avanti o indietro fino a quando
la proiezione della temperatura sarà visibile esattamente in mezzo ai due archi.
3. La proiezione della temperatura è poco visibile:
- la luce ambiente è troppo elevata; fate ombra al soggetto.
4. La guida d’onda è danneggiata o è penetrata acqua nel termometro:
- contattate immediatamente l’Assistenza al numero verde 800-930321.
5. La temperatura rilevata dal termometro appare troppo bassa:
- verificate che siano rispettate le condizioni previste nelle avvertenze;
- verificate che la guida d’onda non sia sporca o danneggiata, in tal caso pulite
come indicato al par. 12, pag. 9 o contattate l’assistenza;
- verificate che il termometro sia perpendicolare alla fronte (fig. 2).
6. La temperatura rilevata dal termometro appare troppo alta:
- verificate che siano rispettate le condizioni previste nelle avvertenze (par. 2.1).
Misurazione sulla fronte
con pulsante : il
display visualizza "Lo.3".
Temperatura della fronte
apparentemente troppo
bassa (<34,0°C).
Verificate che la guida
d’onda non sia sporcao
che il soggetto non
provenga da un ambiente
con bassatemperatura.
Misurazione
con pulsante : il
display visualizza "Lo.3".
La temperatura della
superficie rilevata è al di
sotto dei limiti operativi
(<1°C).
Non è possibile rilevare
la temperatura.
Il display visualizza il
conto alla rovescia, in
minuti e secondi,
necessario a VisioFocus
per ricalibrarsi
automaticamente.
Il termometro non è
stabilizzato. I simboli
dopo la parentesi graffa
invitano a scegliere tra:
• attendere la fine del
conto alla rovescia per
l’AQCS senza toccare
il termometro
• oppure eseguire l’MQCS
(leggeteil par. 7 a pag. 7).
Durante lo stand-by, la
visualizzazione della
temperatura ambiente è
accompagnata
dal simbolo MQCS o
AQCS.
Il termometro ha subito
una stabilizzazione rapida
automatica o manuale:
potete effettuare una
misurazione accurata.
Per una misurazione
perfetta, attendete la
calibrazione normale
del termometro
(dai 10 ai 30 minuti).
Il display visualizza "E.8". Il termometro è stato
mosso prima del lam-
peggio delle luci, oppure si
è in presenza di forti campi
elettromagnetici.
Attendete il lampeggio delle
luci prima di muovere il ter-
mometro; assicuratevi che
non ci siano telefoni cellulari
o cordless nelle vicinanze.
08 - Italiano - 10 - Italiano -
Alimentazione: 4 batterie tipo AAA (LR03) alcaline da 1,5 V (incluse)
Autonomia con batterie di qualità: fino a 3 anni o 30.000 letture (secondo l’uso)
Dimensioni: mm 144 x 43,5 x 21,5 - compreso cappuccio di protezione
Peso: gr. 98 - (batterie comprese)
14. CARATTERISTICHE TECNICHE
VISIOFOCUS®Termometro infrarosso a distanza
Distanza dal soggetto: stabilita mediante sistema di puntamento ottico (circa
6 cm).
Display ampioe ben visibile, dotato di retroilluminazione a 5 colori: azzurro, verde
o violetto, a seconda del pulsante utilizzato (rispettivamente “faccia”, “casa” o
“Mem”); arancio e blu a seconda delle funzioni (rispettivamente visualizzazione
della temperatura ambiente e MQCS).
Intervallo di pressione atmosferica di utilizzo: da 700 hPa a 1,060 hPa.
Intervallo di umidità relativa di utilizzo: da 15 % a 93 %, non-condensante.
Conservare in un luogo asciutto e pulito, preferibilmente ad una temperatura
compresa tra +16 e +40°C. Non conservare a una temperatura inferiore a -18°C
e superiore a +70°C.
Durata di vita prevista del dispositivo: 10 anni.
VisioFocus è un dispositivo medico di classe IIa (secondo la direttiva 93/42/CEE
e s.m.i.). Il suo sistemadi misurazione è stato testato in ospedali e cliniche private
e studi medici. Gli studi clinici sono disponibili su richiesta al fabbricante.
Termometro infrarosso conforme ai requisiti stabiliti dalla norma ASTM
(E1965-98:2009) e alle norme CEI EN 60601-1, 60601-1-2 e 60601-1-11.
Apparecchio con sorgente elettrica interna, previsto per uso continuo.
Tecnimed srl, P.le Cocchi, 12 - 21040 Vedano Olona (VA) - Italia assume piena
responsabilità della conformità di questo prodotto alle norme di riferimento.
I led di VisioFocus emettono esigue radiazioni luminose in conformità IEC 62471.
Leggere le istruzioni
per l’uso
Apparecchio previsto
per uso continuo
Protetto contro l’inseri-
mento di oggetti >12,5
mm e contro l’ingresso
di gocce d’acqua
ATTENZIONE:
leggere le avvertenze
Materiale riciclabile
Parte applicata
tipo BF
Ai sensi dell’art. 13 del Decreto Legislativo 25 luglio 2005, n. 151 “Attuazione delle Direttive 2002/95/CE,
2002/96/CE e 2003/108/CE, relative alla riduzione dell’uso di sostanze pericolose nelle apparecchiature
elettriche ed elettroniche, nonché allo smaltimento dei rifiuti” e ai sensi dell’art. 22 del D. Lgs. 20 novembre
2008, n. 188:il simbolo del cassonetto barratoindica che il prodotto alla fine dellapropria vita utile deve essereraccolto
separatamente dagl i altri rifiuti, così comele pile esauste. L’utente dovrà, pertanto, conferire l’apparecchiatura giunta
a fine vita agli idonei centri di raccolta differenziata dei rifiuti elettronici ed elettrotecnici. L’adeguata raccolta
differenziata per l’avvio successivo dell’apparecchiatura dimessa e dellepile esauste al riciclaggio, al trattam ento
e allo smaltimento ambientalmente compatibile contribuisce ad evitare possibili effetti negativi sull’ambiente e sulla
salute e favorisce il reimpiego e/o riciclo dei materiali di cui è composta l’apparecchiatura. Lo smaltimento abusivo
del prodotto da parte dell’utente comporta l’applicazione delle sanzioni amministrative previste dalla normativa
vigente.
Intervallo di misura
Intervallo di temperatura
ambiente
Risoluzione
Precisione da 34,0 a 35,9°C
Precisione da 36,0 a 39,0°C
Precisione da 39,1 a 42,5°C
34,0/42,5°C
10/45°C (1)
0,1
+/-0,3°C
+/-0,2°C (2)
+/-0,3°C
Intervallo di misura
Intervallo di temperatura ambiente
Risoluzione
Precisione da 1,0 a 19,9°C
Precisione da 20,0 a 35,9°C
Precisione da 36,0 a 39,0°C
Precisione da 39,1 a 42,5°C
Precisione da 42,6 a 80,0°C
1,0/80,0°C
5/45°C (3)
0,1
+/-1,0°C
+/-0,3°C
+/-0,2°C
+/-0,3°C
+/-1,0°C
Misurazioni sulla fronte Altre misurazioni
(3) In ambienti con temperatura compresa tra 5 e
9,9°C, la precisione ed il range operativo non sono
garantiti ed il valore letto viene alternato a "Lo.5".
(1) Con temperatura ambiente tra 10 e 15,9°C o tra 40 e
45°C, la precisione e il range operativo non sono garantiti
ed il valore letto viene alternato a "Lo.5" o “Hi.4”.
(2) Il grado di accuratezza richiesto dalle norme ASTM
E1965-98-2009 per i termometri infrarosso per
temperature tra 37 e 39°C è di +/-0,2°C, mentre per i
termometri a mercurio ed elettronici le norme ASTM
E667-86 e E1112-86 prevedono una precisione di +/-
0,1°C per temperature tra 37 e 39°C.
IP 22
09 - Italiano -
7. Il termometro appare bloccato, non va in posizione di riposo dopo 20 secondi
di inutilizzo o i led di puntamento rimangono accesi dopo il rilascio del pulsante:
- resettate il termometro togliendo e rimettendo le batterie.
11. SOSTITUZIONE BATTERIE
- Premete con il pollice nella piccola nicchia ovale posta sul retro
dell’apparecchio e fate scorrere lo sportello
batterie come illustrato nella figura 11.
- Togliete lo sportello batterie.
- Asportate le vecchie batterie e
gettatele negli appositi contenitori.
- Inserite 4 nuove batterie tipo
AAA - LR03 (ministilo),
preferibilmente alcaline, prestando attenzione
alla posizione indicata nelle rispettive sedi.
- Richiudete lo sportello facendolo scorrere in senso inverso a quello di apertura.
Dopo il cambio delle batterie, lasciate stabilizzare il termometro per 20 minuti prima
di effettuare una misurazione oppure eseguite l’MQCS (par. 7, pagina 7).
- Togliete le batterie se prevedete di non usare il termometro per lungo tempo.
12. PULIZIA
PULIZIA DELLA GUIDA D’ONDA: la guida d’onda del termometro è molto
delicata. Si raccomanda quindi di proteggere sempre il termometro con il suo
cappuccio, quando non è in uso. Se, tuttavia, fosse necessario pulire la guida
d’onda o il sensore situato in fondo ad essa per rimuovere eventuale polvere
o altro sporco, usate un bastoncino di cotone leggermente inumidito con alcool.
Assicuratevi di asportare tutto lo sporco evitando di accumularne sul fondo
della guida d’onda dove si trova il sensore. Non utilizzate altri oggetti o liquidi
che potrebbero facilmente graffiare o danneggiare la superficie della lente o
del sensore. Durante questa operazione assicuratevi che eventuale liquido in
eccesso non penetri tra la guida d’onda ed il sensore.
PULIZI A DEL CORPO DEL TERMOMETRO: u sate un pann o morbido
leggermente inumidito con acqua e sapone ed eventualmente ripassate con
un disinfettante.
NON USARE il termometro per almeno 30 minuti dopo la sua pulizia.
13. DISPLAY
Il display di VisioFocus è retroilluminato in 5 colori:
1. azzurro (pulsante utilizzato: “faccia”. Rif. Par. 4.1 e 4.2);
2. verde (pulsante utilizzato: “casa”. Rif. Par. 4.3);
3. viola (pulsante utilizzato: “Mem”, funzione “memoria”. Rif. Par. 5);
4. arancio (pulsanteutilizzato:“Mem”, funzione “temperatura ambiente”. Rif. Par. 6);
5. blu (funzione MQCS. Rif. Par. 8).
Fig. 11
apri
chiudi