VisionAid Readit Air Installation instructions

Copyright (C) 2008-2016, VisionAid International Ltd, all rights reserved.
Hardware Guide Rev A
English

Page 2
VisionAid International Ltd
Table of Contents
Introduction......................................................................................................... 3
Readit Improvement program ............................................................................. 3
Ownership and intellectual property ................................................................... 4
Box contents ........................................................................................................ 4
Positioning Readit Air for use............................................................................... 5
Readit Air contrast/positioning mat.................................................................. 5
Unfolding Readit Air camera head and attaching the positioning guide ........... 6
Folding Readit Air’s camera head for transport ................................................ 7
Plugging In......................................................................................................... 8
Positioning your documents for capture ............................................................. 9
Readit Air lighting adjustment ............................................................................. 9
Headphones........................................................................................................10
FAQ and Troubleshooting………………………………………………………………………………..10
Maintenance………………………………………………………….………………………………………..10
Cleaning…………………………………………………………………………………………………………..10
Appendix A: Safety..............................................................................................11
Appendix B: Technical Information.....................................................................11

Page 3
VisionAid International Ltd
Introduction
Congratulations on choosing the Readit Air digital capture reading system.
The Readit Air combines high speed OCR, speech and reformatted text output
with ease of use and portability. It can capture and read any printed material
such as letters, bank statements, newspapers, food packaging etc. and weighs
just 500 grams (1.1 lbs).
Readit Improvement program
Users are the best people to help us improve and develop our products so if you
have any ideas or suggestions, no matter how small, please do contact us.
Suggestions contact information
Please use the following methods to contact us regarding your suggestions:
Email:
suggestions@visionaid.com
Post:
VisionAid International Ltd.
Bridge Lodge, Spalding, Lincolnshire
PE11 3AU
United Kingdom
Phone:
+44 (0) 1775 711 977
Thank you and we wish you many hours of enjoyment with your new portable
digital capture reading assistant!

Page 4
VisionAid International Ltd
Ownership and intellectual property
The software makes use of third party software libraries that are redistributed
under their own respective licenses.
LAME is distributed under the terms of the GNU Lesser General Public License
(LGPL), a copy of which can be found at http://www.gnu.org/licenses/lgpl.html
and is included in the software’s program directory.
OpenCV is distributed under the terms of the Berkeley Software Distribution
(BSD) license, a copy of which is included in the software’s program directory.
Copyright (C) 2000-2008, Intel Corporation, all rights reserved.
Copyright (C) 2009, Willow Garage Inc., all rights reserved.
Third party copyrights are property of their respective owners.
Box contents
Your Readit Air box should contain the following items:
1. Readit Air portable digital capture reading system.
2. Drawstring bag for Readit Air.
3. Attachable positioning guide.
4. USB cable.
5. USB extension cable.
6. Over ear headphones with in line volume control.
7. White contrast/positioning mat.
8. Laminated quick reference guide.
9. This hardware guide.
10. Paper software instruction manual.
If any of these items are missing, please contact your local distributor.

Page 5
VisionAid International Ltd
Positioning Readit Air for use
Remove Readit Air from its protective drawstring bag and place it on a flat
surface. When doing so, try and ensure that it’s not directly underneath any
bright lighting, as this can affect its accuracy, especially when reading glossy
documents.
Readit Air contrast/positioning mat
Readit Air also includes a contrast/positioning mat. This can be used if the
surface where you wish to place the Readit Air is very dark and the item wishing
to be read is small (e.g. a postage receipt, business card etc.).
The contrast mat can also be used as a positioning guide, there is a cut out area
in which to position the camera. Place the camera within the cut out area to use
the mat as a positioning guide.
Place the camera
inside the cut out area
to use the mat as a
positioning guide
Velcro patch on
the up side of the
mat, in the rear
right corner,
indicating white
side is facing
upwards

Page 6
VisionAid International Ltd
Unfolding Readit Air camera head and attaching the
positioning guide
Getting Readit Air ready for use takes just a few seconds and two easy steps
Capture Area
1. Lower the Readit Air camera
into the cut out in the included
positing guide. Ensure the long
edge of the positioning guide
points out to the left hand side
of the camera and that it
protrudes in front of it.
2. Unfold the camera head of
the Readit Air camera by
grasping the bottom of the
camera head between your
thumb and your index finger
and lift it upwards until it stops.

Page 7
VisionAid International Ltd
Folding Readit Air’s camera head for transport
To fold Readit Air for transport, simply do the exact opposite of the unfolding
procedure before placing the Readit Air into its drawstring bag with the included
right-angled USB cable.
IMPORTANT:
Always ensure that Readit Air’s camera head is folded into its transport
positions before placing it into its protective drawstring carry bag. This will
help prevent any damage being done to the Readit Air during transport.

Page 8
VisionAid International Ltd
Plugging In
Readit Air has a relatively short attachable USB cable included. This is designed
to be used in conjunction with laptops.
A USB extension lead is also provided for desktop PC use.
At the end of the USB cable is the USB connector that needs inserting into one
of your computer’s USB ports. The connector has a bump-on stuck onto it. This
is to enable you to feel which way round the connector is when inserting it into
a USB socket.
Bump-on attached to top side of USB
connector (for most computers)
USB Socket
IMPORTANT:
Some computers have their
USB ports fitted the wrong
way up!
USB connectors will only
plug into USB sockets one
IMPORTANT:
Some computers have their USB ports fitted the other way up!
USB connectors will only plug into USB sockets one way round. They do
not require much force, so take great care when inserting them into a
socket. Forcing a USB connector into its socket the wrong way round will
break the socket and or the connector. This is not covered by warranty.

Page 9
VisionAid International Ltd
Positioning your documents for capture
Readit Air captures an area slightly larger than an A4 or Letter page.
Documents must be in a landscape orientation with the long edge of the
document going left to right when the Readit Air camera head is facing towards
you.
To align your document, simply place it up against the positioning guide so that
one of the corners of the document is in line with the left edge of the
positioning guide.
Readit’s software will also give a visual indication on screen as to what is going
to be captured.
The orientation of the document will not influence the recognition of the text
but remember that to capture an entire A4 or letter page, the document must
be in landscape orientation, otherwise the bottom of the document will be
missed.
POSITIONING TIP:
Readit Air has powerful
document straightening and
rotation abilities but for the
highest accuracy and speed,
try to position your
document as squarely as
possible and ensure pages
are relatively flat.
Capture Area

Page 10
VisionAid International Ltd
Headphones
Readit Air includes a pair of over ear headphones with
in-line volume control. They have a standard 3.5 mm
audio jack connector.
To use the headphones, (or any other that you may
already own), simply plug them into the headphone
socket on your PC or laptop.
To alter the headphone volume, we
recommend using the in-line volume
wheel, located on the headphone
wire. It is also possible to adjust the volume of the headphones using the
volume control on your computer.
FAQ and troubleshooting
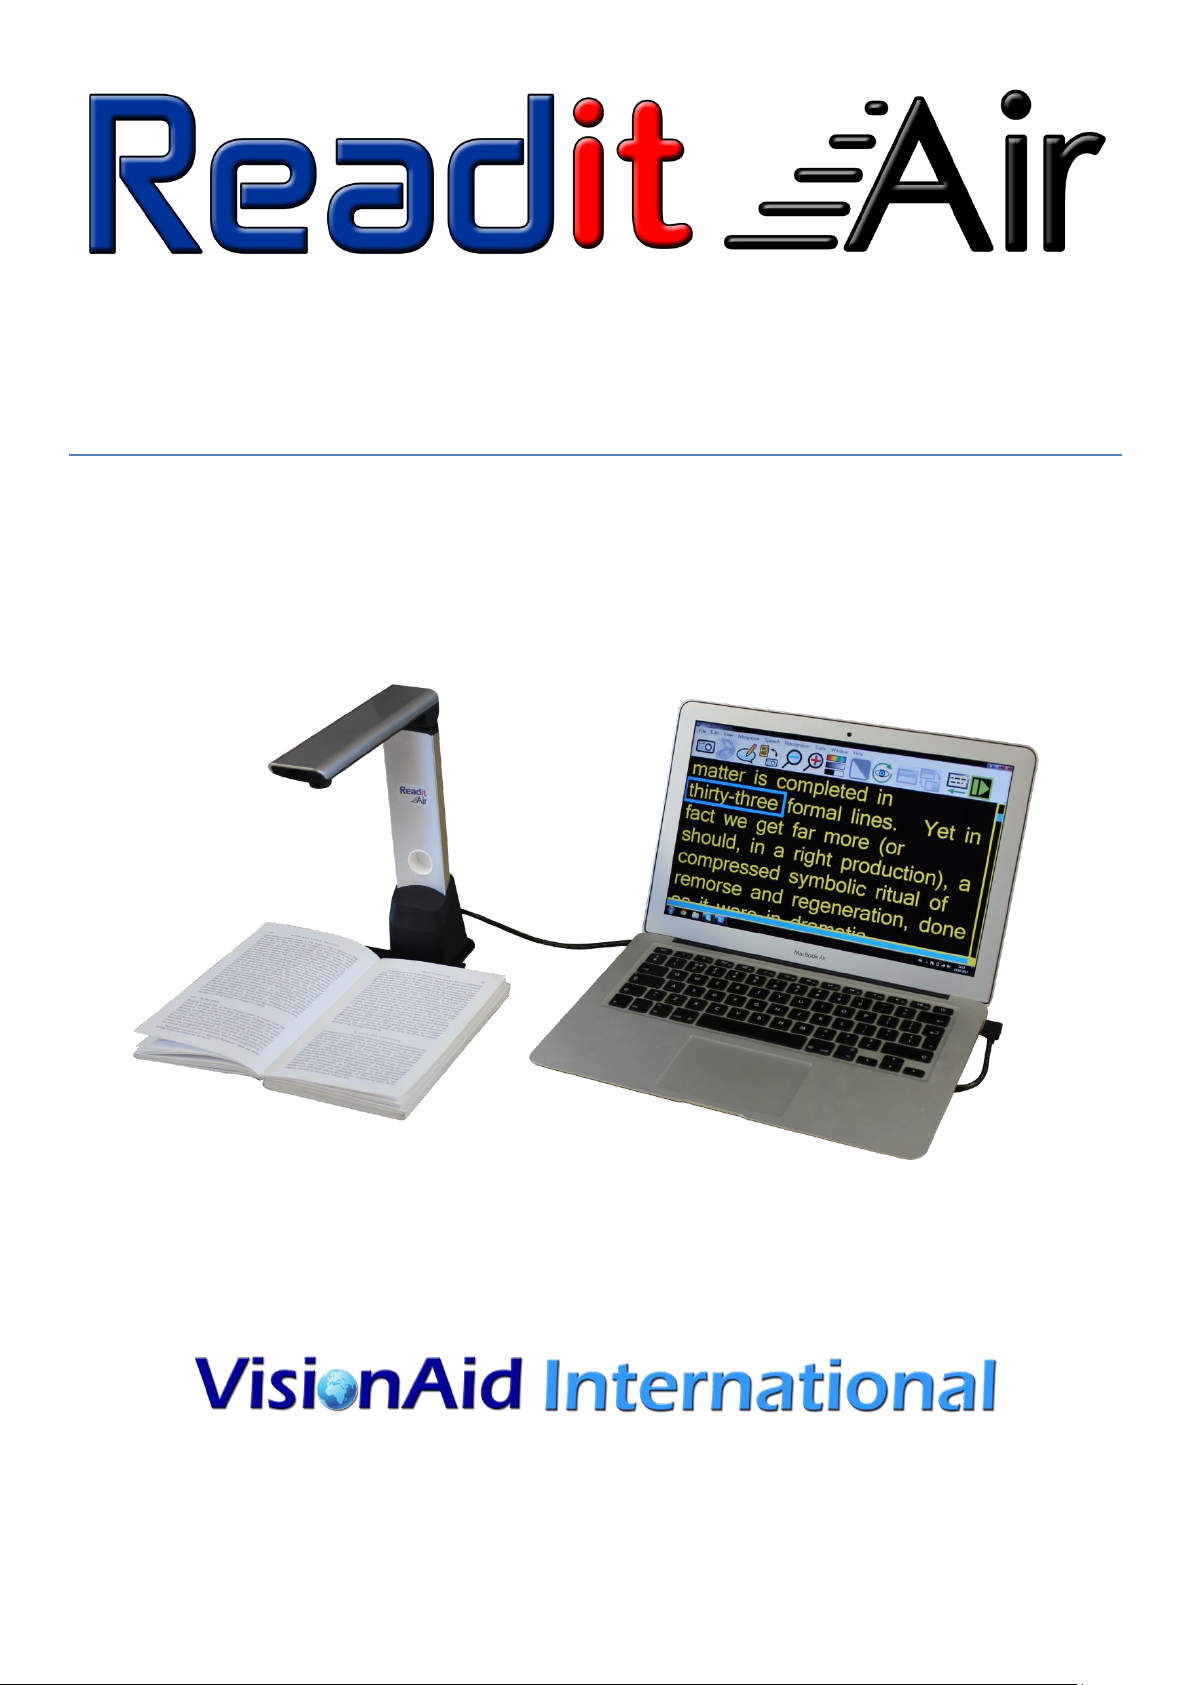
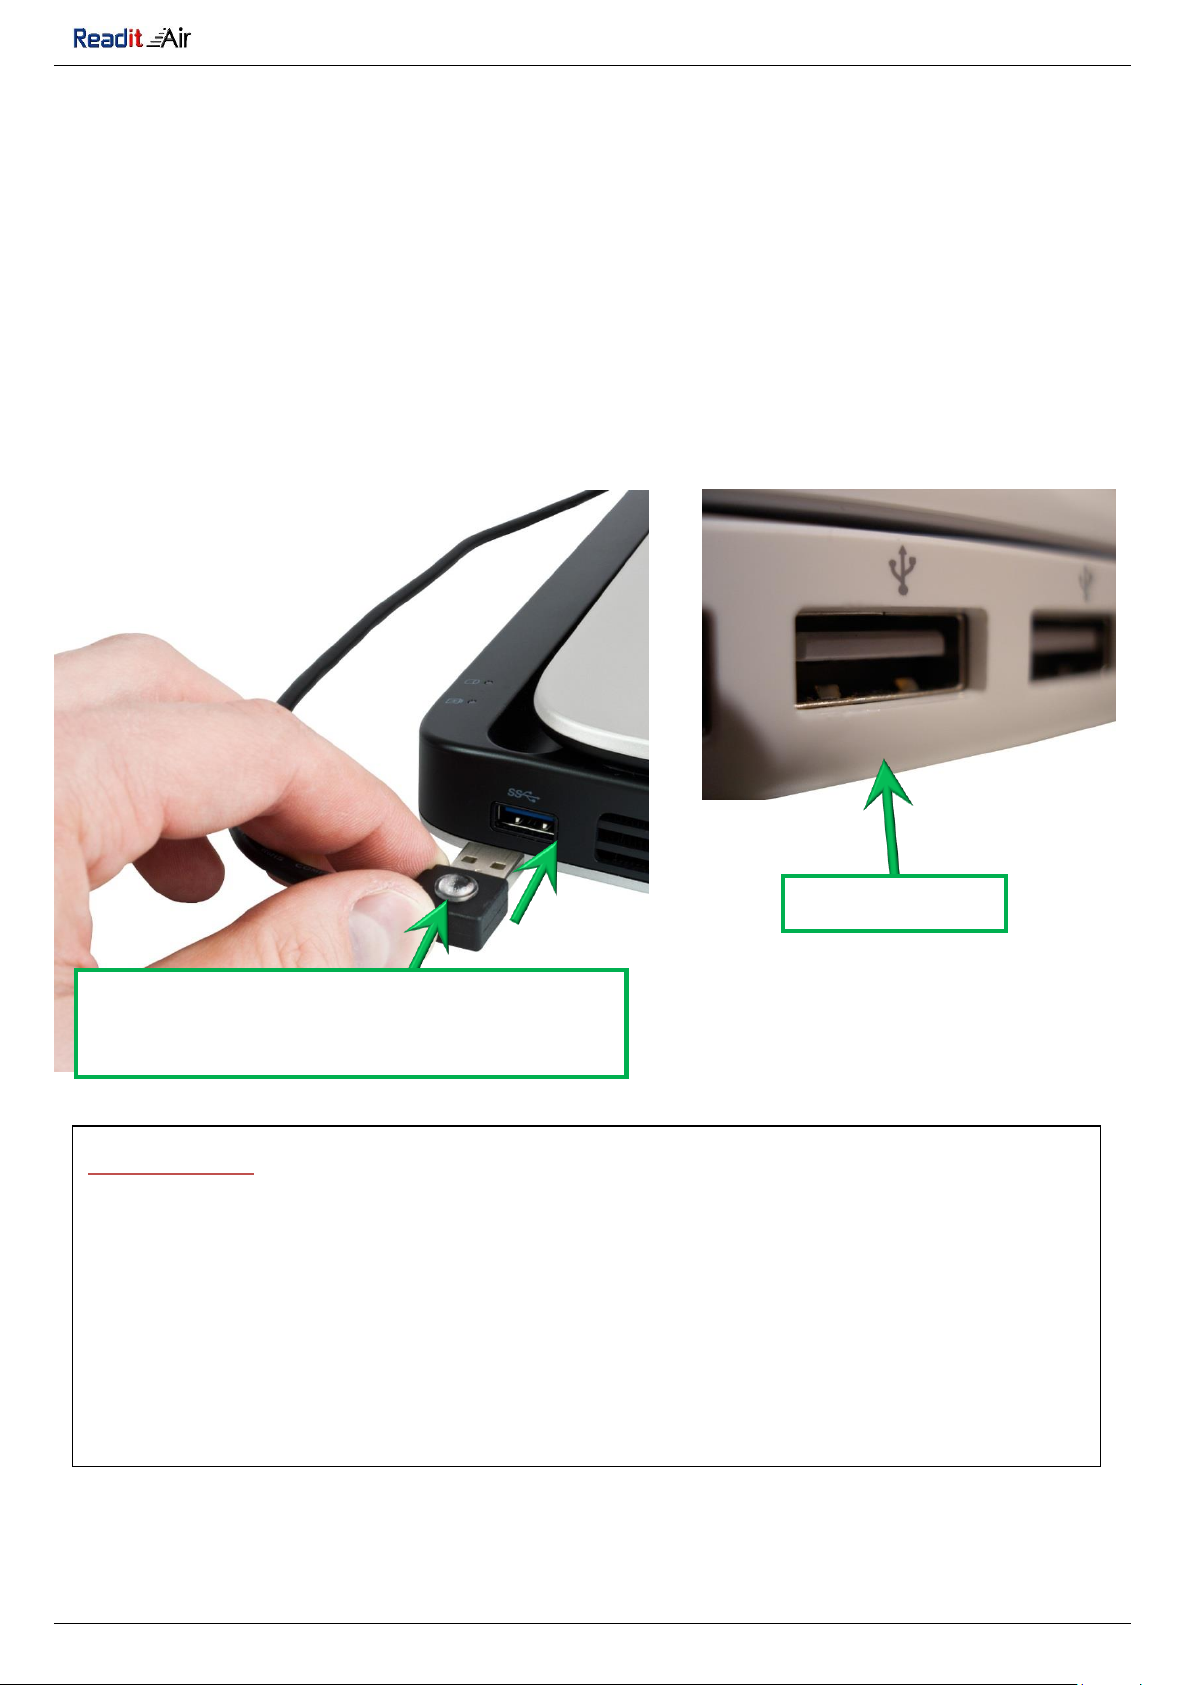
Q. I’m connecting the Air to my PC via USB but the Readit software is not
recognising it.
A. Please try using a different USB port. Ensure as you connect the Air to your
computer that you hear the Windows “Duh-dum” noise. Also ensure you
have tried turning your computer off, (shutting it down completely),
removing the camera, waiting 1 minute, then reconnecting it and turning
your computer back on.
Maintenance
The Air camera is designed so that it requires no maintenance.
Cleaning
The Air requires no special cleaning treatment. It can be dusted when required.
The camera’s lens is recessed within the camera head so it is very unlikely that it
would ever become dirty. If it does, a lint free cotton bud can be used gently to
remove any dust or smears from it.
In-line volume
control
Lighting Control Wheel

Page 11
VisionAid International Ltd
Appendix A: Safety
Handle the Readit Air with care. Rough handling may damage internal
components and will void your warranty.
Contact your VisionAid International distributor to service this equipment
if necessary.
Do not open or remove any parts of the Readit Air as it will void the
warranty.
Do not expose the Readit Air to excessive heat or direct sunlight.
Do not use the Readit Air near inadequately shielded medical devices.
To avoid risk of electrical damage, keep your Readit Air away from fluids
and chemicals.
Use of the Readit Air other than described in this manual will exclude it from
warranty.
Appendix B: Technical information
General information
Dimensions folded:
(WxDxH)
6.3 x 5.6 x 8.1 x 25 cm
2.5 x 2.2 x 9.8 inches
Dimensions unfolded with positioning
guide: (WxDxH)
19.3 x 21.2 x 25.5 cm
7.6 x 8.3 x 10 inches
Footprint - no positioning guide (WxD)
6.3 x 5.6 cm
2.5 x 2.2 inches
Weight:
500 grams (1.1 lbs)
Camera resolution:
High resolution 5 MP
Operating conditions
Relative Humidity:
<70%, no condensation
Temperature:
0 to 35 °C
Storage and transport conditions
Relative humidity:
<95%, no condensation
Temperature:
5 to 45 °C
Table of contents