Viso Systems LabFlicker User manual
VISO LabFlicker
User Manual
Last edited 22 of August 2019

2
Content
SAFETY INFORMATION......................................................................................................................... 3
INTRODUCTION.................................................................................................................................... 4
ABOUT THE VISO LABFLICKER .........................................................................................................................4
ABOUT THIS DOCUMENT .................................................................................................................................4
DIMENSIONS........................................................................................................................................ 5
LABFLICKER PACKAGE CONTENT.......................................................................................................................6
PACKAGES AND WEIGHT .................................................................................................................................6
SOFTWARE INSTALLATION ................................................................................................................... 7
CONNECTING THE VISO LABFLICKER ..................................................................................................... 8
EXTENDING THE USB CONNECTION ...................................................................................................... 9
HOW TO USE THE VISO LABFLICKER ..................................................................................................... 9
MAKE A MESASUREMENT .................................................................................................................. 10
BASIC MEASUREMENT ..................................................................................................................................11
ADVANCED MEASUREMENT...........................................................................................................................11
TOO MUCH/LITTLE LIGHT ................................................................................................................... 12
FLICKER MEASUREMENT DATA .......................................................................................................... 13
FLICKER FREQUENCY ....................................................................................................................................13
FLICKER PERCENTAGE...................................................................................................................................13
FLICKER INDEX ............................................................................................................................................13
FLICKER FFT ...............................................................................................................................................14
SVM.........................................................................................................................................................14
JA8...........................................................................................................................................................15
PSTLM ......................................................................................................................................................15
IMPORT/REMOVE FLICKER MEASUREMENT ....................................................................................... 16
SPECIFICATIONS ................................................................................................................................. 17

3
Safety Information
Warning! This product is not for household use.
Read this manual before installing and operating the controller, follow the safety warnings listed
below, and study all the cautions in the manual.
If the controller or the power supply are in any way damaged, defective, wet, or show signs of
overheating, disconnect the power supply from the AC power and contact Viso Service for
assistance.
Do not install or use the device outdoors. Do not spray with or immerse in water or any other
liquid.
Do not remove any covers or attempt to repair the controller or the power supply. Refer any
service to Viso.
Disposing of this product
Viso products are supplied in compliance with Directive 2002/96/EC of
the European Parliament and of the Council of the European Union on
WEEE (Waste Electrical and Electronic Equipment), as amended by
Directive 2003/108/EC, where applicable.
Help preserve the environment! Ensure that this product is recycled at
the end of its lifetime. Your supplier can give details of local
arrangements for the disposal of Viso products.

4
Introduction
About the VISO LabFlicker
The VISO LabFlicker expands the ability of the Viso Systems Goniometers series to measure the
light Flicker using the same Light Inspector software. The device is easily connected to the
computer using USB and automatically detected by the Light Inspector software.
About this document
These guidelines describe the installation process of the VISO LabFlicker and how to use it with
any of VISO Systems goniometers.
© 2007 Viso Systems ApS, Denmark
All rights reserved. No part of this manual may be reproduced, in any form or by any means, without permission in writing from
Viso Systems ApS, Denmark.
Information subject to change without notice. Viso Systems ApS and all affiliated companies disclaim liability for any injury,
damage, direct or indirect loss, consequential or economic loss or any other loss occasioned by the use of, inability to use or
reliance on the information contained in this manual.
5
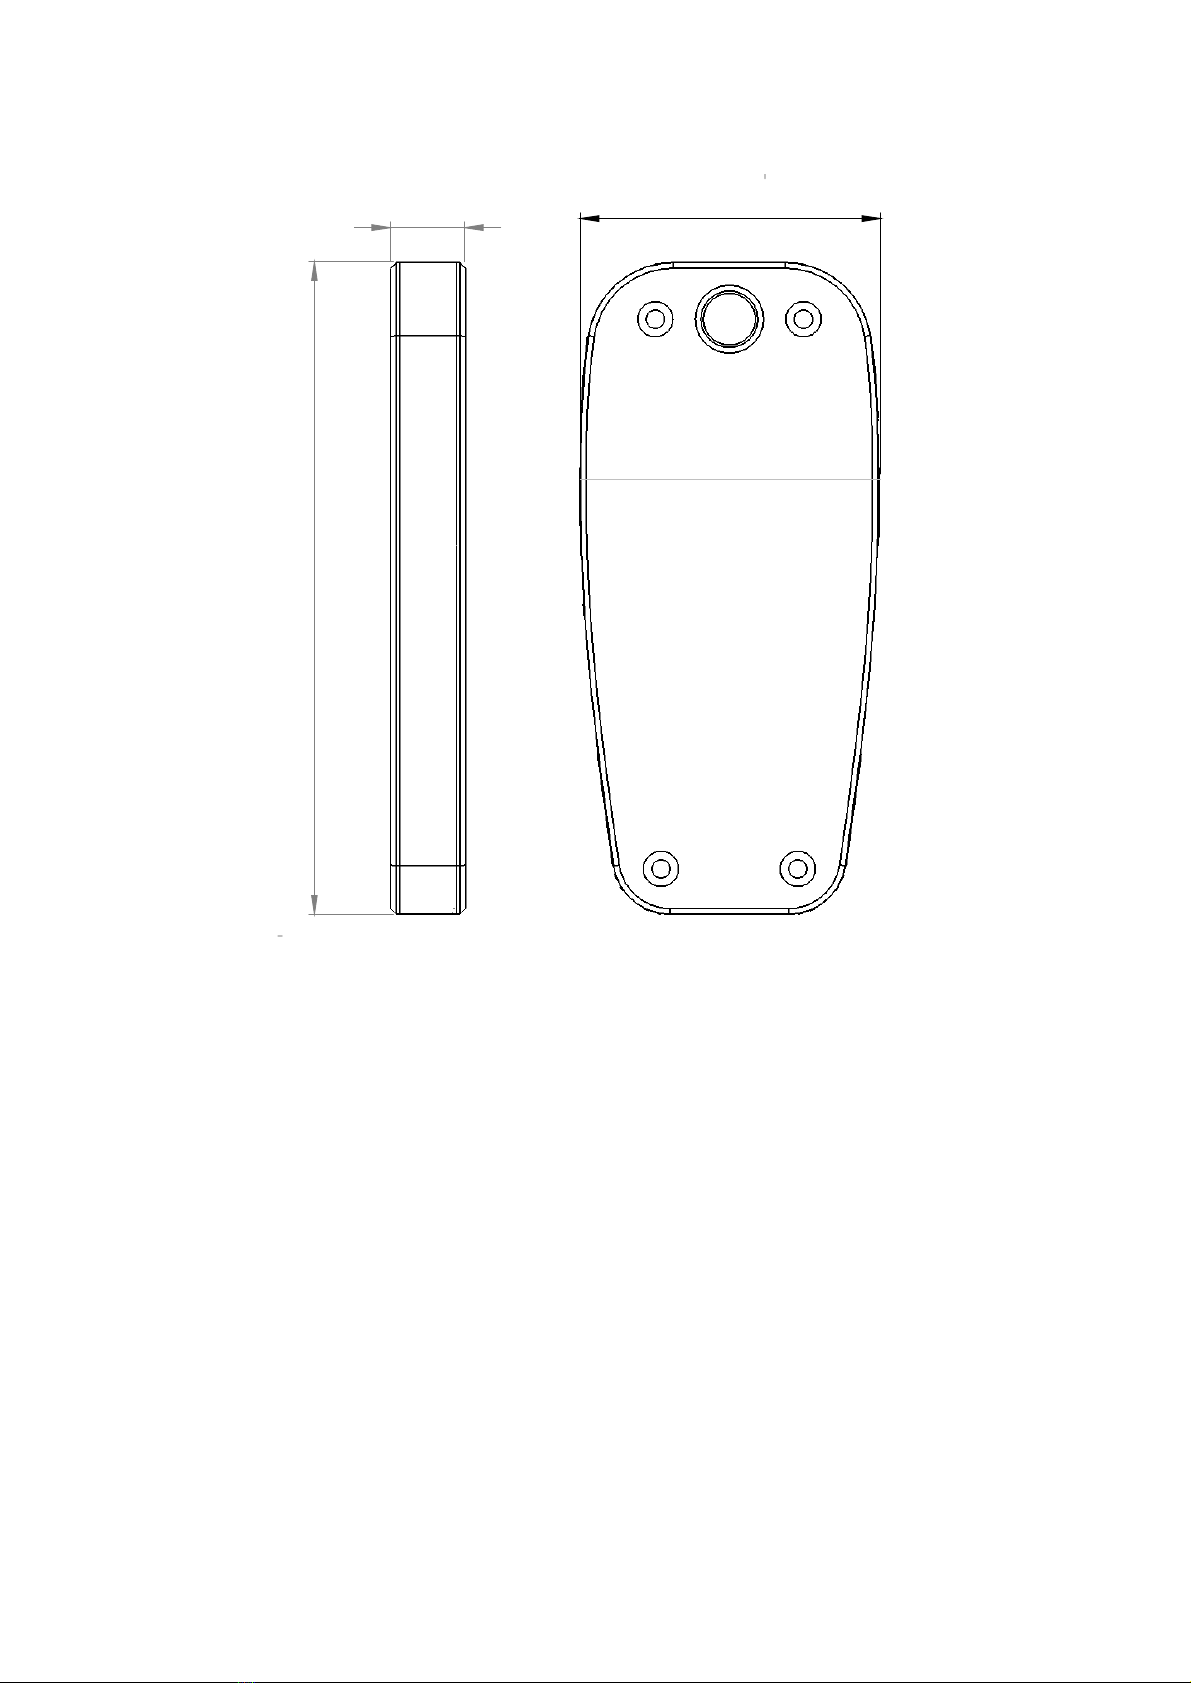
Dimensions
115
13 53
A A
B B
C C
D D
E E
F F
4
4
3
3
2
2
1
1
DRAWN
CHK'D
APPV'D
MFG
Q.A
UNLESS OTHERWISE SPECIFIED:
DIMENSIONS ARE IN MILLIMETERS
SURFACE FINISH:
TOLERANCES:
LINEAR:
ANGULAR:
FINISH: DEBURR AND
BREAK SHARP
EDGES
NAME
SIGNATURE
DATE
MATERIAL:
DO NOT SCALE DRAWING
REVISION
TITLE:
DWG NO.
SCALE:1:1 SHEET 1 OF 1
A4
WEIGHT:
Flicker Assem
6
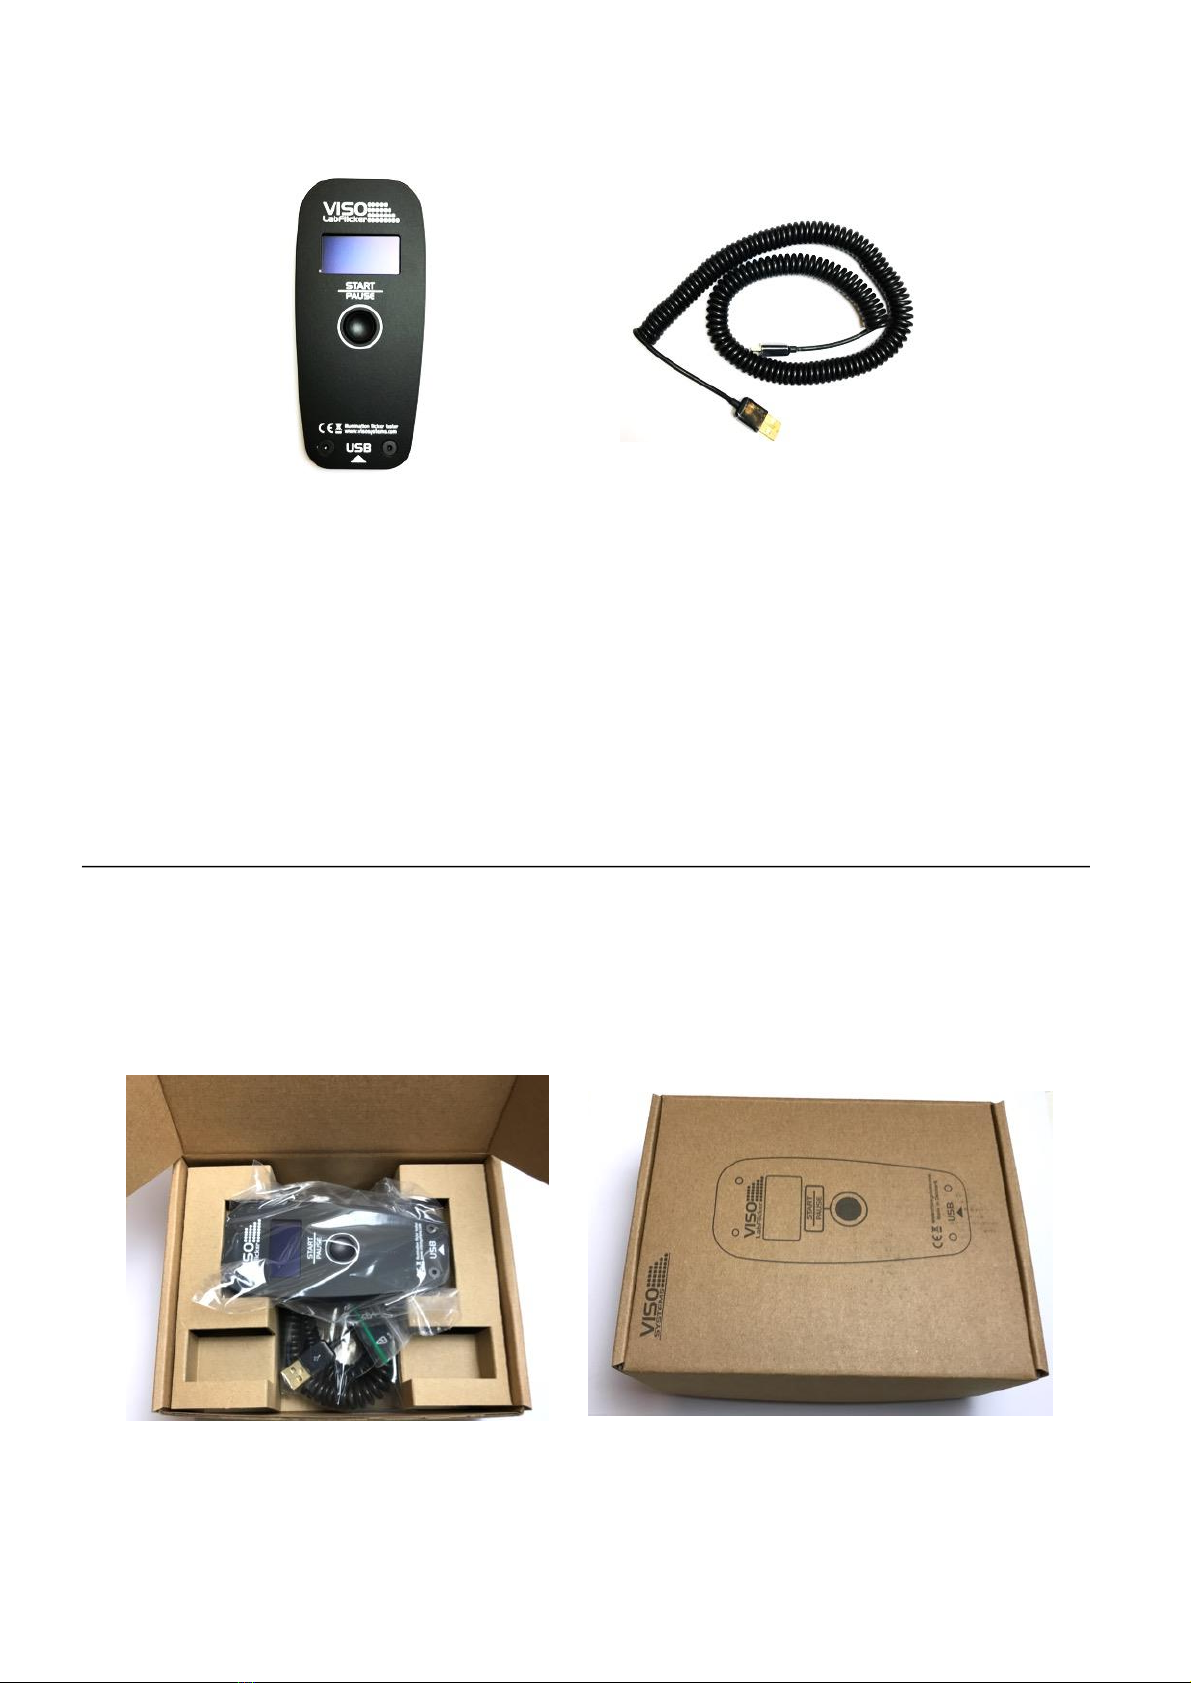
LabFlicker Package Content
•LabFlicker Unit
•5m USB Cable
•Test Certificate
Packages and weight
Shipping packages Shipping dimensions CBM Weight
1. LabFlicker 17 x 13 x 7 cm 0,0015 0,5 Kg
Total shipping weight: 0,5 kg.
The shipment is done in a total of 1 package

7
Software Installation
Before you can start using the VISO LabFlicker, the “Viso Light Inspector” software must be
installed. It is supported on all newer windows platforms.
Use the following link to download the latest version:
http://www.visosystems.com/download-light-inspector/
1) Make sure to install 5.28 or later for LabFLicker, or
the LabFlicker will not be supported by the Light
Inspector.
2) Please make sure the LabFlicker is not connected
to the computer during software installation.
3) Run the .msi file and follow the installation
instruction.
4) USB drivers are automatically installed.
Your measurements are not lost when updating to a
newer version or uninstalling and reinstalling. All
measurements will always remain in your document
folder. If you want to remove all your measurements go
to the ‘Light Inspector’ folder and delete them manually.
Typical folder location:
C:\Users\’Username’\Documents\Viso Systems\Light Inspector
Or if stored in dropbox:
C:\Users\’username’\Dropbox

8
Connecting the VISO LabFlicker
Connect the VISO LabFlicker to your Windows computer using the supplied USB cable.
When connected the VISO LabFlicker will wait for connection and when it is ready it will show
‘Click to Start’ in the display
9
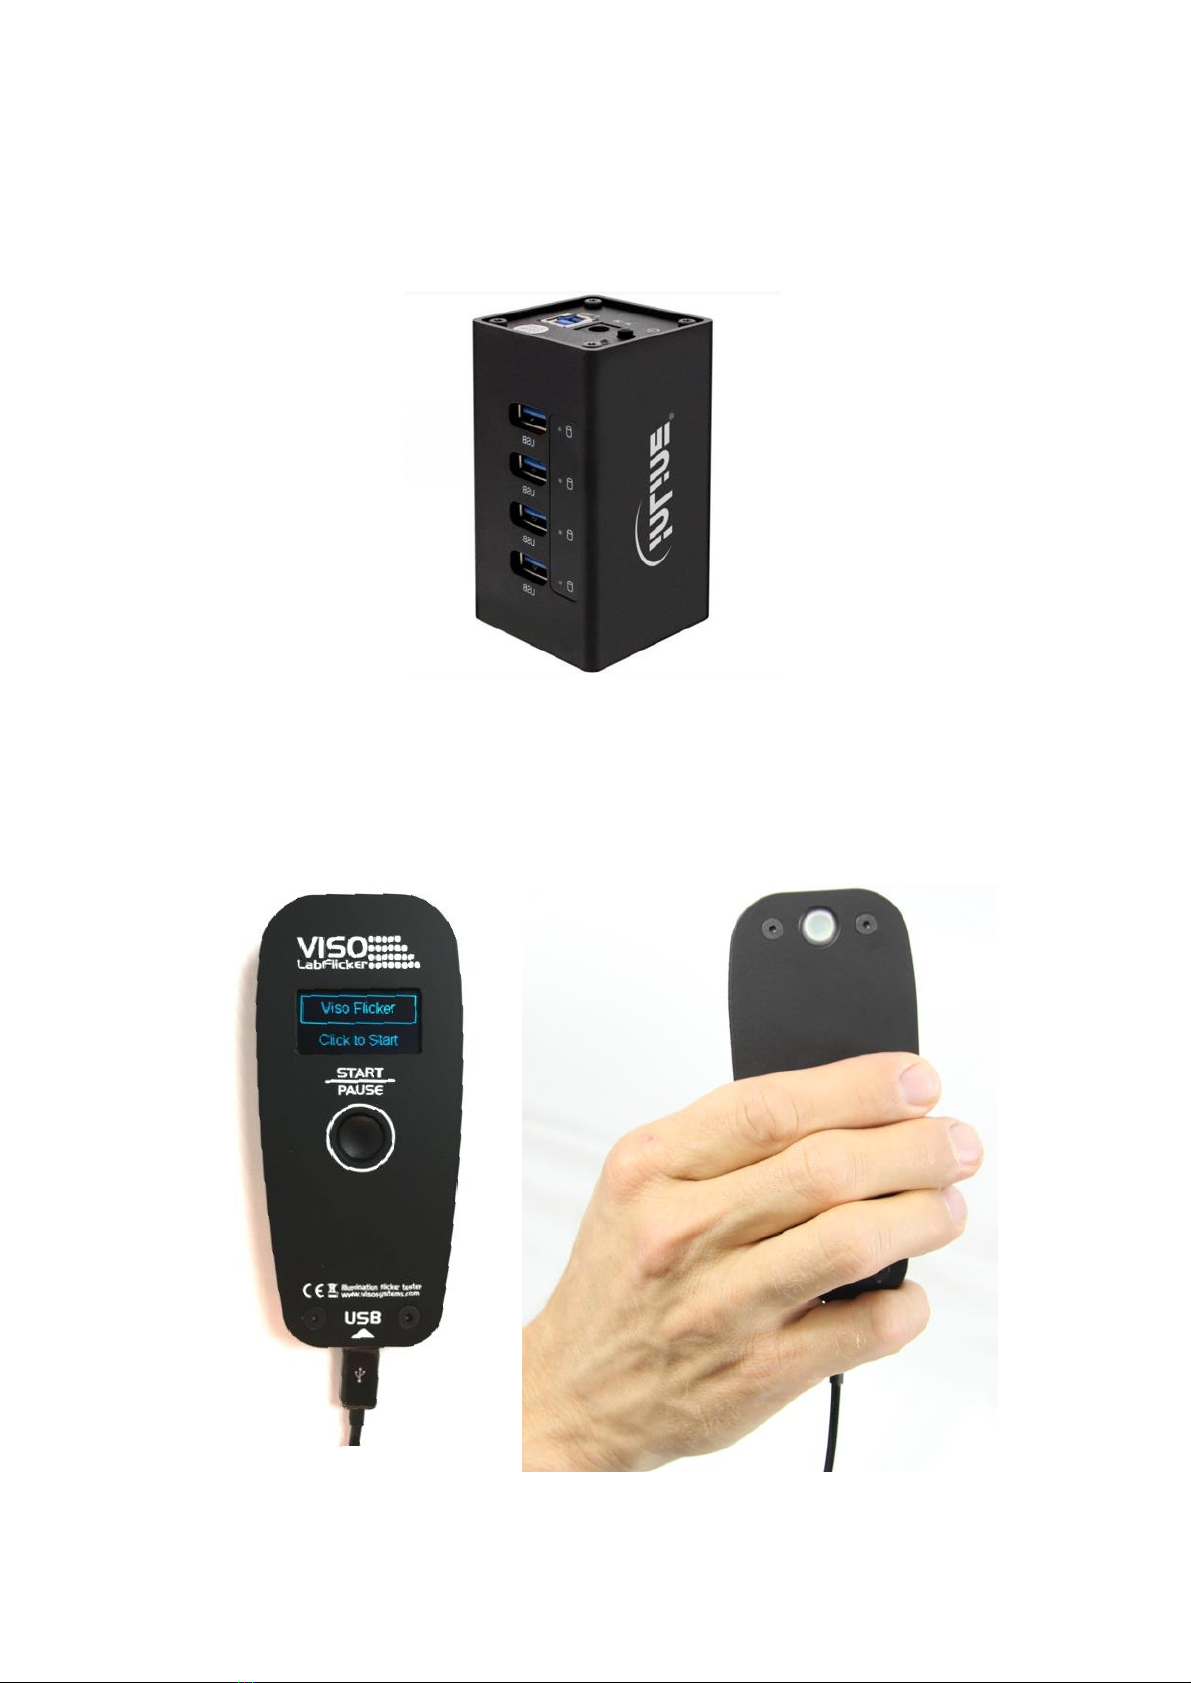
Extending the USB connection
If, for example, the LabFlicker is used with the LabSpion you may want to keep the LabFlicker
around the LabSpion Base. By using an active USB hub you can split the single USB cable to the
LabSpion so both LabSpion and LabFlicker can be used on the same USB connection. A USB hub
as pictured below can be acquired through Viso Systems.
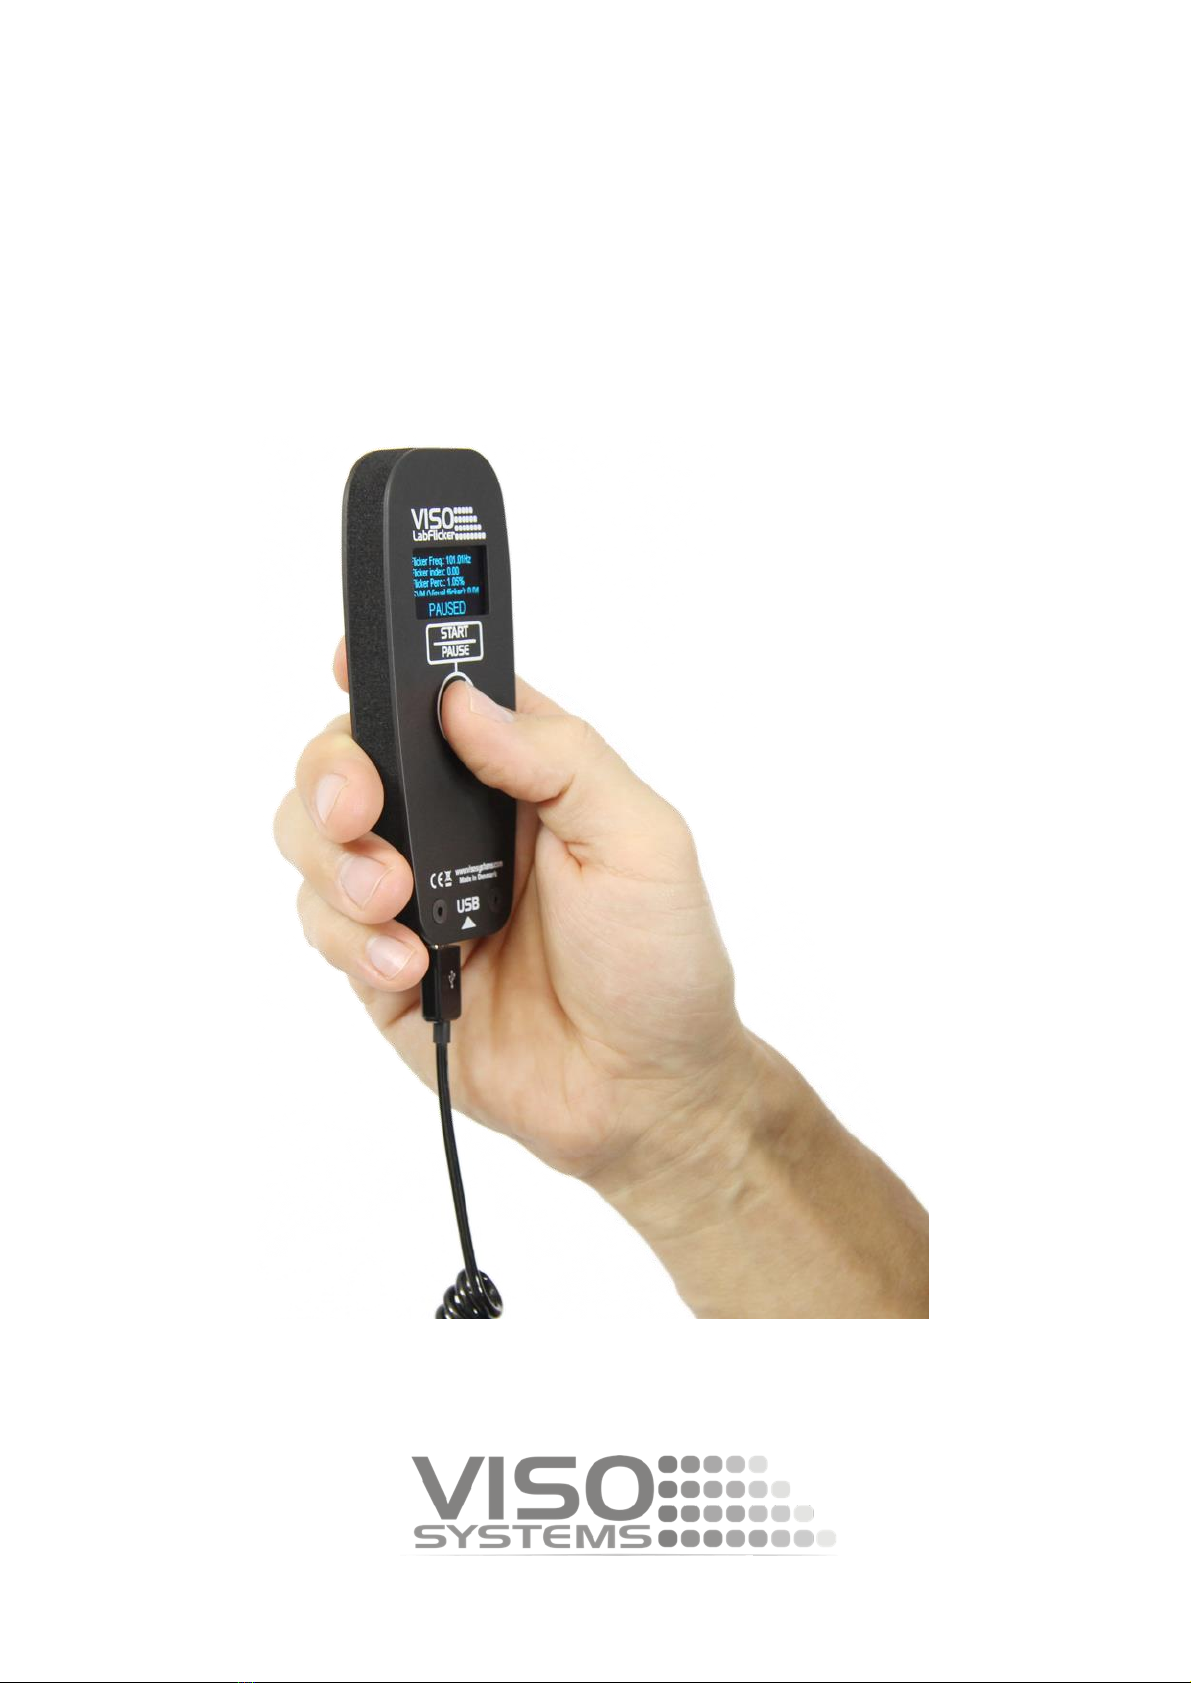
How to use the VISO LabFlicker
On the front of VISO LabFlicker it has a ‘Start/Pause’ button which is used for starting and
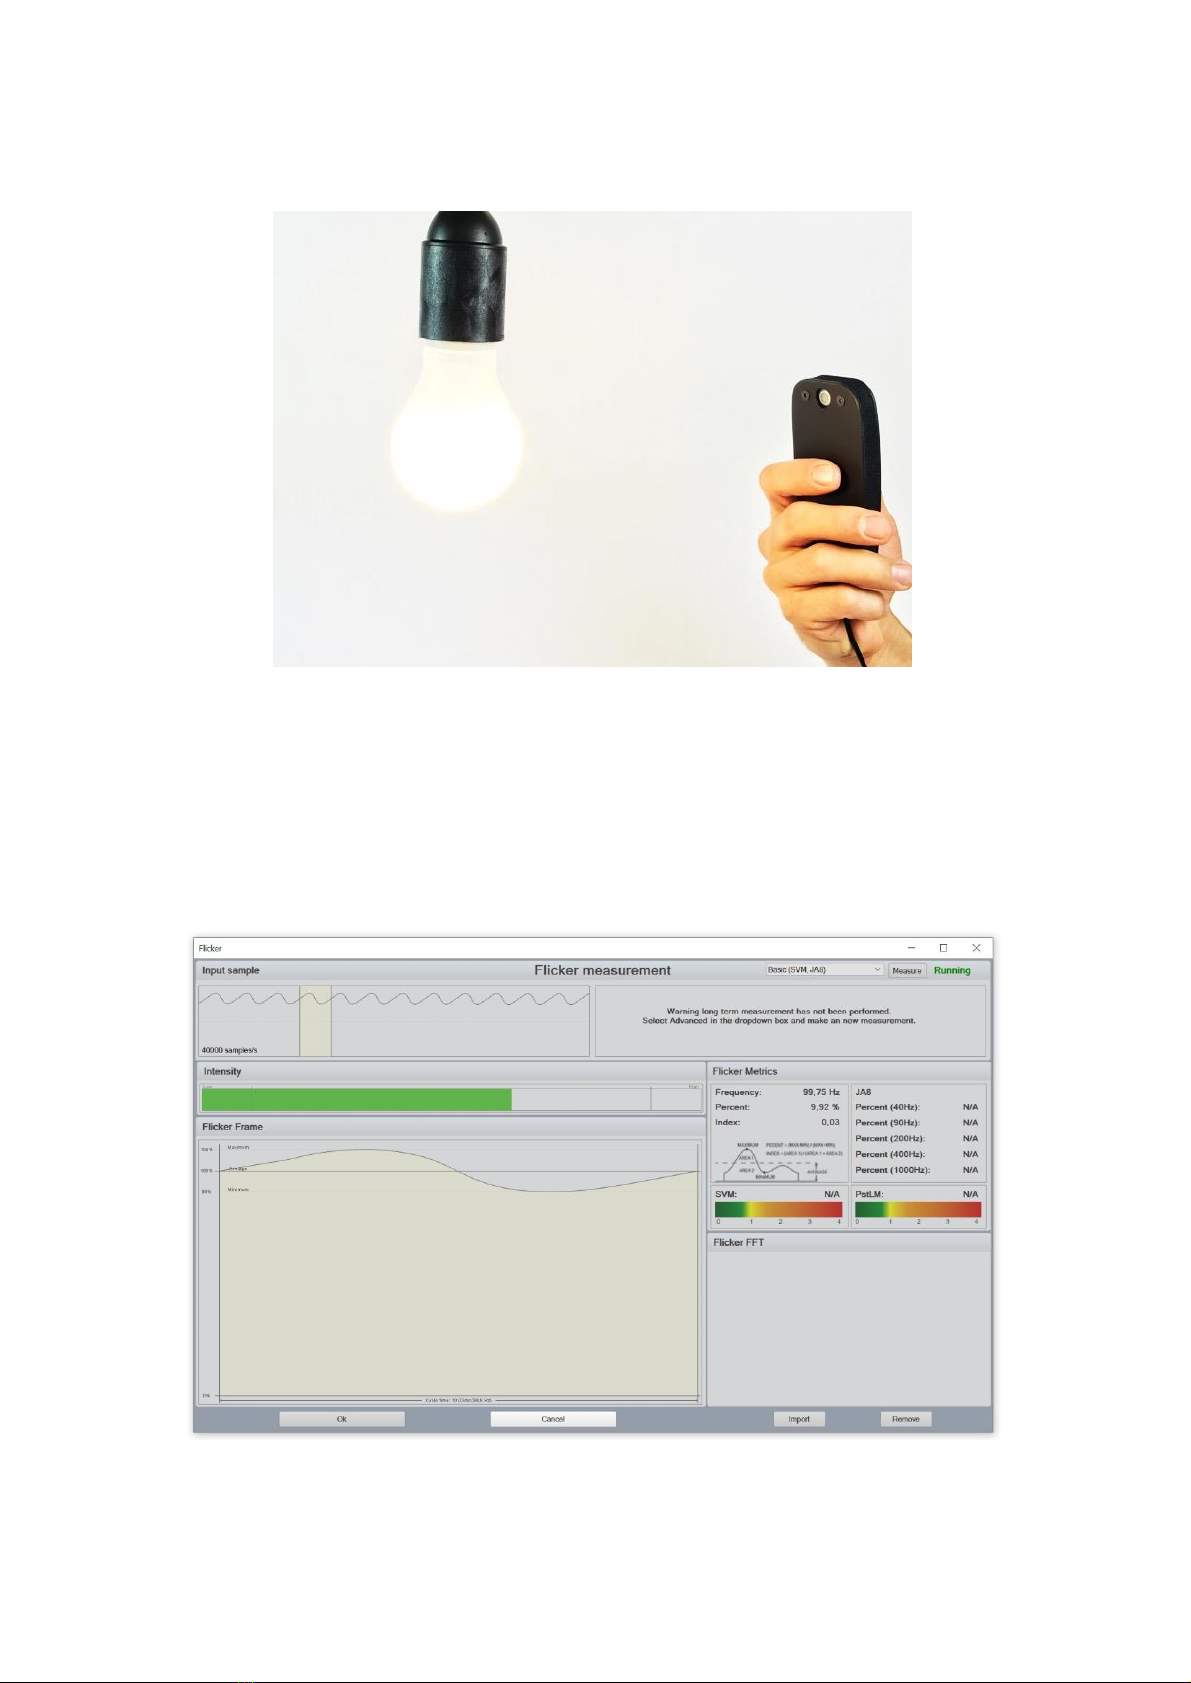
stopping capturing the flicker. On the back you find the sensor at the top. Make sure not to
shadow the sensor while measuring and place your hand like shown below.
10
To make a measurement press the Start/Pause button and move the the LabFlicker towards the
lamp you want to measure, with the sensor facing the lamp.
Make a mesasurement
To make a flicker measurement first choose the light measurement you want to add the flicker
measurement to by selecting it in the library window in the Light Inspector software or choose
a new blank sheet if you just want clean flicker measurement.
When the LabFlicker is connected to the Light Inspector software and the ‘Start/Pause’ button
is pressed a window for the flicker measurement will appear.
The flicker window gives a live feedback of your flicker data.
Other manuals for LabFlicker
1
Table of contents


