manuals.online logo
Brands
  1. Home
  2. •
  3. Brands
  4. •
  5. Visonic
  6. •
  7. Security Sensor
  8. •
  9. Visonic SRN-2000W/PCN User manual

Visonic SRN-2000W/PCN User manual

DE3561 1
SRN
SRNSRN
SRN-2000
-2000-2000
-2000W
WW
W/
//
/PCN
PCNPCN
PCN
Super-Red Wireless PIR Installation Instructions
1
11
1. INTRODUCTION
. INTRODUCTION. INTRODUCTION
. INTRODUCTION
1.1 General Description
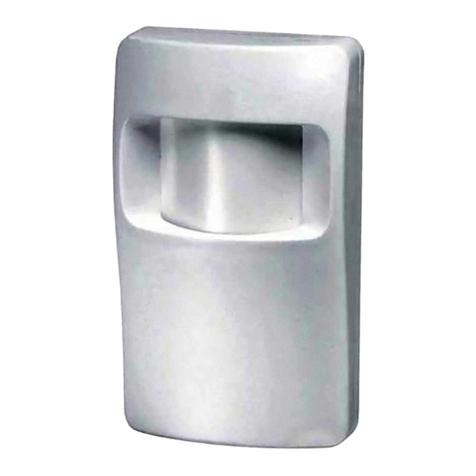
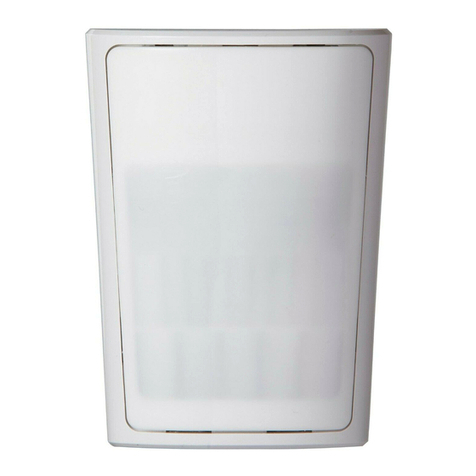
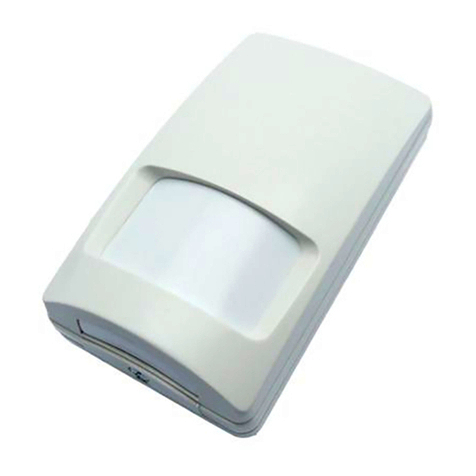
The SRN-2000W/PCN wireless PIR is an advanced micro-
processor-controlled, low-current PIR detector incorporating an
on-board miniature UHF transmitter. Both PIR and transmitter are
powered by an internal 9 Volt alkaline battery housed within the
detector's case.
Following detection, the SRN-2000W/PCN activates the plug-in
UHF transmitter for 2 seconds, then disarms itself to save battery
power. The detector rearms itself automatically (reverts to the
ready state) 2 minutes after the last movement has been
detected. For convenience, a unique TEST/NORMAL selector is
used to override the 2-minute rearm timer during walk testing.
1.2 Features
• Microprocessor-controlled
• 9 Volt battery powered, with unique energy saving circuitry
• Extremely-low current consumption – 0.013 mA
• Automatic low-battery and tamper alerts
• On-board CE and FCC approved transmitter module
• Programmable system and channel codes
• 45 easy-to-change lenses
• Programmable Pulse Counter
• Visible pattern locator option
• 25° vertical and 30° horizontal pattern calibration
• Surface and corner mounting
• Diverse swivel mounting brackets
• SMD technology
• Rejects RF interference up to 1000 MHz
1.3 Lens Selection
Coverage
The standard lens supplied with the SRN-2000W/PCN is No. 100
(see detailed specifications below and fig.1). Coverage patterns
of all other interchangeable lenses are provided in the
SUPER-RED lens library catalog. Your nearest VISONIC LTD.
distributor will be glad to supply you with the lens that suits your
particular requirements.
Lens No. 100 Specifications
Total Number of Beams: 36
Layers: Upper, Intermediate and
Downward.
Upper Layer - 9 twin beams.
optically split to 18 beams.
Intermediate Layer - 5 twin beams
(split), angled 10° below Upper
Layer.
Downward Layer - 4 twin beams
(split), angled 25° below Upper
Layer.
Field of View: 90° Wide Angle.
Coverage range: maximum 18 x
18 m (60 x 60 ft).
Figure 1. Coverage Pattern
- Lens No. 100
2
22
2. SPECIFICATIONS
. SPECIFICATIONS. SPECIFICATIONS
. SPECIFICATIONS
OPTICAL
Standard Lens: Lens No. 100.
Interchangeable Lenses: See SUPER-RED Lens Library.
Adjustment: Vertical +10° to –15° calibrated scale.
Horizontal up to 30°.
ELECTRICAL
Voltage: 9 Volt alkaline or lithium battery.
Standby Current: 0.013 mA.
LED: Walk Test and transmission.
Detector: Dual-element low-noise pyroelectric sensor.
Pulse Counter: Programmable to 1, 2, 3 or 5 pulses with
walk-test override.
Rearm Timer: Rearms the unit about 2 minutes after the last
alarm; timer disabled in the walk test mode.
WIRELESS
Frequency (MHz): 315, 304, 404, 418, 433.92 or other
frequencies according to local requirements.
Alarm Transmission Duration: 2 seconds.
Encoding: 8-bit digital word, 256 combinations, pulse width
modulation.
Channels: 4 channels, switch selectable.
Battery Test: Automatic transmission of "Code 0" at 2-minute
intervals if battery voltage drops below 7 V.
Tamper Alert: Transmission of the "Channel 2" code at 2-minute
intervals, until the tamper switch is restored.
ENVIRONMENTAL
Operating Temperature: -10°C to 50°C (14°F to 122°F).
Storage Temperature: -20° to 60°C (-4°F to 140°F).
RFI Protection: Greater than 20 V/m up to 1000 MHz.
Note: The temperature range may be reduced due to battery
characteristics.
PHYSICAL
Dimensions (H x W x D): 12 x 7 x 4.8 cm (4-3/4 x 2-3/4 x
1-7/8 in)
Weight: 95 g (3.4 oz).
Color: White.
OPTIONAL MOUNTING ACCESSORIES
SRF-201: Flush mounting adapter.
SRS-202: Mounting base for portable applications.
BR-1: Swivel bracket for wall mounting.
BR-2: BR-1 + corner mounting adapter.
BR-3: BR-1 + ceiling mounting adapter.
3
33
3. INSTALLATION
. INSTALLATION. INSTALLATION
. INSTALLATION
3.1 Changing Lenses
To change or adjust a lens, remove the front cover of the
detector, as explained in Section 3.3. Release and remove the
lens retainers located on both sides of the lens by pushing them
from the inner side of the cover (Fig. 2).
Insert a new lens with the grooved surface facing out and the lens
number in the upper right corner. From inside the cover, carefully
center the lens by sliding it right or left, until it edges protrude
equally at both sides.
2DE3561
Holding the lens firmly in
place, insert the lens
retainers from the front
(ridges pointed outward)
and firmly push them
into place until a click is
heard (Fig. 3).
3.2 Selecting
the Mounting
Location
LENS
RETAINER
êê
LENS
Figure 2. Lens Retainer Removal
The SRN-2000W/PCN
wireless PIR can be
mounted directly onto
the wall (surface moun-
ted), or in a corner. It
may also be flush
mounted, using the
optional flush mounting
bracket SRF-201 (Fig.
4). Always mount the
unit on a firm and stable
surface. A special stand
- the SRS-202 (Fig. 5) -
LENS
RETAINER
êê
Figure 3. Locking the Lens in Place
enables you to put the SRN-2000
W/PCN on horizontal surfaces such
as shelves, tables, etc. for tempo-
rary installation or portable appli-
cations where the detector location
should be changed frequently. The
SRS-202 can be fixed permanently
to the horizontal surface, using the
2 screw holes at its bottom (Fig. 5).
It may also be fixed to a vertical
surface, provided that a strong
adhesive is used. Figure 4. SRF-201
A. Select the mounting location so
that the expected motion of an
intruder will cross the beams of
the coverage pattern provided
by the lens in actual use.
It is recommended to aim the
PIR detector toward the coolest
place in the protected area, in
order to obtain the maximum
sensitivity where high ambient
temperatures are expected.
B. Select the most convenient
mounting height.
You may mount the unit any-
where from ground level up to
5 m (17 ft). Figure 5. SRS-202
An accurate adjustment table determines the recommended
angle for any combination of range and mounting height (see
Table 1). Take into account that installations at increased
height result in larger blind areas close to the detector.
C. Where a single-layer pattern has been selected because pets
are present, it is advisable to install the unit as low as possible
- usually 1.2 - 1.5 m (4 - 4.5 ft) - while still allowing the beams
to be directed above the level of the pet's activity.
D. The SRN-2000W/PCN detectors are extremely immune to air
turbulence and RF interference. However, to minimize false
alarms, it is highly recommended to avoid aiming the detector
at heaters, sources of bright light, or windows subjected to
direct sunlight.
3.3 Mounting
A. To open the cover, insert a small screwdriver into the slot on
top of the unit (Fig. 6). Press the blade in slightly between the
cover and the base and lever backwards. The top part of the
cover (equipped with the lens) will snap free.
You may now hinge the top of
the cover outward, separate
the bottom legs of the base
from the slots in the cover and
remove the cover.
B. Mount the base (equipped with
the printed circuit board) in the
location and height selected
for optimum coverage.
For surface mounting use the
two knockouts at the back of
the base; for corner mounting,
use the knockouts on the
angled sides (Fig. 7). Figure 6. Cover Removal
Figure 7. Components Layout
The unit must be fastened
tightly to the mounting
surface to avoid possible
vibrations.
C. To close the case, insert
the legs located on the
bottom of the base into
their respective slots in
the bottom of the cover.
Then close by exerting
slight upward pressure on
the cover (see Fig. 8).
Figure 8. Replacing the Cover
3.4 Swivel Brackets (optional)
Figure 9. Optional Swivel Brackets
DE3561 3
The BR-1 is a swivel, surface-mounted bracket used for greater
flexibility when setting the desired detection range. The BR-1 is
adjustable 30° downward and 45° left, 45° right.
The BR-2 is a swivel bracket kit for room corners. It consists of
the BR-1 and a corner mounting adapter.
The BR-3 is a swivel bracket kit for ceilings. It consists of the
BR-1 and a ceiling mounting adapter.
ATTENTION: with swivel brackets in use, the effective
detection range may differ from that indicated in Table 1 –
the vertical adjusting scale.
3.5 Battery Installation
The SRN-2000W/PCN is powered by a 9-volt alkaline or lithium
battery. Remove the detector's front cover, snap the battery clip
onto the battery and place the battery in its compartment (below
the printed circuit board.). Before testing, allow 10 minutes for the
detector to stabilize (the LED may light during this time).
Warning! For proper operation, use only alkaline or lithium type
batteries.
3.6 System Code Selection
The code selector consists
of an 8-key DIP switch (see
Figure 10). Each key is set
to either ON or OFF position
to create a unique digital
system code combination
(256 possibilities).
Select the desired digital
code so that it will match the
one selected on the compa-
nion receiver.
Figure 10. System Code
Selector
All wireless PIR detectors and the receiver used in the alarm
system must be set to the same digital code.
CAUTION: The code combination 2, 4, 5, 6, 7 ON / 1, 3, 8 OFF
is a factory setting that must be avoided. Also avoid codes such
as all keys ON, all keys OFF or alternating ON-OFF settings.
3.7 Channel Code Selection
The Visonic Ltd. wireless security systems have a multi-channel
capability. Each wireless SRN-2000W/PCN detector can be set
to transmit one of 4 different channel codes. Each channel code
activates a particular output circuit of the companion receiver.
This feature is very useful for zoning
purposes - activation of different type
of zones at the control panel.
The channel selector consists of a
4-key DIP switch (see Figure 11).
The channel code is selected by
setting the key with the desired
channel number to ON.
If there is a low battery condition, a
LOW BATTERY alert code (code "0")
will be automatically transmitted once
Figure 11. Channel
Code Selector
every 2 minutes, regardless of the channel selector setting. Code
"0" causes receivers equipped with a buzzer output to activate
the buzzer. Setting the 4 channel keys to OFF and initiating a
transmission is a way to check whether code "0" works.
Once the detector's tamper switch is activated (by removing the
front cover), channel code "2" will be automatically transmitted
once every 2 minutes, regardless of the channel selector setting.
Caution: Do not select channel 2 as the normal alarm channel,
because this will cause alarm and tamper events to have the
same channel code.
3.8 Adjusting the Coverage Area
A. Horizontal Adjustment
The coverage pattern can be adjusted horizontally approximately
±15° by shifting the lens left or right. Just remove the lens
retainers, carefully shift the lens to the desired position and
re-lock the lens (see Para. 3.1).
B. Vertical Adjusting Scale
The vertical scale (on the left edge of the p.c. board) and the
plastic pointer on the base indicate (in degrees) the vertical angle
between the upper layer of the coverage pattern and the
horizontal line of the unit.
Table 1 gives the recommended scale adjustment for various
combinations of mounting height and coverage distance. The
scale enables pattern adjustment from +10° to -15°, according to
the installation height and the required coverage range.
Table 1. Vertical Adjustment
Use the table only to the maximum range of the selected lens, as
indicated in the lens library catalog.
All SRN-2000W/PCN sensors are factory preset to -5°. To
change the vertical-pattern adjustment, loosen the screw which
fastens the printed circuit board to the base. Slide the p.c. board
up or down to the desired angle and tighten the screw firmly.
C. Beam Masking Material
A masking material sheet supplied with each detector can be
used to mask individual segments in the lens that face potential
sources of false alarms (heaters, blowers, pets, etc). The material
is transparent to visible light but blocks infrared energy.
To block individual beam(s), locate the corresponding segment(s)
in the array (the Beam Locator BL-1 may be used for this purpose
- see Section 3.11). Cut the masking material to the exact
dimensions of the segment(s) to be blocked, remove the backing
paper and apply accurately to the inside (smooth) surface of the
appropriate segment(s). In some cases, more than one layer may
be required to completely block the infrared energy.
3.9 Setting the Pulse Counter
The programmable pulse counter can be set to count 1, 2, 3 or 5
pulses before activating the alarm relay. This is done by placing
the jumper at the desired setting (1, 2, 3 or 5).
5 Pulses: Used in very hostile conditions where many sources,
such as rats or flying birds, produce frequent and repeated
disturbances. This setting is unsuitable for normal environments.
3 Pulses: This setting provides the maximum protection against
false alarms caused by all types of disturbances that may occur
in normal environments.
Three pulses may be selected where wide-angle, multi-beam
lenses are used - such as illustrated in Sections 1, 2, 3, 6 and 7
of the SUPER-RED Lens Library (except for lens No. 53). The
unit will not alarm unless it registers 3 pulses within approxi-
mately one minute. This requires crossing more than one beam
(each dual-beam produces two pulses. One additional beam
element has to be entered to provide the third pulse).
Note: Three pulses should never be used with lens No. 53 or with
the long-range lenses included in Sections 3.1 and 3.2 of the
Lens Library.
2 Pulses: This setting can be used to increase immunity to false
alarms with long-range or low-density lenses (which normally
require one-pulse setting). However, if you choose 2 pulses in
long-range applications, be sure to do it only in temperature-
controlled locations, and where actual room size is significantly
less than the range specified for the lens in use.
1 Pulse: This setting actually disables the pulse counter. An
alarm is activated on the first detected pulse. One pulse should
be selected when using the long-range lenses illustrated in
Sections 4 and 5 of the Lens Library, when using lens No. 53, or
in high-security installations where fast "catch" performance is of
highest importance.
4DE3561
3.10 Final Testing
Overriding the Rearm Timer
Since battery saving is of utmost importance in normal use of the
detector unit, an automatic timer inhibits the detector for
approximately 2 minutes after each transmission. During this
period, the transmitter cannot be triggered again by subsequent
motion within the protected area. The detector is automatically
rearmed 2 minutes after the last motion was detected.
For rapid walk testing of each beam in the coverage pattern, you
must eliminate the 2 minute inhibit interval between successive
alarms. The NORM/TEST selector (Figure 7), when set to TEST,
overrides the 2-minute rearm timer, and also sets the pulse
counter to 1 PULSE. Remember that in the TEST mode, tamper
and low battery alerts will be transmitted at 1/2 second intervals
instead of the usual 2-minute intervals. When the selector is reset
to NORM, the rearm timer reverts to normal operation.
Testing Procedure
A. Snap the battery clip onto the 9 Volt alkaline or lithium battery
and allow ten minutes for the unit to stabilize before testing.
B. Adjust the vertical calibration angle per Table 1.
C. Set the Normal/Test selector to TEST.
D. MASK beams which look at potential sources of false alarms
(see Section 3.8, Para. 5).
E. Replace the cover.
F. Walk-test the entire protected area by walking slowly across
it, observing the LED. The LED lights whenever you cross a
protective beam. Allow the unit to restabilize for 5 seconds
after each test.
G. Set the pulse counter according to Section 3.9.
H. Set the NORMAL/TEST selector to NORM and wait outside
the coverage area. After 5 minutes, re-enter the coverage
area and verify that the LED lights and that the transmitter
output operates (response will be immediate only if the pulse
counter is set to 1 pulse).
If you continue moving within the detector's field of view, the
LED will turn OFF and the unit will remain disabled as long as
movement continues, due to the 2-minute battery saving
rearm timer. The unit will be rearmed provided that no motion
is detected for approximately 2 minutes, and will again be
ready to detect and signal.
CAUTION: The range and coverage area of the unit should
be checked at least once a year. To assure proper
continuous function, the end user should be instructed to
perform a walk test at the far end of the area to assure an
alarm signal prior to each time the alarm system is armed.
3.11 Using Beam Locator BL-1
To use the beam locator BL-1, mount the BL-1 on the 3 pins of
the special header at the top of the printed circuit board. The
BL-1 will cover the pyroelectric detector and its mini-LED will face
forward. The mini-LED will light when installed.
Replace the cover. The beam locator LED now projects visible
light beams through all lens segments, in the same direction as
each corresponding detection beam. Stand within the coverage
area, facing toward the PIR and observe the lens.
An illuminated lens segment indicates that you are positioned
within the corresponding detection beam of that segment.
By walking through the
coverage pattern you can
determine the location of all
detection beams for precise
pattern adjustments or masking
of lens segments which are
exposed to potential sources of
false alarms.
After using the beam locator,
take the cover off and remove
the BL-1 from the on-board pin
header. Figure 12 - BL-1 Installation
4
44
4. WARNINGS
. WARNINGS. WARNINGS
. WARNINGS
Visonic Ltd. wireless systems are reliable are tested to high
standards. However, due to their low transmitting power (required
by FCC and other regulatory authorities), there are some
limitations to be considered:
A. Receivers may be blocked by radio signals on or near their
operating frequencies, regardless of the code selected.
B. Receivers can only respond to one transmitted signal at a time.
C. Wireless equipment should be tested regularly (at least once a
week) to determine if there are sources of interference and to
protect against faults.
WARNING! Changes or modifications to this unit not
expressly approved by the party responsible for compliance
could void the user's authority to operate the equipment
WARRANTY
WARRANTYWARRANTY
WARRANTY
Visonic Ltd. and/or its subsidiaries and its affiliates ("the Manufacturer") warrants its
products hereinafter referred to as "the Product" or "Products" to be in conformance with
its own plans and specifications and to be free of defects in materials and workmanship
under normal use and service for a period of twelve months from the date of shipment by
the Manufacturer. The Manufacturer's obligations shall be limited within the warranty
period, at its option, to repair or replace the product or any part thereof. The Manufacturer
shall not be responsible for dismantling and/or reinstallation charges. To exercise the
warranty the product must be returned to the Manufacturer freight prepaid and insured.
This warranty does not apply in the following cases: improper installation, misuse,
failure to follow installation and operating instructions, alteration, abuse, accident or
tampering, and repair by anyone other than the Manufacturer.
This warranty is exclusive and expressly in lieu of all other warranties, obligations or
liabilities, whether written, oral, express or implied, including any warranty of
merchantability or fitness for a particular purpose, or otherwise. In no case shall the
Manufacturer be liable to anyone for any consequential or incidental damages for breach
of this warranty or any other warranties whatsoever, as aforesaid.
This warranty shall not be modified, varied or extended, and the Manufacturer does not
authorize any person to act on its behalf in the modification, variation or extension of this
warranty. This warranty shall apply to the Product only. All products, accessories or
attachments of others used in conjunction with the Product, including batteries, shall be
covered solely by their own warranty, if any. The Manufacturer shall not be liable for any
damage or loss whatsoever, whether directly, indirectly, incidentally, consequentially or
otherwise, caused by the malfunction of the Product due to products, accessories, or
attachments of others, including batteries, used in conjunction with the Products.
The Manufacturer does not represent that its Product may not be compromised and/or
circumvented, or that the Product will prevent any death, personal and/or bodily injury
and/or damage to property resulting from burglary, robbery, fire or otherwise, or that the
Product will in all cases provide adequate warning or protection. User understands that a
properly installed and maintained alarm may only reduce the risk of events such as
burglary, robbery, and fire without warning, but it is not insurance or a guarantee that such
will not occur or that there will be no death, personal damage and/or damage to property
as a result.
The Manufacturer shall have no liability for any death, personal and/or bodily injury
and/or damage to property or other loss whether direct, indirect, incidental,
consequential or otherwise, based on a claim that the Product failed to function.
However, if the Manufacturer is held liable, whether directly or indirectly, for any loss or
damage arising under this limited warranty or otherwise, regardless of cause or origin, the
Manufacturer's maximum liability shall not in any case exceed the purchase price of the
Product, which shall be fixed as liquidated damages and not as a penalty, and shall be the
complete and exclusive remedy against the Manufacturer.
Warning: The user should follow the installation and operation instructions and among
other things test the Product and the whole system at least once a week. For various
reasons, including, but not limited to, changes in environmental conditions, electric or
electronic disruptions and tampering, the Product may not perform as expected. The user
is advised to take all necessary precautions for his /her safety and the protection of
his/her property.
6/91
VISONIC LTD. (ISRAEL): P.O.B 22020 TEL-AVIV 61220 ISRAEL. PHONE: (972-3) 645-6789, FAX: (972-3) 645-6788
VISONIC INC. (U.S.A.): 10 NORTHWOOD DRIVE, BLOOMFIELD CT. 06002-1911. PHONE: (860) 243-0833, (800) 223-0020. FAX: (860) 242-8094
VISONIC LTD. (UK): FRASER ROAD, PRIORY BUSINESS PARK, BEDFORD MK44 3WH. PHONE: (0870) 730-0800 FAX: (0870) 730-0801
INTERNET: www.visonic.com
VISONIC LTD. 1998 , D-3561-0 NEW : DE3561- (REV. 5, 4/98)
Other Visonic Security Sensor manuals

Visonic MP-802 K9-85 PG2 User manual

Visonic

Visonic MP-802 K9-85 PG2 User manual

Visonic DISC MCW User manual

Visonic

Visonic DISC MCW User manual

Visonic DUET-AM C/O Assembly instructions

Visonic

Visonic DUET-AM C/O Assembly instructions

Visonic Elpas User manual

Visonic

Visonic Elpas User manual

Visonic CLIP-4N User manual

Visonic

Visonic CLIP-4N User manual

Visonic TOWER-32AMPG2 User manual

Visonic

Visonic TOWER-32AMPG2 User manual

Visonic NEXT K9-85 PG2 User manual

Visonic

Visonic NEXT K9-85 PG2 User manual

Visonic DISCOVERY PIR MCW User manual

Visonic

Visonic DISCOVERY PIR MCW User manual

Visonic TOWER 10 AM - User manual

Visonic

Visonic TOWER 10 AM - User manual

Visonic DUET-AM C/O User manual

Visonic

Visonic DUET-AM C/O User manual

Visonic Quatro+ User manual

Visonic

Visonic Quatro+ User manual

Visonic MCT-302 User manual

Visonic

Visonic MCT-302 User manual

Visonic GB-502 PG2 User manual

Visonic

Visonic GB-502 PG2 User manual

Visonic DISC MCW User manual

Visonic

Visonic DISC MCW User manual

Visonic TOWER-20AM PG2 User manual

Visonic

Visonic TOWER-20AM PG2 User manual

Visonic DISC User manual

Visonic

Visonic DISC User manual

Visonic LEGACY User manual

Visonic

Visonic LEGACY User manual

Visonic SRN-2000 SERIES User manual

Visonic

Visonic SRN-2000 SERIES User manual

Visonic SRN-2000 User manual

Visonic

Visonic SRN-2000 User manual

Visonic K-940MCW User manual

Visonic

Visonic K-940MCW User manual

Visonic SPY 1 User manual

Visonic

Visonic SPY 1 User manual

Visonic SD-304C PG2 User manual

Visonic

Visonic SD-304C PG2 User manual

Visonic POWERMAX - User manual

Visonic

Visonic POWERMAX - User manual

Visonic TOWER 20 AM - INSTALLER GUIDE User manual

Visonic

Visonic TOWER 20 AM - INSTALLER GUIDE User manual

Popular Security Sensor manuals by other brands

Satel ADD-200 user manual

Satel

Satel ADD-200 user manual

General Monitors FL3102 instruction manual

General Monitors

General Monitors FL3102 instruction manual

Axiometrix Solutions imc CLSx manual

Axiometrix Solutions

Axiometrix Solutions imc CLSx manual

AJAX DoorProtect quick start guide

AJAX

AJAX DoorProtect quick start guide

Respirex GLS 300 A User instructions

Respirex

Respirex GLS 300 A User instructions

WATERGUARD Solo installation guide

WATERGUARD

WATERGUARD Solo installation guide

Niko 25421 quick start guide

Niko

Niko 25421 quick start guide

Dingtek DF703 datasheet

Dingtek

Dingtek DF703 datasheet

ELTEX UPG-Stitch instructions

ELTEX

ELTEX UPG-Stitch instructions

Kanlux SENTO quick start guide

Kanlux

Kanlux SENTO quick start guide

Elenco Electronics AK-510 Assembly and instruction manual

Elenco Electronics

Elenco Electronics AK-510 Assembly and instruction manual

Honeywell 5800COMBO Installation and setup guide

Honeywell

Honeywell 5800COMBO Installation and setup guide

Sensit HXG-2d instruction manual

Sensit

Sensit HXG-2d instruction manual

Satel AGD-200-BR user manual

Satel

Satel AGD-200-BR user manual

Smartenit ZBMS3 quick start guide

Smartenit

Smartenit ZBMS3 quick start guide

Niko 350-20071 manual

Niko

Niko 350-20071 manual

PCE Health and Fitness PCE-LDC 8 user manual

PCE Health and Fitness

PCE Health and Fitness PCE-LDC 8 user manual

Manostar EMD8A066 instruction manual

Manostar

Manostar EMD8A066 instruction manual

manuals.online logo
manuals.online logoBrands
  • About & Mission
  • Contact us
  • Privacy Policy
  • Terms and Conditions

Copyright 2025 Manuals.Online. All Rights Reserved.