VitalBase Vibby OAK User manual

GIFR_vibby_oak_v121017 Non-contractual photos.

TABLE OF CONTENTS
INSTALLATION GUIDE
INTRODUCTION
Preamble
The steps of automatic fall detection
The functions of the Vibby OAK
2
ACTIVE AND STORAGE MODE
Presentation of each mode
Switch from one mode to another
TEST THE VIBBY OAK
Demo Mode
SET-UP WITH THE MOBILE
APPLICATION
Presentation of the application
Connecting the Vibby OAK to the application
Use of the application
FACT SHEETS
1 - Automatic fall detection
2 - The dierent modes
3 - Manuel set-up of wearing mode
4 - Verication of wearing mode
5 - Manuel set-up of radio protocol
6 - Battery replacement
7 - Fitting the wrist strap /neck cord
8 - Removing the wrist strap/neck cord
9 - Problem solving
4
3
2
1
p 3
p 4
p 5
p 6
p 7
p 8
p 9
p 10-11
p 12

PREAMBLE
INTRODUCTION
3
Vibby OAK is a smart intentional alarm system that, in some
cases, adds additional protection if the user is not able to
manually raise the alarm.
The Vibby OAK is designed to automatically detect heavy/
dangerous falls (sudden and quick loss of balance followed by a
signicant impact of the body with the oor leaving the user lying
on the oor unable to recover to a standing position).
Fall detection technologies that underpin the automatic fall
detection do not allow detection or interpretation of all fall
situations.

THE STEPS OF AUTOMATIC FALL
DETECTION
INTRODUCTION
VIBBY OAK: AN AUTOMATIC FALL DETECTOR*
NORMAL ACTIVITY LOSS OF BALANCE HEAVY FALL SILENT ANALYSIS ALERT
The Vitalbase
technology analyses
the movements of the
person’s daily activity
in a non-intrusive
manner.
Rapid and sudden loss
of the person’s balance
or verticality.
Heavy body impact with
the ground. Using a new
algorithm combined
with numerous sensors,
the Vibby OAK detects an
abnormal activity.
The person is lying on
the ground and does
not stand up. The
person is not able to
press the SOS button or
stand up.
A heavy fall is characterised by 6 steps: 20 sec.
The Vibby OAK ashes
and vibrates for 20
seconds notifying the
user that an alarm is
about to be sent.
*REMINDER:
The Vitalbase technology does not allow the analysis all fall situations.
4
SENDING OF THE
ALARM
The alarm is
automatically sent to
the partner device.
20 sec.

THE FUNCTIONS OF THE
VIBBY OAK
INTRODUCTION
1. MANUEL ALARM 2. AUTOMATIC ALARM
Multiple sensors combined with a new,
innovative algorithm can automatically raise
an alarm when a heavy fall is detected.
(see practical fact sheet 1)
An evidenced SOS button is located in the
middle of the Vibby OAK. By pressing this
button the wearer can himself raise an
alarm.
5

ACTIVE MODE
How do I know if the Vibby OAK is in
active mode?
Just push the button*, the Vibby OAK
vibrates and the red LED illuminates.
What is the active mode?
When the Vibby OAK is in active mode, it
means that it is operational and ready
to be worn. The user benets from the
automatic fall detection and manual call
functions.
STORAGE MODE
What is the storage mode?
The Vibby OAK is shipped by default
in storage mode. This means it is
deactivated in order to preserve
battery life during its storage and
transport. If not used for a while, the
Vibby OAK must be reset to storage
mode (see page 7).
How do I know if the Vibby OAK is in
storage mode?
By simply pressing the button, the Vibby
OAK does not switch on and the device
does not vibrate.
Quickly press the button twice. If the
LED ashes (green or red) and vibrates,
it means that the device is in storage
mode.
PRESENTATION OF EACH MODE
ACTIVE MODE AND STORAGE MODE
6
IMPORTANT:
All subsequent set-up procedures need to be completed from storage mode.
* If the Vibby OAK is in neck worn mode, you have to press a little longer (half a second).

SWITCH FROM ONE MODE
TO ANOTHER
ACTIVE MODE AND STORAGE MODE
Put the Vibby OAK at on a table.
Make sure to keep it still throughout
the 4 steps.
Press the button until the red LED
starts ashing and then release.
Before the red LED goes o, press
the button quickly and successively
5 times.
SWITCH FROM ACTIVE MODE TO STORAGE MODE
The Vibby OAK will vibrate and its
LED ash once to conrm the switch
to storage mode.
1
2 3 4
SWITCH FROM STORAGE MODE TO ACTIVE MODE
Press and hold the button until the
red LED starts ashing.
1
Release the button while it is ashing.
The Vibby OAK will now slightly vibrate to
conrm
2
7
Familiarise yourself with all steps before starting the procedure.
X5

DEMO MODE
TEST THE VIBBY OAK
The demo mode is automatically activated for
5 minutes each time the Vibby OAK switches to
active mode. The green LED ashes.
The Vibby OAK integrates a demo mode because
it is very dicult to simulate the real conditions
of a fall. That is why Vitalbase integrated a demo
mode.
The manual alarm can be tested by simply
pressing the button. The Vibby OAK will
vibrate and the red LED illuminate.
After a period of 20 sec. the Vibby OAK will vibrate and
the red LED ash for 20 sec. before transmitting the
alarm.
2
8
The demo mode stops automatically after 5 minutes. The green LED goes o.
Drop the Vibby OAK on the ground,
at a person’s height.
1
20 sec.
MANUEL ALARM TEST AUTOMATIC FALL ALARM TEST
5 min
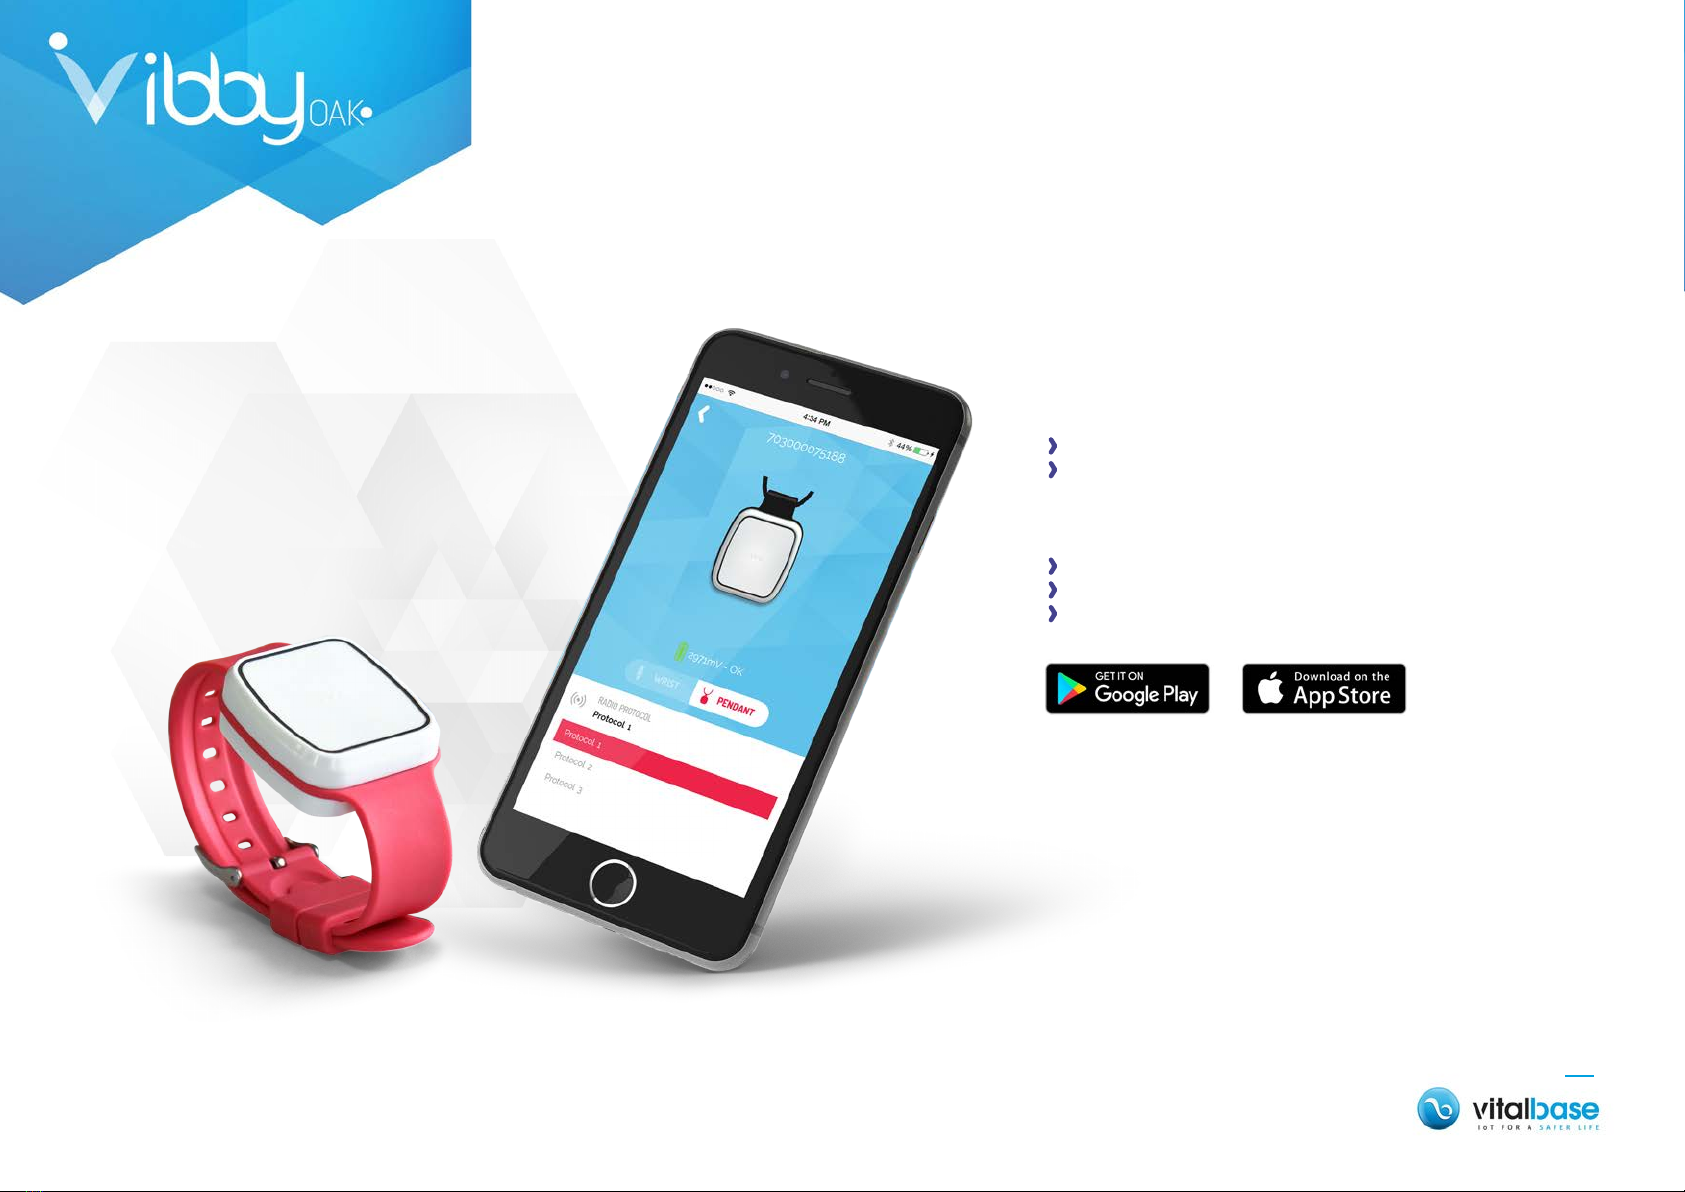
PRESENTATION OF THE
APPLICATION
SET-UP WITH THE MOBILE APPLICATION
Wearing mode selection : wrist or pendant
Radio protocol selection
The application also displays essential information:
Battery status
Vibby OAK serial number for traceability
Radio ID for certain protocols
THE VIBBY OAK CAN BE EASILY SET UP
BY USING A DEDICATED MOBILE
APPLICATION:
IMPORTANT:
TO CONNECT TO THE APPLICATION, YOU NEED
A LOGIN AND A PASSWORD. THESE IDENTIFIERS
WILL BE PROVIDED ON REQUEST BY CAREPHONE
MANUFACTURER. PLEASE CONTACT:
9

CONNECTING THE VIBBY OAK TO
THE APPLICATION
SET-UP WITH THE MOBILE APPLICATION
10
Once identied*, you are redirected to the page « search
for Vibby OAK » (see opposite).
All you need to do now to connect the Vibby OAK to the
application is to follow the procedure on the next page.
*IMPORTANT:
TO CONNECT TO THE APPLICATION, YOU NEED
A LOGIN AND A PASSWORD. THESE IDENTIFIERS
WILL BE PROVIDED ON REQUEST BY CAREPHONE
MANUFACTURER. PLEASE CONTACT:

CONNECTING THE VIBBY OAK TO
THE APPLICATION
Make sure that the Vibby OAK is in
storage mode. (see pages 6 and 7)
Press the button until the second series of red ashes starts and then release immediately.
1 2
The Vibby OAK is connected to the mobile application.
3
3 sec. 8 sec.
SET-UP WITH THE MOBILE APPLICATION
11
Hold the button between the two series of ashes
Familiarise yourself with all steps before starting the procedure.
You need to be identied by the application. The latter has to be in “search for Vibby OAK” mode:

USE OF THE APPLICATION
SET-UP WITH THE MOBILE APPLICATION
12
3
Selection of
wearing
option
Vibby OAK
serial number
Battery status
Selection of
protocol
option


AUTOMATIC FALL DETECTION
VIBBY OAK - FACT SHEETS 1
As soon as the Vibby OAK starts to vibrate a capacitive sensor
enables you to cancel the sending of a potentially false alarm.
Just cover the Vibby OAK entirely with the palm of your hand
for 2 seconds. Remove your hand as soon as vibrations stop.
Otherwise the alarm will be sent.
After a fall, the Vibby OAK will analyse the person’s
movements for 20 seconds. The alarm will be cancelled
if and only if the person stands up and remains standing
for at least 6 seconds. Even in the event of movements
on the ground the alarm call will continue to be
processed.
The Vibby OAK will vibrate and the red LED ashes
intermittently for a period of 20 seconds. From that
moment on the alarm will be raised even if the person
stands up. The sending of the alarm can only be
cancelled by using the capacitive sensor.
After 20 seconds, the alarm will be sent to the partner device.
The Vibby OAK will vibrate and the red LED light up for 2
seconds.
SENDING OF THE ALARM
ALARM CANCELLATION
ALERTSILENT ANALYSIS
OR
1 2 3

CONFIGURATION MODE
STORAGE MODE ACTIVE MODE
Set-up of wearing mode
Set-up of radio protocol
THE DIFFERENT MODES
VIBBY OAK - FACT SHEETS 2

Make sure that the Vibby OAK is in storage
mode (see installation guide pages 6 and 7).
Press the button until the 2nd series of red ashes starts and then release immediately.
1
You have 1 minute to perform the next step
(step 4). If the green LED goes o, go back to
step 2.
3
3 sec. 8 sec.
60 sec.
Press the button and hold it until the red LED lights up and then release immediately.
OR
MANUAL SET-UP OF WEARING MODE
VIBBY OAK - FACT SHEETS 3
Press again until the red LED lights up and then release immediately.
The device returns automatically to storage mode.
5
Press again until the green LED lights up and then release immediately. The device
returns automatically to storage mode.
5
WIRST MODE PENDANT MODE
2
4

Make sure that the Vibby OAK is in storage
mode (see installation guide pages 6 and 7).
1
Quickly press the button twice and then
release.
2
The red LED ashes quickly.
3
The Vibby OAK vibrates.
4
HOW DO I KNOW IF THE VIBBY OAK IS IN WRIST MODE?
HOW DO I KNOW IF THE VIBBY OAK IS IN PENDANT MODE?
X2
X2
Make sure that the Vibby OAK is in storage
mode (see installation guide pages 6 and 7).
1
Quickly press the button twice and then
release.
2
The green LED ashes quickly
3
The Vibby OAK vibrates.
4
VERIFICATION OF
WRIST / PENDANT MODE
VIBBY OAK - FACT SHEETS 4

Make sure that the Vibby OAK is in storage
mode (see installation guide pages 6 and 7).
Press the button until the 2nd series of red ashes starts and then release immediately.
1 2
You have 1 minute to perform the next step
(step 4). If the green LED goes o, go back to
step 2.
3
3 sec. 8 sec.
60 sec.
Press the button and hold it until the Vibby OAK will vibrate and then
release immediately.
4
PROTOCOLS
Ex : protocol 2
PROTOCOLS FLASHES
• PROTOCOL 1
• PROTOCOL 2
• PROTOCOL 3
X 1
X 2
X 3
Press the button again and hold
it until the number ashes of
the red LED corresponds to the
number of the required protocol
and then release immediately.
(see opposite overview)
2nd
1st
MANUEL SET-UP OF PROTOCOLS
VIBBY OAK - FACT SHEETS 5
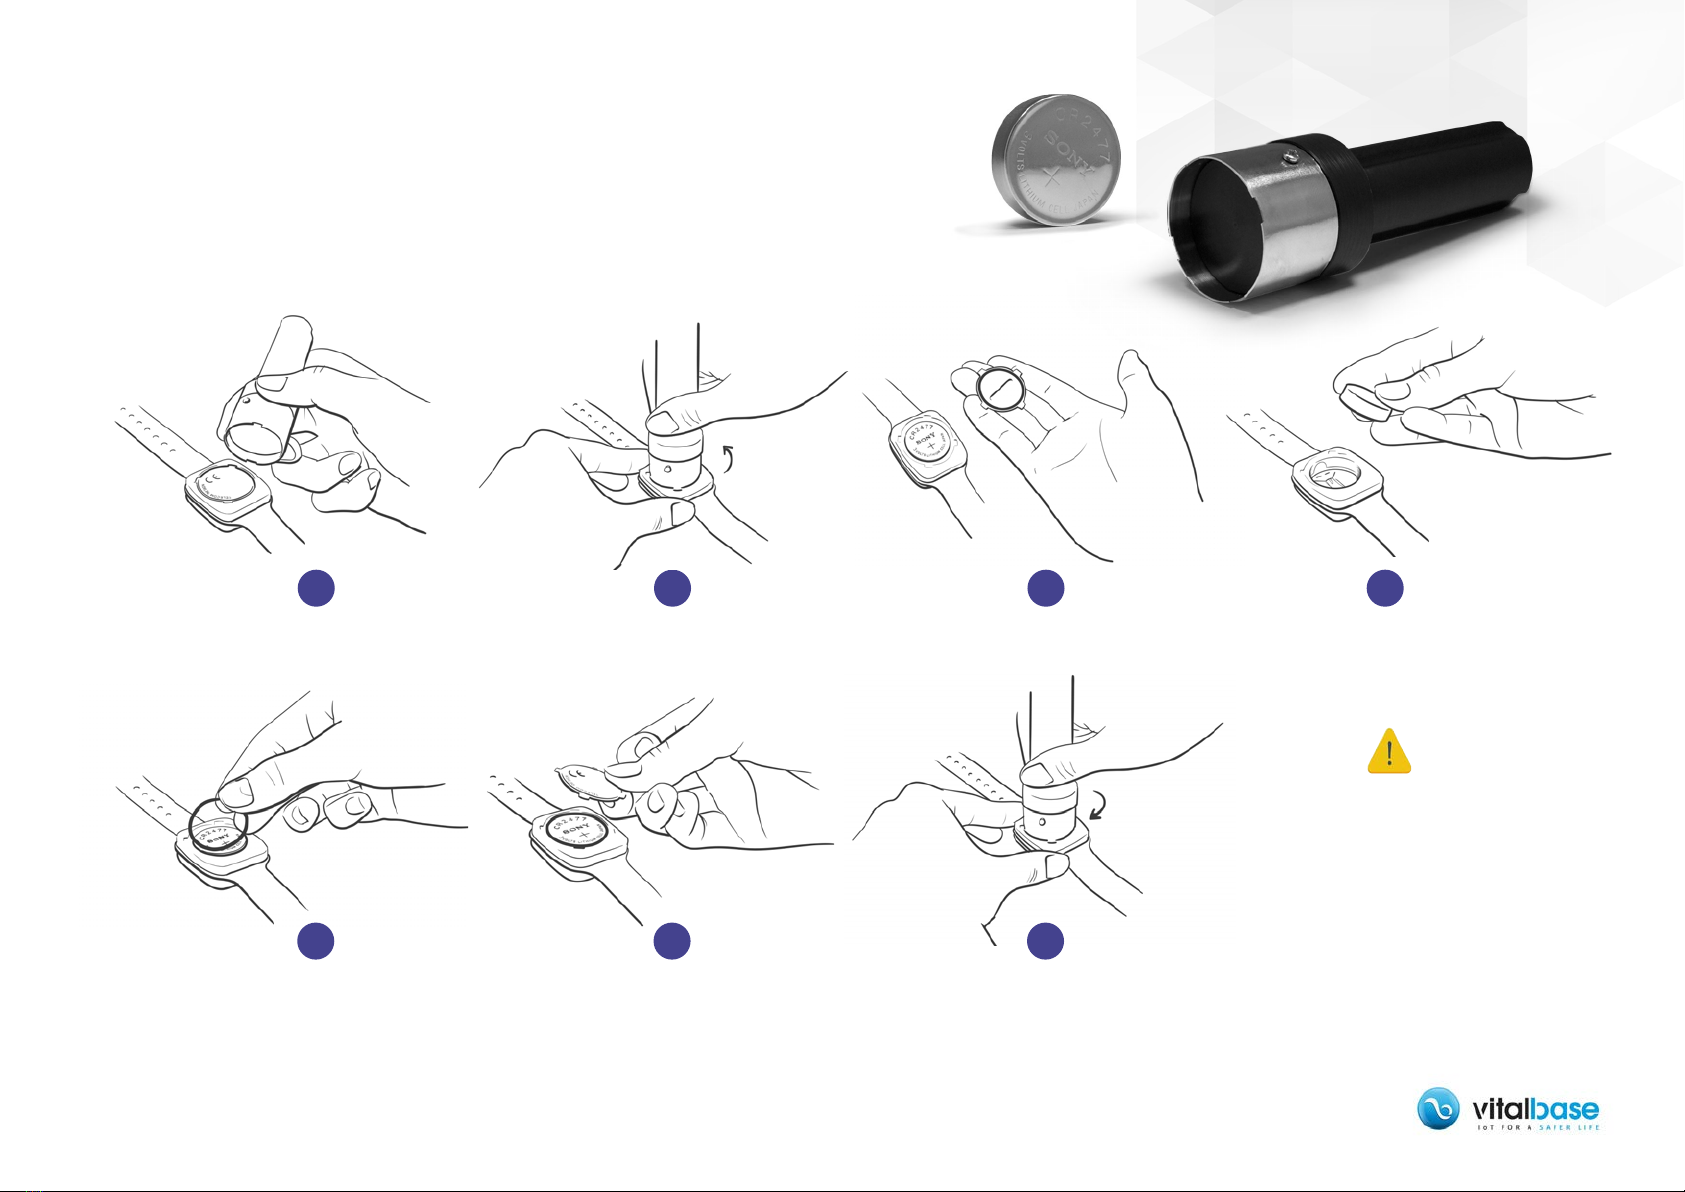
Take the extracting tool to remove
the cover.
1
Use the Vibby OAK battery extracting tool and replace the battery in 7 steps:
Make 1/4 of a turn with the tool.
2
Remove the cover.
3
Replace the used battery.
4
Place a new o-ring. Replace the cover by relying on the
notches.
Make 1/4 of a turn.
Warning:
Risk of explosion if the battery is
replaced by an incorrect type of battery.
Dispose of used batteries in line with
instructions.
Ref : SONY CR2477 / LiMnO2
Battery life: 2 years maximum
5 6 7
BATTERY REPLACEMENT
VIBBY OAK - FACT SHEETS 6
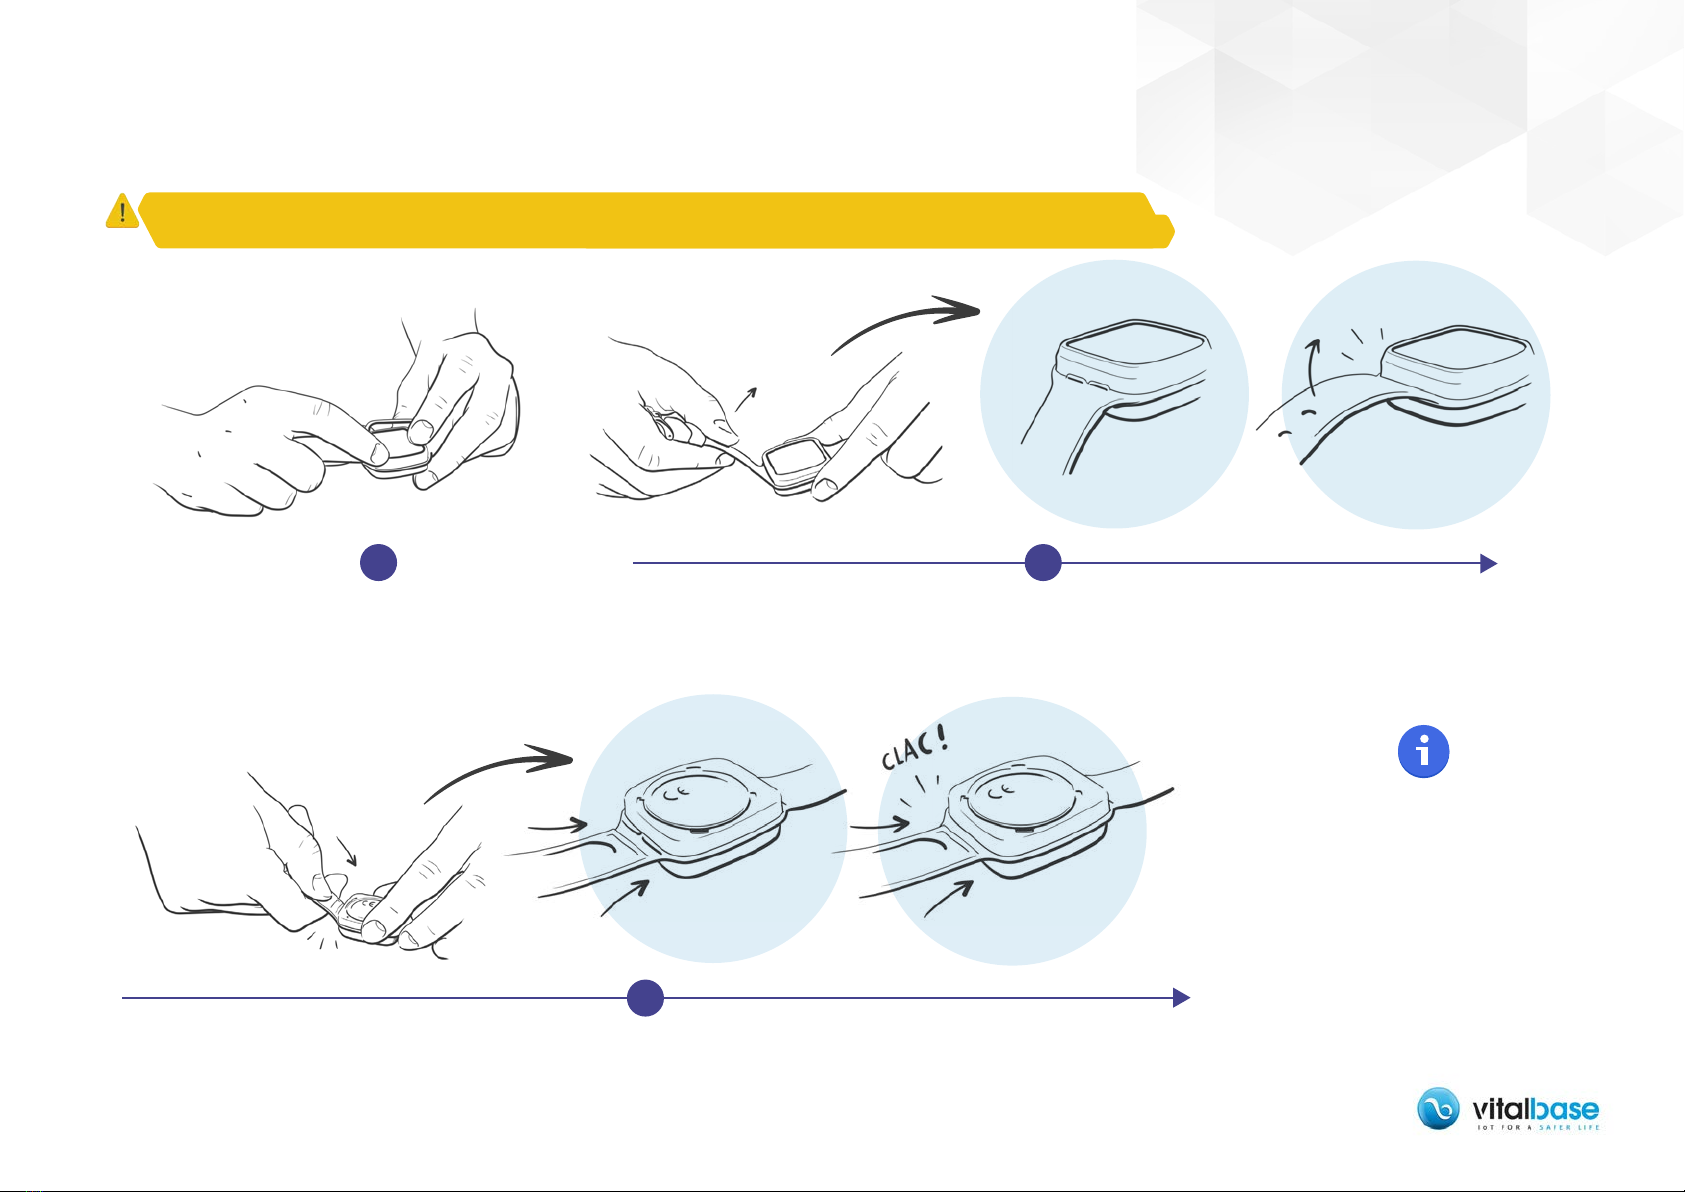
Position the strap of the wrist band in the
grooves of the Vibby OAK. Make sure that the
plastic strap is not twisted.
1
Gently pull each side of the wrist strap so that the retention features fall into the
grooves of the Vibby OAK.
2
Fitting of the pendant:
The procedure is much the same.
Position the strap of the neck cord as
shown in step 1. Follow steps 2 and 3 in
order to properly insert the upper part
of the neck cord.
Place the Vibby OAK face down at on the table. Squeeze the wrist strap rmly and exert a strong pressure
(horizontal and then downward) until the wrist strap is correctly inserted (the retention features must be fully
embedded in the enclosure).
3
Fig. 1 Fig. 2
Fig. 1 Fig. 2
FITTING THE WRIST / PENDANT
VIBBY OAK - FACT SHEETS 7
The tting of the wrist strap /neck cord of the Vibby OAK must be carried out by an installer in storage mode.
The tting is therefore deliberately dicult so that the user or his family cannot easily perform it themselves.
Other manuals for Vibby OAK
2
Table of contents
Other VitalBase Personal Care Product manuals

Popular Personal Care Product manuals by other brands


DURAVIT
DURAVIT LM7865000000000 Mounting instructions

Otto Bock
Otto Bock Manu Neurexa plus 28P30 Instructions for use

Streifeneder
Streifeneder ManuMax 96B1 Series Instructions for use

Magnitone
Magnitone Vibra-Sonic BAREFACED3 manual

Philips
Philips BCR430 quick guide

Foreo
Foreo LUNA play plus 2 Full user manual


