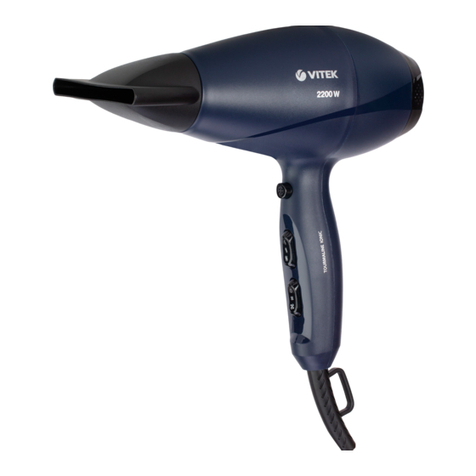
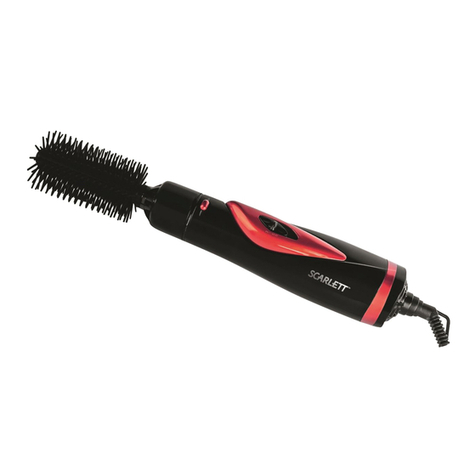
Vitek VT-1301 User manual

МОДЕЛЬ VT1301
ФЕН
HAIR DRYER
ИНСТРУКЦИЯ ПО КСПЛУАТАЦИИ
MANUAL INSTRUCTION
1301.qxd 10.07.03 12:19 Page 2

ENGLISH
2
Гарантийный талон
Сведения о покупке
Модель:
Серийный №:
Дата покупки:
Сведения о продавце
Название и адрес продающей организации
Подтвер даю получение исправного изделия, с условиями гарантии ознакомлен
Подпись покупателя
Телефон:
Купон №3
Модель: Серийный №:
Дата поступления в ремонт:
Дата выполнения ремонта:
Вид ремонта:
М.П.
Купон №2
Модель: Серийный №:
Дата поступления в ремонт:
Дата выполнения ремонта:
Вид ремонта:
М.П.
Купон №1
Модель: Серийный №:
Дата поступления в ремонт:
Дата выполнения ремонта:
Вид ремонта:
М.П.
Внимание!
Гарантийный талон действителен только при наличии печати
продающей организации
М.П.
HAIR DRYER
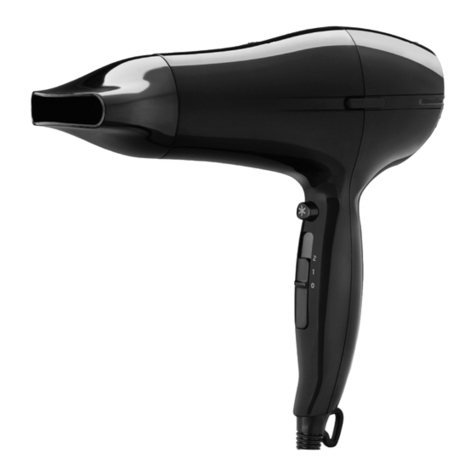
FEATURES
1. The Heat/Speed selector
2. A concentrator
3. Cool shot button
4. Turbo button
5. Cord guard
1301.qxd 10.07.03 12:19 Page 4

IMPORTANT SAFETY INSTRUCTIONS
READ ALL INSTRUCTIONS BEFORE USING
KEEP AWAY FROM WATER
When using electrical appliances, especially when children are present,
basic safety precautions should always be followed, including the followJ
ing:
DANGER J Any hair dryer is electrically live even when the switch is off:
To reduce the risk of death or injury by electric shock:
1. Always "unplug it" immediately after using.
2. Do not use while bathing.
3. Do not place or store appliance where it can fall or be pulled into a tub
or sink.
4. Do not place in, or drop into water or other liquid.
5. If an appliance falls into water, "unplug it" immediately. Do not reach
into the water.
WARNING J To reduce the risk of burns, electrocution, fire, or injury to
persons:
1. This appliance should never be left unattended when plugged in.
2. Close supervision is necessary when this appliance is used by, on, or
near children or invalids.
3. Use this appliance only for its intended use as described in this manual.
Do not use attachments not recommended by the manufacturer.
4. Never operate this appliance if it has a damaged cord or plug, if it is not
working properly, or if it has been dropped, damaged, or immersed in
water.
5. Keep the cord away from heated surfaces. Do not pull, twist, or wrap
cord around dryer.
6. Never block the air openings of the appliance or place it on a soft su
face, such as a bed or couch, where the air openings may be blocked.
Keep the air openings free of lint, hair, and the like.
7. Never use while sleeping.
8. Never drop or insert any object into any opening or hose.
9. Do not use outdoors or operate where aerosol (spray) products are
being used or where oxygen is being administered.
10. Do not use an extension cord to operate dryer.
11. Do not direct hot air toward eyes or other heatJsensitive areas.
12. Attachments may be hot during use. Allow them to cool before hanJ
dling.
ENGLISH
3
10
1301.qxd 10.07.03 12:19 Page 6

13. Do not place appliance on any surface while it is operating.
14. While using the appliance, keep your hair out of it. Keep your hair
away from the air inlets.
15. Do not use with voltage converter.
OPERATING INSTRUCTIONS
This appliance is intended for household use only. Use on Alternating
Current (50Hz) only.
Standard Dryers are designed to operate at 230 volts AC.
This appliance has a polarized plug (one blade is wider that the other).
As a safety feature, this plug will fit in a polarized outlet only one way. If
the plug does not fit fully in the outlet, reverse the plug. If it still does not
fit, contact a qualified electrician. Do not attempt to defeat this safety
feature. To Avoid circuit overload, do not operate another high wattage
appliance on the same circuit.
SAVE THESE INSTRUCTIONS
TO USE YOUR DRYER
1. The hair dryer features a choice of 2 heats / 2 speeds. Use the high
speed /high heat for drying most hair types. Select the low speed / low
heat for finishing a hairstyle or for drying and styling permed, colour
treated or fragile hair.
·With the control setting switch in the "0" position, plug the dryer into a
standard AC outlet. Select heat / speed (airflow) settings that is most
appropriate to your needs and that will deliver the best results.
·The control setting switch has a "0" position. To turn the dryer on,
press up on the switch until it "CLICK" into position of "1" for a LOW
speed/heat setting. Push the switch up from the "1" position until it
"CLICK" into position of "2" for a HIGH speed/heat setting. When finJ
ished using your dryer, move the control switch to the "0" position and
unplug the cord from the outlet.
2. After shampooing hair, towel dry. Turn the hair dryer on to desired posi
tion. As you proceed to dry and style hair, do not keep dryer directed at
one place; keep it in constant motion. This is especially important if dry
ing a wig which heat could damage.
3. After styling with warm air, press the "Cool Shot" button. The fan acce
lerates and speeds cool air to the hair, closing the hair shaft and keep
ing in style.
ENGLISH
4
УСЛОВИЯ ГАРАНТИЙНОГО ОБСЛУЖИВАНИЯ
Уважаемый покупатель!
Фирма VITEK выра ает благодарность за Ваш выбор и гарантирует
высокое качество и безупречное функционирование приобретенного Вами
изделия при соблюдении правил его эксплуатации.
Срок гарантии на все изделия - 12 месяцев со дня покупки. Данным
гарантийным талоном VITEK подтвер дает исправность данного изделия и
берет на себя обязательство по бесплатному устранению всех
неисправностей, возникших по вине производителя.
Гарантийный ремонт мо ет быть произведен в авторизированном
сервис-центре на территории России.
Условия гарантии:
1. Настоящая гарантия имеет силу при соблюдении следующих условий:
- правильное и четкое заполнение гарантийного талона с указанием
наименования модели, ее серийного номера, даты прода и и печати
фирмы-продавца в гарантийном талоне и отрывных купонах;
- наличие оригинала квитанции (чека), содер ащего дату покупки.
2. VITEK оставляет за собой право на отказ в гарантийном обслу ивании в
случае непредоставления вышеуказанных документов, или если
информация в них будет неполной, неразборчивой, противоречивой.
3. Гарантия не включает в себя периодическое обслу ивание, установку,
настройку изделия на дому у владельца.
4. Не подле ат гарантийному ремонту изделия с дефектами, возникшими
вследствие:
- механических повре дений;
- несоблюдении условий эксплуатации или ошибочных действий
владельца;
- неправильной установки, транспортировки;
- стихийных бедствий (молния, по ар, наводнение и т. п.), а так е других
причин, находящихся вне контроля продавца и изготовителя;
- попадания внутрь изделия посторонних предметов, идкостей,
насекомых;
- ремонта или внесения конструктивных изменений неуполномоченными
лицами;
- использования аппаратуры в профессиональных целях;
- отклонений от Государственных Технических Стандартов питающих,
телекоммуникационных и кабельных сетей;
- при выходе из строя деталей, обладающих ограниченным сроком
слу бы.
5. Настоящая гарантия не ущемляет законных прав потребителя,
предоставленных ему действующим законодательством.
РУССКИЙ
9
1301.qxd 10.07.03 12:19 Page 8

5
4. This hair dryer is fitted with a "Turbo" button that located underneath
the cool shot button. By depressing the turbo button, the dryer fan
speed will increase to generate more airflow for a short period of time.
This turbo feature helps to decrease drying time. Depress the button
and hold it for no longer than three minutes at a time. When finger is
released from the button the dryer will automatically resume the te
perature and speed previously chosen.
CONCENTRATOR ATTACHMENTS (USE ONLY IN LOW HEAT SETTING)
USER MAINTENANCE
Your dryer is permanently lubricated and will not require additional lubriJ
cation for the life of the dryer.
WARNING: It contains no user serviceable parts inside. Refer service to
qualified service personnel.
TO CLEAN: Unplug unit and allow to cool. Use a soft; slightly damp cloth
to wipe the dryer surfaces. Do not allow water or any other liquid to get
into the unit. The detachable intake grill should be cleared, just rotate and
detach it from the hair dryer, clean any buildJup of lint or hair with a small
brush.
Blocked or clogged air in take vents will cause the dryer to over
heat. If overheating occurs, an automatic safety device will shut the dryer
or the heat off to prevent damage or personal injury. If the unit or the heat
cycles off, unplug the cord and allow the dryer to cool for 10 to 15 minJ
utes before restarting. Make sure the air vents are clean.
TO STORE: Unplug the dryer and let it cool, store in its box, or in a clean,
dry place. Never store it while it is hot or still plugged in. NEVER WRAP
THE CORD TIGHTLY AROUND THE APPLIANCE. Never hang dryer by the
cord, and do not put any stress on the cord where it enters dryer, as it
could cause the cord to fray and break. Always unplug it after using.
CAUTION J If the cord or dryer is damaged or does not operate properly,
return it for repair to place of purchase. The consumer should attempt no
repairs.
SPECIFICATION
Power requirement 230 V ~ 50 Hz
Max. power 1800 W
SERVICE LIFE OF THE HAIR DRYER NOT LESS THAN 3 YEARS
ИСПОЛЬЗОВАНИЕ ПРИБОРА
1. Полностью размотайте шнур.
2. Присоедините насадку.
3. Подключите прибор к сети.
4. Установите переключатель в одно из поло ений:
"OFF" J отключено
"LOW" J подача теплого воздуха для сушки волос и
мягкой укладки
"HIGH" J подача горячего воздуха для ускоренной сушки
Кнопка подачи холодного воздуха (“COOL”)
Струя холодного воздуха придаст волосам эластичность и
сохранит прическу на долгое время.
Кнопка “TURBO”
Кнопка “TURBO”, располо енная ни е кнопки “COOL”,
предназначена для увеличения скорости и сокращения времени
сушки волос. На мите и удер ивайте кнопку в течение примерно
трех минут. После того, как вы отпустите кнопку “TURBO”,
скорость и ре им сушки автоматически вернутся в пре днее
состояние.
Концентратор
Эта насадка позволяет направить струю воздуха на
определенную прядь волос.
ЧИСТКА
•Время от времени очищайте отверстия фена щеткой.
•Протирайте корпус чистой сухой тканью с добавлением
мягкого чистящего средства.
СПЕЦИФИКАЦИЯ
Питание 230 В ~ 50 Гц
Максимальная мощность 1800 Вт
СРОК СЛУЖБЫ ФЕ А Е МЕ ЕЕ 3#Х ЛЕТ
РУССКИЙ
8
ENGLISH
1301.qxd 10.07.03 12:19 Page 10

ПРАВИЛА БЕЗОПАСНОГО ИСПОЛЬЗОВАНИЯ
•Перед использованием прибора внимательно прочитайте
инструкцию.
•По алуйста, сохраните эту инструкцию, гарантийный талон и,
если возмо но, упаковку.
•Перед включением фена убедитесь, что напря ение сети в
вашем доме соответствует напря ению, указанному на
маркировке прибора.
•Фен предназначен только для индивидуального
использования в быту.
•Отключайте фен от сети, если Вы им не пользуетесь, а так е
перед сменой насадок или чисткой.
•Отключая фен от сети, не тяните за шнур, а дер итесь за
вилку.
•Следите, чтобы дети пользовались феном только в
присутствии взрослых.
•Не пользуйтесь феном, если обнару ите повре дения шнура,
вилки или других частей.
•Не пытайтесь самостоятельно осуществлять ремонт прибора.
•Храните прибор как мо но дальше от источников тепла, влаги,
прямых солнечных лучей.
•Используйте только прилагаемые в комплекте
приспособления.
•Не используйте прибор вне помещения.
•Не пользуйтесь феном в ванной, под душем или над
раковиной, наполненной водой.
•Не погру айте прибор в воду или другие идкости. Не
беритесь за прибор мокрыми и вла ными руками. Если всеJ
таки влага попала вовнутрь прибора, немедленно отключите
его от сети.
•При сушке волос следите, чтобы волосы и посторонние
предметы не попадали в отверстия фена.
•Не используйте фен для сушки искусственных волос или
париков.
•Во время эксплуатации насадки сильно нагреваются.
РУССКИЙ
7
РУССКИЙ
6
ФЕН
1. Кнопка переключения скорости/подачи горячего воздуха
2. Концентратор
3. Кнопка подачи холодного воздуха “Cool”
4. Кнопка “Turbo”
5. Петля для подвешивания
1301.qxd 10.07.03 12:19 Page 12
Other manuals for VT-1301
1
Table of contents
Other Vitek Hair Dryer manuals

Vitek
Vitek VT-2270 BN User manual

Vitek
Vitek VT-1300 User manual

Vitek
Vitek VT-1322 User manual

Vitek
Vitek Champagne VT-1338 SR User manual

Vitek
Vitek VT-2237 User manual

Vitek
Vitek VT-8230 User manual

Vitek
Vitek VT-1300 User manual

Vitek
Vitek VT-2327 CL User manual

Vitek
Vitek Platinum VT-1340 PL User manual

Vitek
Vitek VT-1337 User manual

Vitek
Vitek VT-8205 BK User manual

Vitek
Vitek VT-2533 User manual

Vitek
Vitek VT-8227 User manual

Vitek
Vitek VT-2535 User manual

Vitek
Vitek VT-8228 User manual

Vitek
Vitek VT-8215 JR User manual

Vitek
Vitek VT-1312 User manual

Vitek
Vitek VT-1306 User manual

Vitek
Vitek Charmant VT-1342 B User manual

Vitek
Vitek VT-8218 User manual