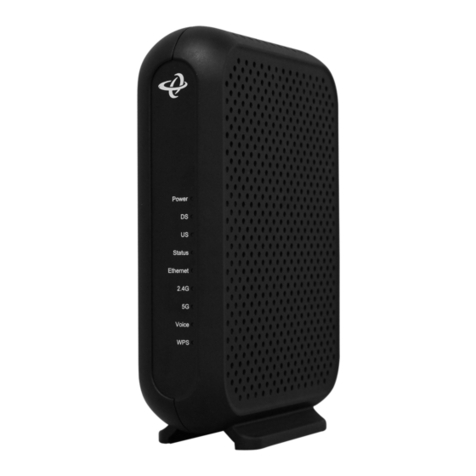
Viva E5830 User manual

User Guide
Welcome to VIVA E5830 Wireless Modem

Note: This guide briey describes the function of the device. For the operation of conguring the management
parameters, see Help on the management program or web management page.
The device can be used in a reasonable closed environment such as a pocket, handbag or laptop bag,
however, if there is a risk that the ambient temperature will increase when the device is processing data ser-
vices for a long period, due to the device not being able to dissipate the heat effectively. If this happens and
as a safety precaution, the device will switch off automatically or disconnect. In the event of this happening
please restart your device as usual to restart the connection.
Thank you for choosing the Wireless Modem

7Signal indicator
8Roam indicator
9WiFi/WPS indicator
10 Mode indicator
11 Battery indicator
1USB connector
2Micro SD card slot
3Battery button
4Power On/Off
5WiFi/WPS button
6Dialing button
GettoKnowYourDevice
1
2
3
4
5
6
7
8
910
11

StatusIndicator
- Steady on and in red: The USIM/SIM card does not exist or the PIN code is not veried
or the signal is inexistent.
- Steady on and in yellow: The signal strength is weak.
- Steady on and in green: The signal strength is strong.
- Off: The device is not in the roaming state.
- Steady on and in red: The device is in the roaming state.
- Off: The WiFi and WPS are disabled.
- Steady on and in blue: The WiFi is enabled.
- Fast Blinking in blue: The WPS is enabled.
- Off: The network service is inexistent.
- Fast blinking in green: dialing up.
- Blinking in green: 2G network registered.
- Steady on and in green: 2G data service connected.
- Blinking in blue: 3G network registered.
- Steady on and in blue: 3G data service connected.

StatusIndicator
- Fast blinking in red: The battery power level is very low and must be charged immediately;
otherwise the device will be powered off.
- Steady on and in red: The battery power level is weak.
- Steady on and in green: The battery power level is enough.
- Blinking: The battery is being charged. If the indicator is in red, the battery level is too low to
power on the device. When the indicator turns green, you can power on the device.

HowtoAccesstheInternetwithWiFi
Step1. Establish the WiFi Connection (Take PC for Example)
1. Select Start > Control Panel > Network Connections > Wireless Network Connection.
Note: To set up a WiFi connection, the PC must be congured with the wireless network adapter. If the wireless network
connection is displayed, the wireless network adapter is available. Otherwise, you should check your wireless
network adapter.
2. Click View available wireless networks to display the wireless network connection list.

3. Select the network connection that the SSID is the same as that of the device, and then click .
Note: - If the encryption parameter is set for the device, the Wireless Network Connection dialog box is displayed and
requires the network key and conrmation.
- The SSID and key label is attached on the device.
Wait for a while. The wireless connection icon displays in the status area in the lower right corner of the screen. Then,
your PC can automatically connect to the device.
Step 2. Access the Internet
By default, the device automatically dials up to access the Internet. You can directly use the
Internet service. If the Internet service does not respond, you can access the Internet using
the dialing button manually. Press and hold until is blinking, the connection is set up
successfully. Then you can use the Internet service.
Note: Press and hold until is off, the connection is torn down.

HowtoInstalltheManagementProgram
The procedure for installing the management program depends on the operating system installed on your PC.
The following section takes Windows XP as an example.
1. Power on the device.
2. Connect the device and PC with the compatible data cable.
3. The OS (Operating System) automatically detects and recognizes new hardware and starts the installation wizard.
Note: If the auto-run program does not respond, nd the installing le in the driver path. Then double-click the installing
le to run the program.
4. Follow the prompts of the installation wizard.
5. After the program is installed, the shortcut icon of the
program is displayed on the desktop.
6. After the device is installed, the program is launched
automatically. Then every time the device is connected
to the PC with the compatible data cable, the program is
launched automatically.
Note: You can also double-click the shortcut icon on the
desktop to launch the program.

1. Start the Internet browser and enter http://192.168.1.1 in the address bar.
2. Enter the password, and then click Login.
- Admin: This user type is authorized to view and change congurations. The default password is admin.
Note: If the page is unavailable while the device is being connected to PC through the compatible data cable, launch
the management program and then access the web page.
Charging the Battery
Note: If you have not used the battery for a long time, please recharge it rst.
Method 1: Using the charger
Caution: - Use the compatible charger delivered only by the manufacturer with this device model. Using a charger of
other device models, other manufacturers or vendors may invalidate any approval or warranty applicable to
the device, result in the non-operation of the device, and cause danger.
How to Access the Web Management Page
Everyday Use

- The Charger is an optional accessory. If the charger is not provided in the package, you can contact your
service provider to buy one yourself.
Method 2: Connecting to a PC for charging
1. Power off the device.
2. Connect the device and PC with the compatible data cable.
Note: To ensure that the battery has sufcient power to provide the data service longer, it is recommended that you do
not power on the device until the charging is nished. If the device is powered on, the management program is
launched automatically and the data service is started. Now, the charging is stopped.
Saving Power mode
If the device has not been carrying out any operations for 15 seconds, the indicators are off.
If the device has not been accessed for 10 minutes by default, the device changes to the deep sleep state. In this state,
you can press any key to activate the device. Now the indicators become lightened.
When the device is in the deep sleep state, the WiFi is automatically disabled.
Enabling/Disabling the WiFi
- Press and hold until is steady on and in blue, the WiFi is enabled.
- Press and hold
WiFi/WPS
until is off, the WiFi is disabled.
WiFi/WPS

OperationsMode
1. Access the Internet using the dialing button manually. For details, see the chapter of “Step2.
Access the Internet”.
2. Wait for a while. If you are notied that the connection is successful, you can use the
Internet service.
Note: You can also launch the management program or web page to connect to
or disconnect from the network following the prompts.
Manual
After the device is powered on, it can automatically connect to the Internet when data
transmission is required. If data transmission is not performed over a period of time,
the device automatically tears down the Internet connection.
On Demand
After the device is powered on, it can automatically connect to the Internet no matter
whether data transmission is required.
Auto
Mode of Accessing the Internet
After you establish the WiFi Connection successfully, you can access the Internet using the following modes.
Note: - The dialing button dose not work in the Auto or On Demand mode.
- You can launch the web management page to select the mode of accessing the Internet.

EstablishingtheWPSConnection
If the WiFi Clients, connected with the device support the WPS, the device can automatically generate a network key
without manually entering. The operation steps of WPS-PBC (Push Button Conguration) are as follows.
1. Power on the device.
2. Start the Clients connected with the device.
3. Enable the WPS of the device.
Note: After the WiFi is enabled, press and hold . When becomes off rst and then fast blinking in blue, the WPS
of the device is enabled.
4. Enable the WPS of the Clients.
Note: For the WiFi operations of the Clients see the Clients’ user guide.
WiFi/WPS

Networking Diagram
The procedure for establishing a WiFi connection
depends on the operating system installed on your WiFi
Clients. The aforesaid section takes a WiFi PC as an
example. For other Clients, you need to congure them
as required.

MicroSDCard
If the WiFi Clients connected with the device support the WPS, the device can automatically generate a network key
without manually entering. The operation steps of WPS-PBC (Push Button Conguration) are as follows.
1. Remove the rubber cap from the Micro SD card slot. Then insert the Micro SD card into the slot.
2. After inserting the Micro SD card completely, replace the rubber cap.
Note: - Micro SD card is an optional accessory. If the Micro SD card is not provided in the package, you can buy
one yourself.
- To remove the Micro SD card, open the rubber cap and press the Micro SD card gently. Now the Micro SD card
will pop up automatically. Then take it out.
- Do not remove the card when it is being used. Removing the card during an operation may damage the card as
well as the device, and data stored on the card may be corrupted.
Restoring to Factory Defaults
If you need to reconstruct the network or you forget the changes of some parameters, you can choose to restore factory
defaults and recongure the device.

Press and hold
WiFi/WPS
and at the same time until all the indicators are off, you restore the factory defaults successfully.
Note: After this operation, all personal conguration settings are deleted and all web-based management settings and
parameters will be restored to their default values.
Friendly Tips
If you cannot ensure that the device is normal, you can try these following ways to solve:
- See Help on the management program or web page.
- Restart the device.
- Restore the factory defaults.
- Contact your service provider.

PreparetheDevice
Install the USIM/SIM Card and Battery
Position the card at the card slot entrance, making sure it is facing the same way as shown
in the diagram, with the notched corner at the top left. Then slide in.

ﺔﻳرﺎﻄﺒﻟاو USIM/SIM ﺔﺤﻳﺮﺷ ﺖﻴﺒﺜﺗ
،ﻲﻄﻴﻄﺨﺘﻟا ﻢﺳﺮﻟا ﻲﻓ ﺮﻬﻈﻳ يﺬﻟا هﺎﺠﺗﻻا ﺲﻔﻧ ﻪﺟاﻮﺗ ﺎﻬﻧأ ﻦﻣ ﺪﻛﺄﺗو ،ﺎﻬﻟ ﺺﺼﺨﻤﻟا نﺎﻜﻤﻟا ﻲﻓ ﺔﺤﻳﺮﺸﻟا ﻊﺿ
.ﺎﻬﻟ ﺺﺼﺨﻤﻟا نﺎﻜﻤﻟﺎﺑ ﺔﺤﻳﺮﺸﻟا ﻖﻟزأ ﻢﺛ .ىﺮﺴﻴﻟا ﺔﻳواﺰﻟا ﻰﻠﻋأ ﻲﻓ ﺔﻠﺋﺎﻤﻟا ﺔﻳواﺰﻟا نأ ﻦﻣ ﻖﻘﺤﺗو
زﺎﻬﺠﻟا داﺪﻋإ

.حﺎﺠﻨﺑ ﻊﻨﺼﻤﻟا ﻂﺒﺿ ةدﺎﻌﺘﺳا ﻦﻣ ﺖﻨﻜﻤﺗ ، تاﺮﺷﺆﻤﻟا ﻊﻴﻤﺟ ﺄﻔﻄﺗ نأ ﻰﻟإ ﻪﺴﻔﻧ ﺖﻗﻮﻟا ﻲﻓ و راﺮﻤﺘﺳﺎﺑ ﻂﻐﺿا
:ﺔﻈﺣﻼﻣ
.ﺔﻴﺿاﺮﺘﻓﻻا ﺎﻬﻤﻴﻗ ﻰﻟإ دﺎﻌﺗ فﻮﺳ ةرادا ﺔﺤﻔﺻ تﺎﻤﻠﻌﻣو تاداﺪﻋإ ﻊﻴﻤﺟ و ﺔﻴﺼﺨﺸﻟا ﺔﺌﻴﻬﺘﻟا تاداﺪﻋإ ﻊﻴﻤﺟ فﺬﺣ ﻢﺘﻳ ، ﺔﻴﻠﻤﻌﻟا هﺬﻫ ﺪﻌﺑ
:ﺔﻳدو ﺢﺋﺎﺼﻧ
1.:ﻞﺤﻛ ﺔﻴﻟﺎﺘﻟا ﻞﺒﺴﻟا هﺬﻫ بﺮﺠﺗ نأ ﻚﻨﻜﻤﻳ ، ﻲﻌﻴﺒﻃ زﺎﻬﺠﻟا نأ ﻦﻣ ﺪﻛﺄﺘﻟا ﻊﻴﻄﺘﺴﺗ ﻻ ﺖﻨﻛ اذإ
.ةرادا ﺔﺤﻔﺻ وأ ةرادا ﺞﻣﺎﻧﺮﺑ لﻮﺣ تﺎﻤﻴﻠﻌﺘﻟا ﻊﺟار 2..زﺎﻬﺠﻟا ﻞﻴﻐﺸﺗ ةدﺎﻋﺈﺑ ﻢﻗ 3..ﻊﻨﺼﻤﻟا ﻂﺒﺿ ةدﺎﻌﺘﺳﺎﺑ ﻢﻗ 4..ﺔﻣﺪﺨﻟا دوﺰﻤﺑ لﺎﺼﺗﻻﺎﺑ ﻢﻗ
WiFi/WPS

MicroSD ةﺮﻛاذﺔﻗﺎﻄﺑ
WPS-PBC ﺔﻴﻠﻤﻌﻟا تاﻮﻄﺧ .ىوﺪﻳ ﻞﺧﺪﺗ نود ﺔﻜﺒﺸﻟا حﺎﺘﻔﻣ ﺪﻴﻟﻮﺗ ﺎﻴﺋﺎﻘﻠﺗ زﺎﻬﺠﻠﻟ ﻦﻜﻤﻳ ، WPS ﻢﻋﺪﺗ زﺎﻬﺠﻟﺎﺑ ﺔﻠﺼﺘﻤﻟا WiFi ةﺰﻬﺟأ ﺖﻧﺎﻛ اذإ
..ﻲﻟﺎﺘﻟا ﻮﺤﻨﻟا ﻰﻠﻋ ﻲﻫ
1..ﺔﺤﺘﻔﻟا ﻲﻓ Micro SD ةﺮﻛاذ ﺔﻗﺎﻄﺑ ﻞﺧدأ ﻢﺛ . Micro SD ةﺮﻛاذ ﺔﻗﺎﻄﺑ ﺔﺤﺘﻓ ﻦﻣ ﻲﻃﺎﻄﻤﻟا ءﺎﻄﻐﻟا ﺔﻟازإ 2..ﻲﻃﺎﻄﻤﻟا ءﺎﻄﻐﻟا ﺪﻋأ ، ﻞﻣﺎﻜﻟﺎﺑ Micro SD ةﺮﻛاذ ﺔﻗﺎﻄﺑ لﺎﺧدإ ﺪﻌﺑ
:ﺔﻈﺣﻼﻣ
.ﻚﺴﻔﻨﺑ ةﺪﺣاو ءاﺮﺷ ﻚﻨﻜﻤﻳ ، ﺔﻣﺰﺤﻟا ﻲﻓ Micro SD ةﺮﻛاذ ﺔﻗﺎﻄﺑ ﺮﻓﻮﺘﺗ ﻢﻟ اذإ .يرﺎﻴﺘﺧا ﻖﺤﻠﻣ ﻰﻫ Micro SD ةﺮﻛاذ ﺔﻗﺎﻄﺑ
ﺮﻬﻈﺗ فﻮﺳ Micro SD ةﺮﻛاذ ﺔﻗﺎﻄﺑ نا .ﻒﻄﻠﺑ Micro SD ةﺮﻛاذ ﺔﻗﺎﻄﺑ ﻰﻠﻋ ﻂﻐﺿإ و ﻲﻃﺎﻄﻤﻟا ءﺎﻄﻐﻟا ﺢﺘﻓإ ، Micro SD ةﺮﻛاذ ﺔﻗﺎﻄﺑ ﺔﻟاز
.ﺎﻬﺟاﺮﺧﺈﺑ ﻢﻗ .ﺎﻴﺋﺎﻘﻠﺗ
، زﺎﻬﺠﻟا ﻒﻠﺗ ﻦﻋ ﻼﻀﻓ ﺔﻗﺎﻄﺒﻟا ﻒﻠﺗ ﻰﻟإ يدﺆﻳ ﺪﻗ ماﺪﺨﺘﺳﻻا لﻼﺧ ﺔﻗﺎﻄﺒﻟا ﺔﻟازإ .ﺎﻬﻣاﺪﺨﺘﺳا ﻢﺘﻳ ﺎﻣﺪﻨﻋ Micro SD ةﺮﻛاذ ﺔﻗﺎﻄﺑ ﺔﻟازﺈﺑ ﻢﻘﺗ ﻻ
.ﻒﻠﺘﻠﻟ ضﺮﻌﺘﺗ ﺪﻗ ةﺮﻛاﺬﻟا ﺔﻗﺎﻄﺑ ﻰﻠﻋ ﺔﻧﺰﺨﻤﻟا تﺎﻧﺎﻴﺒﻟاو
ﻊﻨﺼﻤﻟا ﻂﺒﺿ ةدﺎﻌﺘﺳا
ﻊﻨﺼﻤﻟا ﻂﺒﺿ ةدﺎﻌﺘﺳا رﺎﻴﺘﺧا ﻚﻨﻜﻤﻳ ، تﺎﻣﻮﻠﻌﻤﻟا ﺾﻌﺒﺑ ﺔﺻﺎﺨﻟا تاﺮﻴﻴﻐﺘﻟا ﺖﻴﺴﻧ ﺖﻨﻛ اذإ وأ ﺔﻜﺒﺸﻟا ءﺎﻨﺑ ةدﺎﻋ ﺔﺟﺎﺣ ﻲﻓ ﺖﻨﻛ اذإ
.زﺎﻬﺠﻟا ﻦﻳﻮﻜﺗ ةدﺎﻋإو

ﺔﻜﺒﺸﻟا ﻢﻴﻤﺼﺗ
ﺖﺒﺜﻤﻟا ﻞﻴﻐﺸﺘﻟا مﺎﻈﻧ ﻰﻠﻋ ﺪﻤﺘﻌﻳ WiFi لﺎﺼﺗا ﺲﻴﺳﺄﺗ تاءاﺮﺟإ
ﺮﺗﻮﻴﺒﻤﻛ زﺎﻬﺟ ﺬﺧﺄﻳ رﻮﻛﺬﻤﻟا ﻊﻄﻘﻤﻟا .ﻚﺑ ﺔﺻﺎﺨﻟا WiFi ةﺰﻬﺟأ ﻰﻠﻋ
ﺎﻫداﺪﻋإ ﻰﻟإ جﺎﺘﺤﺗ ، ىﺮﺧا ةﺰﻬﺟﻟ .ﻚﻟذ ﻰﻠﻋ لﺎﺜﻤﻛ WiFi
.بﻮﻠﻄﻤﻟا ﻮﺤﻨﻟا ﻰﻠﻋ
Table of contents
Languages:
Other Viva Modem manuals


