Viva E57 User manual

VIVA 4G LTE Mini Router
Quick Start Guide

Thank you for choosing the VIVA 4G LTE Mini
Router (hereinafter referred to as the E57)
•Thesupportedfunctionsandactualappearancearesubjecttotheproductpurchased.
The following pictures are displayed for illustration purposes only. For the product
selectiondetails,consultyourserviceprovider.
•ThisguidebrieydescribesthefunctionsoftheE57.Fordetailsabouthowtosetthe
managementparameters,seetheHelpsectionontheWebManagementpage.
•IftheE57isplacedinanenvironmentwithpoorventilation,itwillbecomewarmafter
extended use. When the E57 temperature reaches a certain high tempreature, it will
switchoffordisconnectfromthenetworkautomaticallytoprotectitself.Ifthishappens,
pleaseplacetheE57inawell-ventilatedareaforheatdissipationandthenrestartit.
1
2
3
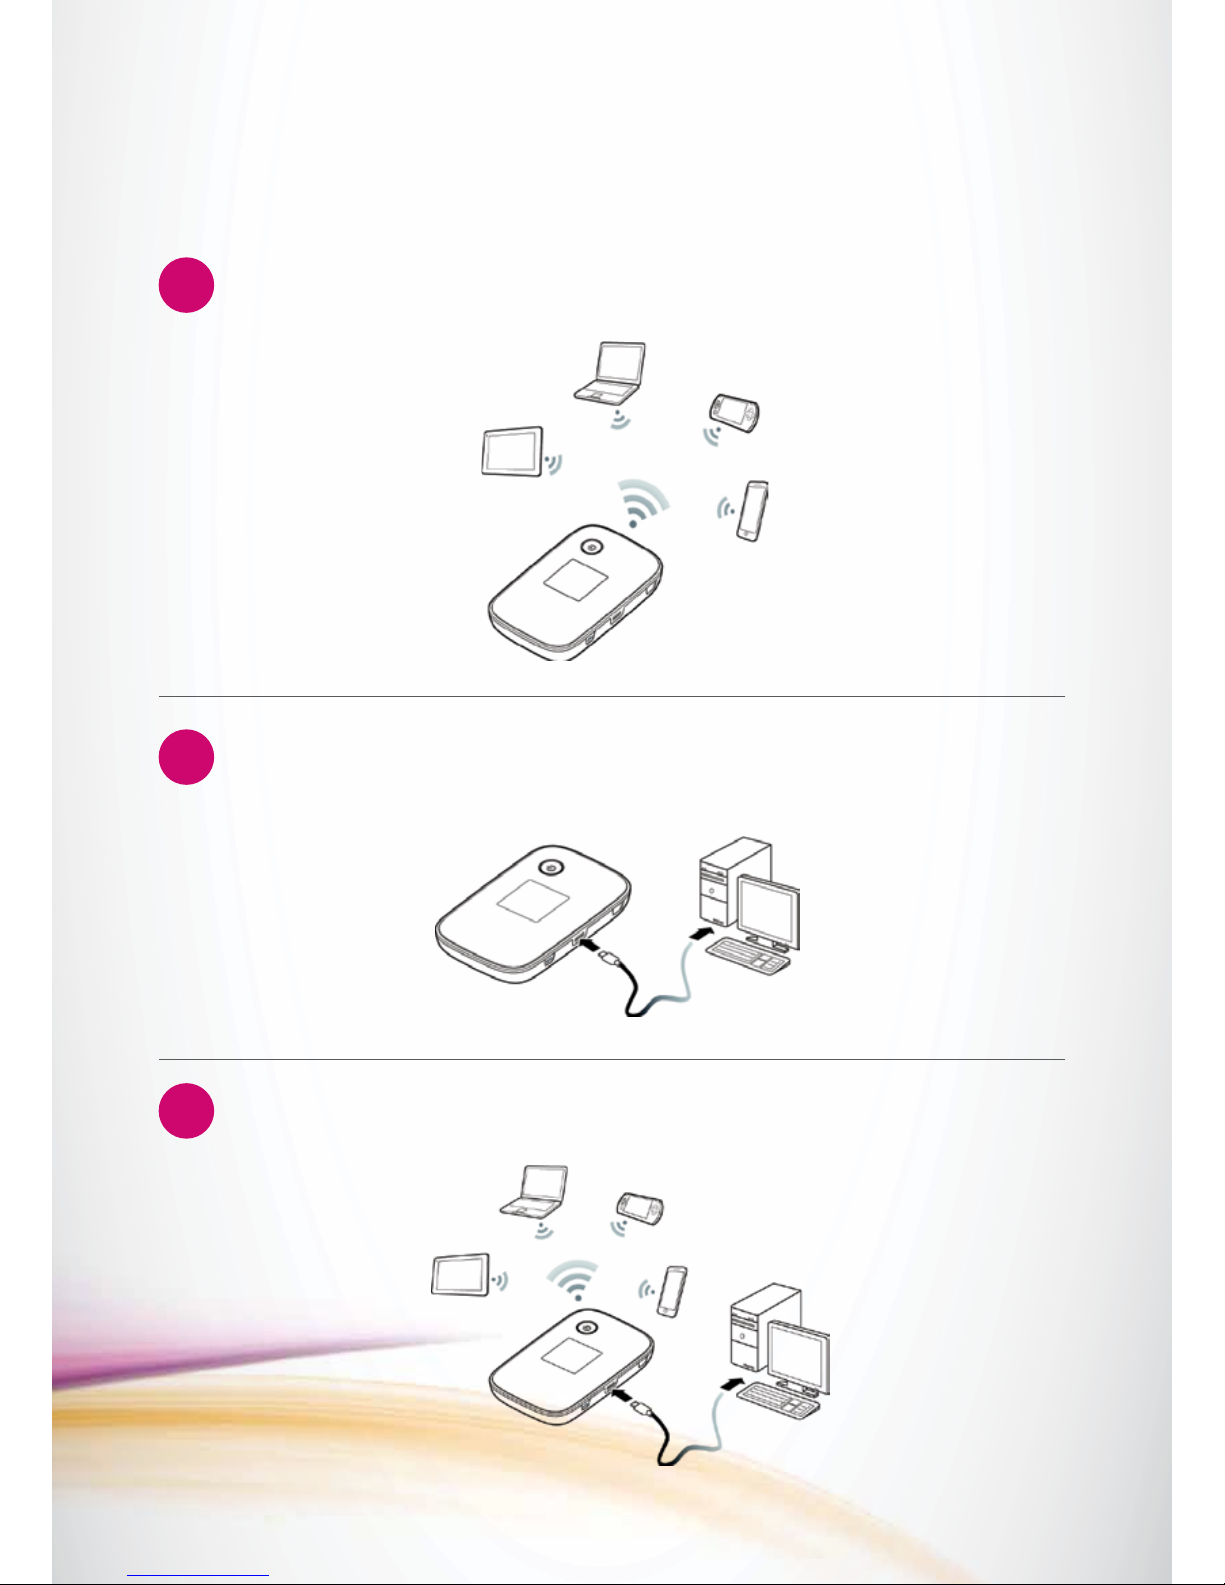
Application Scenarios
TheWi-FideviceorcomputercanconnecttotheinternetthroughtheE57.The
actualconnectionproceduredependsontheoperatingsystemoftheWi-Fideviceor
computer.Youcanperformtheconnectionoperationsasprompted.
ScenarioconnectingmultipledevicesthroughWi-Fi
ScenarioconnectingasingledevicethroughUSB
Scenario
multi-deviceaccessviaWi-FiandUSBat
thesametime
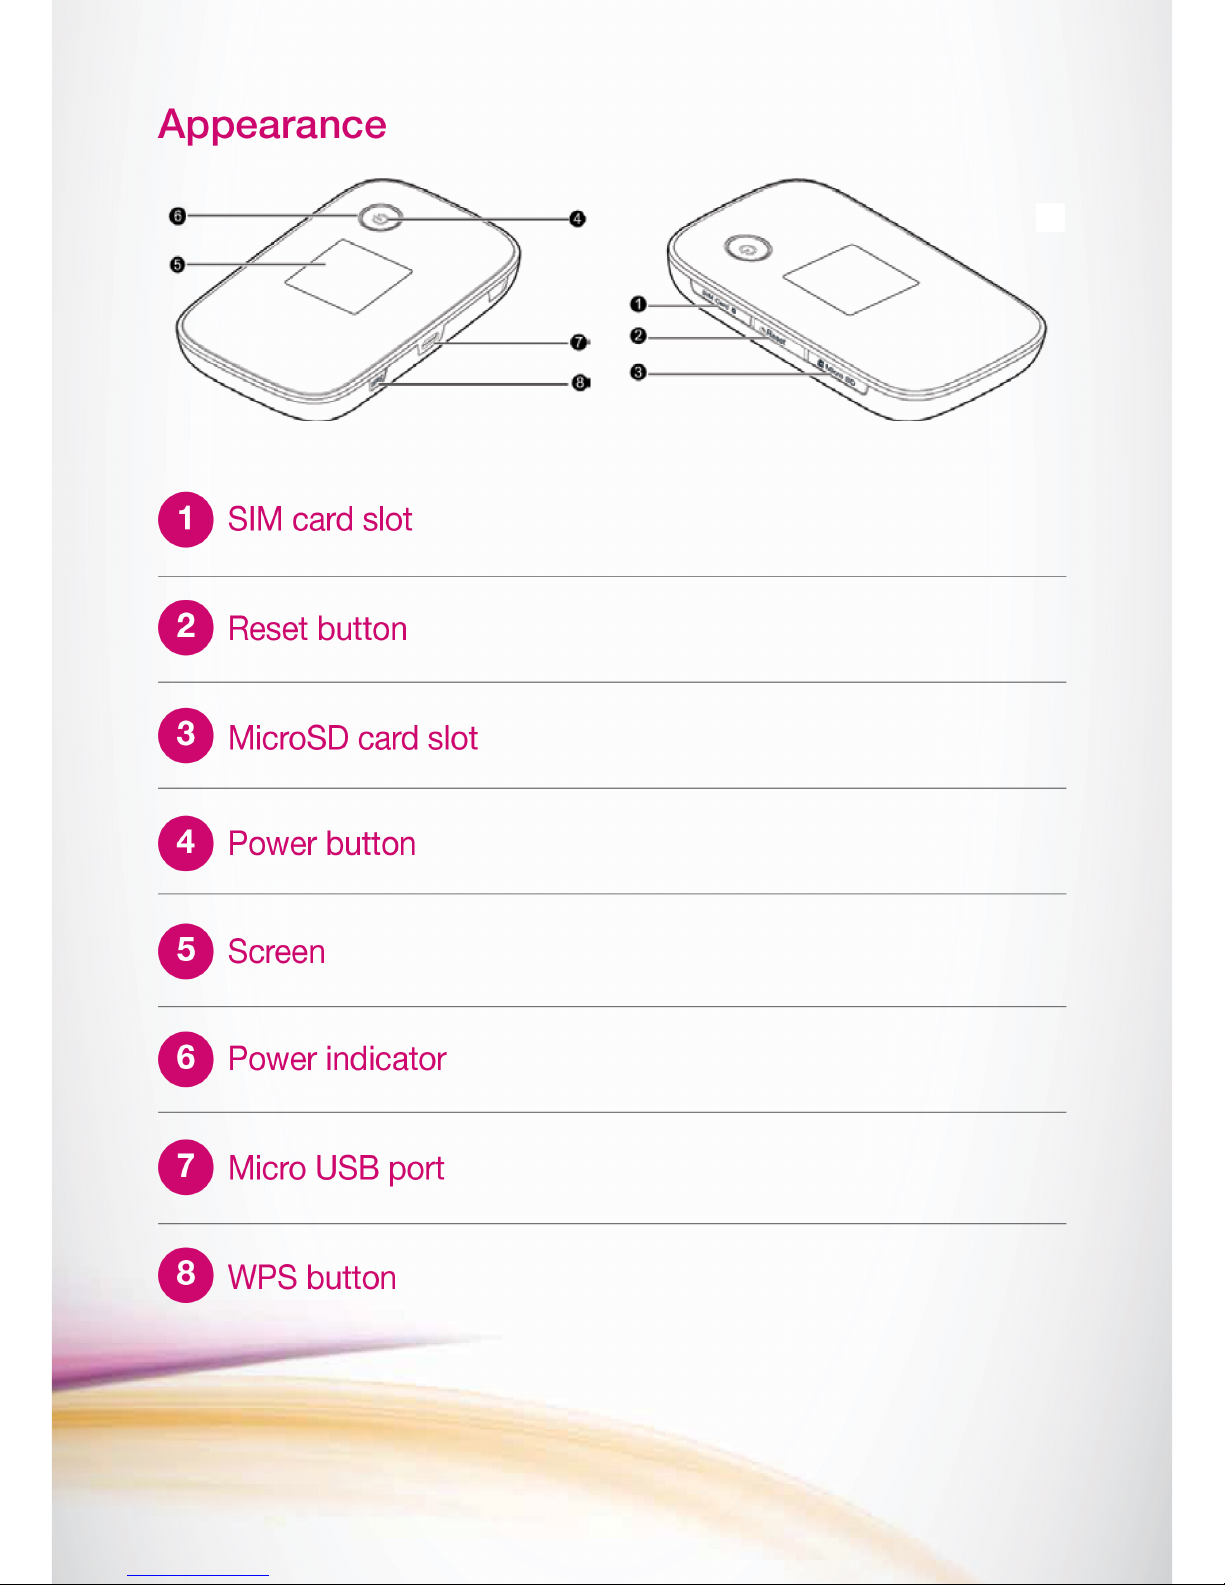
1
2
3
4
5
6
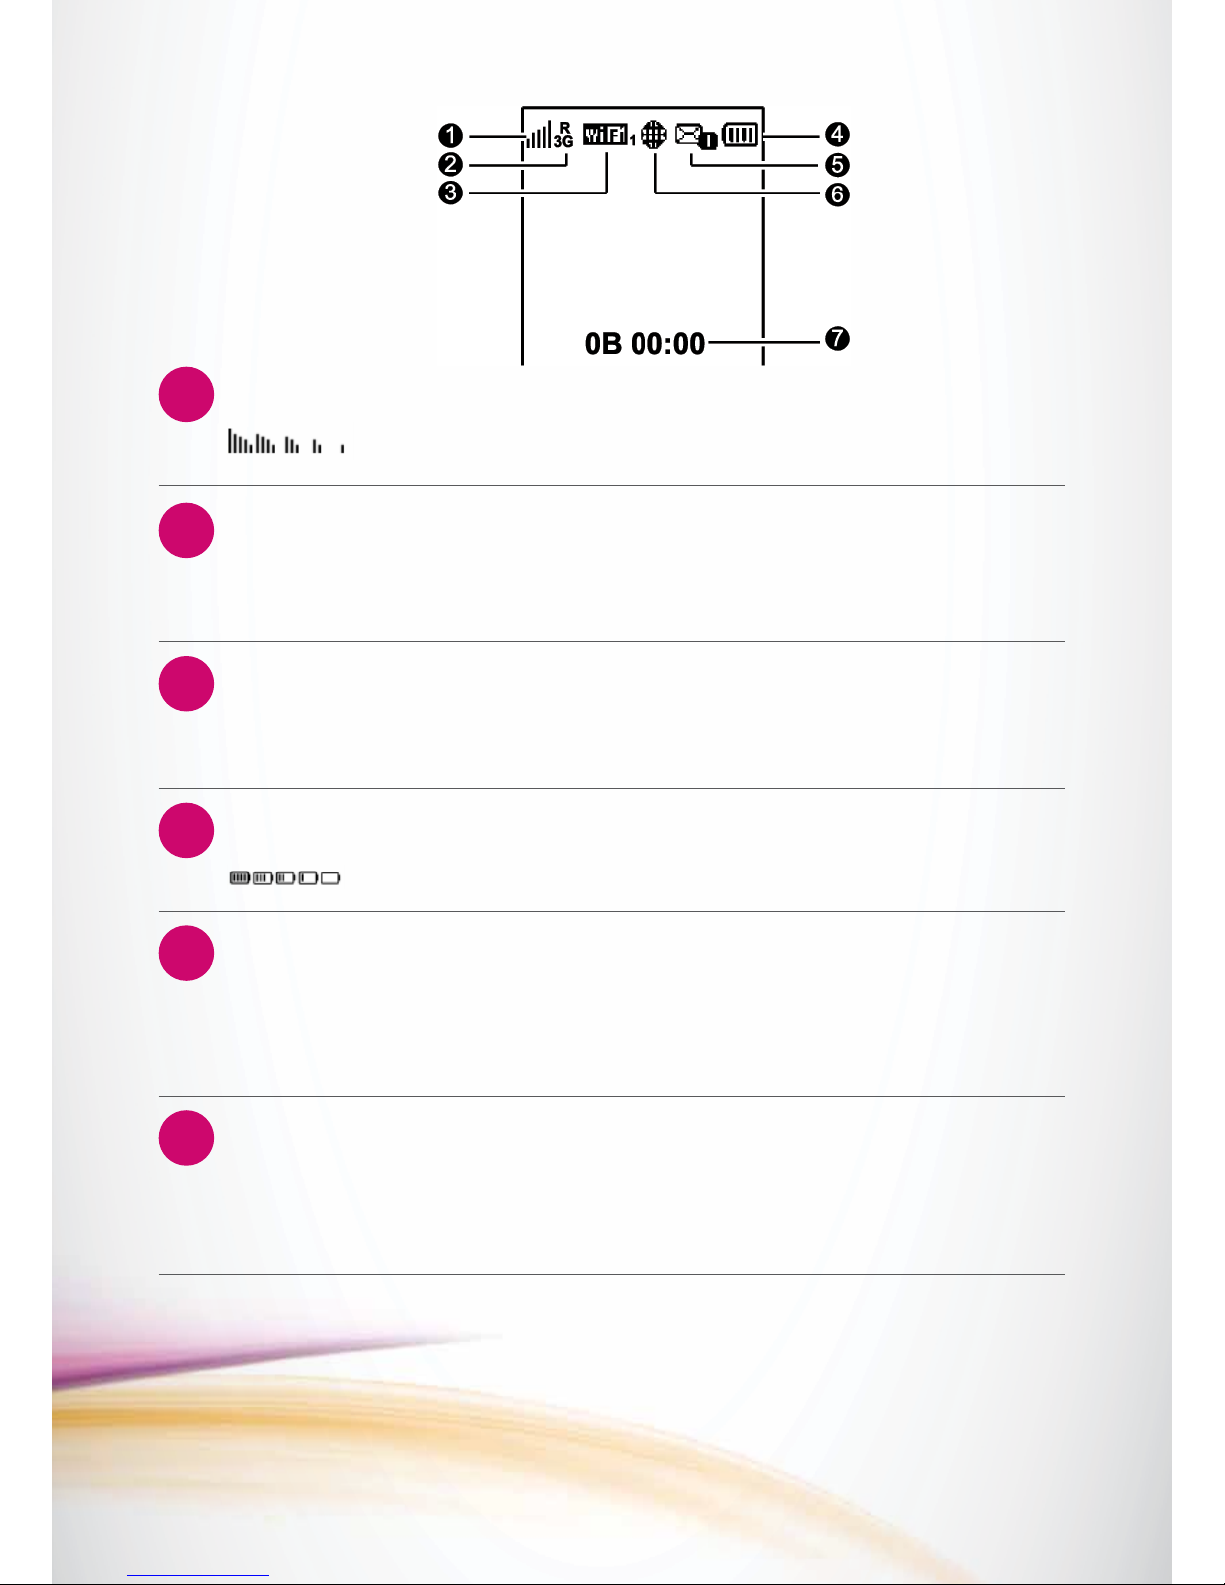
:Signalstrengthfromweaktostrong.
:Batterylevelfromlowtohigh.
Screen
Signalstrength
Networktype
Wi-Fi
SIMcardslot
SMS
Internetconnectionissetup
•Wi-FiisOn.
•NumberofconnectedWi-Fidevices.
•2G/3G/4G:Connectedtoa2G/3G/LTEnetwork.
•R:DataroamingisOn.
•Newmessages.
•Numberofnewmessages.
•Networkconnectionstatus.
•Trafcstatistics.
•Datatrafcinformation.
•Connectiontime.
Note:
•Wi-Fi:wirelessconnectionquality.
•WPS:protectedsetup.
•Datatrafcinformationisforyourreferenceonly.Formoreaccuratedatatrafc
information,pleaseconsultyourserviceprovider.

Before You Start Installing the SIM Card
and the Battery
InserttheSIMcardinthecardslot.EnsuretheSIMcardisfacingintherightdirection,
asshowninthegurebelow,andthenslidetheSIMcardintotheslot.
Note:
•WhenremovingtheSIMcard,openthetabandgentlypresstheSIMcardin,then
release.Thecardwillautomaticallypopout.
•DonotremovetheSIMcardwhenitisinuse.Otherwise,thecardandtheWi-Fimay
bedamaged,anddatastoredonthecardmaybelost.
•Do not remove the SIM card when it is in use. Doing so will affect the performance
of your Mobile WiFi and data stored on the SIM card may be lost.
Installing the microSD Card
InserttheMicroSDasshownbelow.
Note:
•TheMicroSDcardisanoptionalaccessory.IfaMicroSDcardisnotprovidedin
thepackage,youmaybuyone.
•ToremovetheMicroSDcard,pressthecardingently.TheMicroSDcardwillpop
outforremoval.
• Do not remove the MicroSD card when it is in use. Otherwise, the card and
the E57 may be damaged, and data stored on the card may be lost.

Charging the Battery
Note:
Ifthebatteryhasnotbeenusedforalongtime,itmustberechargedrst.
Method1:Usingthecharger
Caution:
OnlyusethechargercompatiblewiththeE57andprovidedbythedesignated
manufacturer.Ifachargerincompatiblewiththedevicemodelorprovidedbyother
manufacturersorvendorsisused,theE57mayfailtoworkanddamagetothedevice
mayoccur.Atthesametime,anynationalregulationsoncommunicationsproductsor
warrantyapplicabletotheE57willbecanceled.Thechargerisanoptionalaccessory,if
thechargerisnotprovidedinthepackageyoucancontactyourlocaldealertobuyone.
Method2:ConnectingtoaPCforcharging
ConnecttheMobileWi-FitoaPCusingacompatibledatacable.

Accessing the Internet via Wi-Fi Connection
Note:
Bydefault,managementparametersarepresetontheE57accordingtothe
requirementsofVIVA,theserviceprovider.Youmayfollowthestepsbelowtoquickly
accesstheInternet.Fordetailsabouthowtosetmanagementparameters,seetheHelp
sectionontheWebManagementpage.
Step1: Power on the E57
Pressandhold untilthescreenlightsup.TheE57ispoweredon.
Note:
Pressandhold topowerofftheE57.
Step 2: Establish a Wi-Fi Connection (Below example
uses Windows® XP OS)
1.MakesurethattheWi-Fiisenabled.
2.SelectStart>ControlPanel>NetworkConnections>WirelessNetworkConnection.
Note:
TosetupaWi-Ficonnection,thePCmusthaveawirelessnetworkadapterinstalled.
IfWireless Network Connectionisdisplayed,awirelessnetworkadapterisavailable.
Otherwise,checktomakesureyouhaveawirelessnetworkadapterinstalled.
3.ClickViewavailable(wirelessnetworks)todisplayalistofwirelessnetworksavailable.
4.SelectanetworkindicatedbytheSSIDoftheE57,andthenclickConnect.
Note:
•IftheencryptionparameterisalreadysetfortheE57,theWireless Network
Connectiondialogboxisdisplayed.Enterthenetworkpasswordinthedialogbox.
•TheSSIDandnetworkkeylabelareafxedtoyourE57.PresstheWPSbuttontwice
toviewthecurrentSSIDandwirelessnetworkencryptionkeyonthescreen.
•Waituntilthewirelessconnectioniconisdisplayedinthestatusareainthelowerright
cornerofthePCscreen.

Mode
Auto
Manual
Operations
After the E57 is powered on, it can automatically connect to the
internetwhendatatransmissionisrequired.Ifdatatransmissionisnot
performed over a period of time, the E57 automatically disconnects
fromtheInternetconnection.
LaunchtheWebManagementpageandfollowthepromptstoconnect
toordisconnectfromthenetwork.
Step 3: Access the Internet
AfteryouestablishaWi-Ficonnectionsuccessfully,youcanaccesstheInternetusing
thefollowingmodes.Bydefault,themodeisAuto.
Note:
•LaunchtheWebManagementpagetoselectthemodeforaccessingtheInternet.
•IftheE57accessestheroamingnetwork,theE57automaticallydisconnectsfrom
theestablishednetworkconnection.IfyouneedtoaccesstheInternetfromthenew
network,youmustre-establishanetworkconnection.
Accessing the Web Management Page
1.MakesurethattheconnectionbetweentheE57andthedeviceisproperlyestablished.
2.StarttheInternetbrowserandenterhttp://192.168.1.1intheaddressbar.
3.Enterthepasswordandlogintothewebmanagementpage.
Note:
Thedefaultpasswordisadmin.
Create a Secure Connection
1.Launchthewebbrowserandenterhttp://192.168.1.1intheaddressbar.
2.Enterthepasswordandclicklogin.Thedefaultpasswordisadmin.
3.Clickon“Settings”.
4.Clickon“Quicksetup”.Amessage“Welcometothequicksetupwizard”willbeshown.
5.Clickon“Next”.Amessage“CongureProleSettings”willbeshown.
6.Clickon“Next”.Amessage“CongureDial-upSettings”willbeshown.
7.Clickon“Next”.Amessage“CongureWLANsettings”willbeshown.Insertthe
desiredrouternameinthe“Name(SSID)”eld
8.Clickon“Next”.Forthe“Authentication”select“Auto”,forthe“Encryptionmode”
select“WEP”.Enterthedesirednetworkkeyinthe“Networkkey1”eld.Thiskeywill
berequestedeverytimeausertriestoaccessthisconnection.
9.Clickon“Next”
10.Clickon“Finish”.Amessage“Theactionwilldisconnectyourconnection,areyou
suretoproceed?”willbeshown
11.Clickon“Ok”.
Note:
Thepasswordthatyouwillsetforyourdeviceshouldbeinnumericalformat
(example123456).
Daily Use
Power Saving Mode
IfnooperationisperformedontheE57forawhile,thescreenturnsoff.Pressanykeyto
lightupthescreen.
IftheE57ispoweredbythebatteryonly,choosewhethertoenabletheE57toturnoff
Wi-Fiautomatically.IfthisfunctionisenabledandnoWi-FidevicesaccesstheE57fora
setperiod,theE57turnsoffWi-Fiautomatically.YoucanpressanykeytoturnonWi-Fi
again.
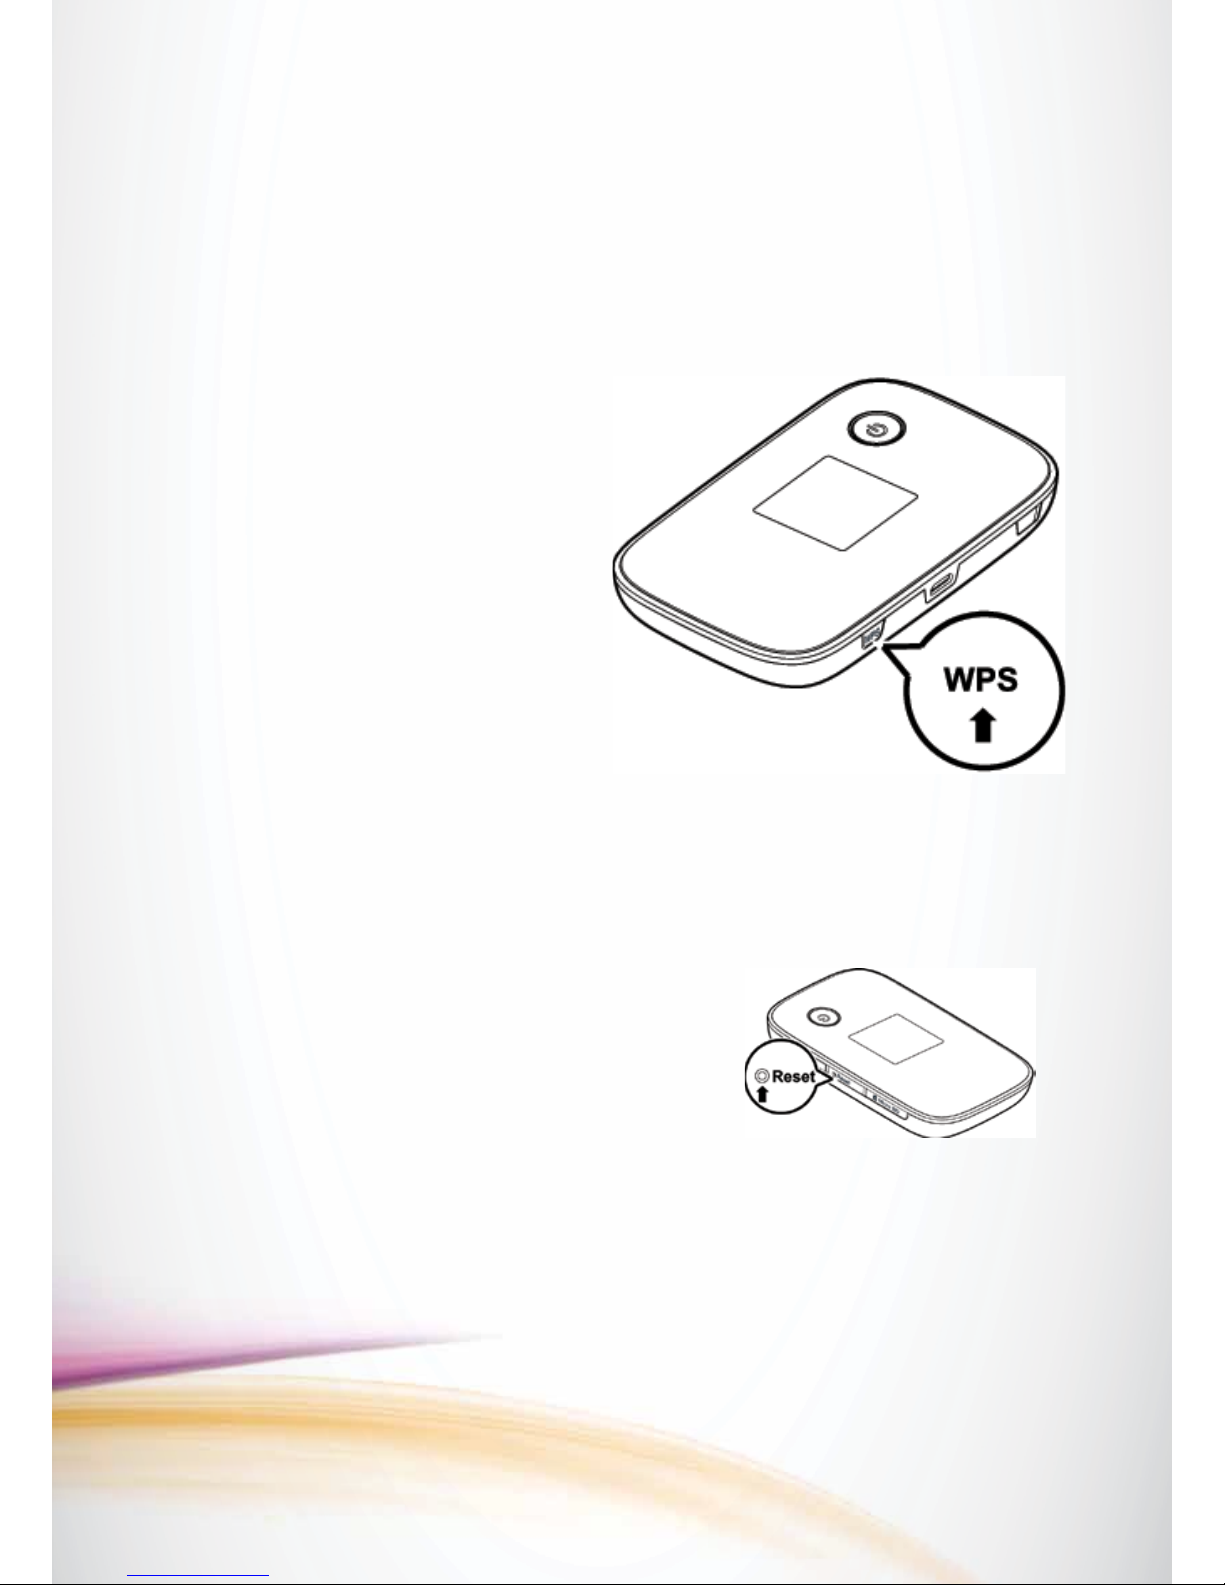
Establishing a WPS
Connection
IfaWi-FiclientconnectedtotheE57
supportstheWPSfunction,anetwork
keywillbeautomaticallygenerated
withoutmanualinput.ToestablishaWPS
connection,performthefollowingsteps:
1.PowerontheE57.
2.Starttheclient.
3.EnabletheWPSfunctionoftheE57.
4.EnabletheWPSfunctionoftheclient.
Note:
•AfterWi-Fiisenabled,pressandholdtheWPSbuttontoenabletheWPSfunctionof
theE57.
•ForWPSoperationsontheclient,seetheuserguideoftheclient.
Restoring Factory Defaults
Ifyouforgetthechangesyouhavemadetosome
parameters,youmayrestorefactorydefaultsand
reconguretheE57.
Torestorethefactorydefaults:pressandholdthe
RESETbuttonuntilthescreenturnsoff.Allfactory
defaultsettingswillbesuccessfullyrestored.
Note:
Restoringfactorydefaultsdeletesallpersonalcongurationsettingsandrestoresall
web-basedmanagementsettingsandparameterstotheirdefaultvalues.
Tips
IfyouareexperiencingdifcultiesusingtheE57,trythefollowing:
•Seethe(Help)sectionontheWebManagementpage.
•RestarttheE57.
•Restorethefactorydefaults.
•Contactyourserviceprovider.
Table of contents
Other Viva Network Router manuals


