Vivanco VivControl 6 User manual

Vivanco GmbH, Ewige Weide 15, D-22926 Ahrensburg, Tel:+49 (0)4102 231235,
Vivanco VivControl 6, 8 & 8 Eco Set Universal Controller
1.
2.
3. = SETUP (3 s) = Set
4. = TV
5. = 1 Set: XXX, e.g. 1= 1XX
6. = 5; Set: XXX, e.g. 5= 15X
7. = 2 Set: XXX, e.g. 2= 152
(GB) Instructions
VivControl 6 + 8 remote control and VivControl 8 EcoSet for
almost all TV, audio, video and other infrared-controllable
equipment
1 Inserting the batteries
Open the battery flap on the back of the remote control, s. Fig.1.
– press the tongue lightly upwards, then insert 2 (VivControl 6)
or 4 alkaline AAA batteries. Check that the polarity markings on
the batteries and in the battery compartment are correctly lined
up (+=+), then close the flap carefully. – Always use undamaged
batteries.
2 Setting label
Attach the enclosed label in your language to the back of the
VivControl so that you can still set the remote control should
these instructions not be available.
3 Adapting to appliances
In order to control your appliances you must adapt or set the
remote control to them. There are three ways of doing so: direct
control code entry, code search or learning the button functions
of original remote controls.
If your VivControl does not understand you it blinks rapidly
several times. Each understood entry is confirmed by an
appliance button blinking once briefly.

Vivanco GmbH, Ewige Weide 15, D-22926 Ahrensburg, Tel:+49 (0)4102 231235,
3.1 Direct control code entry using the enclosed list
Example: setting to control a Panasonic television set:
3.1.1 The enclosed list gives, for example, the Panasonic
Code 152.
Please make sure you have selected the correct list for
television sets (TV).
3.1.2 To prepare code entry, keep the SETUP button
pressed until the lamp (LED) lights constantly.
3.1.3 Then press the required appliance button, e.g. TV,
and the number buttons (e.g. 1 5 2) in sequence.
3.1.4 Once the numbers have been entered the button lamp
goes out and the remote control is ready to control your
appliance.
3.1.5 Finally, test the control code setting by trying to control (in
this example) your television set. If it does not work at all or not
correctly try a different code from the list or the code search (see
below).
3.1.6 How to set the remote control for other appliances is
described in part 3.1. ff. Instead of the TV appliance button,
press another button, e.g. VCR, SAT, CD, CBL, HOME).
Vivanco VivControl remote controls are TV+ remote controls, i.e.
under TV you can only set television sets or video projectors,
but any other appliance under the other appliance buttons.
The button decriptions SAT, ASAT (analog sat receiver), DSAT
(digital sat receiver), VCR, etc. are intended only for easier
orientation.
Example: Under the VCR appliance button you can also enter a
CD code and control your CD player.
3.2 Code search
If the brand of your appliance is not in the list or none of the
codes given fits, we recommend a code search.
3.2.1 Slow code search
3.2.1.1 Switch on the appliance to be controlled. Program is
running.
3.2.1.2 Keep the SETUP button pressed until the lamp
lights constantly in one of the appliance buttons.
3.2.1.3 Press the required appliance button, e.g. ASAT.
3.2.1.4 Press the ON/OFF (appliance on/off) button once
briefly.
3.2.1.5 Press the ON/OFF (appliance on/off) or CHAN+
(next channel) button repeatedly until the appliance, e.g. your
satellite receiver, reacts.
Each time a button is pressed the lamp goes out briefly then
comes back on to confirm.
If no button is pressed, the VivControl automatically continues to
search by sending a signal to your appliance every 3 seconds.
If you notice the reaction of your appliance too late and the next
code has already been emitted you can go back by pressing
CHAN-. If your appliance has switched itself off you must switch
it back on again, e.g. on the appliance or with the original remote
control, to continue searching.
3.2.2 When your appliance reacts, simply press the arrow key
(Enter) and end the search.
3.2.3 To test whether the right setting has been found, simply
press a few buttons on the VivControl and check whether the
functions work correctly. If everything is OK you can now set the
VivControl for the second appliance.
If nothing happens or some of the buttons do not work correctly
you must let the VivControl continue to search for the correct
setting as described starting in 3.2.1.
The VivControl Zap 2 continues with the search at the point
where you ended the search with . When the end of the code
list is reached the search stops automatically. The remote
control blinks quickly several times. The code last confirmed with
remains stored.
The research backwards always ends automatically at the code
last confirmed.
3.2.4 Searching by brand
You can considerably speed up the code search if you search by
brand. This is done as follows:
3.2.4.1 Switch on the appliance to be controlled. Program is
running.
3.2.4.2 Keep the SETUP button pressed until the lamp
lights constantly in one of the appliance buttons.
3.2.4.3 Press the required appliance button, e.g. ASAT.
3.2.4.4 Press the brand number button, button 1 for Philips, 2
for Sony, 3 for Thomson, 4 for Grundig or 6 for Nokia
appliances. Then continue as described in 3.2.1.4.
3.3 Quick code search
Your remote control finds the correct settings almost
automatically in seconds:
3.3.1 Switch on the appliance to be controlled. A channel
number, for example, appears in the display of your satellite
receiver.
3.3.2 Keep the SETUP button pressed until the lamp lights
constantly in one of the appliance buttons.
3.3.3 Press the required appliance button, e.g. ASAT.
3.3.4 Press the ON/OFF (appliance on/off) button once
briefly.
3.3.5 Automatic quick search: If you then do nothing more
the VivControl emits a different signal every 0.7 seconds. When
your appliance reacts, very quickly press the button (Enter)
to confirm a functioning control code. - It is advisable to have
your finger already placed on the (Enter) button so that you
can react quickly enough. Otherwise the VivControl emits the
next signal before you have reacted.
Note: With very few appliances the quick search does not work.
The search is automatically stopped if there is no reaction from
the appliance to be controlled. You should then use a different
setting procedure, e.g. code entry or slow search.
Instead of pressing (Enter) and possibly missing the correct
setting you can also switch the VivControl to slow code search:
to do so, press the CHAN-, CHAN+ or ON/OFF button instead of
the (Enter) button. Then continue as described above in
3.2.1.
Remember to switch your appliance, e.g. SAT, back on again if
you wish to continue searching.
3.3.6 Finally, test the control code setting by trying to control
your SAT appliance. If it does not work correctly, please try the
code search again. The code search then begins with the next
code in the sequence.
3.4 Code identification
You can identify the codes you have set at any time:
3.4.1 Keep the SETUP button pressed until the lamp lights
constantly in one of the appliance buttons.
3.4.2 Press the appliance button, e.g. ASAT.
3.4.3 Press the SETUP button once briefly.
3.4.4 Then read off the 3-digit code: Press the number buttons,
1-9 and 0, one after the other. The hundred figure is displayed
when the appliance button goes out briefly when a button is
pressed. The number corresponds to the button number. The
ten figure is displayed when the appliance button goes out briefly
when a button is pressed a second time. The number
corresponds to the button number. The one figure is displayed
when the appliance button goes out when a button is pressed.
The number corresponds to the button number.
Example: You want to read off the code under the TV button. To
do so, keep SETUP pressed until an appliance button lights
constantly. Then press TV, SETUP, 1 in succession. For button
1 the button goes out briefly and you note 1. Then continue by
pressing 1,2,3,4,5. For button 5 the button goes out briefly and
you write 5 after the 1. Then continue by pressing 1,2. For button
2 the appliance goes out completely and you note the 2 after 15
and have found the code 152.
3.4.5 You can note the numbers on the back of the battery
compartment, e.g. for quick code entry after replacing the
batteries.
The code details are also required when making queries on the
Vivanco Hotline. Please read off all the codes used and make a
note of them before contacting the Hotline. Table: see back page
of these instructions.
Once the code is known, the Hotline can explain which buttons
you can use with the code concerned.
3.5 Learning buttons
If you do not find a suitable code to operate one of your
appliances, or if important button functions are missing, your
VivControl can learn up to 50 additional button functions from
your original remote controls. Proceed as follows:
3.5.1 Before you begin, prepare the VivControl for learning by
keeping the SETUP button pressed until an appliance button
lights up. Then press LEARN twice, followed by SETUP. All
learnt button functions are deleted.
3.5.2 The VivControl learns a button function as follows:

Vivanco GmbH, Ewige Weide 15, D-22926 Ahrensburg, Tel:+49 (0)4102 231235,
3.5.2.1 Your VivControl receives infrared signals from an
original remote control via the light-sensitive/light-emitting semi-
conductor element (glass ball) built in to the upper narrow side.
Original remote controls are fitted with similar elements in a
similar position which are sometimes hidden behind transparent
plastic covers. To learn button functions, the VivControl glass
ball must have good "eye contact" – approx. 2-3 cm – to the
glass ball of the original remote control concerned. Place the two
remote controls head to head on a table in front of you. The two
glass balls should be at roughly the same height and approx. 2-3
cm apart. If necessary, place something under one or both of the
remote controls to prevent them from moving out of this position
when buttons are pressed.
3.5.2.2 Before learning buttons for a particular appliance,
prepare the VivControl for learning by keeping SETUP pressed
until an appliance button lights up. Then press the appliance
button of the appliance to be learnt, e.g. TV, 2x LEARN and then
SETUP in that order. The button is then no longer lit. All the
previously learnt button functions of the selected appliance, e.g.
TV, are deleted.
3.5.2.3 Keep SETUP pressed until an appliance button lights,
then press the button of the appliance whose button functions
are to be learnt, e.g. TV.
3.5.2.4 Briefly press the button that is to learn a new function,
e.g. , and then press the button to be learnt on the original
remote control until the light in the appliance button on the
VivControl goes out briefly then comes back on again.
If the appliance button blinks several times this means that the
button has not been learnt successfully and you must begin
learning again as described in 3.5.2.2. Therefore let the
VivControl learn only a few buttons at first and then check
whether it has worked.
3.5.2.5 The VivControl learns other buttons for the same
appliance as described in 3.5.2.4.
3.5.2.6 When your VivControl has learnt all the necessary
functions, press SETUP to end the learning process. The
appliance button light goes out.
Notes on learning buttons
It is best to use fresh batteries.
Avoid learning under strip lights, energy-saving lamps or in
direct sunlight.
The VivControl memory is organised dynamically. The
number of learnable button functions is dependent on the
original remote controls and can vary between 25 and over 50.
When the memory is full the VivControl blinks for 3
seconds. Before any further buttons can be learnt an appliance
area must be deleted as described in 3.5.2.2.
The appliance buttons TV, VCR, etc., the SHIFT and
SETUP buttons and the Macro buttons M1 and M2 are not
available for button learning. The L1 and L2 buttons on the
VivControl 6 are initially not preprogrammed and are provided
specially for learning purposes.
For all appliances, buttons can have or be allocated dual
functions. The 2nd function is allocated by pressing the SHIFT
button. The appliance button in question displays the availability
of a second function by lighting constantly.
Button learning is also possible for the second function of
a button. This is done by pressing the SHIFT button before the
button to be programmed. If a button has been learnt under
SHIFT you must then press SHIFT again if a button is to be
programmed on the 1st level.
3.6 Home automation (VivControl 8 + 8 EcoSet only)
3.6.1 Attach the FM plug socket of the VivControl 8 EcoSet,
e.g. to the power supply line of your AV system. Plug the FM
plug socket (Receiver Module) into a mains socket and insert
the plug of the mains extension adapter to which your AV
equipment is connected into the FM socket.
It is advisable to connect your video recorder direct to the mains
so that its timer still works when the FM socket has disconnected
your system from the mains.
3.6.2 Please remove the aerial of the receiver module.
3.6.3 Vivanco FM sockets and similar equipment are controlled
by your VivControl via Code 640; setting: see section 3. ff.. The
FM socket included in the VivControl 8 Eco Set is set to A using
a screwdriver and controlled via button 1.
The sockets can only be controlled via FM, i.e. only with the
Vivanco VivControl 8 RF or equivalent FM remote controls.
3.7 Macro or all on one button (VivControl 8 + 8 EcoSet
only)
Your VivControl 8 is fitted with 2 special buttons, M1 and M2.
Using these buttons, control sequences can be performed at the
touch of a single button. You can, for example, switch your entire
audio and video system on and off (System on, System off) by
pressing one button. To make the settings for these function
buttons, proceed as follows:
3.7.1 Keep SETUP pressed until an appliance button lights
constantly.
3.7.2 Press M1 (or M2, depending on which button you
want to program).
3.7.3 Press in the required order the buttons whose functions
are to be performed when the M button is pressed. For example:
System on: Press the buttons (HOME), (socket 1),
(On), (TV), (On), (Sat receiver),(On)
in this order.
3.7.4 Press M1 or M2 to complete the setting. The button light
goes out.
3.7.5 Try out the button after first switching off all the
appliances.
This example assumes that you own a Vivanco VivControl 8
EcoSet and that the adapter socket included is set to House A. If
everything works correctly, the socket first of all switches on the
power for all the appliances, then the TV and the satellite
receiver are switched on.
If you do not have an EcoSet, omit the HOME buttons and try
out the example starting with the TV button.
Up to 14 buttons can be entered in succession.
One button function signal is emitted per second. If an
appliance, e.g. your TV, takes more than one second to accept,
for example, the PWR command, you can set pauses of 2 to 9
seconds between the emission of two button functions. Where a
pause is required, press the Pause (II) button and then a
number button between 2and 9.
3.7.6 You can delete the button sequences under M1 or M2:
3.7.6.1 Keep SETUP pressed until an appliance button lights
constantly.
3.7.6.2 Press the button whose function you want to delete, i.e.
M1 or M2.
3.7.6.3 Press SETUP briefly. The button light goes out and the
button sequence is deleted.
4 Operation
You operate the basic functions of your appliances in the same
way as if you were using the original remote controls.
4.1 Select appliance: You select the appliance to be controlled
using the appliance buttons TV, VCR etc., row (B) (see
illustration at beginning). When a button is pressed and shortly
afterwards, the button lights up and indicates which appliance
you are currently controlling. Apart from the TV button, the other
buttons can be programmed as required, i.e. the lettering is only
a recommendation. The function can be different to that of the
lettering, depending on which appliance you have programmed
on this button. You could, for example, have programmed an
audio cassette player or a Minidisk player under VCR.
4.2 Settings and On/Off: In the top row of buttons (A) you will
find the buttons SETUP and PWR=power=On/Off.
4.3 Volume and channel control: In the button area (C) you will
normally find the buttons for volume control (VOL-=quieter,
Mute on/off, VOL+=louder) and for switching channels (CHAN+=
next channel and CHAN-= previous channel). Volume Punch-
Through function: To simplify operation, the volume buttons
(VOL+ or VOL-) and the Mute button always control the
television set when video recorders are being controlled. If you
have programmed audio or other appliances on an appliance
button the volume buttons control the programmed appliance.
With HOME, for example, a dimmer can be controlled remotely.
4.4 2nd operating level: With the Shift button in area (D)
you select the 2nd button function of the remote control buttons.
After you have pressed Shift and the appliance button is lit you
have all the button functions of the 2nd operating level at your
disposal. In many cases, it is possible to adjust the colour and
brightness of televisions in this way using the volume and
channel buttons. But many other, rarely used buttons are also to
be found on the second level. Try it out for yourself. Our Hotline
can also help you to find missing button functions. You return to
the first level by pressing Shift again or after no button has been
pressed for a longer period.
4.5 Scan / Video+® (SV/V+) in area (D):When this button
is pressed the next channel signal is emitted every 3 seconds
with CHAN+ and the following channels are shown automatically
one after the other without your having to press a button
repeatedly. This function stops when you press any button and

Vivanco GmbH, Ewige Weide 15, D-22926 Ahrensburg, Tel:+49 (0)4102 231235,
ends automatically after 2 minutes.
The Scan function is not possible with video recorders. The
button is then used for Video+® or timer programming of your
video recorder. Consult the instruction manual of your video
recorder or DVD player for further details.
4.6 Number pad and AV: In area (E) you will find the
customary number pad. You normally enter 2-digit numbers
(channel numbers) using the arrow button or SHIFT and
then the arrow button. With the button you normally select
the AV input, e.g. sat receiver or video recorder.
4.7 LEARN, M1, M2, Display: In area (F) you will find
the Learn button, (see above for function),
the buttons to activate sequences (VivControl 8 + 8 EcoSet
only), see above, and the Display button, with which you can
usually switch the status display of your controlled appliances on
and off, as well as the Learn buttons L1 and L2 (VivControl 6).
4.8 Videotext and Toptext: In the areas (G) and (I) you will find
the Videotext buttons , , , and in area (J) die
Toptext buttons Red, Green, Yellow and Blue.
The buttons in area (J) are used to control the drive functions of
video recorders, CD players, etc.
4.9 Button illumination (VivControl 8 + 8 EcoSet only): With
in area (K) you switch on the button illumination. If no more
buttons are then pressed the illumination switches itself off again
after about 5 seconds to save battery power. The VivControl 6
has self-illuminating fluorescent buttons which save energy
during daylight and emit it as light in the dark.
Hotline
Should you have any questions regarding your remote control
you can call our telephone hotline: Tel. 01442 246088. –
Vivanco products are improved constantly. The code library in
particularly is updated continuously. If something is missing, call
possible that we already have a solution to your problem.
Please always indicate the brand and type of the appliances you
wish to control and which Vivanco control code you are using.
See also 3.4.
Specifications
Batteries: 4/2 AAA batteries VivControl 8 + 8 EcoSet/VivControl
6, R03, UM4
Range: max. 7 m
Not for 400 kHz equipment
VivControl 8 EcoSet:
RF: 433 MHz
Mains module: 230 V 16 A
2-year works guarantee
Should your VivControl cease to work within 2 years of
purchasing you will receive a free replacement from Vivanco.
Exceptions: deliberate destruction and normal wear and tear of
the housing and buttons.
® Registered trademark of Gemstar International Inc.
___________________________________________________
(D) Bedienungsanleitung
Fernbedienung VivControl 6 + 8 und VivControl 8 EcoSet für
fast alle Fernseh-, Audio-, Video und anderen
infrarotsteuerbaren Geräte
1 Batterien einlegen
Bitte öffnen Sie die Batterieklappe an der Geräterückseite, s.
Abb.1. – Lasche leicht nach oben drücken, und legen Sie 2
(VivControl 6) bzw. 4 Alkali-Mikrozellenbatterien ein. Achten Sie
auf die angegebenen Polaritäten auf Batterien und im
Batteriefach (+=+), und schließen Sie das Fach wieder
vorsichtig. – Bitte achten Sie darauf, immer einwandfreie
Batterien zu verwenden.
2 Einstellungsaufkleber
Bitte kleben Sie den beigefügten Aufkleber Ihrer Sprache auf die
Rückseite Ihrer VivControl , damit Sie die Fernbedienung auch
einstellen können, wenn diese Anleitung mal nicht zur hand sein
sollte.
3 Geräteanpassung
Um Ihre Geräte steuern zu können, müssen Sie die
Fernbedienung für Ihre Geräte einstellen. Dazu gibt es drei
Möglichkeiten: die direkte Steuerkodeeingabe, die Kodesuche
oder das Lernen von Tastenfunktionen von
Originalfernbedienungen.
Wenn die VivControl Sie nicht versteht, dann blinkt sie mehrfach
heftig hintereinander. Jede verstandene Eingabe quittiert sie mit
einem kurzen Blink einer Gerätetaste.
3.1 Die direkte Steuerkodeeingabe mithilfe der
beigefügten Liste
Beispiel: Einstellung der Fernbedienung für ein Panasonic-
Fernsehgerät:
3.1.1 Aus der beigefügten Liste entnehmen Sie z.B. den
Panasonic-Code 152.
Bitte vergewissern Sie sich, dass Sie die korrekte Liste für
Fernseher (TV) gewählt haben.
3.1.2 Zur Vorbereitung der Kodeeingabe drücken Sie
solange die SETUP (Einstellen)-Taste bis das Lämpchen in
einer Gerätetaste (LED) dauernd leuchtet.
3.1.3 Dann drücken Sie die gewünschte Gerätetaste, z.B.
TV, und danach nacheinander die Zifferntasten (z.B. 1 5 2).
3.1.4 Nach der Zifferneingabe erlischt die Tastenlampe
und die Fernbedienung ist bereit zum Steuern Ihres Gerätes.
3.1.5 Zum Abschluss testen Sie den eingestellten
Steuerkode, indem Sie versuchen in diesem Fall Ihr TV-Gerät zu
steuern. Funktioniert es nicht oder nicht richtig, dann versuchen
Sie bitte einen weiteren Kode aus der Liste oder die Kodesuche,
s.u..
3.1.6 Die Einstellung der Fernbedienung zur Steuerung
weiterer Geräte nehmen Sie entsprechend Abschnitt 3.1. ff. vor.
Anstelle der Gerätetaste TV drücken Sie andere Tasten, z.B.
VCR, SAT, CD, CBL, HOME). .
Vivanco VivControl-Fernbedienungen sind TV+
Fernbedienungen, d.h. Sie können unter TV nur Fernsehgeräte
oder Videoprojektoren einstellen, unter den anderen
Gerätetasten aber jedes beliebige andere Gerät. Die
Tastenbeschriftungen SAT, ASAT (Analogsatempfänger), DSAT
(Digitalsatempfänger), VCR usw.dienen daher nur Ihrer
leichteren Orientierung.
Beispiel: Sie können unter der Gerätetaste VCR auch einen CD-
Kode eingeben und Ihren CD Player steuern
3.2 Die Kodesuche
Wenn die Marke eines Gerätes nicht in der Liste steht oder kein
angegebener Kode paßt, empfiehlt sich eine Kodesuche.
3.2.1 Langsame Kodesuche
3.2.1.1 Bitte das zusteuernde Gerät einschalten. Programm
läuft.
3.2.1.2 SETUP (Einstellen)-Taste drücken, solange bis
das Lämpchen in einer Gerätetaste dauernd brennt.
3.2.1.3 Gewünschte Gerätetaste, z.B. ASAT, drücken.
3.2.1.4 Einmal kurz EIN/AUS (Gerät ein/aus)Taste
drücken.
3.2.1.5 Wiederholt EIN/AUS (Gerät ein/aus) oder
CHAN+ (nächstes Programm) Taste drücken bis Gerät, z.B. Ihr
Satreceiver, reagiert.
Das Lämpchen geht nach jedem Tastendruck zur Bestätigung
kurz aus und wieder an.
Wenn Sie keine Taste drücken, wird die VivControl automatisch
weitersuchen, indem sie alle 3 Sekunden an Ihr Gerät ein Signal
aussendet.
Wenn Sie die Reaktion Ihres Gerätes zu spät bemerkt haben
und schon der nächste Kode gesendet wurde, dann macht das
nichts: Sie können zurück, indem Sie CHAN- drücken. Hatte
sich Ihr Gerät ausgeschaltet, so müssen Sie es, z.B. am Gerät
oder mit der Originalfernbedienung zur weiteren Suche wieder
einschalten.
3.2.2 Wenn Ihr Gerät reagiert, drücken Sie einfach die
Pfeiltaste (Eingabe) und beendenden so die Suche.
3.2.3 Zum Test, ob die richtige Einstellung gefunden
wurde, drücken Sie einfach ein paar VivControl-Tasten und
probieren so die richtige Funktion. Wenn alles ok ist, können Sie
nun die VivControl für das nächste Gerät einstellen.
Wenn gar nichts geht oder einige Tasten nicht richtig
funktionieren, müssen Sie Ihre VivControl, wie ab Abschnitt
3.2.1.beschrieben, weiter nach der richtigen Einstellung suchen
lassen.
Die VivControl setzt die Suche dort fort, wo Sie die Suche mit
abgebrochen hatten. Wenn das Ende der Kodeliste erreicht
ist, endet die Suche automatisch. Dabei blinkt die
Fernbedienung mehrfach schnell hintereinander. Der zuletzt mit
bestätigte Kode bleibt gespeichert.
Die Suche rückwärts, endet immer automatisch beim zuletzt
bestätigten Kode.

Vivanco GmbH, Ewige Weide 15, D-22926 Ahrensburg, Tel:+49 (0)4102 231235,
3.2.4 Markenbegrenzte Suche
Sie können die Kodesuche stark beschleunigen, wenn Sie
markenorientiert suchen lassen. Das geht so:
3.2.4.1 Bitte das zusteuernde Gerät einschalten. Programm
läuft.
3.2.4.2 SETUP (Einstellen)-Taste drücken, solange bis
das Lämpchen in einer Gerätetaste dauernd brennt.
3.2.4.3 Gewünschte Gerätetaste, z.B. ASAT, drücken.
3.2.4.4 Markenziffertaste drücken, Taste 1 für Philips-, 2 für
Sony-, 3 für Thomson-, 4 für Grundig- oder 6 für Nokia-Geräte.
Weiter geht es dann nach Abschnitt 3.2.1.4.
3.3 Schnelle Kodesuche
In wenigen Sekunden findet Ihre Fernbedienung fast
automatisch die richtigen Steuereinstellungen:
3.3.1 Bitte das zusteuernde Gerät einschalten. Z.B.
erscheint eine Programmnummer in der Anzeige Ihres
Satempfängers.
3.3.2 SETUP (Einstellen)-Taste drücken, solange bis
das Lämpchen in einer Gerätetaste dauernd brennt.
3.3.3 Gewünschte Gerätetaste, z.B. ASAT, drücken.
3.3.4 Einmal kurz EIN/AUS (Gerät ein/aus)Taste
drücken.
3.3.5 Automatische schnelle Suche: Wenn Sie dann
nichts weiter tun, sendet die VivControlalle 0,7 Sekunden ein
anderes Signal aus. Wenn Ihr Gerät reagiert drücken Sie sehr
schnell die -Taste (Eingabe) zur Bestätigung eines
funktionierenden Steuerkodes. - Es empfiehlt sich einen Finger
schon vorher auf die (Eingabe)Taste zu legen, damit Sie
schnell genug reagieren können. Sonst sendet VivControlschon
das nächste Signal bevor Sie reagiert haben.
Hinweis: Bei ganz wenigen Geräten funktioniert die schnelle
Suche nicht. Die Suche wird ohne Reaktion des zu steuernden
Gerätes automatisch abgebrochen. Dann bitte ein anderes
Einstellverfahren, z.B. Kodeingabe oder langsame Suche,
anwenden.
Statt (Eingabe) zu drücken und eventuell die richtige
Einstellung zu verpassen, können Sie die VivControl aber auch
auf die langsame Kodesuche umschalten: Dazu drücken Sie
anstatt der (Eingabe) Taste die CHAN-,CHAN+ oder
EIN/AUS Taste. Weiter geht´s dann wie unter Abschnitt. 3.2.1.
weiter oben beschrieben.
Vergessen Sie nicht Ihr Gerät z.B. SAT, wenn Sie weiter suchen
lassen wollen, wieder am Gerät einzuschalten.
3.3.6 Zum Abschluss testen Sie den eingestellten
Steuerkode, indem Sie versuchen z.B. Ihr SAT-Gerät zu
steuern. Funktioniert es nicht richtig, dann versuchen Sie bitte
die Kodesuche noch einmal. Die Codesuche startet dann mit
dem nächstfolgenden Code.
3.4 Codeindentifikation
Sie können die eingestellten Codes jederzeit auslesen:
3.4.1 SETUP (Einstellen)-Taste drücken, solange bis
das Lämpchen in einer Gerätetaste dauernd brennt.
3.4.2 Gerätetaste, z.B. ASAT, drücken.
3.4.3 Einmal kurz SETUP (Einstellen)-Taste drücken.
3.4.4 Dann 3-stelligen Kode auslesen: Drücken Sie die
Zifferntasten, 1-9 und 0, eine nach der anderen. Die
Hunderterziffer wird angezeigt, wenn die Gerätetaste beim
Drücken einer Taste kurz ausgeht. Die Ziffer entspricht der
entsprechenden Tastennummer. Die Zehnerziffer wird
angezeigt, wenn die Gerätetaste beim Drücken einer Taste zum
2. Mal kurz ausgeht. Die Ziffer entspricht der entsprechenden
Tastennummer. Die Einerziffer wird angezeigt, wenn die
Gerätetaste beim Drücken einer Taste erlischt. Die Ziffer
entspricht der Tastennummer.
Beispiel: Sie wollen den Code unter Taste TV auslesen. Dazu
drücken Sie SETUP, solange bis eine Gerätetaste dauernd
brennt. Dann drücken Sie nacheinander TV, SETUP, 1. Bei
Taste 1 erlischt die Taste kurz und Sie notieren die 1. Dann
drücken Sie weiter 1,2,3,4,5. Bei Taste 5 erlischt die Taste kurz
und Sie schreiben hinter die 1 eine 5. Dann drücken Sie weiter
1,2. Bei Taste 2 erlischt die Gerätetaste entgültig und Sie
notieren hinter 15 eine 2 und haben mit 152 den Code gefunden.
3.4.5 Die gefundenen Werte können Sie sich z.B. zum
schnellen Codeeingeben nach Batteriewechseln, z.B. auf der
Rückseite des Batteriefachdeckels, notieren.
Die Kodeangaben werden auch für Rückfragen bei der Vivanco-
Hotline benötigt. Bitte lesen Sie alle verwendeten Codes aus
und notieren Sie sich diese bevor Sie die Hotline anrufen.
Tabelle: s. Rückseite dieser Bedienungsanleitung.
Anhand eines Codes kann Ihnen die Hotline erklären, welche
Tasten Sie bei einem Code benutzen können.
3.5 Tastenlernen
Sollten Sie keinen passenden Code für die Bedienung eines
Ihrer Geräte finden, oder sollten Ihnen wichtige Tasten fehlen,
dann kann Ihre VivControl bis zu 50 Tastenfunktionen von Ihren
Originalfernbedienungen zusätzlich lernen. Gehen Sie
folgendermaßen vor:
3.5.1 Vor dem ersten Tastenlernen bereiten Sie die
VivControl zum Lernen vor, indem Sie SETUP solange drücken
bis eine Gerätetaste leuchtet. Dann drücken Sie nacheinander
2x LEARN und danach SETUP. Die Taste leuchtet dann nicht
mehr. Alle gelernten Tastenfunktionen werden gelöscht.
3.5.2 Eine Tastenfunktion lernt die VivControl wie folgt:
3.5.2.1 Ihre VivControl empfängt Infrarotlichtsignale von
einer Originalfernbedienung über das in der oberen Schmalseite
eingebaute lichtempfindliche/lichtsendende Halbleiterelement
(Glaskugel). Originalfernbedienungen verfügen an ähnlicher
Stelle über ähnliche Elemente, die manchmal hinter
Kunstglasabdeckungen versteckt sind. Zum Lernen von
Tastenfunktionen muss die VivControl Glaskugel guten
Sichtkontakt, Abstand ca. 2 – 3 cm, zu der „Glaskugel“ der
jeweiligen Originalfernbedienung haben. Legen Sie dazu beide
Fernbedienungen Kopf an Kopf vor sich auf eine Tischplatte. Die
beiden „Glaskugeln“ sollten sich in etwa auf einer Ebene in ca.
2-3 cm Sichtabstand befinden. Ggf. sollten Sie etwas unter die
eine und/oder andere Fernbedienung legen, sodass sie ihre
richtigen Positionen beim Drücken der Tasten nicht verändern
können.
3.5.2.2 Vor jedem neuen Tastenlernen für ein Gerät bereiten
Sie die VivControl zum Lernen vor, indem Sie SETUP solange
drücken bis eine Gerätetaste leuchtet. Dann drücken Sie
nacheinander die Gerätetaste, des zu lernenden Gerätes, z.B.
TV, 2x LEARN und danach SETUP. Die Taste leuchtet dann
nicht mehr.Alle dazu gelernten Tastenfunktionen des gewählten
Gerätes, z:B. TV, werden gelöscht.
3.5.2.3 Sie drücken SETUP,solange bis eine Gerätetaste
leuchtet, dann die Taste des Gerätes zu dem Tastenfunktionen
hinzugelernt werden sollen , z.B. TV.
3.5.2.4 Drücken Sie kurz die Taste, die eine neue Funktion
lernen soll, z.B. , und danach die zu lernende Taste auf der
Originalfernbedienung solange bis das Licht in der Gerätetaste
der VivControl kurz aus und wieder angegangen ist.
Sollte die Gerätetaste mehrfach hintereinander blinken, dann
war das Lernen der Taste erfolglos und Sie müssen das Lernen
gemäß Abschnitt 3.5.2.2. erneut beginnen. Lassen die
VivControl daher zum Üben zunächst nur ein paar Tasten lernen
und probieren Sie den Erfolg aus.
3.5.2.5 Weitere Tasten für dasselbe Gerät lernt die
VivControl gemäß Abschnitt 3.5.2.4.
3.5.2.6 Wenn Ihre VivControl alle erforderlichen Funktionen
gelernt hat, drücken Sie SETUP, um den Lernvorgang zu
beenden. Die Gerätetaste erlischt.
Hinweise zum Tastenlernen
Bitte möglichst frische Batterien verwenden.
Vermeiden Sie das Lernen unter Leuchtstoffröhren,
Stromsparlampen, direkter Sonneneinstrahlung.
Der VivControlspeicher wird dynamisch verwaltet. Die
Anzahl der lernbaren Tastenfunktionen hängt von den
Originalfernbedienungen ab und kann je nachdem zwischen 25
und über 50 schwanken.
Wenn der Speicher voll ist, blinkt die VivControl 3
Sekunden lang. Bevor weitere Tastenfunktionen lernbar sind, ist
ein Gerätebereich gemäß Abschnitt 3.5.2.2 zu löschen.
Die Gerätetasten, TV, VCR usw., die SHIFT- und SETUP-
Taste und die Macrotasten M1 und M2 sind zum Tastenlernen
nicht verfügbar. Die Tasten L1 und L2 der VivControl 6 sind
zunächst unbelegt und sind speziell zum Lernen vorgesehen.
Für alle Geräte können Tasten doppelt belegt sein oder
belegt werden. Die 2. Belegung erreichen Sie, indem Sie die
SHIFT-Taste drücken. Die entsprechende Gerätetaste zeigt die
Verfügbarkeit der 2.Belegung durch dauerndes Brennen an.
Tastenlernen ist auch auf der 2. Belegung einer Taste
möglich. Dazu muss vor der zu programmierenden Taste die
SHIFT-Taste gedrückt werden. Wenn eine Taste unter SHIFT
gelernt wurde, ist anschließend wieder SHIFT zu drücken, wenn
eine Taste wieder auf der 1.Belegungsebene programmiert
werden soll.

Vivanco GmbH, Ewige Weide 15, D-22926 Ahrensburg, Tel:+49 (0)4102 231235,
3.6 Haustechnik (nur VivControl 8 + 8 EcoSet)
3.6.1 Montieren Sie die Funksteckdose des VivControl 8
EcoSets, z.B. in die Stromversorgungszuleitung Ihrer AV-
Anlage. Die Funksteckdose (Receiver Module) stecken Sie
dazu in eine Haussteckdose und in die Funkdose stecken Sie
den Stecker einer Stromverteiler-Steckerleiste an die Ihre AV-
Geräte angeschlossen sind.
Evtl. sollten Sie Ihren Videorecorder direkt an das Stromnetz
anschließen, damit sein Timer auch noch funktioniert, wenn die
Funkdose Ihr System vom Netz getrennt hat.
3.6.2 Bitte ziehen Sie die Antenne der Steckdose heraus.
3.6.3 Vivanco Funksteckdosen und ähnliche Geräte
steuert Ihre VivControl über den Code 640, Einstellung: s.
Abschnitt 3 ff.. Die zum VivControl 8 Eco Set gehörige
Funksteckdose wird mittels Schraubenzieher auf A gestellt und
über Taste 1 gesteuert.
Die Dosen lassen sich nur über Funk steuern, d.h. nur mit der
Vivanco VivControl 8 RF oder entsprechenden
Funkfernbedienungen.
3.7 Macro oder alles auf einer Taste (nur VivControl
8 + 8 EcoSet)
Ihre VivControl 8 ist mit 2 Spezialtasten, M1 und M2,
ausgestattet. Mit ihnen lassen sich Steuersequenzen auf einen
einzigen Tastendruck hin ausführen. Z.B. können Sie mit einen
Tastendruck Ihre ganze Audio- und Videoanlage ein- und ggf.
wieder ausschalten (System ein,System aus). Zur Einstellung
dieser Funktionstasten gehen Sie folgt vor:
3.7.1 Drücken Sie SETUP solange bis eine Gerätetaste
dauernd leuchtet.
3.7.2 Drücken Sie M1 (oder M2, je nachdem welche
Taste Sie einstellen wollen).
3.7.3 Drücken Sie nacheinander die Tasten, die nachher
nach drücken der M-Taste nacheinander ausgeführt werden
sollen. Z.B. System ein: Sie drücken nacheinander die Tasten
(HOME), (Dose 1), (On=Ein), (TV),
(Ein), (Satempfänger),(Ein).
3.7.4 Drücken Sie M1 oder M2 um die Einstellung
abzuschließen. Die Taste erlischt.
3.7.5 Probieren Sie die Taste aus nachdem Sie zunächst
alle Geräte ausgeschaltet haben.
Das Beispiel geht davon aus, dass Sie ein Vivanco VivControl 8
EcoSet besitzen und die mitgelieferte Zwischensteckdose auf
House A gestellt ist. Wenn alles richtig funktioniert schaltet
zunächst die Dose den Strom für die Geräte ein, dann wird der
Fernseher und danach der Satellitenreciever eingeschaltet.
Wenn Sie nicht über ein EcoSet verfügen, dann lassen Sie bitte
die HOME-Tasten weg, und probieren Sie das Beispiel ab der
Eingabe der TV-Taste.
Es können bis zu 14 Tasten hintereinander eingegeben werden.
Es wird je Sekunde eine Tastenfunktion ausgeben. Wenn ein
Gerät, z.B. Ihr Fernseher, mehr als eine Sekunde braucht, um
z.B. den PWR-Befehl anzunehmen, dann können Sie Pausen
zwischen 2 und 9 Sekunden zwischen der Aussendung von zwei
Tastenfunktionen einstellen. Dort wo eine Pause erwünscht ist
drücken Sie die Pausen- II Taste und danach eine Zifferntaste
zwischen 2und 9.
3.7.6 Sie können die Tastenfolgen unter M1 oder M2
wieder löschen:
3.7.6.1 Drücken Sie SETUP solange bis eine Gerätetaste
dauernd leuchtet.
3.7.6.2 Drücken die Taste deren Funktion Sie löschen
wollen, also M1 oder M2.
3.7.6.3 Drücken Sie kurz SETUP. Die Taste erlischt und die
Tastenfolge ist gelöscht.
4 Bedienung
Sie bedienen Ihre Geräte praktisch genauso, wie Sie es von
Ihren Originalfernbedienungen her kennen.
4.1 Gerät auswählen: Mit den Gerätetasten TV, VCR
usw., Reihe (B), s. Abbild vorn, wählen Sie das zu steuernde
Gerät aus. Beim Drücken einer Taste und kurz danach leuchtet
die Taste und zeigt Ihnen an, welches Gerät Sie gerade steuern.
Außer der Fernsehtaste TV sind die anderen Tasten beliebig
einstellbar. D.h. ihre Beschriftung ist nur eine Empfehlung, je
nachdem welches Gerät Sie dort eingestellt haben, kann die
Funktion anders als beschriftet sein. Z.B. könnten Sie unter VCR
einen Audiokassettenrecorder oder einen Minidiskplayer
einprogrammiert haben.
4.2 Einstellungen und Ein/Aus: In der obersten
Tastenreihe (A) finden Sie die Taste SETUP=Einstellen und
PWR=power= Ein/Aus.
4.3 Lautstärke und Programmsteuerung: Im
Tastenbereich (C) finden Sie üblicherweise die Tasten zur
Lautstärkeregelung ((VOL-=leiser, Stumm ein/aus,
VOL+=lauter) und zum Programmwechsel (CHAN+= nächster
Kanal und CHAN-= vorheriger Kanal). Lautstärke-Punch-
Through-Funktion: Zur Vereinfachung der Bedienung steuern
die Lautstärketasten (VOL+ oder VOL-) und die
Stummschalttaste (Stumm) immer das Fernsehgerät, wenn
Videogeräte gesteuert werden. Wenn Sie Audio oder andere
Geräte unter einer Gerätetaste eingestellt haben, steuern die
Lautstärketasten das eingestellte Gerät. Z.B. bei HOME kann
eine Dimmer ferngesteuert werden.
4.4 2. Bedienebene: Mit der Shift-Taste im Bereich
(D) wählen die 2. Tastenfunktion der Fernbedienungstasten.
Nachdem Sie Shift gedrückt haben, die Gerätetaste leuchtet,
stehen Ihnen alle Tastenfunktionen der 2. Belegungsebene zur
Verfügung. Häufig können Sie bei Fernsehern so über
Lautstärke- und Programmtasten Farbe und Helligkeit steuern.
Aber auch vielen andere, selten gebrauchte Tasten finden Sie
auf der zweiten Ebene. Versuchen Sie´s doch mal. Aber auch
unsere Hotline kann Ihnen helfen, vermisste Tasten zu finden.
Sie kommen wieder auf die erste Ebene, wenn Sie noch mal
Shift drücken oder länger keine Taste drücken.
4.5 Scan bzw. ShowView® (SV/V+) im Bereich (D):
Wenn Sie diese Taste drücken, wird alle 3 Sekunden der
nächste Kanal mit CHAN+ ausgegeben und automatisch die
folgenden Programme nacheinander gezeigt, ohne dass Sie
ständig eine Taste drücken müssen. Wenn Sie irgendeine Taste
drücken, hält das Kanalweiterschalten an. Nach 2 Minuten endet
die Funktion automatisch.
Die Scanfunktion ist nicht bei Videorecordern möglich. Die Taste
wird dann zur ShowView® bzw. Timerprogrammierung Ihres
Videorecorders verwendet. Näheres: s. Bedienungsanleitung
Ihres Video- oder DVD-Recorders.
4.6 10er-Stelle und AV: Im Bereich (E) finden Sie die
gewohnte 10er-Tastatur. 2-stellige Zahlen (Kanalnummern)
geben Sie in der Regel über die -Pfeil- bzw. SHIFT und
dann Pfeiltaste ein. Mit der -Taste wählen Sie i.d.R. den AV-
Eingang z.B. den Satreceiver oder Videorecorder.
4.7 LEARN, M1, M2, Anzeige/Display: Im Bereich (F)
finden Sie die Lerntaste, Funktion s.o., die
Tasten zum Aufrufen von Sequenzen (nur VivControl 8 + 8
EcoSet) s.o. und die Displaytaste, mit der Sie i.d.R. die
Statusanzeige Ihrer gesteuerten Geräte ein- und wieder
ausschalten können, sowie auf der VivControl 6 die Lerntasten
L1 und L2.
4.8 Videotext und Toptext: In den Bereichen (G) und (I)
finden Sie die Videotexttasten , , , und im
Abschnitt (J) die Toptexttasten Rot, Grün, Gelb und
Blau. Die Tasten im Bereich (J) werden bei Videorecordern,
CD Playern usw. zur Steuerung der Laufwerkfunktionen
verwendet.
4.9 Tastaturbeleuchtung (nur VivControl 8 + 8 EcoSet):
Mit im Bereich (K) schalten Sie die Tastenbeleuchtung ein.
Wenn Sie danach keine weitere Taste drücken, wird die
Beleuchtung nach ca. 5 Sekunden wieder ausgeschaltet, um
Batteriestrom zu sparen. Die VivControl 6 verfügt über
selbstleuchtende Fluoriszenztasten, die bei Tageslicht die
Energie speichern und als Licht im Dunkeln wieder abgeben.
Hotline
Sollten Sie Fragen zu Ihrer Fernbedienung haben, dann rufen
Sie unsere Telefon-Hotline an: Tel. 04102-231235. – Vivanco
Produkte werden ständig verbessert. Insbesondere die
Kodebibliothek wird ständig aktualisiert. Wenn Sie etwas
vermissen, rufen Sie uns an oder schreiben Sie uns ein E-Mail,
[email protected]. Es ist gut möglich, dass wir bereits eine
Lösung für Ihr Problem haben.
Bitte teilen Sie uns immer die Marke, den Typ Ihrer
zusteuernden Geräte mit und welchen Vivanco Steuerkode Sie
verwenden, siehe auch Abschnitt. 3.4.
Technische Daten
Batterien: 4/2x Mikrozellen VivControl 8 + 8 EcoSet/VivControl
6, R03, UM4
Reichweite: max. 7 m
Nicht für 400 kHz Geräte
VivControl 8 EcoSet:
RF: 433 MHz

Vivanco GmbH, Ewige Weide 15, D-22926 Ahrensburg, Tel:+49 (0)4102 231235,
Netzmodul: 230 V 16 A
2 Jahre Werksgarantie
Fällt Ihre VivControl innerhalb von 2 Jahren nach dem Kauf aus,
dann bekommen Sie von Vivanco kostenlos Ersatz.
Ausnahmen: vorsätzliche Zerstörung und normale Abnutzung
des Gehäuses und der Tasten.
® Registrierte Marke der Gemstar International Inc.
___________________________________________________
(F) Mode d’emploi
Télécommande VivControl 6 + 8 et VivControl 8 EcoSet
compatible avec presque tous les téléviseurs, appareils
audio et vidéo et autres dispositifs à commande par rayons
infrarouges
1 Mise en place des piles
Ouvrez le volet du compartiment des piles au dos de
l’appareil, cf. fig. 1. – Relevez légèrement la languette et
introduisez dans le compartiment 2 (VivControl 6) ou 4 piles
alcalines rondes R03. Veillez à respecter la polarité indiquée sur
les piles ainsi que dans le compartiment des piles (+=+), et
refermez ce dernier avec précaution. – Veillez à toujours utiliser
des piles bien chargées et en parfait état.
2 Autocollant de réglage
Veuillez coller l’autocollant fourni, dans la langue de votre pays,
au dos de votre VivControl, de manière à pouvoir régler la
télécommande même lorsque vous n’avez pas ce mode
d’emploi sous la main.
3 Adaptation aux divers appareils
Pour pouvoir commander vos appareils, vous devez régler la
télécommande sur ces mêmes appareils. Il existe ici trois
possibilités : l’entrée directe du code de commande, la
recherche préalable des codes ou l’apprentissage des fonctions
des touches des télécommandes originales.
Lorsque VivControl ne vous comprend pas, elle clignote
vivement plusieurs fois de suite. Elle confirme chaque saisie
clairement comprise par un clignotement bref de l’une des
touches de l’appareil.
3.1 Entrée directe des codes de commande à l’aide
de la liste fournie
Exemple : réglage de la télécommande pour un téléviseur
Panasonic :
3.1.1 Sur la liste jointe, prenez par exemple le code
Panasonic 152.
Veuillez vous assurer que vous avez bien choisi la liste
correspondant aux téléviseurs (TV).
3.1.2 Pour préparer l’entrée du code, appuyez sur la
touche SETUP (réglage) jusqu’à ce que le petit voyant
lumineux dans l’une des touches de l’appareil (diode) reste
allumé en permanence.
3.1.3 Appuyez ensuite sur la touche de l’appareil
souhaitée, TV, par ex., puis consécutivement sur les touches
numériques (1 5 2, par ex.).
3.1.4 Une fois les chiffres entrés, le voyant de la touche
s’éteint et la télécommande est prête à fonctionner.
3.1.5 Pour finir, testez le code de commande que vous
venez de régler en essayant dans le cas présent de commander
votre téléviseur. Si la commande ne fonctionne pas du tout ou si
elle ne fonctionne pas correctement, essayez un autre code de
la liste ou procédez à la recherche de code, voir ci-dessous.
3.1.6 Pour régler la télécommande sur d’autres appareils,
veuillez vous reporter aux instructions contenues dans la section
3.1 et suivantes. Au lieu d’appuyer sur la touche TV, appuyez
sur d’autres touches, VCR, SAT, CD, CBL, HOME par ex.).
.
Les télécommandes VivControl Vivanco sont des
télécommandes TV+ ; autrement dit, vous pouvez régler
uniquement des téléviseurs ou des vidéoprojecteurs avec la
touche TV, mais régler n’importe quel autre appareil en
utilisant les autres touches d’appareil. Les inscriptions sur les
touches SAT, ASAT (receveur analogique), DSAT (receveur
numérique), VCR etc. n’ont par conséquent qu’un caractère
indicatif.
Exemple : Avec la touche VCR, vous pouvez aussi entrer un
code CD et commander votre lecteur CD.
3.2 Recherche de code
Au cas où la marque de votre appareil ne figure pas sur la liste,
ou si aucun code indiqué ne fonctionne, il est recommandé de
procéder à la recherche de code.
3.2.1 Recherche de code lente
3.2.1.1 Mettre l‘appareil à commander sous tension. Le
programme se déroule.
3.2.1.2 Appuyer sur la touche de réglage SETUP jusqu’à
ce que le voyant lumineux dans l’une des touches d’appareil
reste allumée en permanence.
3.2.1.3 Appuyer sur la touche d’appareil souhaitée,
ASAT, par ex.
3.2.1.4 Appuyer brièvement et une seule fois sur la touche
MARCHE/ARRÊT (marche/arrêt appareil).
3.2.1.5 Appuyer plusieurs fois sur la touche
MARCHE/ARRÊT (marche/arrêt appareil) ou sur CHAN+
(chaîne suivante) jusqu’à ce que l’appareil (votre receveur
satellite, par ex.), réagisse.
A chaque fois que vous pressez une touche, le témoin lumineux
s’éteint brièvement et se rallume pour confirmation.
Si vous n’appuyez sur aucune touche, la VivControl va
poursuivre automatiquement sa recherche en envoyant toutes
les 3 secondes un signal à votre appareil.
Si vous avez remarqué trop tard que votre appareil avait réagi et
si le code suivant a déjà été envoyé, cela ne fait rien : vous
pouvez revenir en arrière en appuyant sur CHAN- . Si votre
appareil s’est éteint, vous devez le rallumer sur l’appareil même
ou avec la télécommande originale pour pouvoir continuer la
recherche.
3.2.2 Dès que votre appareil réagit, il vous suffit d’appuyer
sur la touche fléchée (Entrée) pour arrêter la recherche.
3.2.3 Pour vérifier si vous avez bien trouvé le réglage
correct, appuyez sur diverses touches de votre VivControl et
assurez-vous ainsi que l’appareil fonctionne correctement. Si
tout es en ordre, vous pouvez alors régler votre VivControl pour
l’appareil suivant.
Si rien ne fonctionne, ou si certaines touches ne fonctionnent
pas correctement, il faut continuer à faire rechercher le réglage
adéquat par votre VivControl, en procédant de la manière
décrite à partir de la section 3.2.1.
La VivControl reprend la recherche là où vous l'aviez
interrompue en appuyant sur . La recherche s'arrête
automatiquement lorsque la fin de la liste des codes est atteinte.
La télécommande clignote alors plusieurs fois à un rythme
rapide. Le dernier code confirmé par reste mémorisé.
La recherche à rebours s’achève toujours automatiquement par
le dernier code confirmé.
3.2.4 Recherche limitée par des repères
Vous pouvez accélérer considérablement la recherche de code
en faisant effectuer la recherche selon des repères. Cela
fonctionne ainsi :
3.2.4.1 Allumer l’appareil à commander. Le programme se
déroule.
3.2.4.2 Appuyer sur la touche SETUP (réglage), jusqu’à
ce que le voyant lumineux dans l’une des touches d’appareil
reste allumé en permanence.
3.2.4.3 Appuyer sur la touche d’appareil souhaitée,
ASAT, par exemple.
3.2.4.4 Appuyer sur la touche chiffrée des marques, touche
1 pour les appareils Philips, touche 2 pour Sony, touche 3 pour
Thomson, touche 4 pour Grundig ou touche 6 pour Nokia. Se
reporter ensuite à la section 3.2.1.4.
3.3 Recherche de code accélérée
Votre télécommande trouve ici en quelques secondes, et
presque automatiquement, les réglages de commande adéquats
:
3.3.1 Allumer l’appareil à commander. Un numéro de
chaîne apparaît par exemple sur l’affichage de votre récepteur
satellite.
3.3.2 Appuyer sur la touche SETUP (réglage) jusqu’à
ce que le voyant lumineux dans l’une des touches d’appareil
reste allumé en permanence.
3.3.3 Appuyer sur la touche d’appareil souhaitée,
ASAT, par exemple.
3.3.4 Appuyer brièvement et une seule fois sur la touche
MARCHE/ARRÊT (marche/arrêt appareil).
3.3.5 Recherche automatique accélérée : si vous ne
faites ensuite plus rien, la VivControlenvoie à intervalle de 0,7
secondes un signal à chaque fois différent. Si votre appareil
réagit, appuyez alors très vite sur la touche (entrée) pour
confirmer un code de commande efficace. – Nous vous
conseillons de placer à l’avance un doigt sur la touche
(entrée) pour pouvoir réagir avec une rapidité suffisante, sinon la

Vivanco GmbH, Ewige Weide 15, D-22926 Ahrensburg, Tel:+49 (0)4102 231235,
VivControlaura déjà émis le signal suivant avant que vous
n'ayez réagi.
N.B. : Sur certains appareils, très peu nombreux, la recherche
accélérée ne fonctionne pas. La recherche s'arrête
automatiquement sans que l'appareil à commander ait réagi.
Utiliser dans ce cas un autre procédé de réglage comme l'entrée
de code ou la recherche lente.
Au lieu d’appuyer sur (entrée) et de manquer éventuellement
le réglage adéquate, vous pouvez également commuter la
VivControl sur la recherche de code lente : Au lieu d’appuyer
sur la touche (Entrée), pressez pour cela la touche CHAN-,
CHAN+ ou MARCHE/ARRÊT. Pour continuer, procédez ensuite
comme décrit à la section 3.2.1. ci-dessus.
Si vous désirez poursuivre la recherche, n'oubliez pas de
rallumer éventuellement votre appareil, par exemple votre
récepteur SAT.
3.3.6 Pour finir, testez le code réglé en essayant par
exemple de commander votre récepteur SAT. Si cela ne
fonctionne pas correctement, veuillez renouveler le processus
de recherche de code. La recherche de code reprend alors avec
le code qui suit.
3.4 Identification des codes
Vous pouvez consulter à tout instant les codes réglés :
3.4.1 Appuyer sur la touche SETUP (réglage) jusqu’à
ce que le voyant lumineux dans l’une des touches d’appareil
reste allumée en permanence.
3.4.2 Appuyer sur la touche de l’appareil, ASAT, par
exemple.
3.4.3 Appuyer brièvement et une seule fois sur la touche
SETUP (réglage).
3.4.4 Procéder ensuite à la lecture du code à 3 chiffres :
Appuyez sur les touches numériques 1-9 et 0, l’une après
l’autre. Le chiffre des centaines est affiché lorsque la touche de
l’appareil s’éteint brièvement lorsque vous appuyez sur une
touche. Le chiffre correspond au numéro de touche. Le chiffre
des dizaines est affiché lorsque la touche de l’appareil s’éteint
une seconde fois brièvement lorsque vous appuyez sur une
touche. Le chiffre correspond au numéro de touche. Le chiffre
des unités est affiché lorsque la touche de l’appareil s’éteint
lorsque vous appuyez sur une touche. Le chiffre correspond au
numéro de touche.
Exemple : Vous souhaitez lire le code sous la touche TV.
Appuyer pour cela sur SETUP jusqu’à ce qu’une touche
d’appareil soit allumée en permanence. Appuyez ensuite
consécutivement sur les touches TV, SETUP, 1. Lorsque vous
appuyez sur la touche 1, elle s’éteint brièvement et vous notez le
1. Ensuite, appuyez sur 1,2,3,4,5. A la touche 5, celle-ci s’éteint
brièvement et vous notez le chiffre 5 derrière le 1. Ensuite,
appuyez sur 1,2. A la touche 2, la touche de l’appareil s’éteint
définitivement et vous notez un 2 derrière le 15 ; vous avez
identifié le code, qui est bien 152.
3.4.5 Vous pouvez par exemple noter les nombres que
vous avez ainsi trouvés au dos du compartiment des piles, pour
entrer rapidement les codes suite à un changement de piles.
Les codes sont également nécessaires lorsque vous faites appel
à l’assistance en ligne de Vivanco. Veuillez lire et noter tous les
codes utilisés avant d’appeler l’assistance téléphonique.
Tableau : voir au dos de ce mode d’emploi.
Ce code permettra à l’assistance téléphonique de trouver les
touches que vous pourrez utiliser pour un code précis.
3.5 Apprentissage des touches
Si vous ne trouvez aucun code adéquat pour la commande de
vos appareils, ou s’il vous manque des touches essentielles,
votre VivControl est en mesure d’apprendre jusqu’à 50 fonctions
supplémentaires à partir de vos télécommandes originales.
Veuillez procéder comme suit :
3.5.1 Avant le premier apprentissage des touches,
préparez la VivControl à cette procédure, en appuyant sur la
touche SETUP jusqu’à ce qu’une touche d’appareil s’allume.
Pressez ensuite 2 fois consécutives la touche LEARN puis
SETUP. La touche n’est plus allumée. Toutes les fonctions de
touches sont supprimées.
3.5.2 La VivControl fait l’apprentissage d’une fonction de
touche comme décrit ci-après :
3.5.2.1 Votre VivControl reçoit des signaux lumineux
infrarouges à partir d’une télécommande originale, via le
composant semi-conducteur (boule de verre)
photosensible/émetteur de lumière intégré dans le petit côté
supérieur. Les télécommandes originales sont dotées à un
emplacement similaire d’éléments de même type, parfois
dissimulés derrière des caches en verre synthétique. Pour
apprendre les fonctions des touches, la boule de verre de la
VivControl doit avoir un bon contact visuel, distance 2 à 3 cm
environ, avec la „boule de verre“ de la télécommande originale.
Pour cela, posez les deux télécommandes en vis-à-vis sur une
table. Les deux „boules de verre“ doivent se trouver à peu près
au même niveau, à une distance à vue de 2 à 3 cm environ. Le
cas échéant, placez quelque chose sous l’une ou l’autres des
télécommandes, pour éviter de changer leurs positions
correctes lorsque vous appuyez sur les touches.
3.5.2.2 Avant chaque nouvel apprentissage des touches
d’un appareil, préparez la VivControl à cette procédure en
appuyant sur la touche SETUP jusqu’à ce qu’une touche
d’appareil s’allume. Pressez ensuite consécutivement la touche
de l’appareil concerné par l’apprentissage, par ex. TV, 2x
LEARN puis SETUP. La touche n’est plus allumée. Toutes les
fonctions des touches apprises depuis l’appareil sélectionné, par
ex. TV, sont supprimées.
3.5.2.3 Appuyez sur la touche SETUP jusqu’à ce qu’une
touche d’appareil soit allumée, puis la touche de l’appareil pour
lequel l’apprentissage supplémentaire des fonctions des touches
doit être effectué, par ex. TV.
3.5.2.4 Appuyez brièvement sur la touche qui devra faire
l’apprentissage d’une nouvelle fonction, par ex. , puis sur la
touche à apprendre, sur la télécommande originale, jusqu’à ce
que le voyant de la touche d’appareil de la VivControl s’éteigne
brièvement et se rallume ensuite.
Si la touche d’appareil clignote plusieurs fois de suite,
l’apprentissage de la touche a échoué et vous devez
recommencer la procédure conformément aux instructions de la
section 3.5.2.2. Il est préférable de laisser tout d’abord la
VivControl n’apprendre que quelques touches, et de vérifier si
cela a bien fonctionné.
3.5.2.5 La VivControl fait l’apprentissage d’autres touches
pour le même appareil conformément aux indications de la
section 3.5.2.4.
3.5.2.6 Lorsque votre VivControl a appris toutes les
fonctions requises, appuyez sur la touche SETUP pour mettre
fin à la procédure d’apprentissage. La touche d’appareil s’éteint.
Remarques relatives à l’apprentissage des touches
De préférence, utiliser des piles neuves.
Evitez d’effectuer l’apprentissage sous des lampes au
néon, des lampes d’économie d’énergie, ou avec un
rayonnement solaire direct.
La mémoire VivControl est à gestion dynamique. Le
nombre de fonctions de touches pouvant être apprise dépend
des télécommandes originales et peut varier entre 25 et 50
fonctions.
Lorsque la mémoire est saturée, VivControl clignote
pendant 3 secondes. Avant de pouvoir effectuer l’apprentissage
d’autres fonctions de touches, une zone d’appareil doit être
supprimée conformément aux instructions de la section 3.5.2.2.
Les touches d’appareil, TV, VCR etc., les touches SHIFT
et SETUP ainsi que les touches macro M1 et M2 ne sont pas
disponibles pour l’apprentissage des touches. Les touches L1 et
L2 de la VivControl 6 ne sont pas programmées tout d’abord et
ont été spécialement prévues pour effectuer l’apprentissage.
Les touches peuvent être occupées en double pour tous
les appareils. Pour atteindre le second niveau d’occupation, il
suffit d’appuyer sur la touche SHIFT. La touche d’appareil
correspondante signale la disponibilité du second niveau
d’occupation en restant allumée en permanence.
Il est également possible de procéder à l’apprentissage au
second niveau d’occupation d’une touche. Pour cela, il faut
appuyer sur la touche SHIFT avant la touche à programmer
Lorsqu’une touche a été apprise sous SHIFT, il faut ensuite
appuyer à nouveau sur SHIFT si l’on souhaite retourner au
premier niveau d’occupation pour y programmer une touche.
3.6 Domotique (VivControl 8 + 8 EcoSet uniquement)
3.6.1 Installez la prise radio du dispositif VivControl 8
EcoSet, sur la ligne d’alimentation en courant de votre
installation AV. A cette fin, connectez la prise radio (Receiver
Module) à une prise domestique, et enfichez dans la prise radio
la prise multipoints de distribution de courant à laquelle vos
appareils sont connectés.
Il est éventuellement conseillé de raccorder directement votre
magnétoscope au réseau de courant, afin que son temporisateur
continue à fonctionner même lorsque la prise radio a déconnecté
votre système du réseau..
3.6.2 Veuillez ôter l’antenne de la prise.

Vivanco GmbH, Ewige Weide 15, D-22926 Ahrensburg, Tel:+49 (0)4102 231235,
3.6.3 Votre VivControl commande les prises radio et
dispositifs similaires via le code 640; pour le réglage, se reporter
à la section 3 et suivantes. La prise radio correspondant au
dispositif VivControl 8 Eco Set se place sur A au moyen d’un
tournevis et sa commande s’effectue avec la touche 1.
Les prises peuvent uniquement être commandées par radio,
c’est à dire uniquement avec la Vivanco VivControl 8 RF ou
avec des télécommandes radio.
3.7 Macro ou tout sur une même touche (VivControl
8 + 8 EcoSet uniquement)
Votre VivControl 8 est dotée de 2 touches spéciales, M1 et M2.
Elles permettent d’effectuer des séquences de commande en
appuyant sur une seule touche. Vous pouvez par ex., en
appuyant sur une seule touche, allumer ou éteindre si vous le
souhaitez l’ensemble de votre installation audio et vidéo
(Marche système,Arrêt système). Pour régler ces touches de
fonction, procédez de la manière suivante :
3.7.1 Appuyez sur la touche SETUP jusqu’à ce que la
touche d’appareil reste allumée en permanence.
3.7.2 Appuyez sur la touche M1 (ou M2, en fonction
de la touche dont vous souhaitez procéder au réglage).
3.7.3 Appuyez consécutivement sur les touches devant
être réglées les unes après les autres une fois que vous avez
appuyé sur la touche M. Par ex. Marche système : vous
appuyez consécutivement sur les touches (HOME),
(Prise 1), (On=Marche), (TV), (Marche),
(Receveur satellite),(Marche).
3.7.4 Appuyez sur la touche M1 ou M2 pour mettre fin au
réglage. Le voyant de la touche s’éteint.
3.7.5 Testez ensuite la touche après avoir tout d’abord
éteint tous les appareils.
Dans l’exemple mentionné, on considère comme acquis que
vous possédez un appareil Vivanco VivControl 8 EcoSet et que
la prise intermédiaire livrée en même temps a été placée sur
House A. Si tout fonctionne correctement, la prise connecte tout
d’abord le courant destiné aux appareils, puis le téléviseur et en
dernier lieu le receveur satellite sont connectés.
Si vous ne disposez pas d’un EcoSet, n’utilisez pas les touches
HOME, et essayez l’exemple donné à partir de la saisie de la
touche TV.
Il est possible d’entrer jusqu’à 14 touches les unes après les
autres.
Une fonction de touche est sortie par seconde. Lorsqu’un
appareil, votre téléviseur par ex., a besoin de plus d’une
seconde pour accepter l’instruction PWR, vous pouvez régler
des pauses dans une plage comprise entre 2 et 9 secondes
entre la sortie de deux fonctions de touches. Là où vous
souhaitez une pause, appuyez sur la touche Pause- II, puis sur
une touche numérique comprise entre 2et 9.
3.7.6 Vous pouvez à nouveau supprimer les séquences de
touches sous M1 ou M2 :
3.7.6.1 Appuyez sur SETUP jusqu’à ce qu’une touche
d’appareil reste allumée en permanence.
3.7.6.2 Appuyez sur la touche dont vous souhaitez
supprimer la fonction, c’est à dire sur M1 ou M2.
3.7.6.3 Pressez brièvement SETUP. La touche s’éteint et la
séquence de touches est supprimée.
4 Commande
Vous commandez les fonctions de base de vos appareils
pratiquement de la même manière qu'avec votre télécommande
originale.
4.1 Sélectionner l’appareil : sélectionnez l’appareil à
commander au moyen des touches d’appareils TV, VCR etc.,
rangée (B), voir fig. avant. Lorsque vous appuyez sur une
touche et juste après, le voyant de la touche s’allume, signalant
quel appareil vous êtes en train de commander. Toutes les
autres touches sont réglables à volonté, sauf la touche de
téléviseur TV. Par conséquent, le marquage des touches revêt
uniquement un caractère indicatif, et dépend de l’appareil que
vous avez réglé ; la fonction réglée peut donc être différente du
marquage. Vous pouvez par ex. avoir programmé sous VCR un
magnétoscope ou un lecteur Mini Disc
4.2 Réglages et Marche/Arrêt : Dans la rangée de
touches supérieure (A), vous trouvez la touche SETUP=Réglage
et la touche PWR=power= Marche/Arrêt.
4.3 Volume et sélection des programmes : Dans la zone
des touches (C), vous trouvez habituellement les touches
servant à régler le niveau sonore ((VOL-=vol. plus faible,
Sourdine Marche/Arrêt, VOL+=volume plus fort) et pour la
sélection des programmes (CHAN+= chaîne suivante et CHAN-
= chaîne précédente). Fonction Punch-Through pour le
Volume : pour simplifier la commande, les touches de volume
(VOL+ ou VOL-) et la touche de sourdine commandent
toujours le téléviseur, lorsque des magnétoscope doivent être
commandés. Si vous avez réglé audio ou d’autres appareils
sous une touche d’appareil, les touches de volume commandent
l’appareil que vous avez réglé. Par ex, vous pouvez
télécommander un variateur de lumière sous HOME.
4.4 2d niveau de commande : Sélectionnez avec la
touche Shift dans la zone (D) la seconde fonction des
touches de la télécommande. Lorsque vous avez appuyé sur la
touche Shift , la touche d’appareil s’allume, et toutes les
fonctions de touches du second niveau d’occupation vous sont
accessibles. Fréquemment, vous pouvez ainsi régler la couleur
et la lumière des téléviseurs au moyen des touches de volume
et de programmes. Vous trouvez aussi au second niveau
beaucoup d‘autres touches rarement utilisées. Essayez-les, tout
simplement. Notre ligne d’assistance pourra également vous
aider à trouver des touches manquantes. Vous revenez au
premier niveau en appuyant à nouveau sur la touche Shift ou
lorsque vous n’appuyez sur aucune touche pendant un certain
temps.
4.5 Scan ou ShowView® (SV/V+) dans la zone (D) :
Lorsque vous appuyez sur cette touche, la chaîne suivante est
sortie toutes les 3 secondes avec CHAN+ , et les programmes
suivants sont automatiquement affichés à la suite les uns des
autres, sans qu’il soit nécessaire d’appuyer sans arrêt sur une
touche. Si vous appuyez sur une touche quelconque, la
commutation sur d’autres chaînes s’arrête. La fonction prend fin
automatiquement au bout de 2 minutes.
La fonction Scan n’est pas disponible pour les magnétoscopes.
La touche est alors utilisée pour le ShowView® ou pour la
programmation de temporisation de votre magnétoscope. Pour
de plus amples détails, veuillez consulter la notice d’utilisation
de votre magnétoscope ou de appareil DVD.
4.6 Clavier 10 touches et AV: Dans la zone (E), vous
trouvez le clavier à 10 touches usuel. Habituellement, vous
entrez les dizaines (chiffres des chaînes) en vous servant de la
touche fléchée ou de la touche SHIFT, puis de la touche
fléchée. Avec la touche , vous sélectionnez généralement
l’entrée AV, le receveur satellite ou le magnétoscope.
4.7 LEARN, M1, M2, Affichage/Display: Dans la zone
(F), vous trouvez la touche d’apprentissage
(fonction décrite plus haut), les touches
permettant l’appel de séquences (VivControl 8 + 8 EcoSet
uniquement), cf. plus haut, et la touche d’affichage, qui vous
permet généralement d’allumer et d’éteindre à nouveau
l’affichage d’état des appareils commandés, ainsi que les
touches d’apprentissage L1 et L2 sur la VivControl 6.
4.8 Vidéotexte et Toptexte: Dans les zones (G) et (I),
vous trouverez les touches de vidéotexte , , ,
et dans la section (J) les touches de Toptexte Rouge,
Vert, Jaune et Bleu. Les touches de la zone (J) sont
utilisées pour commander les fonctions des lecteurs des
magnétoscopes, lecteurs de CD, etc.
4.9 Eclairage des touches (VivControl 8 + 8 EcoSet
uniquement) : Utilisez la touche dans la zone (K) pour activer
l’éclairage des touches. Si vous n’appuyez ensuite sur aucune
autre touche, l’éclairage s’éteint après 5 secondes environ, pour
économiser le courant des piles. La VivControl 6 est dotée de
touches fluorescentes autoluminescentes qui stockent de
l’énergie à la lumière du jour et la restituent ensuite sous forme
de lumière dans l‘obscurité.
Ligne d’assistance (hotline)
Au cas où vous auriez des questions concernant votre
télécommande, appelez notre ligne d'assistance téléphonique
au 01 30795459. – Les produits Vivanco font l'objet d'une
optimisation permanente. Notre bibliothèque de codes,
notamment, est constamment actualisée. Si vous avez un
problème, appelez-nous ou adressez-nous un e-mail, vivanco-
[email protected]. Il est tout à fait possible que nous
ayons déjà une solution à votre problème.
Veuillez nous communiquer dans tous les cas la marque et le
type des appareils à commander, ainsi que le code de
commande Vivanco que vous utilisez, voir également la section
3.4.
Fiche technique
Piles : 4/2 piles rondes R03 VivControl 8 + 8 EcoSet/VivControl
6, R03, UM4

Vivanco GmbH, Ewige Weide 15, D-22926 Ahrensburg, Tel:+49 (0)4102 231235,
Portée maxi : 7 m
Non utilisable pour les appareils de 400 kHz
VivControl 8 EcoSet:
RF: 433 MHz
Module réseau : 230 V 16 A
2 ans de garantie usine
Si votre VivControl tombe en panne dans les deux ans suivant
l’achat, Vivanco vous la remplace gratuitement. Exceptions :
destruction intentionnelle et usure normale du boîtier et des
touches.
® Marque enregistrée de la société Gemstar International Inc.
(E) Instrucciones para el uso
Telemando VivControl 6 + 8 y VivControl 8 EcoSet para casi
todos los televisores, aparatos de audio y vídeo y otros
aparatos de telemando infrarrojo
1 Colocación de pilas
Abra el compartimiento de pilas situado en la parte trasera del
telemando, (ilustr. 1). – Apriete suavemente hacia arriba la
lengüeta y coloque 2 (VivControl 6) resp. 4 micropilas alcalinas.
Preste atención a las polaridades indicadas en las pilas y el
compartimiento de las mismas (+=+) y cierre cuidadosamente el
compartimiento. – Rogamos preste atención a que siempre son
empleadas pilas impecables.
2 Adhesivo con las informaciones de ajuste
Pegue el adhesivo suministrado en su idioma en la parte trasera
de su VivControl, para que pueda ajustar el telemando también
en el caso de no tener al alcance las presentes instrucciones.
3 Adaptación del telemando
Para poder mandar sus aparatos, debe adaptar el telemando a
los aparatos a mandar. A este efecto, hay tres posibilidades: la
introducción directa del código de mando, la búsqueda de
código o el aprendizaje de las funciones de teclas de
telemandos originales.
Si su VivControl no le entiende, da varias veces seguidas luz
intermitente. Cada introducción entendida es confirmada
mediante un brillo breve de una tecla de aparato.
3.1 Introducción directa del código de mando
mediante la lista anejada
Ejemplo: Ajuste del telemando para un televisor Panasonic
3.1.1 En la lista anejada puede localizar p.ej. el código 152
para Panasonic.
Asegúrese de que haya elegido la lista correcta para televisores
(TV).
3.1.2 Para preparar la introducción del código, presione la
tecla SETUP (tecla de ajuste) hasta que la lámpara (LED) de
una tecla de aparato esté permanentemente iluminada.
3.1.3 Entonces, debe presionar la tecla de aparato
requerida, p.ej. TV y después, una tras otra, las teclas de
número (p.ej. 1 5 2).
3.1.4 Después de haber sido introducidos los números, se
apaga la lámpara de tecla y el telemando está listo para mandar
su aparato.
3.1.5 Finalmente, debe ensayar el código de mando
ajustado intentando a mandar p.ej. su televisor. Caso que no
funcione o no funcione correctamente, debe elegir otro código
de la lista o servirse de la búsqueda de código, v. pasos
siguientes.
3.1.6 El ajuste del telemando para el mando de otros
aparatos debe efectuarlo según descrito bajo 3.1. ss.. Entonces,
en vez de la tecla de aparato TV debe presionar otras teclas,
p.ej. VCR, SAT, CD, CBL, HOME.
Los telemandos Vivanco VivControl son telemandos TV+, es
decir que bajo TV sólo puede ajustar televisores o proyectores
de vídeo, bajo las demás teclas de aparato cualquier otro
aparato. Debido a esto, las denominaciones de tecla SAT,
ASAT (receptor analógico SAT), DSAT (receptor digital SAT),
VCR etc. sólo facilitan la orientación.
Ejemplo: Bajo la tecla de aparato VCR también puede introducir
un código para CD o mandar su reproductor respectivo.
3.2 La búsqueda de código
Si la marca de un aparato no está indicada en la lista o si no es
correcto ninguno de los códigos indicados, recomendamos
emplear la búsqueda de código.
3.2.1 Búsqueda de código lenta
3.2.1.1 Activar el aparato a mandar. El programa está
activo.
3.2.1.2 Presionar la tecla SETUP (tecla de ajuste) hasta
que la lámpara de una de las teclas de aparato de luz
permanente.
3.2.1.3 Presionar la tecla de aparato requerida, p.ej.
ASAT.
3.2.1.4 Presionar una vez brevemente la tecla
ACTIVAR/DESACTIVAR (activar/desactivar aparato).
3.2.1.5 Presionar repetidas veces la tecla ACTIVAR/
DESACTIVAR (activar/desactivar aparato) o la tecla
CHAN+ (próximo programa) hasta que reaccione el aparato,
p.ej. su receptor SAT.
Después de cada accionamiento de tecla, la lámpara confirma
apagándose brevemente e iluminándose de nuevo.
Si no es presionada ninguna tecla, el VivControl
automáticamente sigue buscando enviando cada 3 segundos
una señal hacia su aparato.
No importa, si no haya notado a tiempo la reacción de su
aparato y si ya haya sido enviado el próximo código: Puede
regresar mediante el accionamiento de la tecla CHAN. Caso
que su aparato entretanto se haya desactivado, debe activarlo
de nuevo o en el aparato o mediante el telemando original, para
seguir con la búsqueda.
3.2.2 Si su aparato reacciona, presione la tecla de flecha
(tecla de ajuste) y la búsqueda termina.
3.2.3 Para ensayar, si el ajuste localizado es el correcto,
presione algunas teclas del VivControl y compruebe así el
funcionamiento correcto. Si todo funciona correctamente, puede
proceder a realizar el ajuste del VivControl para el próximo
aparato.
Caso que no funcione nada o si algunas teclas no funcionen de
la manera correcta, debe dejar seguir buscando – según
descrito bajo 3.2.1. - su VivControl, hasta que encuentre el
ajuste correcto.
El VivControl sigue la búsqueda allí, donde la había
interrumpido mediante el accionamiento de . En cuanto el
sistema haya alcanzado el fin de la lista de códigos, la
búsqueda es terminada de manera automática. En esto, el
telemando da luz intermitente rápida. El código últimamente
confirmado mediante es guardado.
La búsqueda retrógrada siempre termina automáticamente en el
código últimamente confirmado.
3.2.4 Búsqueda por marcas de aparato
Puede acelerar considerablemente la búsqueda, si efectúa una
búsqueda por marcas. A este efecto, proceda de la manera
siguiente:
3.2.4.1 Activar el aparato a mandar. El programa está
activo.
3.2.4.2 Presionar la tecla SETUP (tecla de ajuste) hasta
que la lámpara de una de las teclas del telemando esté
permanentemente iluminada.
3.2.4.3 Presionar la tecla de aparato requerida, p.ej.
ASAT.
3.2.4.4 Presionar la tecla del número de marca, tecla 1 para
Philips, 2 para Sony, 3 para Thomson, 4 para Grundig o 6 para
aparatos de Nokia. Para los pasos siguientes véase el capítulo
3.2.1.4.
3.3 Búsqueda de código rápida
Dentro de pocos segundos, su telemando localiza casi de
manera automática los ajustes de mando correctos.:
3.3.1 Debe activar el aparato a mandar. P.ej. aparece un
número de programa en el indicador de su receptor de satélite.
3.3.2 Presionar la tecla SETUP (tecla de ajuste) hasta
que la lámpara de una de las teclas esté permanentemente
iluminada.
3.3.3 Presionar la tecla de aparato requerida, p.ej.
ASAT.
3.3.4 Presionar una vez brevemente la tecla ACTIVAR/
DESACTIVAR (activar/desactivar aparato).
3.3.5 Búsqueda rápida automática: Si Usted después no
hace nada, cada 0,7 segundos el VivControl emite una señal
diferente a la anterior. En cuanto su aparato reaccione, debe
presionar rápidamente la tecla (tecla de ajuste) para
confirmar así el código de mando correcto. - Es recomendable
posicionar ya antes un dedo en la tecla (tecla de ajuste),
para poder reaccionar con la rapidez necesaria. Caso contrario,
el VivControl ya emite la próxima señal antes de que Usted haya
reaccionado.

Vivanco GmbH, Ewige Weide 15, D-22926 Ahrensburg, Tel:+49 (0)4102 231235,
Nota: Hay unos pocos aparatos que no reaccionan a la
búsqueda rápida. En tales casos, la búsqueda es
automáticamente interrumpida sin que reaccione el aparato a
mandar. Si fuese así, debe emplear otro procedimiento de
búsqueda, p.ej. introducción de código o la búsqueda de código
lenta .
En vez de presionar la tecla (tecla de ajuste) y perder
eventualmente el ajuste correcto, también puede ajustar el
modo de búsqueda de código lenta en su VivControl: A este
efecto, en vez de la tecla (tecla de ajuste) debe presionar las
teclas CHAN-,CHAN+ o la tecla ACTIVAR/DESACTIVAR. Por
lo demás, debe seguir según descrito bajo 3.2.1.
No olvide activar nuevamente su aparato en el aparato mismo,
p.ej. SAT, si desea seguir con la búsqueda.
3.3.6 Finalmente, debe ensayar el código de mando
ajustado intentando a mandar p.ej. su aparato SAT. Caso que
no funcione de la manera correcta, debería reiniciar la búsqueda
de código. Entonces, la búsqueda de código empieza con el
código siguiente.
3.4 Identificación de códigos
Puede recontar en cualquier momento los códigos ajustados:
3.4.1 Presione la tecla SETUP (tecla de ajuste) hasta
que la lámpara de una de las teclas del telemando esté
permanentemente iluminada.
3.4.2 Presione la tecla de aparato, p.ej. ASAT.
3.4.3 Presione una vez brevemente la tecla SETUP
(tecla de ajuste.
3.4.4 Ahora puede recontar el código de 3 dígitos:
Presione, una tras otra, las teclas de números 1-9 y 0. El dígito
de centenas es indicado, cuando la luz de la tecla de aparato se
apaga brevemente en el momento de presionar una tecla. El
dígito corresponde al número de tecla respectivo. El dígito de
decenas es indicado, cuando la luz de la tecla de aparato se
apaga brevemente en el momento de presionar por segunda
vez una tecla. El dígito corresponde al número de tecla
respectivo. El dígito de unidades es indicado, cuando la luz de la
tecla de aparato se apaga en el momento de presionar una
tecla. El dígito corresponde al número de tecla respectivo.
Ejemplo: Desea recontar el código memorizado bajo la tecla TV.
A esto, debe presionar SETUP hasta que la lámpara de una
tecla de aparato esté permanentemente iluminada. Entonces,
debe presionar, una tras otra, TV, SETUP, 1. Presionando la
tecla 1, la luz se apaga brevemente y Usted apunta el 1. Des-
pués, presione 1,2,3,4,5. Presionando la tecla 5, la luz se apaga
brevemente y Usted apunta el 5. Siga presionando 1,2.
Presionando la tecla 2, la luz de la tecla de aparato se apaga
definitivamente y Usted apunta el 2. El código es el 152.
3.4.5 Puede apuntar los valores averiguados, p.ej. en la
parte trasera del compartimiento de pilas, para poder efectuar
una introducción de código rápida p.ej. después de haber
cambiado las pilas.
Los códigos también son necesarios en caso de llamar al
servicio hot line de Vivanco. Rogamos recuente todos los
códigos empleados y apúntelos antes de llamar el hot-line.
Tabla: v. dorso de las instrucciones de uso.
A través de un código, el servicio hot line le puede explicar,
cuales de las teclas puede emplear respecto a que código.
3.5 Aprender funciones de teclas
Caso que no haya encontrado un código adecuado para
manejar uno de sus aparatos o si le faltaran teclas importantes,
su VivControl puede aprender hasta 50 funciones de tecla de su
telemandos originales. Proceda de la manera siguiente:
3.5.1 Antes de aprender su telemando las funciones de
teclas, debe preparar su VivControl presionando la tecla SETUP
hasta que una tecla de aparato esté iluminada. Entonces,
primero debe presionar 2x LEARN y después SETUP. La luz de
la tecla se apaga. Todas las funciones de tecla anteriormente
aprendidas son anuladas.
3.5.2 De la manera siguiente, VivControl aprende una
función de tecla:
3.5.2.1 A través del elemento semiconductor
fotosensible/emisor de luz (bola de vidrio) instalado en la
superior parte delgada, su VivControl recibe señales infrarrojas
de un telemando original. Telemandos originales disponen de
elementos similares también instalados en lugares semejantes,
que a veces están escondidos por detrás de cubiertas de vidrio
artificial. Para poder aprender funciones de tecla, la bola de
vidrio del VivControl debe tener buen contacto visual, distancia
de aprox. 2 – 3 cm, con la "bola de vidrio" del respectivo
telemando original. A esto, posicione ambos telemandos de tal
manera en la mesa que sus respectivas partes superiores
('cabezas') se encuentren frente a frente. Las dos "bolas de
vidrio" deben hallarse a un nivel, a una distancia visual de
aprox. 2-3 cm el uno del otro. Dado el caso, debería posicionar
algo por debajo de uno u otro de los telemandos, de manera
que los telemandos no se desplazcan durante el accionamiento
de las teclas.
3.5.2.2 Antes de cada aprendizaje de tecla de un aparato
debe acondicionar su VivControl presionando la tecla SETUP
hasta que una tecla de aparato se ilumine. Entonces, debe
presionar, una tras otra, la tecla de aparato del aparato cuyas
funciones el telemando debe aprender, p.ej. TV, 2x LEARN y
después la tecla SETUP. Entonces, la tecla ya no está
iluminada. Todas las funciones de tecla anteriormente
aprendidas del aparato elegido, p:ej. TV, son anuladas.
3.5.2.3 Presione SETUP,hasta que se ilumine una tecla de
aparato. Después, presiona la tecla del aparato cuyas funciones
de teclas quiere que las aprenda el telemando, p.ej. TV.
3.5.2.4 Presione brevemente la tecla que debe aprender la
función nueva, p.ej. , y después la tecla del telemando original
bajo la cual está guardada la función a aprender, hasta que la
luz de la tecla de aparato del VivControl se apague brevemente
y se pone otra vez.
Caso que la tecla de aparato de varias veces luz intermitente, el
aprendizaje no ha funcionado y Usted debe empezar de nuevo
según descrito en cap. 3.5.2.2. Debido a esto, inicialmente sólo
deje aprender el VivControl unas pocas funciones de tecla y
compruebe, si el procedimiento ha sido exitoso.
3.5.2.5 Otras teclas para el mismo aparato las aprende el
VivControl según descrito en cap. 3.5.2.4.
3.5.2.6 En cuanto su VivControl haya aprendido todas las
funciones necesarias, debe presionar SETUP para terminar el
proceso de aprendizaje. La tecla de aparato se apaga.
Advertencias respecto al aprendizaje
Se recomienda emplear pilas nuevas.
Evite que el aprendizaje esté realizado bajo lámparas
fluorescentes, lámparas economizadoras de corriente o
irradiación solar.
La memoria del VivControl es administrada de manera
dinámica. El número de funciones de tecla aprendizables
depende de los telemandos originales y puede, según el caso,
elevarse a entre 25 y 50.
En cuanto la memoria esté llena, el VivControl da luz
intermitente durante 3 segundos. Antes de poder aprender otras
funciones de tecla hay que borrar una sección de aparato según
descrito en cap. 3.5.2.2.
Para aprender, no están a disposición las teclas TV, VCR,
etc.., las teclas SHIFT- y SETUP y las teclas de macro M1 y M2.
Las teclas L1 yL2 del VivControl 6 no están ocupadas y
especialmente previstas para la función de aprender.
Para todos los aparatos, es posible ocupar las teclas con
dos funciones. La 2ª ocupación de una tecla es conseguida a
través del accionamiento de la tecla SHIFT. La respectiva tecla
de aparato indica la disponibilidad de la 2ª función mediante luz
permanentemente iluminada.
También la 2ª ocupación de una tecla es aprendizable. A
esto, antes de presionar la tecla a programar debe presionar la
tecla SHIFT. Caso que la función de una tecla haya sido
aprendizada mediante SHIFT, después debe accionar
nuevamente la tecla SHIFT, si desea programar dicha tecla en
el 1er nivel de ocupación.
3.6 Técnica doméstica (sólo para VivControl 8 + 8
EcoSet)
3.6.1 Monte el tomacorriente radioeléctrico del VivControl
8 EcoSet en, p.ej. la línea de alimentación por la red de su
equipo AV. A esto, enchufe el módulo radioeléctrico (módulo
receptor) en un tomacorriente usual y el enchufe de la barra de
enchufes, en la que están enchufados sus aparatos AV, en el
módulo radioeléctrico.
Eventualmente, debería conectar su videograbador
directamente a la red, para que funcione bien su temporizador
también en casos en que el módulo radioeléctrico corté su
sistema de la red.
3.6.2 Saque la antena del tomacorriente.
3.6.3 Su VivControl controla tomacorrientes
radioeléctricos y aparatos similares a través del código 640;
para el ajuste respectivo: v. cap. 3 ss.. Mediante un
destornillador, el tomacorriente radioeléctrico que forma parte
del VivControl 8 Eco Set es ajustado en A y mandado a través
de la tecla 1.
Estos tomacorrientes son únicamente mandables de manera

Vivanco GmbH, Ewige Weide 15, D-22926 Ahrensburg, Tel:+49 (0)4102 231235,
radioeléctrica, es decir sólo a través del Vivanco VivControl 8
RF o respectivos telemandos radioélectricos.
3.7 Macro o 'todo en una tecla' (sólo para VivControl
8 + 8 EcoSet)
Su VivControl 8 está equipado con 2 teclas especiales, M1 y
M2. A través del accionamiento de estas teclas resulta posible
efectuar secuencias de mando mediante un sólo accionamiento.
de tecla. P. ej. puede activar resp. desactivar su completo
equipo AV mediante un accionamiento de tecla (activar
sistema,desactivar sistema). Para ajustar estas teclas de
función debe proceder de la manera siguiente:
3.7.1 Presione SETUP hasta que una de las teclas de
aparato esté permanentemente iluminada.
3.7.2 Presione M1 (o M2, según la tecla que desea
programar).
3.7.3 Presione, una tras otra, aquellas teclas, cuyas
funciones desea que estén efectuadas después de haber
presionado la tecla M. P.ej. Activar sistema: Presione, una tras
otra, las teclas (HOME), (toma 1), (On=activar),
(TV), (activar), (receptor SAT),(activar).
3.7.4 Presione M1 o M2 para terminar el ajuste. La
lámpara de tecla se apaga.
3.7.5 Pruebe el funcionamiento de esta tecla después de
haber desactivado todos los aparatos.
El ejemplo supone que Usted disponga de un Vivanco
VivControl 8 EcoSet y que el enchufe intermedio suministrado
esté ajustado en House A. Si todo funciona bien, el enchufe
primero activa la corriente para los aparatos; después son
activados el televisor y el receptor de satélite.
Caso que no disponga de un EcoSet, no accione la tecla HOME
y pruebe el ajuste descrito a partir de la introducción a través de
la tecla TV.
Es posible introducir hasta 14 teclas, una tras otra.
Cada segundo es indicada una función de tecla. Si un aparato,
p.ej. su televisor, necesite más que un segundo para aceptar
p.ej. la orden PWR, Usted puede ajustar períodos de 2 a 9
segundos entre la emisión de dos funciones de tecla. Donde
requiere una pausa, debe presionar la tecla Pause- II e
introducir después un número entre 2y 9mediante las teclas
respectivas.
3.7.6 Puede anular los órdenes de teclas bajo M1 oM2:
3.7.6.1 Presione SETUP hasta que una tecla de aparato
esté permanentemente iluminada.
3.7.6.2 Presione la tecla, cuya función desea anular, es
decir M1 o M2.
3.7.6.3 Presione brevemente SETUP. La luz de tecla se
apaga y la función es anulada.
4 Manejo
El manejo de sus aparatos es prácticamente el mismo que el
efectuado con los telemandos originales.
4.1 Seleccionar un aparato: Mediante las teclas de
aparato TV, VCR etc., hilera de teclas (B), (v. ilustr.) debe elegir
el aparato a mandar. Durante el accionamiento de una tecla y
poco después, la tecla está iluminada e indica cual de los
aparatos está mandando actualmente. Excepto de le tecla de
televisor TV, todas las demás teclas son libremente
programables. Es decir, que su designación sólo forma una
recomendación. Según el aparato programado bajo una de
estas teclas, la función puede ser designada de manera
diferente. P.ej. puede programar un radiocassette o un MiniDisc
bajo VCR.
4.2 Ajustes y ACTIVAR/DESACTIVAR: En la hilera de
teclas superior (A) se encuentran las teclas SETUP=Ajustes y
PWR=power= Activar/Desactivar.
4.3 Volumen y mando de canales: En la hilera de teclas
(C) se encuentran normalmente las teclas de regulación de
volumen (VOL-=bajar el volumen, poner/apagar el sonido,
VOL+=aumentar el volumen) y las para cambiar de canal
(CHAN+= próximo canal y CHAN-= canal anterior). Función de
volumen Punch-Through: Para simplificar el manejo, las teclas
de regulación de volumen (VOL+ o VOL-) y la tecla de apagar el
sonido (mute) siempre controlan el televisor, si son
mandados aparatos de vídeo. Si aparatos audio u otros
aparatos están programados bajo una tecla de aparato, las
teclas de regulación de volumen mandan el aparato
programado. P.ej. con HOME es posible mandar un regulador
de intensidad (dimmer).
4.4 2° nivel de manejo: Con la tecla Shift, sección de
teclas (D), es seleccionada la 2ª función de tecla de las teclas
del telemando. Después de haber presionado la tecla Shift y la
tecla de aparato está iluminada, están a disposición todas las
funciones de tecla del 2° nivel de manejo. Frecuentemente, así
puede regular a través de las teclas de regulación de volumen y
selección de canal la intensidad de colores y la de luminosidad
de un televisor. Pero también muchas otras teclas no tan
frecuentemente usadas se encuentran en el 2° nivel. Prúebelo.
Pero también nuestro servicio hot line le puede ayudar a
localizar teclas que echa de menos. Puede regresar al 1er nivel
presionando otra vez la tecla Shift o no presionando ninguna
tecla durante un período más largo.
4.5 Scan resp. ShowView® (SV/V+), en sección
(D):Presionando esta tecla, el telemando cambia cada 3
segundos al próximo canal emitiendo una señal de la función
CHAN+ y son automáticamente elegidos los respectivos
programas siguientes sin que resulte necesario presionar cada
vez de nuevo una tecla. Si presiona cualquier tecla, para la
función de cambio de canal. Después de 2 minutos la función
termina automáticamente. La función Scan no está activa en
caso de videograbadores. Entonces, la tecla es empleada para
ShowView® resp. la programación del temporizador de su
videograbador. Para más informaciones véase las instrucciones
de su videograbador o su reproductor DVD.
4.6 Bloque numérico y AV: En la sección (E) se
encuentra el bloque de teclas numéricas. Números de 2 dígitos
(números de canal) son generalmente introducidos a través de
la tecla flechas resp. la tecla SHIFT y la tecla de flechas.
Mediante la tecla puede seleccionar generalmente la
entrada AV, p.ej. el receptor de SAT o el videograbador.
4.7 LEARN, M1, M2, Indicador/Display: En la sección
(F) se encuentra la tecla de aprendizaje -
para su funcionamiento v.a. -, las teclas para la ejecución de
secuencias (sólo VivControl 8 + 8 EcoSet), y la tecla de display,
con la que, por lo general, puede activar y desactivar el
indicador de estado de los aparatos mandados, y en el
VivControl 6 las teclas de aprendizaje L1 y L2.
4.8 Videotexto y Toptexto: En las secciones (G) y (I) se
encuentran las teclas para el videotexto , , , y
en la sección (J) las teclas para toptexto rojo, verde,
amarillo y azul. Las teclas situadas en la sección (J) son
empleadas para mandar las funciones de drive de
videograbadores, reproductores de CD etc..
4.9 Iluminación de teclado (sólo VivControl 8 + 8
EcoSet): Mediante la tecla en la sección (K) es activada la
iluminación de teclado. Si después no presiona otra tecla, la
iluminación se apaga después de unos 5 segundos, para
ahorrar la energía de las pilas. El VivControl 6 dispone de teclas
autofluorescentes que almacenan la energía de luz durante el
día y que se iluminan en la oscuridad.
Hot-line
En el caso de que tenga preguntas respecto a su telemando,
rogamos llame nuestro hot-line: tel. 93 572 1525. – Productos
Vivanco son permanentemente perfeccionados. Especialmente
la biblioteca de códigos es continuamente actualizada. Si echa
algo de menos, no tarde en llamar o escribirnos un email a
vivanco@vivanco.es. Puede que ya hayamos encontrado la
solución de su problema.. Rogamos siempre nos comunique la
marca, el modelo de sus aparatos a mandar y el código de
mando Vivanco empleado (véase también cap. 3.4.).
Datos técnicos:
Pilas: 4/2x micropilas VivControl 8 + 8 EcoSet/VivControl 6,
R03, UM4
Alcance: máx. 7 m
No apropiado para aparatos de 400 kHz
VivControl 8 EcoSet:
RF: 433 MHz
Fuente de alimentación: 230 V 16 A
2 años de garantía de fábrica
En el caso de que su VivControl Zap 2 falle dentro de 2 años
después de haberlo adquirido, Vivanco sustituye el aparato
gratuitamente. Excepciones: destrucción intencionada y
desgaste normal de la caja y las teclas.
® Marca registrada de Gemstar International Inc.

Vivanco GmbH, Ewige Weide 15, D-22926 Ahrensburg, Tel:+49 (0)4102 231235,
(I) Istruzioni per l'uso
Telecomandi VivControl 6 + 8 e VivControl 8 EcoSet per
quasi tutti i televisori ed altri apparecchi audio-video che
possono essere comandati a infrarossi
1 Inserimento delle batterie
Aprire il vano batterie sul dorso dell'apparecchio; v. fig.1.
Esercitare una leggera pressione che permetterà l'apertura del
coperchio, e inserire 2 (VivControl 6) o 4 batterie ministilo
alcaline. Prestare attenzione alla polarità indicata sulle batterie e
nel vano batterie (+=+); poi richiudere il vano facendo
attenzione. Utilizzare esclusivamente batterie in ottimo stato.
2 Adesivo con istruzioni per la regolazione
Incollare sul dorso di VivControl l'adesivo nella lingua desiderata
fornito insieme al telecomando, affinché sia possibile regolare il
telecomando anche in assenza delle presenti istruzioni per l'uso.
3 Programmazione del telecomando
Prima di poter comandare un apparecchio, è necessario
programmare il telecomando per l'apparecchio in questione. Ciò
può avvenire in tre modi: mediante l'inserimento diretto del
codice di comando, mediante la funzione di ricerca del codice,
oppure mediante l'apprendimento di funzioni di tasto dai
telecomandi originali.
Se VivControl non capisce un inserimento, lampeggia
fortemente più volte; valida invece ogni inserimento capito
mediante il breve lampeggiamento di uno dei tasti di
apparecchio.
3.1 Inserimento diretto di un codice di comando
preso dall'elenco fornito insieme al telecomando
Esempio: regolazione del telecomando per un televisore
Panasonic.
3.1.1 Il codice Panasonic sull'elenco è per es. 152.
Accertarsi che si stia consultando l'elenco giusto per televisori
(TV).
3.1.2 Quale preliminare all'inserimento del codice,
premere il tasto SETUP (regolazione) finché la spia (LED) in
uno dei tasti di apparecchio si accende e resta accesa.
3.1.3 In seguito, premere il tasto di apparecchio
desiderato, per es. TV , e poi, consecutivamente, i tasti
numerici (per es. 1 5 2).
3.1.4 Una volta inserite le cifre, il LED si spegne e il
telecomando è pronto per il comando dell'apparecchio.
3.1.5 In seguito, provare il codice di comando regolato
cercando di comandare, nel caso presente, il televisore. Se non
succede nulla, o se non accade quanto dovrebbe accadere,
tentare con un nuovo codice preso dall'elenco oppure servirsi
della funzione di ricerca del codice (v. sotto).
3.1.6 La regolazione del telecomando per il comando di
altri apparecchi è descritta ai punti 3.1 ss. Al posto del tasto di
apparecchio TV, premere un altro tasto (per es. VCR, SAT, CD,
CBL, HOME). .
I telecomandi VivControl della Vivanco sono telecomandi TV+,
vale a dire che al tasto TV possono essere assegnati solo
televisori o videoproiettori; agli altri tasti di apparecchio però,
un qualsiasi altro apparecchio. Le diciture vicino ai tasti, SAT,
ASAT (ricevitore analogico), DSAT (ricevitore digitale), VCR
ecc., hanno dunque esclusivamente valore indicativo.
Esempio: è possibile assegnare al tasto di apparecchio VCR
anche un lettore di CD, inserendo il relativo codice, e così
comandare il lettore in questione.
3.2 Ricerca del codice
Si raccomanda l'utilizzazione della funzione di ricerca del codice
qualora l'elenco non comprendesse un apparecchio, o se il
codice specificato non funziona.
3.2.1 Ricerca lenta del codice
3.2.1.1 Accendere l'apparecchio che si desidera comandare
(l'apparecchio in questione sarà già regolato su un programma).
3.2.1.2 Premere il tasto SETUP (regolazione) finché la
spia in uno dei tasti di apparecchio si accende e resta accesa.
3.2.1.3 Premere il tasto di apparecchio desiderato, per es.
ASAT .
3.2.1.4 Premere una volta brevemente il tasto ON/OFF
(apparecchio ON/OFF).
3.2.1.5 Premere di nuovo il tasto ON/OFF (apparecchio
ON/OFF) o CHAN+ (programma seguente) finché l'apparecchio
(nell'esempio dato il ricevitore da satelliti) reagisce.
Ogni qualvolta un tasto viene premuto, la spia si spegne e si
riaccende subito dopo per validare.
Se nessun tasto viene premuto, VivControl prosegue la ricerca
automaticamente e trasmette ogni 3 secondi un segnale
all'apparecchio.
Non fa nulla se quando ci si accorge che l'apparecchio ha
reagito, il codice successivo è già stato trasmesso: è possibile
infatti tornare indietro premendo CHAN-. Se nel frattempo
l'apparecchio si è spento, per proseguire la ricerca sarà
necessario riaccenderlo, agendo per es. sull'apparecchio o sul
telecomando originale.
3.2.2 Quando l'apparecchio reagisce, basta premere il
tasto freccia (Enter) per terminare la ricerca.
3.2.3 Per appurare se la regolazione eseguita
automaticamente è anche quella giusta, premere un paio di tasti
sul telecomando VivControl. Se tutto funziona correttamente, è
possibile ora programmare VivControl per un altro apparecchio.
Se invece non funziona nulla o alcuni tasti non funzionano bene,
si dovrà proseguire la ricerca del codice giusto come descritto ai
punti 3.2.1 ss.
VivControl continua la ricerca là dove era stata interrotta
premendo . La ricerca termina automaticamente con il
raggiungimento della fine dell'elenco dei codici. Il telecomando
lampeggia allora rapidamente più volte di seguito. Il codice
validato per ultimo con resta memorizzato.
Una ricerca all'indietro termina sempre automaticamente con il
raggiungimento del codice validato per ultimo.
3.2.4 Ricerca limitata a una marca
E' possibile velocizzare sensibilmente la ricerca del codice
orientandola verso una marca determinata. Procedere come
segue:
3.2.4.1 Accendere l'apparecchio che si desidera comandare
(l'apparecchio in questione sarà già regolato su un programma).
3.2.4.2 Premere il tasto SETUP (regolazione) finché la
spia in uno dei tasti di apparecchio si accende e resta accesa.
3.2.4.3 Premere il tasto di apparecchio desiderato, per es.
ASAT .
3.2.4.4 Premere un tasto numerico associato a una marca:
tasto 1 per gli apparecchi della Philips, 2 per Sony, 3 per
Thomson, 4 per Grundig o 6 per Nokia. Continuare come
descritto al punto 3.2.1.4.
3.3 Ricerca veloce del codice
Il telecomando eseguirà nel giro di pochi secondi, quasi
automaticamente, le regolazioni giuste:
3.3.1 Accendere l'apparecchio che si desidera comandare
(nel caso di un ricevitore da satelliti, appare così, per es., un
numero di programma sul display dell'apparecchio).
3.3.2 Premere il tasto SETUP (regolazione) finché la
spia in uno dei tasti di apparecchio si accende e resta accesa.
3.3.3 Premere il tasto di apparecchio desiderato, per es.
ASAT .
3.3.4 Premere una volta brevemente il tasto ON/OFF
(apparecchio ON/OFF).
3.3.5 Ricerca veloce automatica: se non si agisce su
nessun altro tasto, VivControl emette ogni 0,7 s un altro
segnale. Quando l'apparecchio reagisce, premere
immediatamente il tasto (Enter) per validare il codice di
comando funzionante. Si consiglia di avere già prima il dito sul
tasto (Enter), per reagire con la rapidità necessaria prima
che VivControl possa trasmettere il segnale successivo.
Avvertenza: la ricerca veloce potrebbe non funzionare nel caso
di alcuni apparecchi. La ricerca si interromperà allora
automaticamente benché l'apparecchio che si desidera
comandare non abbia reagito. In tal caso ricorrere ad un'altra
procedura di regolazione, per es. l'inserimento manuale del
codice oppure la ricerca lenta.
Invece di premere (Enter), e perdere così eventualmente la
regolazione giusta, c'è anche la possibilità di attivare la funzione
di ricerca lenta del codice, premendo, al posto del tasto
(Enter), i tasti CHAN-,CHAN+ oON/OFF. Continuare poi come
descritto sopra, al punto 3.2.1.
Non si dimentichi di riaccendere l'apparecchio (agendo
sull'interruttore sull'apparecchio), per es. il ricevitore da
satelliti, se si desidera proseguire la ricerca.
3.3.6 In seguito, provare il codice di comando regolato
cercando di comandare il ricevitore da satelliti. Se non funziona
correttamente, riavviare la ricerca del codice. La ricerca partirà
dal codice successivo.

Vivanco GmbH, Ewige Weide 15, D-22926 Ahrensburg, Tel:+49 (0)4102 231235,
3.4 Identificazione del codice
E' possibile in qualsiasi momento sapere qual è il codice
regolato:
3.4.1 Premere il tasto SETUP (regolazione) finché la
spia in uno dei tasti di apparecchio si accende e resta accesa.
3.4.2 Premere il tasto di apparecchio desiderato, per es.
ASAT .
3.4.3 Premere una volta brevemente il tasto SETUP
(regolazione).
3.4.4 In seguito, per conoscere il codice a tre cifre:
premere i tasti numerici da 1 a 9 e 0 consecutivamente. Un
breve spegnimento del tasto di apparecchio al premere di un
tasto numerico indica la cifra delle centinaia. La cifra
corrisponde al numero del tasto premuto. Un secondo breve
spegnimento del tasto di apparecchio al premere di un tasto
numerico indica la cifra delle decine. La cifra corrisponde al
numero del tasto premuto. Lo spegnimento del tasto di
apparecchio al premere di un tasto numerico indica la cifra delle
unità. La cifra corrisponde al numero del tasto premuto.
Esempio: si desidera conoscere il codice assegnato al tasto TV.
Premere a tale scopo il tasto SETUP finché un tasto di
apparecchio si accende e resta acceso. In seguito, premere
consecutivamente TV, SETUP, 1. Al premere del tasto 1, il tasto
di apparecchio si spegne brevemente; annotarsi allora "1".
Continuare premendo 1, 2, 3, 4, 5. Al premere del tasto 5, il
tasto di apparecchio si spegne brevemente; annotare allora "5" a
fianco di "1". Poi continuare premendo 1, 2. Al premere del tasto
2, il tasto di apparecchio si spegne definitivamente. Aggiungere
dunque "2" a "15" ottenendo così "152", cioè il codice.
3.4.5 I valori così trovati possono essere annotati per es.
sul dorso del vano batterie, per velocizzare il reinserimento del
codice per es. dopo una sostituzione di batterie.
Conoscere i codici è utile anche per quando ci si rivolge
all'Assistenza Clienti della Vivanco. Perciò, prima di contattare
l'Assistenza Clienti, identificare e annotarsi tutti i codici utilizzati.
Tabella: v. dorso delle presenti istruzioni per l'uso.
A partire da un codice, l'Assistenza Clienti può dire infatti quali
tasti premere quando si utilizza il codice in questione.
3.5 Apprendimento di tasti
Qualora non si trovasse il codice adatto al comando di un
apparecchio, o se mancassero tasti importanti, VivControl è in
grado di apprendere fino a 50 funzioni di tasto supplementari dai
telecomandi originali. Procedere come segue:
3.5.1 Cominciare col preparare VivControl
all'apprendimento premendo SETUP finché un tasto di
apparecchio si accende. In seguito, premere consecutivamente
2 volte LEARN, poi SETUP. Il tasto allora si spegne. Tutte le
funzioni di tasto sono cancellate.
3.5.2 VivControl apprende una funzione di tasto nel modo
seguente:
3.5.2.1 VivControl riceve segnali infrarossi da un
telecomando originale tramite l'elemento semiconduttore (globo
di vetro) incorporato nella parte stretta superiore. L'elemento
semiconduttore è sensibile alla luce ed emette luce. I
telecomandi originali dispongono di elementi simili in posizione
simile, nascosti alle volte dietro coperchietti di finto vetro.
Affinché VivControl possa apprendere funzioni di tasto, il globo
di vetro di VivControl e il globo del telecomando originale
devono "poter guardarsi" ad una distanza di ca. 2-3 cm. Disporre
dunque su una tavola entrambi i telecomandi con la testa
dell'uno rivolta verso la testa dell'altro. I due globi di vetro
devono dunque trovarsi alla stessa altezza ad una distanza di
ca. 2-3 cm, e non devono esservi ostacoli fra l'uno e l'altro.
Eventualmente disporre qualcosa sotto un telecomando, o sotto
entrambi, di modo che ciascuno possa conservare la propria
posizione giusta quando vengono premuti i tasti.
3.5.2.2 Prima di ogni nuovo apprendimento di tasti,
preparare VivControl alla procedura premendo SETUP finché un
tasto di apparecchio si accende. In seguito, premere
consecutivamente il tasto di apparecchio desiderato, per es. TV,
poi 2 volte LEARN, e successivamente SETUP. Il tasto allora si
spegne. Tutte le funzioni di tasto apprese relative
all'apparecchio selezionato, per es. TV, sono cancellate.
3.5.2.3 Premere SETUP finché un tasto di apparecchio si
accende, poi il tasto dell'apparecchio da cui le funzioni di tasto
devono essere apprese, per es. TV.
3.5.2.4 Premere brevemente il tasto che deve apprendere
una nuova funzione, per es. , e poi, sul telecomando originale,
il tasto da cui apprendere, finché la spia nel tasto di apparecchio
di VivControl si spegne per riaccendersi subito dopo.
Se il tasto di apparecchio lampeggia più volte consecutivamente,
vuol dire che l'apprendimento del tasto è fallito e che è
necessario ripetere la procedura come descritto al punto 3.5.2.2.
Agli inizi è dunque opportuno fare apprendere a VivControl solo
un paio di tasti, a titolo di prova, per vedere se la procedura
riesce.
3.5.2.5 Come fare apprendere a VivControl altri tasti per lo
stesso apparecchio, è descritto al punto 3.5.2.4.
3.5.2.6 Quando VivControl ha appreso tutte le funzioni
necessarie, premere SETUP per terminare la procedura di
apprendimento. Il tasto di apparecchio si spegnerà.
Avvertenze per l'apprendimento di tasti
Utilizzare batterie possibilmente nuove.
Evitare l'apprendimento alla luce di tubi fluorescenti e di
lampadine per il risparmio di energia, nonché ai raggi diretti del
sole.
La memoria di VivControl è a gestione dinamica. Il numero
delle funzioni di tasto che possono essere apprese dipende dai
telecomandi originali e può variare, a seconda delle circostanze,
fra 25 e più di 50.
Se la memoria è piena, VivControl lampeggerà per 3
secondi. Prima che altre funzioni di tasto possano essere
apprese, sarà necessario cancellare la porzione di memoria
riservata ad un apparecchio come descritto al punto 3.5.2.2.
I tasti di apparecchio TV, VCR ecc., i tasti SHIFT e SETUP
nonché i macrotasti M1 e M2,non possono essere appresi.
Inizialmente, i tasti L1 eL2 di VivControl 6 non sono assegnati;
questi tasti sono specialmente previsti per l'apprendimento.
Per quanto riguarda tutti gli apparecchi, è possibile che i
tasti siano o vengano assegnati a due livelli. Per attivare il
secondo livello premere il tasto SHIFT. Il tasto di apparecchio
attivo segnalerà l'attivazione del secondo livello accendendosi e
restando acceso.
L'apprendimento di tasti è possibile anche al secondo
livello; premere a tale scopo il tasto SHIFT prima del tasto da
programmare. Se un tasto è stato appreso dopo aver premuto
SHIFT, successivamente occorrerà ripremere SHIFT se si
desidera programmare di nuovo un tasto al primo livello.
3.6 Impianti domestici (solamente VivControl 8 + 8
EcoSet)
3.6.1 Per collegare la presa radiocomandata di VivControl
8 EcoSet per es. alla linea di alimentazione dell'impianto audio-
video, inserire la presa (modulo ricevitore) in una presa di
corrente domestica, e inserire nella presa radiocomandata la
spina della striscia di prese cui sono collegati gli apparecchi
audio-video.
Collegare eventualmente il videoregistratore direttamente alla
rete elettrica, di modo che il timer dell'apparecchio possa
continuare a funzionare anche dopo che la presa
radiocomandata ha staccato il sistema dalla rete.
3.6.2 Estrarre l'antenna della presa radiocomandata.
3.6.3 VivControl comanda le prese radiocomandate della
Vivanco ed apparecchi simili mediante il codice 640;
regolazione: v. punti 3 ss. La presa radiocomandata, compresa
in VivControl 8 Eco Set, va regolata su A con un giravite; il
comando si effettua tramite il tasto 1.
E' possibile comandare le prese esclusivamente via radio, cioè
solo con VivControl 8 RF Vivanco o radiocomandi equivalenti.
3.7 Macro o... tutto con un solo tasto (solamente
VivControl 8 + 8 EcoSet)
VivControl 8 è dotato di 2 tasti speciali, M1 e M2, che
consentono di eseguire sequenze di comandi agendo su un
unico tasto. E' possibile per es., premendo un tasto, accendere
o spegnere l'intero impianto audio-video (Sistema ON,Sistema
OFF). Procedere come segue per programmare questi tasti di
funzione:
3.7.1 Premere SETUP finché un tasto di apparecchio si
accende e resta acceso.
3.7.2 Premere M1 (o M2, a seconda del tasto che si
desidera programmare).
3.7.3 Premere consecutivamente i tasti le cui funzioni, una
volta premuto il tasto M, saranno eseguite automaticamente.
Esempio Sistema ON: Premere consecutivamente i tasti
(HOME), (presa 1), (On=ON), (TV), (ON),
(ricevitore da satelliti),(ON).
3.7.4 Premere M1, o M2, per terminare la procedura. Il
tasto si spegnerà.
3.7.5 Provare il tasto dopo aver spento tutti gli apparecchi.

Vivanco GmbH, Ewige Weide 15, D-22926 Ahrensburg, Tel:+49 (0)4102 231235,
L'esempio parte dal presupposto di possedere VivControl 8
EcoSet della Vivanco, e di aver regolato su House A la presa
intermedia compresa nel set. Se tutto funziona correttamente,
dapprima la presa alimenterà gli apparecchi elettricamente, poi
si accenderà il televisore seguito dal ricevitore da satelliti.
Se non si è in possesso di EcoSet, ignorare i tasti HOME e
provare l'esempio cominciando con il tasto TV.
E' possibile premere fino a 14 tasti consecutivamente.
I comandi vengono trasmessi ad intervalli di 1 secondo. Qualora
un apparecchio, per es. il televisore, avesse bisogno di più di un
secondo per accettare per es. il comando PWR, sarà possibile
impostare intervalli maggiori, fra 2 e 9 secondi, fra la
trasmissione di due comandi. Laddove si desidera una pausa,
premere il tasto Pause II e poi un tasto numerico fra 2e 9.
3.7.6 Per cancellare le sequenze di tasti assegnate a M1 o
M2:
3.7.6.1 Premere SETUP finché un tasto di apparecchio si
accende e resta acceso.
3.7.6.2 Premere il tasto di cui si desidera cancellare la
funzione, cioè M1 o M2.
3.7.6.3 Premere brevemente SETUP.Il tasto si spegne e la
sequenza di tasti è cancellata.
4 Comando
Il comando degli apparecchi avviene in modo identico a quello
già noto dei telecomandi originali.
4.1 Selezione apparecchio: i tasti di apparecchio TV,
VCR ecc., fila (B),v. fig. all'inizio, permettono la selezione
dell'apparecchio da comandare. Premendo un tasto, il tasto si
accenderà subito dopo indicando così qual è l'apparecchio
selezionato. A eccezione del tasto del televisore (TV), gli altri
tasti possono essere regolati liberamente. Vale a dire che le
diciture rispettive, indicanti quale apparecchio è assegnato a
quale tasto, hanno solo valore indicativo; la funzione potrà
dunque differire dalla dicitura. Esempio: a VCR sarà possibile
assegnare un registratore di audiocassette o un lettore di
minidisk.
4.2 Impostazioni e ON/OFF: la fila di tasti superiore (A)
comprende il tasto SETUP = regolazione e PWR = power =
ON/OFF.
4.3 Volume e comando di programmi: l'area di tasti (C)
comprende di solito i tasti per regolare il volume (VOL- = più
basso, MUTE ON/OFF , VOL+ = più alto) e per cambiare
programma (CHAN+ = canale seguente e CHAN- = canale
precedente). Funzione "Volume Punch Through": per
semplificare l'utilizzazione, i tasti di regolazione del volume
(VOL+ e VOL-) ed il tasto MUTE agiscono sempre sul
televisore se si comandano apparecchi video; agiranno invece
sull'apparecchio selezionato se si comanda un apparecchio
audio o un altro tipo di apparecchio. Esempio: HOME può
permettere il telecomando di un dimmer.
4.4 2° livello di comando: il tasto Shift nell'area (D)
consente di accedere al secondo livello dei tasti di funzione del
telecomando. Premendo Shift, il tasto di apparecchio si
accende e resta acceso. Adesso tutte le funzioni di tasto del
secondo livello di assegnazione sono disponibili. Ciò permette
spesso, nel caso di un televisore, il comando del colore e della
luminosità agendo sui tasti per il volume e di cambio canale. Il
secondo livello comprende però anche molte altre funzioni di
uso meno frequente. Provare dunque per trovare... oppure
rivolgersi alla nostra Assistenza Clienti che aiuterà a trovare i
tasti perduti. Per tornare al primo livello, premere di nuovo Shift
oppure non premere nessun tasto per un certo tempo.
4.5 Scan o ShowView® (SV/V+) nell'area (D):
premendo questo tasto, un segnale CHAN+ (programma
seguente) sarà emesso ogni 3 secondi; vale a dire che i
programmi seguenti appariranno sullo schermo in successione
senza dover premere un tasto ogni volta. Premere un tasto
qualsiasi per arrestare la scansione. La funzione si disattiva
automaticamente al termine di 2 minuti.
La funzione di scansione non è disponibile nel caso dei
videoregistratori. Il tasto sarà allora utilizzato per la funzione di
ShowView® o per la programmazione del timer del
videoregistratore. Per ulteriori informazioni consultare le
istruzioni per l'uso del registratore di videocassette o di DVD.
4.6 Tasti numerici e audio-video: l'area (E) comprende la
consueta tastiera numerica. L'inserimento di numeri a 2 cifre
(numeri di canale) avviene normalmente agendo sulla freccia
, oppure su SHIFT e poi sul tasto freccia. Il tasto
consente normalmente di selezionare l'ingresso audio-video;
esempio: ricevitore da satelliti o videoregistratore.
4.7 LEARN, M1, M2, visualizzazione/display: l'area (F)
comprende i seguenti tasti : il tasto di
apprendimento (v. sopra per funzionamento), i tasti per il
richiamo di sequenze (solamente VivControl 8 + 8 EcoSet - v.
sopra), il tasto display che consente, normalmente, di
attivare/disattivare la visualizzazione di stato degli apparecchi
comandati, nonché i tasti di apprendimento L1 e L2 (VivControl
6).
4.8 Videotext e Toptext: le aree (G) e (I) comprendono i
tasti Videotext , , , ; l'area (J), i tasti Toptext
Rosso , Verde , Giallo e Blu . I tasti nella zona (J)
vengono utilizzati per il comando delle funzioni di ricerca di
videoregistratori, lettori di CD ecc.
4.9 Illuminazione tastiera (solamente VivControl 8 + 8
EcoSet): il tasto nell'area (K) consente di attivare
l'illuminazione della tastiera. Se nessun altro tasto è premuto per
ca. 5 secondi, l'illuminazione si spegnerà automaticamente per
economizzare la corrente delle batterie. VivControl 6 dispone di
tasti fluorescenti che emettono luce al buio a seguito
dell'assorbimento di luce diurna.
Assistenza Clienti
Se si hanno domande riguardo al telecomando, rivolgersi
all'Assistenza Clienti: tel. 039/24 95 009. I prodotti Vivanco
fanno continuamente l'oggetto di modifiche destinate a
perfezionarli. Soprattutto la biblioteca dei codici viene aggiornata
di continuo. Se si presenta un problema, basta chiamarci o
trasmettere un e-mail al seguente indirizzo:
[email protected]. E' possibilissimo, infatti, che la soluzione
al problema in questione ci sia già nota.
Specificare sempre la marca e il tipo degli apparecchi che si
desidera comandare, nonché il codice di comando Vivanco
utilizzato (v. anche punto 3.4).
Dati tecnici
Batterie: 4/2 ministilo VivControl 8 + 8 EcoSet/VivControl 6, R03,
UM4
Portata: max. 7 m
Non per apparecchi 400 kHz
VivControl 8 EcoSet:
RF: 433 MHz
Alimentatore: 230 V 16 A
2 anni di garanzia di fabbrica
Se VivControl si guasta nei 2 anni dalla data di acquisto,
Vivanco si impegna a sostituire gratuitamente il telecomando.
Eccezioni: distruzione deliberata e usura naturale della scatola e
dei tasti.
® Marchio registrato di Gemstar International Inc.
(NL) Gebruiksaanwijzing
Afstandsbediening VivControl 6 + 8 en VivControl 8 EcoSet
voor bijna alle televisie-, audio- en videoapparatuur en
anderen infrarood bedienbare apparaten
1 Batterij plaatsen
Open de batterijklep aan de achterkant van het apparaat zie afb.
1. – Lipje licht naar boven drukken en plaats 2 (VivControl 6)
resp. 4 alcali – microcel batterijen. Let op de aangegeven
polariteiten op de batterijen en in het batterijvak (+=+) en sluit
het batterijvak weer voorzichtig. – Let erop dat u altijd perfecte
en volledig geladen batterijen gebruikt.
2 Sticker instellingen
Plak de bijgevoegde sticker van uw taal op de achterzijde van
uw VivControl , zodat de afstandsbediening ook kan worden
ingesteld als de gebruiksaanwijzing niet binnen handbereik is.
3 Aanpassing van het apparaat
Om uw apparatuur te kunnen bedienen, moet de
afstandsbediening op de apparaten worden ingesteld. Daartoe
zijn er drie mogelijkheden: het rechtstreeks invoeren van de
bedieningscode, het zoeken van de code of het leren van de
toetsfuncties van de originele afstandsbedieningen.
Wanneer de VivControl u niet begrijpt, dan knippert deze
meermalen fel achter elkaar. Iedere begrepen invoer wordt
afgesloten met een kort signaal van een apparaattoets.
3.1 Rechtstreeks invoeren van de bedieningscode
met behulp van de bijgevoegde lijst
Voorbeeld: instellen van de afstandsbediening voor een
Panasonic televisie:
3.1.1 Uit de bijgevoegde lijst leest u b.v. de Panasonic-
code 152 af.
Overtuig u ervan dat u de juiste lijst voor televisies (TV) hebt
gekozen.

Vivanco GmbH, Ewige Weide 15, D-22926 Ahrensburg, Tel:+49 (0)4102 231235,
3.1.2 Als voorbereiding op het invoeren van de code drukt
u zo lang op de SETUP (instellen)-toets tot het lampje in een
apparaattoets (LED) continu brandt.
3.1.3 Vervolgens drukt u op de gewenste apparaattoets,
b.v. TV en vervolgens na elkaar op de cijfertoetsen (b.v. 1 5
2).
3.1.4 Na het invoeren van de cijfers gaat het toetslampje
uit en de afstandsbediening is klaar voor het bedienen van uw
apparaat.
3.1.5 Tot slot test u de ingestelde stuurcode door het
bedienen van – in dit geval – uw TV-toestel uit te proberen.
Wanneer dit niet of niet goed functioneert, probeer dan een
andere code uit de lijst of de functie code zoeken – zie onder.
3.1.6 De instelling van de afstandbediening voor het
bedienen van andere apparaten gaat op dezelfde manier
volgens par. 3.1. e.v.. In plaats van op de apparaattoets TV
drukt u op een andere toets, b.v. VCR, SAT, CD, CBL, HOME).
.
Vivanco VivControl-afstandsbedieningen zijn TV+
afstandsbedieningen, d.w.z. dat u onder TV alleen televisies of
videoprojectoren kunt instellen. Onder de andere
apparaattoetsen kan echter ieder ander willekeurig apparaat
worden ingesteld. De toetsaanduidingen SAT, ASAT (analoge
satelliet ontvanger), DSAT (dig. sat. ontvanger), VCR enz.
dienen alleen voor de oriëntatie.
Voorbeeld: u kunt onder de apparaattoets VCR ook een cd-code
invoeren en uw cd-speler op afstand bedienen.
3.2 Code zoeken
Wanneer een het merk van een apparaat niet in de lijst staat of
een aangegeven code niet werkt, is de functie code zoeken de
aangewezen weg.
3.2.1 Langzaam code zoeken
3.2.1.1 Het te bedienen apparaat inschakelen. Het
programma loopt.
3.2.1.2 SETUP (instellen)-toets indrukken tot het lampje
continu brandt.
3.2.1.3 Gewenste apparaattoets b.v. ASAT indrukken.
3.2.1.4 Eén maal kort AAN/UIT (apparaat aan/uit)-toets
indrukken.
3.2.1.5 Herhaald AAN/UIT (apparaat aan/uit) of CHAN+
(volgende programma) toets indrukken tot het apparaat, b.v. uw
satreceiver, reageert.
Het lampje gaat na iedere toetsdruk ter bevestiging kort uit en
weer aan.
Wanneer u geen toets indrukt, zal VivControl automatisch verder
zoeken, door om de 3 seconden een signaal naar uw apparaat
uit te zenden.
Wanneer u de reactie van het apparaat te laat hebt opgemerkt
en de volgende code al werd verzonden, dan geeft dat niet: u
kunt terug door CHAN- in te drukken. Had het apparaat zichzelf
al uitgeschakeld, dan moet u het b.v. aan het apparaat zelf of
met de oorspronkelijke afstandsbediening weer worden
ingeschakeld om verder te zoeken.
3.2.2 Wanneer uw apparaat reageert, eenvoudig op de
pijltjestoets (invoer) drukken en op deze manier het zoeken
beëindigen.
3.2.3 Om te testen of de juiste instelling werd gevonden,
eenvoudig een paar VivControl-toetsen indrukken en zo de
juiste functie uitproberen. Wanneer alles in orde is, kunt u de
VivControl op het volgende apparaat instellen.
Wanneer er helemaal niets gebeurt of wanneer er enkele
toetsen niet juist functioneren, moet u de VivControl, zoals
beschreven in par. 3.2.1. verder laten zoeken naar de juiste
instelling.
De VivControl gaat door met zoeken, waar het zoeken met
werd afgebroken. Wanneer het einde van de codelijst is bereikt,
eindigt het zoeken automatisch. Daarbij knippert de
afstandsbediening meerdere malen snel achter elkaar. De
laatste met bevestigde code blijft opgeslagen.
Het achterwaarts zoeken eindigt steeds automatisch bij de laatst
bevestigde code.
3.2.4 Zoeken met beperkt aantal merken
U kunt de functie code zoeken flink versnellen door merkgericht
te zoeken. Dat gaat als volgt:
3.2.4.1 Het te bedienen apparaat inschakelen. Het
programma loopt.
3.2.4.2 SETUP (instellen)-toets indrukken tot het lampje
in een apparaattoets continu brandt.
3.2.4.3 De gewenste apparaattoets, bv. ASAT
indrukken.
3.2.4.4 Cijfertoets van het merk indrukken: toets 1 voor
Philips-, 2 voor Sony-, 3 voor Thomson-, 4 voor Grundig- of 6
voor Nokia-apparatuur. Verder gaan volgens paragraaf 3.2.1.4.
3.3 Snel code zoeken
Binnen enkele seconden vindt uw afstandsbediening bijna
automatisch de juiste instellingen voor de bediening:
3.3.1 Het te bedienen apparaat inschakelen. Er verschijnt
b.v. een programmanummer in het display van uw
satellietontvanger.
3.3.2 SETUP (instellen)-toets indrukken tot het lampje
in een apparaattoets continu brandt.
3.3.3 Gewenste apparaattoets, b.v. ASAT indrukken.
3.3.4 Eén maal kort AAN/UIT (apparaat aan/uit)-toets
indrukken.
3.3.5 Automatisch snel zoeken: wanneer u dan
vervolgens niets doet, zendt de VivControliedere 0,7 seconden
een ander signaal uit. Wanneer uw apparaat reageert, heel snel
de -toets (invoer) indrukken ter bevestiging van een
functionerende stuurcode. – Het is aan te raden om al van te
voren een vinger aan de (invoer)toets te houden zodat u snel
genoeg kunt reageren. Anders stuurt de VivControlal het
volgende signaal uit voordat u hebt gereageerd.
Tip: bij een enkel apparaat functioneert snel zoeken niet. Het
zoeken wordt zonder reactie van het te bedienen apparaat
automatisch afgebroken. In dat geval een andere manier van
instellen, b.v. code-invoer of langzaam zoeken gebruiken.
In plaats van (invoer) in te drukken en eventueel de juiste
instelling te missen, kunt u de VivControl echter ook omzetten
naar langzaam code zoeken: daartoe in plaats van de
(invoer) toets de CHAN-,CHAN+ of AAN/UIT toets indrukken.
Ga vervolgens verder bij par. 3.2.1. zoals boven beschreven.
Vergeet niet uw apparaat b.v. SAT wanneer u verder wilt laten
zoeken, weer op het apparaat in te schakelen.
3.3.6 Tot slot test u de ingestelde bedieningscode door
b.v. te proberen of uw SAT-apparaat kan worden bediend.
Wanneer dit niet juist functioneert, probeer dan het code zoeken
nog een keer. Het code zoeken start dan met de eerstvolgende
code.
3.4 Code-identificatie
U kunt de ingestelde codes ieder moment uitlezen:
3.4.1 SETUP (instellen)-toets indrukken tot het lampje
in een apparaattoets continu brandt.
3.4.2 Apparaattoets b.v. ASAT indrukken.
3.4.3 Eén maal kort SETUP (instellen)-toets indrukken.
3.4.4 Vervolgens de 3-cijferige code uitlezen: druk steeds
na elkaar de cijfertoetsen 1-9 en 0 in. Het honderdtal wordt
getoond wanneer de apparaattoets bij het indrukken van een
toets kort uit gaat. Het cijfer komt overeen met het betreffende
toetsnummer. De tientallen worden getoond, wanneer de
apparaattoets bij het indrukken van een toets voor de tweede
keer kort uit gaat. Het cijfer komt overeen met het betreffende
toetsnummer. De eenheden worden getoond wanneer de
apparaattoets bij het indrukken van een toets uit gaat. Het cijfer
komt overeen met het toetsnummer.
Voorbeeld: uw wilt de code onder de toets TV uitlezen. Daartoe
drukt u op SETUP, tot er een apparaattoets continu brandt.
Vervolgens drukt u achtereenvolgens op TV, SETUP en 1. Bij
toets 1 dooft de toets kort en u noteert 1. Vervolgens drukt u
verder op 1,2,3,4,5. Bij toets 5 dooft de toets kort en u schrijft
een 5 achter de 1. Vervolgens drukt u op 1,2. Bij toets 2 dooft de
apparaattoets definitief en u noteert een 2 achter 15 en hebt de
code 152 gevonden.
3.4.5 De gevonden waarden kunt u b.v. gebruiken voor het
snel invoeren van de code na het verwisselen van de batterijen
en deze code b.v. op de achterzijde van het deksel van het
batterijvak noteren.
De codegegevens zijn ook nodig bij vragen aan de Vivanco-
Hotline. Lees dus alle gebruikte codes uit en noteer deze
voordat u de Hotline belt. Tabel: zie achterzijde van deze
gebruiksaanwijzing.
Aan de hand van een code kan de Hotline u uitleggen welke
toetsen u bij een code kunt gebruiken.
3.5 Toetsen leren
Wanneer u geen passende code kunt vinden voor de bediening

Vivanco GmbH, Ewige Weide 15, D-22926 Ahrensburg, Tel:+49 (0)4102 231235,
van één van uw apparaten of wanneer er belangrijke toetsen
ontbreken, dan kan de VivControl extra tot 50 toetsfuncties van
uw oorspronkelijke afstandsbedieningen leren. Ga daartoe als
volgt te werk:
3.5.1 U bereidt de Vivcontrol op het toetsen leren voor,
door SETUP zolang in te drukken tot er een apparaattoets gaat
branden. Vervolgens drukt u achtereenvolgens 2x op LEARN en
daarna op SETUP. De toets licht dan niet meer op. Alle geleerde
toetsfuncties worden gewist.
3.5.2 De VivControl leert als volgt een toetsfunctie:
3.5.2.1 De VivControl ontvangt infrarode lichtsignalen van
een oorspronkelijke afstandsbediening via het lichtgevoelige /
licht sturende halfgeleiderelement (glaskogel) dat in de bovenste
smalle kant is ingebouwd. Oorspronkelijke afstandsbedieningen
beschikken op dezelfde plaats over dezelfde elementen, die
soms achter een kunstglas afdekking schuilgaan. Voor het leren
van toetsfuncties moet de glaskogel van de VivControl goed
zichtcontact, afstand ca. 2 – 3 cm, tot de “glaskogel” van de
betreffende oorspronkelijke afstandsbediening hebben. Leg
daartoe de afstandsbedieningen kop aan kop voor u op een
tafelblad. De twee “glaskogels” moeten zich ongeveer op
eenzelfde niveau bevinden, op een zichtafstand van 2-3 cm.
Eventueel moet dit enigszins onder de ene en/of andere
afstandsbediening liggen, zodat hun juiste positie bij het
indrukken van de toetsen niet kan veranderen.
3.5.2.2 Vóór ieder nieuw leren van de toetsen bij een
apparaat bereidt u de VivControl voor op het leren, door SETUP
in te drukken tot er een apparaattoets oplicht. Vervolgens na
elkaar de apparaattoets van het te programmeren apparaat
indrukken, b.v. TV, 2x LEARN en daarna SETUP. De toets
brandt dan niet meer. Alle daartoe geleerde toetsfuncties van
het gekozen apparaat, b.v. de TV, worden gewist.
3.5.2.3 U drukt op SETUP tot er een apparaattoets gaat
branden en vervolgens de toets van het apparaat waaraan de
toetsfuncties geleerd moeten worden, b.v. de TV.
3.5.2.4 Druk de toets die een nieuwe functie moet aanleren,
kort in, b.v. en daarna de leertoets op de oorspronkelijke
afstandsbediening, tot het licht in de apparaattoets van de
VivControl kort uit en weer aan gegaan is.
Wanneer de apparaattoets meermalen achter elkaar knippert,
dan had het aanleren van de toets geen resultaat en moet het
aanleren door de toets volgens par. 3.5.2.2. worden overgedaan.
Laat de VivControl daarom om te oefenen eerst een paar
toetsen aanleren en probeer daarna of het succes heeft gehad.
3.5.2.5 Andere toetsen voor het zelfde apparaat leert de
VivControl volgens par. 3.5.2.4.
3.5.2.6 Wanneer de VivControl alle noodzakelijke functies
heeft aangeleerd, drukt u op SETUP om het leerproces te
beëindigen. De apparaattoets dooft.
Tips voor het toetsen aanleren
Gebruik zo mogelijk nieuwe batterijen.
Vermijd aanleren bij tl-lampen, spaarlampen en direct
zonlicht.
Het geheugen van de VivControl wordt dynamisch
beheerd. Het aantal leerbare toetsfuncties hangt af van de
oorspronkelijke afstandsbedieningen en kan afhankelijk daarvan
schommelen tussen 25 en meer dan 50.
Wanneer het geheugen vol is, knippert de VivControl 3
seconden. Voordat anderen toetsfuncties kunnen worden
aangeleerd, moet een apparaatgebied worden gewist zoals
beschreven in par. 3.5.2.2.
De apparaattoetsen TV, VCR enz., de SHIFT- en SETUP-
toets en de macrotoetsen M1 en M2 zijn voor de toetsleerfunctie
niet beschikbaar. De toetsen L1 en L2 van de VivControl 6 zijn
aanvankelijk niet bezet en speciaal bedoeld voor de leerfunctie.
Voor alle apparaten kunnen toetsen dubbel bezet zijn of
bezet worden. De tweede functie kunt u aanleren door de
SHIFT-toets in te drukken. De betreffende apparaattoets toont
de beschikbaarheid voor de tweede functie door continu te gaan
branden.
Toetsen aanleren is ook mogelijk bij de tweede bezetting
van een toets. Daartoe moet voor de te programmeren toets de
SHIFT-toets worden ingedrukt. Wanneer een toets onder SHIFT
werd geprogrammeerd, moet aansluitend opnieuw SHIFT
worden ingedrukt wanneer een toets weer op het eerste niveau
moet worden geprogrammeerd.
3.6 Installatie in huis (alleen VivControl 8 + 8 EcoSet)
3.6.1 Monteer de receivermodule van de VivControl 8
EcoSets, b.v. in het stopcontact van uw AV-installatie. De
receivermodule steekt u daartoe in een stopcontact en in de
receivermodule steekt u de stekker van een verdelerdoos
waarop uw AV-apparatuur is aangesloten.
Sluit uw videorecorder eventueel direct aan op het stroomnet
zodat ook de timer nog functioneert wanneer de radiodoos uw
systeem van het net heeft gescheiden.
3.6.2 Trek de antenne van de contactdoos eruit.
3.6.3 Vivanco radiocontactdozen en dergelijke apparaten
stuurt uw VivControl aan via de code 640, instelling: zie par. 3
e.v.. De radiocontactdoos die behoort tot de VivControl 8 Eco
Set wordt met een schroevendraaier op A gezet en bediend via
toets 1.
De dozen kunnen alleen radio gestuurd worden bediend, dus
alleen met de Vivanco VivControl 8 RF of vergelijkbare radio
afstandsbedieningen.
3.7 Macro of alles onder één toets (alleen VivControl
8 + 8 EcoSet)
Uw VivControl 8 is voorzien van 2 speciale toetsen: M1 en M2.
Hiermee kunnen stuurrijen met één enkele toetsdruk worden
uitgevoerd. Zo kunt u b.v. met een enkele toetsdruk uw hele
video- en audioinstallatie in- of weer uitschakelen (Systeem
aan,Systeem uit). Voor het instellen van de functietoetsen gaat
u als volgt te werk:
3.7.1 Druk op SETUP tot een apparaattoets continu
brandt.
3.7.2 Druk M1 (of M2 in, afhankelijk van de toets die u
wilt instellen).
3.7.3 Druk achtereenvolgens op de toetsen die later na het
indrukken van de M-toets moeten worden geactiveerd, b.v.
Systeem aan: u drukt achtereenvolgens op de toetsen
(HOME), (doos 1), (On=aan), (TV),
(aan), (Satellietontv),(aan).
3.7.4 Druk op M1 of M2 om het instellen af te sluiten. De
toets dooft.
3.7.5 Probeer de toets uit nadat u eerst alle apparaten
hebt uitgeschakeld.
Het voorbeeld gaat ervan uit dat u in het bezit bent van een
Vivanco VivControl 8 EcoSet en dat de meegeleverde tussen-
contactdoos op House A is gezet. Wanneer alles goed
functioneert, schakelt de doos eerst de stroom voor de
apparaten in; vervolgens wordt de televisie en daarna de
satellietontvanger ingeschakeld.
Wanneer u geen EcoSet hebt, laat dan de HOME-toets weg, en
probeer het voorbeeld vanaf het invoeren van de TV-toets.
Er kunnen tot 14 toetsen achter elkaar worden ingevoerd.
Er wordt iedere seconde een toetsfunctie uitgegeven. Wanneer
een apparaat, b.v. uw televisie meer dan een seconde nodig
heeft om b.v. de PWR-opdracht te accepteren, dan is het
mogelijk pauzes tussen 2 en 9 seconden in te stellen tussen het
uitzenden van twee toetsfuncties. Op de plaats waar een pauze
gewenst is, drukt u op de Pausen- II (Pauze) toets en
vervolgens op een cijfertoets tussen 2en 9.
3.7.6 U kunt de serie toetsen onder M1 of M2 weer
wissen:
3.7.6.1 Druk op SETUP tot er een apparaattoets continu
brandt.
3.7.6.2 Druk de toets in waarvan u de functie wilt wissen,
dus M1 of M2.
3.7.6.3 Druk kort op SETUP. De toets dooft en de serie
toetsen is gewist.
4 Bediening
U bedient de apparaten praktisch gezien op dezelfde manier als
u dit van uw oorspronkelijke afstandsbediening kent.
4.1 Apparaat kiezen: met de apparaattoetsen TV, VCR
enz., serie (B), zie afb. boven, kiest u het te bedienen apparaat.
Bij het indrukken van een toets en kort daarna gaat de toets
branden en toont u welk apparaat u bedient. Behalve de
televisietoets TV kunnen de andere toetsen naar wens worden
ingesteld. Dit wil zeggen dat de aanduiding slechts een advies
is. Afhankelijk van welk apparaat u daar hebt ingesteld, kan de
functie anders zijn dan aangegeven. Zo kunt u onder VCR een
cassetterecorder of een minidiscplayer hebben
geprogrammeerd.
4.2 Instellingen en Aan/Uit: in de bovenste rij toetsen (A)
vindt u de toets SETUP=instellen en PWR=power= Aan/Uit.
4.3 Volume en programmabesturing: in het toetsgebied
(C) vindt u zoals gebruikelijk de toetsen voor de volumeregeling
((VOL-=zachter, Mute (all off) aan/uit, VOL+=harder) en voor
het wisselen van programma’s (CHAN+= volgende kanaal en
CHAN-= vorige kanaal). Volume-Punch-Through-functie: ter

Vivanco GmbH, Ewige Weide 15, D-22926 Ahrensburg, Tel:+49 (0)4102 231235,
vereenvoudiging van de bediening bedienen de volumetoetsen
(VOL+ of VOL-) en de Mute-toets (all off) altijd de televisie
wanneer de videoapparatuur wordt bediend. Wanneer u audio-
of andere apparatuur onder een apparaattoets hebt ingesteld,
bedient u met de volumetoetsen het ingestelde apparaat, zo kan
bij HOME een dimmer op afstand worden bediend.
4.4 Tweede bedieningsniveau: met de Shift-toets in
het gebied (D) kiest u de tweede toetsfunctie van de toetsen van
de afstandsbediening. Nadat u Shift hebt ingedrukt, de
apparaattoets brandt, staan u alle toetsfuncties van het tweede
bedieningsniveau ter beschikking. Bij televisies kunt u op deze
manier via volume- en programmeertoetsen kleur en helderheid
instellen. Maar ook veel andere, zelden gebruikte toetsen vindt u
op het tweede niveau. Probeer het eens. Maar ook onze Hotline
kan u helpen ontbrekende toetsen te vinden. U komt weer op
het eerste niveau wanneer u nogmaals op Shift drukt of
gedurende langere tijd geen toets indrukt.
4.5 Scan bzw. ShowView® (SV/V+) in gebied (D):
wanneer u op de toets drukt, wordt iedere 3 seconden het
volgende kanaal met CHAN+ uitgezonden en worden
automatisch de achtereenvolgende programma’s na elkaar
getoond zonder dat u steeds een toets moet indrukken.
Wanneer u op een willekeurige toets drukt, stopt het
doorschakelen van de kanalen. Na 2 minuten eindigt de functie
automatisch.
Deze scanfunctie is bij videorecorders niet mogelijk. De toets
wordt gebruikt voor ShowView® of timerprogrammering van uw
videorecorder. Voor meer informatie zie de gebruiksaanwijzing
van uw video- of DVD-recorder.
4.6 Plaats van tiental en AV: in het gebied (E) vindt u de
gebruikelijke cijfertoetsen. 2-cijferige getallen (kanaalnummers)
voert u doorgaans via de -pijltjes- of SHIFT en vervolgens
pijltjestoets in. Met de -toets kiest u doorgaans de AV-
ingang b.v. de satreceiver of videorecorder.
4.7 LEARN, M1, M2, weergave/display: In het gebied (F)
vindt u de leertoetsfunctie zie boven, de
toetsen voor het oproepen van de reeksen (alleen VivControl 8 +
8 EcoSet) zie boven en de displaytoets waarmee u doorgaans
de statusaanduiding van uw bediende apparaten kunt in- en
uitschakelen, alsmede op de VivControl 6 de leertoetsen L1 en
L2.
4.8 Videotext en Toptext: in de gebieden (G) en (I) vindt
u de Videotexttoetsen , , , en in het deel (J)
de Toptexttoetsen Rood, Groen, Geel en Blauw.
De toetsen in het gebied (J) worden bij videorecorders, CD
Players enz. gebruikt voor het besturen van de loopwerkfuncties.
4.9 Toetsverlichting (alleen VivControl 8 + 8 EcoSet):
Met in het gebied (K) schakelt u de toetsverlichting in.
Wanneer u vervolgens geen andere toets indrukt, wordt de
verlichting na ong. 5 seconden weer uitgeschakeld om
batterijstroom te besparen. De VivControl 6 beschikt over
zelfverlichtende fluorescerende toetsen die bij daglicht energie
opslaan en deze in het donker als licht weer afgeven.
Hotline
Bij vragen over uw afstandsbediening kunt u bellen met de
telefonische hotline: Tel. 030 6007050. – Vivanco producten
worden voortdurend verbeterd. Vooral de codebibliotheek wordt
voortdurend geactualiseerd. Wanneer er iets ontbreekt, bel ons
mogelijk dat wij al een oplossing voor uw probleem hebben.
Noem ons altijd het merk en het type van het te bedienen
apparaat en welke Vivanco stuurcode u gebruikt, zie ook par.
3.4.
Technische gegevens
Batterijen: 4/2x Microcellen VivControl 8 + 8 EcoSet/VivControl
6, R03, UM4
Reikwijdte: max. 7 m
Niet voor 400 kHz apparaten
VivControl 8 EcoSet:
RF: 433 MHz
Netmodule: 230 V 16 A
2 Jaar fabrieksgarantie
Wanneer uw VivControl binnen 2 jaar na aankoop uitvalt, dan
krijgt u van Vivanco kosteloos een vervangend apparaat.
Uitzonderingen: opzettelijke beschadiging en normale slijtagen
van behuizing en toetsen.
® Geregistreerd merk van Gemstar International Inc.
(PL) Instrukcja obsługi
Pilot VivControl 6 + 8 i VivControl 8 EcoSet do prawie
wszystkich typów sprzętu TV, audio-wideo i innych
urządzeństerowanych podczerwienią
1 Zakładanie baterii
Otworzyćwieczko zakrywające baterie na odwrotnej stronie
pilota, patrz rys.1. – wysunąć wypustkę, wciskając lekko w górę,
po czym włożyć2 (VivControl 6) lub 4 mini-baterie alkaliczne.
Zwrócićuwagęna zgodność biegunów (+=+). Ostrożnie
zamknąć wieczko. – Należy zawsze stosowaćtylko baterie
znajdujące sięw nienagannym stanie.
2 Naklejka
Nakleićzałączonąetykietkęw języku polskim na odwrotnej
stronie pilota VivControl, tak aby byli Państwo w stanie zmienić
ustawienia pilota bez pomocy instrukcji.
3 Programowanie urządzenia
Aby móc sterowaćurządzeniami, pilota należy odpowiednio
zaprogramować. Istniejątrzy możliwości programowania: przez
bezpośrednie wpisanie kodu, za pomocąautomatycznego
odszukiwania kodu oraz przez przejęcie funkcji z pilota
oryginalnego.
Jeżeli pilot VivControl nie „rozumie“ poleceń, to wyraźnie kilka
razy migocze. Każda „zaakceptowana“ informacja kwitowana jest
krótkim błyśnięciem.
3.1 Bezpośrednie wpisywanie kodu z załączonego
wykazu kodów
Przykład: programowanie pilota do obsługi telewizora marki
Panasonic:
3.1.1 Odszukaćw załączonym wykazie kodów kod dla
Panasonic 152.
Proszęupewnićsię, że wybrali Państwo właściwy wykaz kodów
dla odbiorników telewizyjnych (TV).
3.1.2 Przed rozpoczęciem wpisywania kodu przyciskaćtak
długo przycisk SETUP (programowanie), ażdioda w
przycisku odbiornika (LED) zacznie siębez przerwy świecić.
3.1.3 Teraz wcisnąć najpierw odpowiedni przycisk, np.
TV, a następnie po kolei przyciski numeryczne (np. 1 5 2).
3.1.4 Po wpisaniu cyfr lampka gaśnie – pilot jest gotowy
do sterowania.
3.1.5 Na zakończenie należy przetestowaćustawiony kod
sterowniczy, wypróbowując różne funkcje przy pomocy pilota.
Jeżeli sterowanie nie działa prawidłowo, należy wypróbowaćinny
kod z listy, patrz poniżej.
3.1.6 Programowanie dalszych urządzeńopisano w
punkcie 3.1. Zamiast przycisku TV należy wcisnąć inny przycisk,
np. VCR, SAT, CD, CBL, HOME.
Piloty Vivanco VivControl to urządzenia przygotowane do
sterowania TV+ pilotów, tzn. pod przyciskiem TV mogąPaństwo
zaprogramowaćobsługętelewizorów lub wideoprojektorów, a
pod innymi przyciskami każde dowolne urządzenie.
Znajdujące sięna przyciskach skróty SAT, ASAT (analogowy
dekoder satelitarny), DSAT (cyfrowy dekoder satelitarny), VCR
itp., majązatem tylko funkcjęorientacyjną.
Przykład: pod przyciskiem VCR można równieżwpisaćkod CD i
sterowaćodtwarzaczem płyt CD
3.2 Odszukiwanie kodu
Jeżeli marka danego urządzenia nie figuruje w wykazie kodów
lub gdy żaden z podanych kodów nie pasuje, to należy
zastosowaćautomatyczne odszukiwanie kodu.
3.2.1 Powolne odszukiwanie kodu
3.2.1.1 Włączyćurządzenie, którym chcąPaństwo sterować.
Program startuje.
3.2.1.2 Wciskaćprzycisk SETUP (ustawianie), aż
lampka na odpowiednim przycisku zacznie siębez przerwy
świecić.
3.2.1.3 Wcisnąć odpowiedni przycisk symbolizujący dany
odbiornik, np. ASAT.
3.2.1.4 Wcisnąć jeden raz krótko przycisk EIN/AUS
(wł./wył.).
3.2.1.5 Wcisnąć kilkakrotnie przycisk EIN/AUS (wł./wył.)
lub CHAN+ (następny program), ażodpowiednie urządzenie, np.
dekoder satelitarny, zareaguje.
Dla potwierdzenia operacji lampka gaśnie na krótko po każdym
wciśnięciu przycisku, po czym sięznów zapala.
Jeżeli nie wcisnąPaństwo żadnego przycisku, to VivControl
będzie próbowaćautomatycznie odnaleźć właściwy kod,
wysyłając co 3 sekundy sygnałdo odbiornika.

Vivanco GmbH, Ewige Weide 15, D-22926 Ahrensburg, Tel:+49 (0)4102 231235,
Jeżeli zauważą Państwo zbyt późno, że urządzenie zareagowało,
przez co zostałwysłany następny kod, to mogąPaństwo
powrócićdo poprzedniego kodu, wciskając przycisk CHAN-.
Gdyby odbiornik sięw międzyczasie wyłączył, to w celu
kontynuacji odszukiwania kodu należy go ponownie włączyć, np.
za pomocąoryginalnego pilota.
3.2.2 Jeżeli odbiornik zareagowałprawidłowo, wcisnąć
przycisk (zapisz) i zakończyćodszukiwanie kodu.
3.2.3 W celu sprawdzenia, czy odnaleziona została
prawidłowa konfiguracja, wystarczy wcisnąć kilka przycisków
pilota VivControl i sprawdzićprawidłowość funkcjonowania.
Jeżeli urządzenie funkcjonuje prawidłowo, to można przejść do
programowania kolejnego urządzenia.
Jeżeli sterowanie w ogóle nie funkcjonuje lub niektóre przyciski
nie funkcjonująprawidłowo, to programowanie należy powtórzyć,
jak opisano w punkcie 3.2.1.
VivControl kontynuuje odszukiwanie kodu w miejscu, w którym
zostało ono przez wciśnięcie przycisku przerwane. Po
przeszukaniu całej listy kodów odszukiwanie zostaje
automatycznie zakończone, przy czym pilot wysyła kilka
szybkich sygnałów migoczących. Kod, który zostałjako ostatni
potwierdzony przez wciśnięcie ,zostaje zapisany w pamięci.
Poszukiwanie w tyłkończy sięzawsze automatycznie na
ostatnim potwierdzonym kodzie.
3.2.4 Odszukiwanie kodu według marki
Odszukiwanie kodu można znacznie przyśpieszyć, jeżeli
ogranicząsięPaństwo do szukania w ramach jednej marki. W
tym celu należy poczynićnastępujące kroki:
3.2.4.1 Włączyćurządzenie, którym chcąPaństwo sterować.
Program startuje.
3.2.4.2 Wciskaćprzycisk SETUP (ustawianie), aż
lampka na odpowiednim przycisku zacznie siębez przerwy
świecić.
3.2.4.3 Wcisnąć odpowiedni przycisk symbolizujący dany
odbiornik, np. ASAT.
3.2.4.4 Wcisnąć przycisk numeryczny symbolizujący daną
markę: 1 dla Philipsa, 2 dla Sony, 3 dla Thomsona, 4 dla
Grundiga lub 6 dla Nokii. Dalej postępowaćwedług wskazówek
podanych w punkcie 3.2.1.4.
3.3 Szybkie odszukiwanie kodu
Pilot odnachodzi prawie automatycznie w przeciągu kilku sekund
prawidłowąkonfiguracjęsterowniczą:
3.3.1 Włączyćurządzenie, którym chcąPaństwo sterować.
Np. na wyświetlaczu dekodera satelitarnego ukazuje sięnumer
programu.
3.3.1.1 Wciskaćprzycisk SETUP (ustawianie), aż
lampka na przycisku zacznie siębez przerwy świecić.
3.3.2 Wcisnąć odpowiedni przycisk, np. ASAT.
3.3.3 Wcisnąć raz krótko przycisk EIN/AUS (wł./wył.).
3.3.4 Szybkie automatyczne odszukiwanie kodu: jeżeli
nie poczyniąPaństwo dalszych kroków, to VivControl emituje co
0,7 sekundy inny sygnał. W chwili, gdy odbiornik zareagował
pozytywnie, wcisnąć natychmiast przycisk (zapisz), aby
potwierdzićprawidłowy kod. Radzimy jużwcześniej położyć
palec na przycisku (zapisz), tak aby móc odpowiednio
szybko zareagować. W przeciwnym razie VivControlwyśle
następny sygnał, zanim zdążą Państwo potwierdzićprawidłowy
kod.
Wskazówka: W przypadku niektórych urządzeńszybkie
odszukiwanie kodu nie funkcjonuje. Odszukiwanie kodu zostaje
wtedy wobec braku reakcji ze strony urządzenia przerwane. W
takim wypadku należy zastosowaćinny sposób programowania,
jak np. manualne wpisanie kodu lub powolne odszukiwanie.
Zamiast potwierdzenia ustawienia za pomocąprzycisku
(zapisz) - przy czym można ewentualnie przeoczyćprawidłowy
kod - mogąPaństwo w następujący sposób przełączyć
VivControl na powolne odszukiwanie kodu: zamiast przycisku
(zapisz) wcisnąć przycisk CHAN-,CHAN+ lub EIN/AUS.
Dalej postępowaćwedług punktu 3.2.1.
Jeżeli chcąPaństwo kontynuowaćodszukiwanie kodu, proszę
pamiętaćo wybraniu na pilocie odpowiedniego odbiornika, np.
SAT.
3.3.5 Na zakończenie zaprogramowany kod sterowniczy
należy przetestować, np. wypróbowując obsługędekodera SAT.
Jeżeli sterowanie nie funkcjonuje prawidłowo, to odszukiwanie
kodu należy powtórzyć. Odszukiwanie kodu rozpoczyna się
wtedy od kolejnego kodu.
3.4 Identyfikacja kodu
Zaprogramowane kody mogąPaństwo w każdej chwili odczytać
w następujący sposób:
3.4.1.1 Wciskaćprzycisk SETUP (ustawianie), aż
lampka na przycisku zacznie siębez przerwy świecić.
3.4.2 Wcisnąć odpowiedni przycisk, np. ASAT.
3.4.3 Wcisnąć raz krótko przycisk SETUP
(ustawianie).
3.4.3.1 Wpisaćpo kolei przy pomocy przycisków
numerycznych 1-9 i 0 trzycyfrowy kod. Cyfra miejsca setnego
pojawia się, gdy przycisk odbiornika po wciśnięciu na krótko
zgaśnie. Cyfra odpowiada numerowi przycisku. Cyfra dziesiętna
pojawia się, gdy przycisk odbiornika po wciśnięciu powtórnie na
krótko zgaśnie. Cyfra odpowiada numerowi przycisku. Cyfra
jednostkowa pojawia siępo zgaśnięciu przycisku odbiornika.
Cyfra odpowiada numerowi przycisku.
Przykład: odczytywanie kodu zapisanego pod przyciskiem TV.
Wciskaćprzycisk SETUP, ażlampka na przycisku zacznie się
bez przerwy świecić, po czym wcisnąć po kolei TV, SETUP, 1.
Po wciśnięciu przycisku „1“ przycisk gaśnie na chwilę-
zanotowaćcyfrę1. Wciskaćdalej 1, 2, 3, 4, 5. Przy przycisku „5“
przycisk gaśnie na chwilę– po 1 zanotowaćcyfrę5. Wcisnąć 1,
2. Po wciśnięciu przycisku „2“ przycisk odbiornika gaśnie
ostatecznie – po 15 zanotować2 – odnaleziony kod brzmi: 152.
3.4.4 Odczytanąwartość można zanotowaćnp. na
etykietce na odwrocie pilota - może to sięprzydaćw razie
konieczności szybkiego podania kodu np. po zmianie baterii.
Informacje dotyczące kodu potrzebne sąrównieżprzy konsulatcji
z infoliniąfirmy Vivanco. Przed nawiązaniem kontaktu z infolinią
prosimy zatem zanotowaćwszystkie stosowane kody. Tabelę
znajdąPaństwo na odwrotnej stronie tej instrukcji obsługi.
Technicy z infolinii mogąna podstawie kodu wskazać, jakich
przycisków mogąPaństwo używaćprzy danym kodzie.
3.5 Przejęcie funkcji z pilota oryginalnego
Na wypadek, gdyby nie udało sięodnaleźć do któregośz
urządzeńpasującego kodu lub gdyby brakowało istotnych
funkcji, VivControl może przejąć do 50 dodatkowych funkcji
oryginalnego pilota. W tym celu należy poczynićnastępujące
kroki:
3.5.1 Przed pierwszorazowym zastosowaniem tej metody
pilot VivControl należy odpowiednio przygotować, wciskając
przycisk SETUP tak długo, ażprzycisk odbiornika zacznie się
świecić. Teraz wcisnąć po kolei 2x LEARN oraz SETUP.
Przycisk przestaje sięświecić.Wszystkie do tej pory przejęte
funkcje przycisków zostały zmazane.
3.5.2 VivControl przejmuje funkcje w następujący sposób:
3.5.2.1 VivControl odbiera sygnały w podczerwieni, wysyłane
przez oryginalnego pilota za pomocąwbudowanego w górnej
bocznej części półprzewodnika (szklana kulka), wysyłającego i
odbierającego sygnały świetlne. Oryginalne piloty posiadająw
odpowiednim miejscu podobne elementy, które okryte są
niekiedy plastikowąosłoną. Aby przejąć funkcje innego pilota,
szklana kulka VivControl musi znajdowaćsięw niewielkiej
odległości (ok. 2 – 3 cm) od „szklanej kulki“ odpowiedniego
oryginalnego pilota. W tym celu obydwa piloty należy położyć
obok siebie na równej powierzchni. Obydwie „szklane kulki“
powinny znajdowaćsięna równej wysokości w odległości ok. 2-3
cm od siebie. W razie potrzeby należy podłożyćjakiśprzedmiot,
tak aby piloty podczas operowania przyciskami sięnie
przesunęły.
3.5.2.2 Przed pierwszorazowym zastosowaniem tej metody
pilot VivControl musi zostaćodpowiednio przygotowany przez
wciśnięcie przycisku SETUP i przytrzymanie tak długo, aż
zaświeci sięprzycisk odbiornika. Teraz wcisnąć ten przycisk,
który odpowiada urządzeniu, z którego chcemy przejąć funkcje,
np. TV, 2x LEARN oraz SETUP. Przycisk przestaje sięświecić.
Wszystkie nowo przejęte funkcje przycisków danego urządzenia,
np. TV, zostająwymazane.
3.5.2.3 Najpierw wciskaćSETUP tak długo, ażzapali się
przycisk odbiornika, po czym wcisnąć przycisk tego odbiornika,
do którego chcemy dodaćfunkcje, np. TV.
3.5.2.4 Wcisnąć najpierw krótko ten przycisk, który ma
przejąć nowąfunkcję, np. , po czym wcisnąć ten przycisk na
oryginalnym pilocie, który tęfunkcjęzawiera oraz przytrzmaćgo
tak długo, ażświatełko w przycisku odbiornika na VivControl na
chwilęzgaśnie i sięponownie zapali.
Jeżeli przycisk odbiornika zacznie migotać, to operacja przejęcia
funkcji sięnie udała i należy jąpowtórzyć, jak opisano w punkcie

Vivanco GmbH, Ewige Weide 15, D-22926 Ahrensburg, Tel:+49 (0)4102 231235,
3.5.2.2. Radzimy na próbęprzejąć funkcje zaledwie kilku
przycisków, aby sprawdzićczy metoda ta funkcjonuje.
3.5.2.5 Przejmowanie funkcji z kolejnych przycisków tego
samego urządzenia opisano w punkcie 3.5.2.4.
3.5.2.6 Po przejęciu przez VivControl wszystkich żądanych
funkcji należy wcisnąć przycisk SETUP, aby zakończyćoperację
przejmowania funkcji. Przycisk odbiornika gaśnie.
Wskazówki dotyczące przejmowania funkcji przycisków
Radzimy stosowaćnowe baterie.
Wyżej opisanej metody przejmowania funkcji nie należy
stosowaćw pobliżu świetlówek, żarówek energooszczędnych,
ani w jaskrawym świetle słonecznym.
Pamięć VivControl jest sterowana dynamicznie. Liczba
możliwych do przejęcia funkcji zależy od typu oryginalnego pilota
i może wynosićod 25 do ponad 50.
Jeżeli pamięć jest zapełniona, to pilot VivControl migocze
przez 3 sekundy. Przed przejęciem dalszych funkcji z innych
pilotów należy wymazaćczęść pamięci, jak opisano w punkcie
3.5.2.2.
Przyciski odbiorników, np. TV, VCR itd., przyciski SHIFT- i
SETUP oraz przyciski makro M1 i M2 nie nadająsiędo
przejmowania funkcji. Przyciski L1 iL2 na VivControl 6 nie mają
żadnych funkcji i sąprzeznaczone specjalnie do przejmowania
funkcji z innych pilotów.
Przyciski mogąposiadaćpodwójne funkcje. Drugąfunkcję
można zapisaćprzez wciśnięcie przycisku SHIFT. Odpowiedni
przycisk odbiornika sygnalizuje optycznie możliwość zapisania
drugiej funkcji.
Przejmowanie funkcji możliwe jest równieżna drugim
poziomie przycisku. W tym celu przed wciśnięciem przycisku,
który ma byćdodatkowo zaprogramowany, należy wcisnąć
przycisk SHIFT. Jeżeli programowanie odbyło siępo wciśnięciu
przycisku SHIFT, to aby kontynuowaćprogramowanie na 1.
poziomie, należy ponownie wcisnąć SHIFT.
3.6 Technika domowa (tylko VivControl 8 + 8 EcoSet)
3.6.1 Zamontowaćgniazdko modułowe VivControl 8
EcoSet, np. w przewodach zasilających Państwa zestaw AV
(audio-wideo). Gniazdko modułowe (receiver module) należy
włożyćw normalne gniazdko domowe. Następnie włożyćw
gniazdko modułowe wtyczkęprzedłużacza-rozdzielnika, do
którego podłączony jest sprzęt AV.
W razie potrzeby magnetowid należy podłączyćbezpośrednio do
sieci, tak aby jego timer mimo odłączenia systemu od sieci przez
gniazdko modułowe nadal funkcjonował.
3.6.2 Wyciągnąć antenęgniazdka.
3.6.3 Gniazdka modułowe Vivanco i podobne urządzenia
sąsterowane przez VivControl za pomocąkodu 640, ustawienie:
patrz: akapit 3 i następne. Załączone do VivControl 8 Eco Set
gniazdko modułowe należy przy pomocy śrubokręta ustawićw
pozycji A. Sterowane jest ono przyciskiem 1.
Gniazdka można sterowaćtylko falami radiowymi, tj. tylko przy
pomocy Vivanco VivControl 8 RF lub innych odpowiednich
pilotów wysyłających fale radiowe.
3.7 Makro tj. wszystko w jednym przycisku (dotyczy
tylko VivControl 8 + 8 EcoSet)
VivControl 8 posiada 2 specjalne przyciski - M1 i M2 – które
służą do wysyłania sekwensu sygnałów za jednym
przyciśnięciem. MogąPaństwo np. za jednym przyciśnięciem
włączyći wyłączyćcały zestaw stereo lub magnetowid (System
ein,System aus). W celu zaprogramowania tego przycisku
funkcyjnego należy poczynićnastępujące kroki:
3.7.1 WciskaćSETUP tak długo, ażprzycisk odbiornika
będzie siębez przerwy świecił.
3.7.2 Wcisnąć M1 (lub M2, w zależności od tego jaki
przycisk chcąPaństwo ustawić).
3.7.3 Wcisnąć po kolei te przyciski, które później mająbyć
po kolei aktywowane przy pomocy przycisku M. Np. System ein:
Wcisnąć po kolei (HOME), (gniazdko 1),
(On=Wł.), (TV), (Ein), (dekoder sat),(wł.).
3.7.4 Wcisnąć M1 lub M2, aby zakończyćprogramowanie.
Przycisk gaśnie.
3.7.5 Wypróbowaćprzycisk po uprzednim wyłączeniu
wszystkich urządzeń.
W podanym wyżej przykładzie zakładamy, że posiadająPaństwo
Vivanco VivControl 8 EcoSet, a załączone gniazdko łączące
ustawione jest na House A. Jeżeli cały system funkcjonuje
prawidłowo, to gniazdko podłącza najpierw urządzenia do sieci,
po czym zostająwłączone po kolei telewizor i dekoder
satelitarny.
Jeżeli nie posiadająPaństwo zestawu EcoSet, to należy opuścić
przyciski HOME i wypróbowaćpodany wyżej sposób
programowania, poczynając od przycisku TV.
Można zaprogramowaćmaks. 14 przycisków.
Co sekundęwysyłana jest jedna funkcja. Jeżeli któreś
urządzenie, np. telewizor, potrzebuje więcej niżsekundęna
odbiór np. polecenia PWR, to między dwoma kolejnymi
funkcjami mogąPaństwo zaprogramować2-9 sekundowe
przerwy. W miejscu, gdzie chcąPaństwo zaprogramować
przerwę, należy wcisnąć przycisk Pausen- II i odpowiedni
przycisk numeryczny od 2do 9.
3.7.6 Kolejność przycisków zaprogramowana pod M1 lub
M2 można anulować:
3.7.6.1 WciskaćSETUP tak długo, ażjeden z przycisków
odbiornika zacznie siębez przerwy świecić.
3.7.6.2 Wcisnąć ten przycisk, którego funkcjęchcąPaństwo
anulować, tzn. M1 lub M2.
3.7.6.3 Wcisnąć krótko SETUP. Przycisk gaśnie – kolejność
włączania przycisków została zmazana.
4 Obsługa
Podstawowe funkcje sterowanych urządzeńobsługuje się
praktycznie w taki sam sposób jak przy pomocy pilota
oryginalnego.
4.1 Wybór urządzenia: wybraćprzy pomocy przycisków
TV, VCR itd., rząd (B), patrz: rys. na wstępie, odpowiednie
urządzenie (odbiornik). Po wciśnięciu przycisk zaczyna się
świecić, wskazując, które urządzenie jest sterowane. Poza
przyciskiem TV wszystkie inne przyciski można dowolnie
zaprogramować- tzn. istniejące napisy stanowiąjedynie
propozycję- w zależności od tego, jakie urządzenia zostały
zaprogramowane. Np. pod VCR można zaprogramować
magnetofon kasetowy lub odtwarzacz mini-dysków.
4.2 Ustawianie i włączanie/wyłączanie: w górnym rzędzie
przycisków (A) znajdująsięprzyciski SETUP=ustawianie i
PWR=zasilanie= wł./wył.
4.3 Poziom głośności i sterowanie programami: w
obrębie przycisków (C) znajdująsięzwykle przyciski służące do
regulacji głośności (VOL-=ciszej, wł./wył. tonu,
VOL+=głośniej) oraz do zmiany programu (CHAN+= następny
kanałi CHAN-= poprzedni kanał). Funkcja „Punch through“:
dla ułatwienia obsługi przyciski regulacji głośności (VOL+ lub
VOL-) i przycisk wyłączania tonu sterujązawsze telewizorem,
jeżeli sterowane sąmagnetowidy. Jeżeli pod jednym przyciskiem
zaprogramowali Państwo urządzenia audio lub inny sprzęt, to
przyciski głośności sterująustawione urządzenie. Np. przy
HOME można zdalnie sterowaćprzełącznik zmierzchowy
oświetlenia.
4.4 2. poziom obsługi: przy pomocy przycisku Shift
można w zakresie (D) wybrać2. funkcjęprzycisku. Po wciśnięciu
przycisku Shift (przycisk odbiornika świeci się) mająPaństwo do
dyspozycji wszystkie funkcje na 2. poziomie. Podczas oglądania
telewizji można w ten sposób przy pomocy przycisków regulacji
głośności i zmiany programów regulowaćbarwy i jasność
obrazu. Na drugim poziomie znajdująsięrównieżinne rzadko
używane funkcje. Najlepiej wypróbowaćwszystkie ustawienia.
Nasza infolinia pomoże Państwu chętnie w odnalezienu
„zgubionych“ funkcji. Jeżeli wcisnąPaństwo ponownie przycisk
Shift lub nie wcisnąprzez dłuższy czas żadnego przycisku,
powrócąPaństwo automatycznie do pierwszego poziomu.
4.5 Skanowanie lub ShowView® (SV/V+) w
zakresie (D):po wciśnięciu tego przycisku pilot emituje co 3
sekundy sygnałprzełączania na następny program (CHAN+) -
na ekranie wyświetlane sąkolejne programy - bez konieczności
ciągłego wciskania przycisku. Przełączanie kanałów zostaje
zatrzymane po wciśnięciu dowolnego przycisku. Funkcja
zatrzymuje sięautomatycznie po upływie 2 minut.
4.6 Z funkcji skanowania nie można korzystaćw
połączeniu z magnetowidem. W takim wypadku służy ona do
programowania ShowView® lub timera. Dalsze informacje na
ten temat znajdąPaństwo w instrukcji obsługi magnetowidu lub
nagrywarki płyt DVD.
4.7 Liczby dwucyfrowe i AV: w zakresie (E) znajduje się
normalna klawiatura dziesięciocyfrowa. Liczby dwucyfrowe
(numery kanałów) wpisuje sięz reguły za pomocąprzycisku
lub SHIFT w połączeniu z przyciskiem . Przy pomocy
przycisku wybraćmożna z reguły wejście AV, np. dekodera
satelitarnego lub magnetowidu.
4.8 LEARN, M1, M2, Display: W zakresie (F) znajdują
sięprzyciski - funkcje – patrz powyżej,
przyciski służące do wywoływania sekwensów (tylko VivControl
This manual suits for next models
2
Table of contents
Languages:
Other Vivanco Remote Control manuals
Vivanco
Vivanco UNIVERSAL 8 IN 1 REMOTE CONTROL User manual
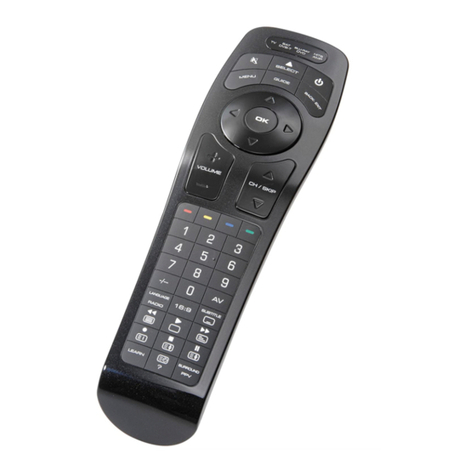
Vivanco
Vivanco TITAN UR 2300 User manual
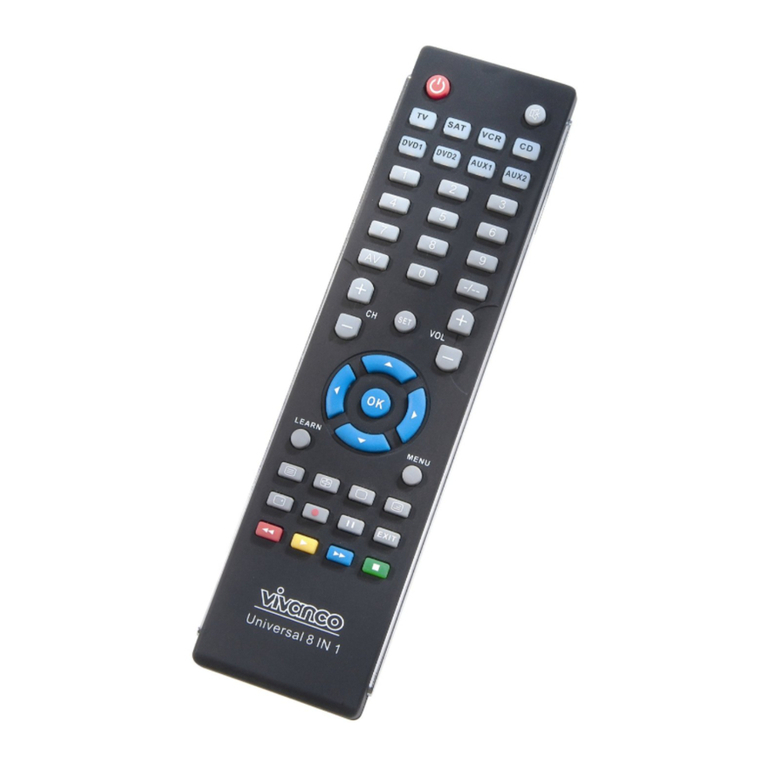
Vivanco
Vivanco UNIVERSAL 8 IN 1 REMOTE CONTROL User manual
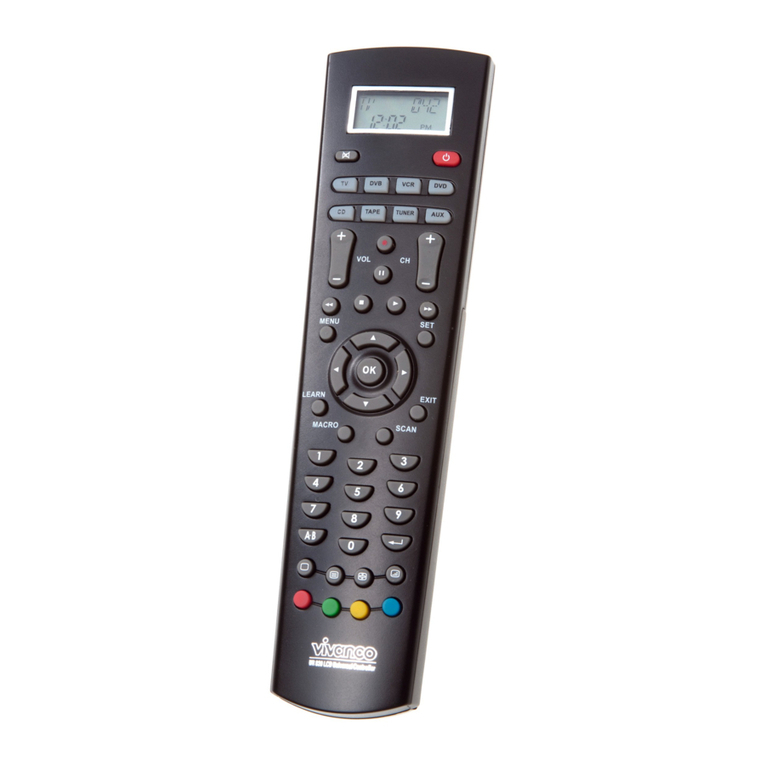
Vivanco
Vivanco UNIVERSAL 8 IN 1 REMOTE CONTROL Operating instructions
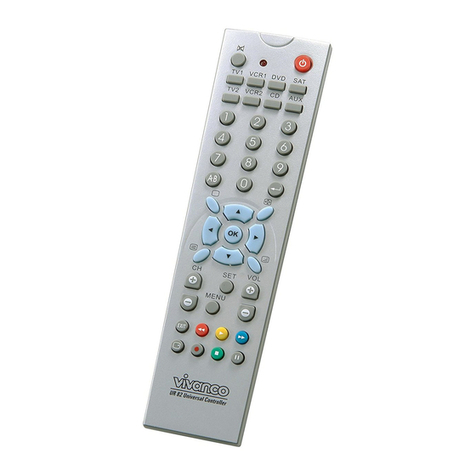
Vivanco
Vivanco UR82 User manual
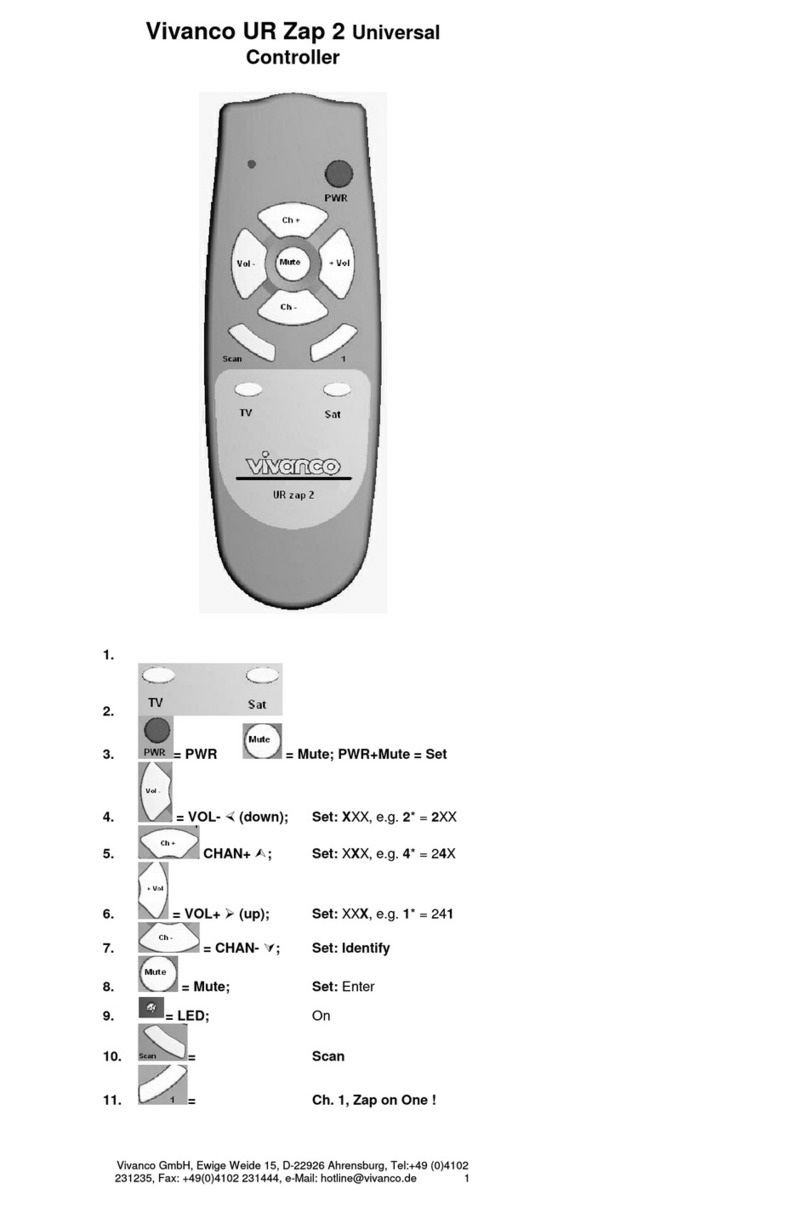
Vivanco
Vivanco UR Zap 2 User manual
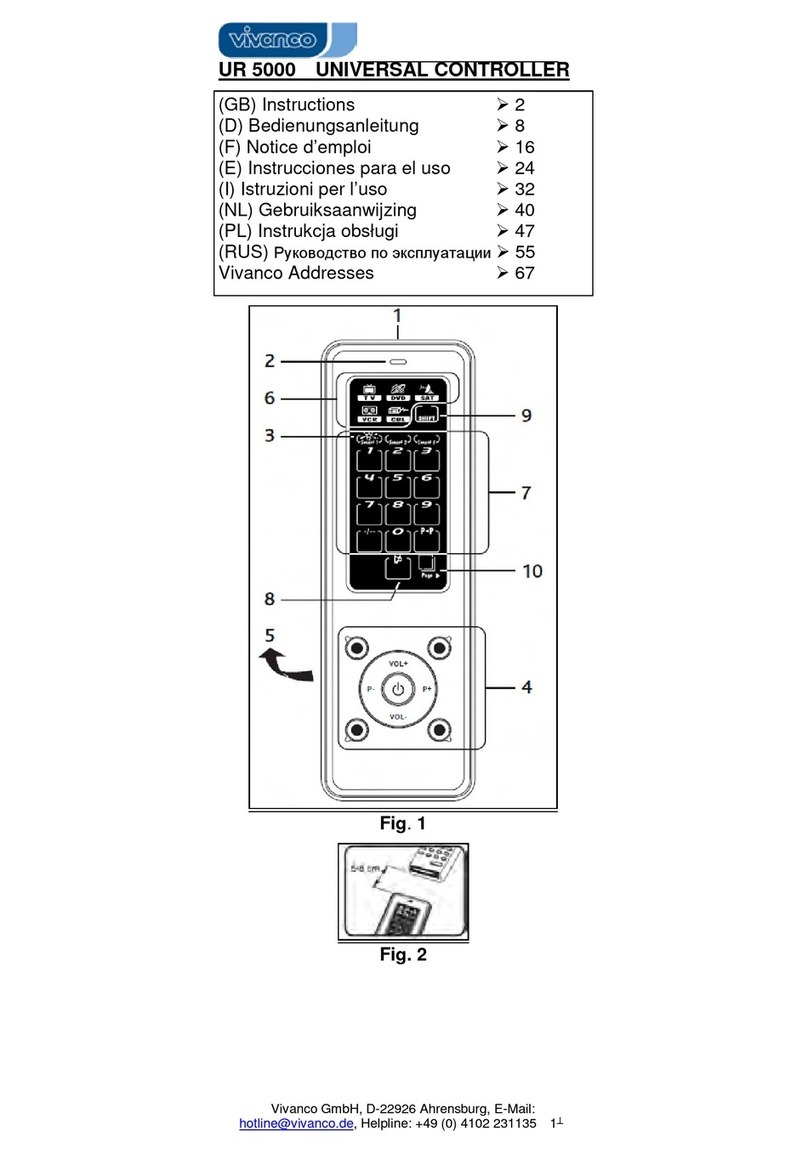
Vivanco
Vivanco UR 5000 User manual
Vivanco
Vivanco SBX 99 SE User manual
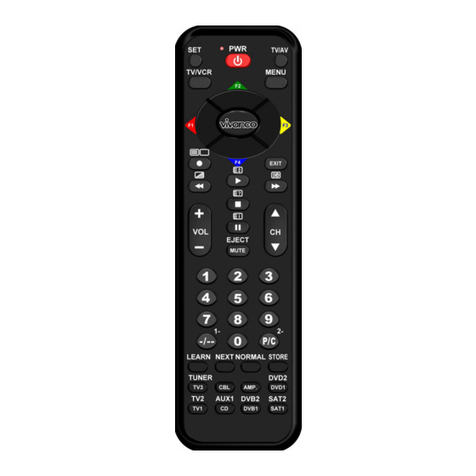
Vivanco
Vivanco UR 14 User manual
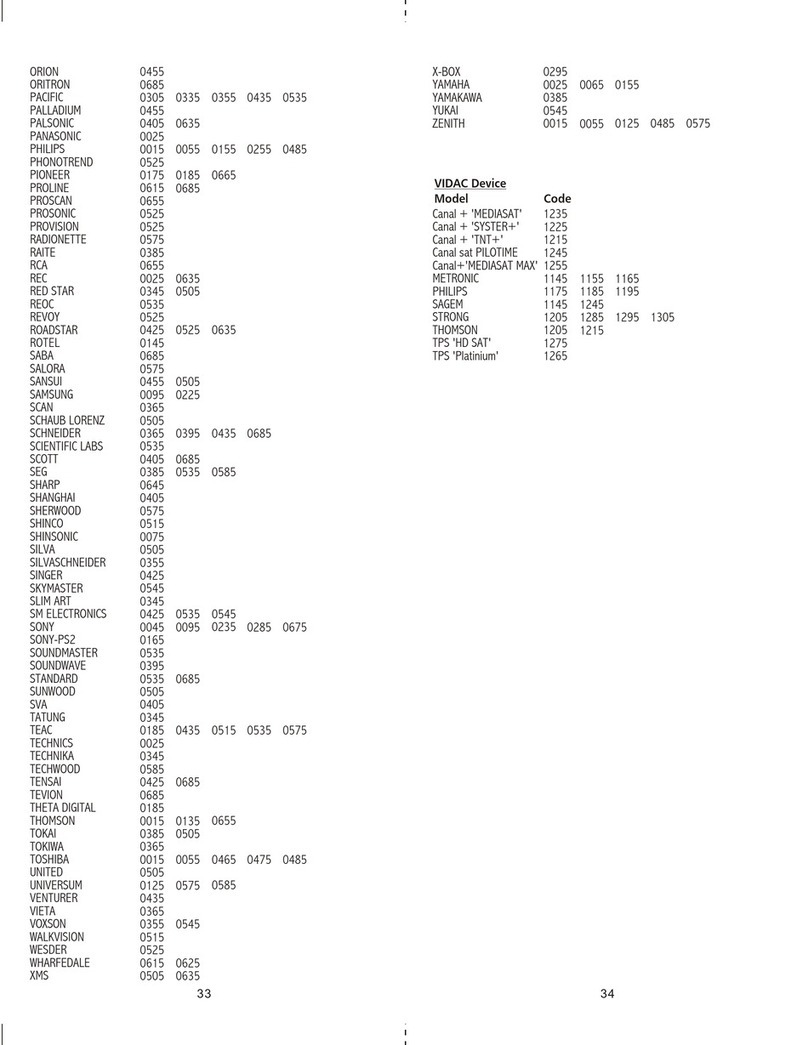
Vivanco
Vivanco UR 5000 - CODE User manual
